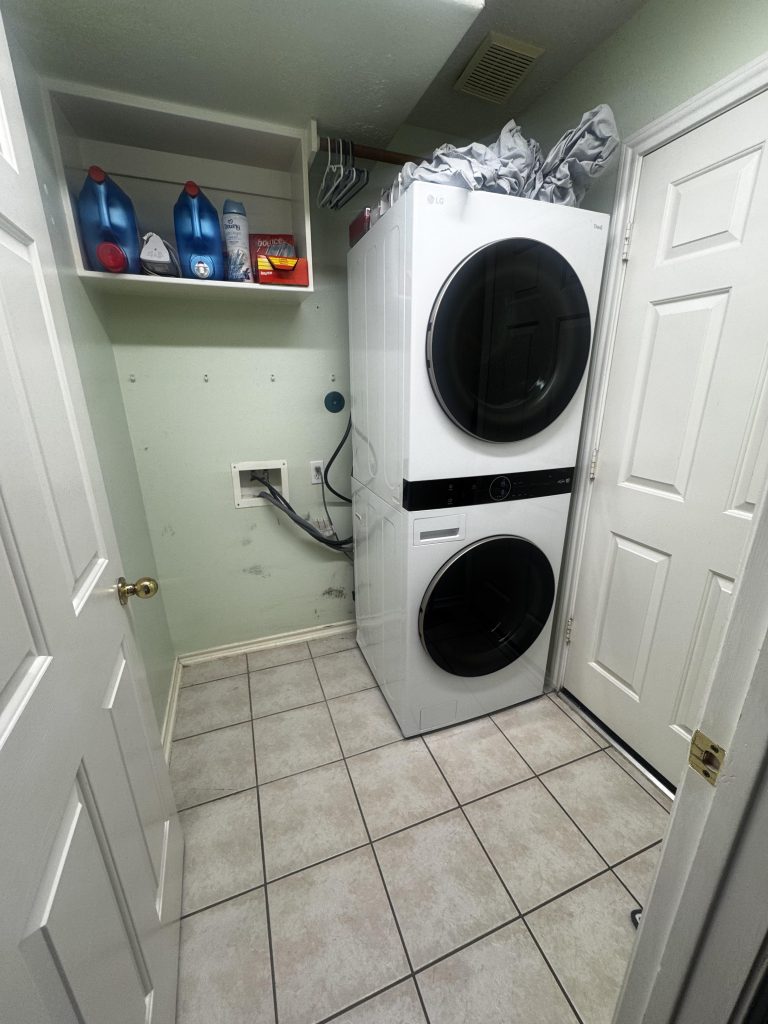
Are you struggling to separate your stacked washer and dryer? It might seem tricky at first, but with the right steps, you can do it safely and easily.
Knowing how to unstack these appliances can save you time, avoid damage, and give you more space to work with. In this guide, you’ll learn exactly what to do, step by step. Keep reading, and you’ll feel confident handling your washer and dryer like a pro.
Credit: www.maytag.com
Tools Needed
Unstacking a washer and dryer safely requires the right tools. Using proper tools helps avoid damage and injury.
Gathering all tools before you start makes the process smoother and faster.
Basic Hand Tools
Basic hand tools help you remove bolts and brackets holding the units together.
- Socket wrench set
- Screwdrivers (both Phillips and flathead)
- Adjustable wrench
- Pliers
Safety Equipment
Safety equipment protects you during the unstacking process. It is important to wear these items.
- Work gloves to protect your hands
- Safety goggles to shield your eyes
- Closed-toe shoes for foot protection
Additional Helpful Tools
Some extra tools can make unstacking easier and help keep parts organized.
| Tool | Purpose |
| Furniture dolly | Move heavy machines safely |
| Masking tape | Label cords and parts |
| Flashlight | See inside dark spaces |
| Helper strap | Secure units during lifting |

Credit: www.youtube.com
Prepare The Area
Unstacking a washer and dryer needs a safe and clear workspace. Preparing the area makes the process easier and safer.
Before you start, gather the tools and clear the space around your appliances.
Clear The Surrounding Space
Remove any items near your washer and dryer. This prevents accidents and gives you room to move.
- Move laundry baskets away
- Clear floor space around the units
- Keep pets and children out of the area
Gather Necessary Tools
Have the right tools ready before you start unstacking. This saves time and effort.
- Screwdriver (usually Phillips head)
- Adjustable wrench
- Flashlight for better visibility
- Helper or sturdy gloves for safety
Prepare The Floor Surface
Protect your floor and keep the units stable during the process.
| Floor Type | Preparation Tip |
| Tile or Hardwood | Place a soft blanket or rug beneath units |
| Carpet | Use a flat board to prevent sinking |
| Concrete | Check for evenness and clean debris |
Turn Off Power And Water
Safety first: disconnect power and water to avoid shocks and leaks.
Locate the power cords and unplug them from the wall. Then, shut off the water valves connected to the washer.
Unplug And Disconnect
Before unstacking your washer and dryer, you must unplug and disconnect them. This step keeps you safe from electric shocks and water leaks.
Take your time to carefully remove all connections. This helps avoid damage to your appliances and home.
Unplug The Washer And Dryer
Locate the power cords behind each machine. Pull the plug out from the wall socket. Do not pull the cord itself.
Make sure the power is off before you touch any wires or outlets. This stops accidents during unstacking.
Turn Off Water Supply
Find the water valves connected to the washer. Turn the valves clockwise to shut off the water.
Check that no water flows out when you disconnect the hoses. This avoids leaks and water damage.
Disconnect Water Hoses
Use pliers or your hands to unscrew the water hoses from the washer. Place a bucket or towel to catch any leftover water.
Keep the hoses in a safe place if you plan to reuse them later. Inspect hoses for damage before reconnecting.
Disconnect Dryer Vent
Locate the vent hose at the back of the dryer. Loosen the clamp or screws that hold it in place.
Carefully pull the vent hose away from the dryer. Clean out any lint buildup before storing the hose.
Remove Dryer From Washer
Unstacking your dryer from the washer is safe if done carefully. You need to find the fasteners holding them together first.
Then, unscrew the brackets before lifting the dryer off the washer. Follow each step for safety.
Locate Fasteners
Look around the edges where the washer and dryer meet. You will find screws or clips that keep them stacked.
- Check the back corners for metal brackets
- Look under the top of the dryer for locking clips
- Inspect the sides for any screws holding the units together
Unscrew The Brackets
Use the right screwdriver to remove the screws or bolts. Keep the screws safe for later use.
| Tool Needed | Purpose |
| Phillips screwdriver | Remove cross-head screws |
| Flathead screwdriver | Remove flat screws or pry clips |
| Wrench | Unscrew bolts on brackets |
Lift The Dryer Safely
Dryers are heavy. Get help to lift it off the washer without damage or injury.
- Ask a friend to help you lift
- Hold the dryer firmly on both sides
- Lift straight up and move slowly
- Place the dryer on a flat surface
- Check that the washer is stable after removal
Separate The Units
Unstacking a washer and dryer means separating the two machines safely. This process helps you clean or move the units easily.
Before pulling them apart, check all connections and prepare the space for moving the units.
Check For Additional Connections
Look behind the stacked units for any extra connections. Besides power cords, washers and dryers may share other links.
- Unplug the power cords from the wall outlets.
- Disconnect the water supply hoses from the washer.
- Remove the dryer vent hose carefully.
- Check for any bolts or brackets holding the units together.
Move Units Apart
After disconnecting, gently move the washer and dryer away from each other. Keep these tips in mind:
| Tip | Reason |
|---|---|
| Have a helper assist you | Both machines can be heavy and hard to move alone |
| Lift from the sides, not the top | Prevents damage to control panels or doors |
| Place a cloth or mat under units | Protects the floor from scratches |
| Move slowly and carefully | Avoids hitting walls or furniture |
Reposition Washer And Dryer
Unstacking your washer and dryer can free up space. This guide helps you do it safely. Follow these steps to reposition your appliances.
Always ensure both units are unplugged before you start. Repositioning them can make your laundry space more efficient.
Place Units Side By Side
Once unstacked, place the washer and dryer next to each other. This setup makes loading and unloading easier. It also reduces the risk of accidents.
Ensure there is enough space between the units. This helps with ventilation and prevents overheating. Check that both appliances have easy access to power and water connections.
- Maintain at least one inch of space between units.
- Ensure both power cords reach the outlets.
- Check water hose connections for the washer.
Level Both Appliances
Leveling your washer and dryer is crucial. It prevents vibrations and noise. Use a level tool to check each unit.
Adjust the feet on each appliance until they are stable. This ensures they operate efficiently and safely.
- Place the level tool on top of each appliance.
- Adjust the feet by turning them clockwise or counter-clockwise.
- Ensure the bubble in the level tool is centered.
Reconnect Power And Hoses
After unstacking your washer and dryer, it’s time to reconnect the power and hoses. This step is crucial for proper operation.
Make sure to follow safety precautions. Ensure both appliances are unplugged before starting.
Reconnect Power
Connecting the power is the first step. Plug the power cords into a grounded outlet.
- Locate the power cords for both appliances.
- Ensure the outlet is in good condition.
- Plug the washer’s power cord into the outlet.
- Plug the dryer’s power cord into the outlet.
- Check that all connections are secure.
Reconnect Hoses
Properly connecting the hoses is essential to avoid leaks. Follow these steps to ensure a tight fit.
| Hose Type | Connection Point |
| Water Supply Hose | Washer Back |
| Drain Hose | Washer Drain Pipe |
| Vent Hose | Dryer Vent Outlet |
Make sure the hoses are not kinked. Tighten all connections with a wrench if necessary.
Test Functionality
After you unstack your washer and dryer, it is important to test their functionality. This ensures both machines work well alone.
Testing helps find any problems early. It also confirms that the machines are ready to use safely.
Check Power And Connections
Plug in each machine separately. Make sure each one powers on without issues.
Inspect all hoses and cords for proper connection. Loose wires or hoses can cause errors or leaks.
- Plug washer and dryer into separate outlets
- Check for firm hose and cord connections
- Look for any visible damage or wear
Run A Test Cycle On Washer
Start the washer on a short cycle. Listen for unusual sounds and watch for leaks.
Check that water fills and drains properly. The machine should wash and spin without stopping.
- Choose a quick wash program
- Listen for smooth motor and water flow
- Watch for water entering and draining
- Stop the cycle if you see leaks
Run A Test Cycle On Dryer
Turn on the dryer to a timed cycle. Check if the drum spins and heats up correctly.
Make sure the dryer vents air properly. Confirm the dryer stops at the end of the cycle.
- Select a short drying cycle
- Verify the drum rotates smoothly
- Feel for warm air coming out
- Confirm the dryer stops on time
Safety Tips
Unstacking a washer and dryer needs care to avoid injuries. Follow safety rules to protect yourself and your machines.
Using the right tools and having a helper makes the job safer and easier. Take your time and check everything before you start.
Turn Off Power And Water
Always unplug both machines before unstacking. This stops electric shocks and accidents.
Turn off the water supply to the washer. Disconnect hoses carefully to avoid leaks.
Use Proper Tools And Equipment
Use a wrench or screwdriver to remove stacking brackets. Have a sturdy step stool if needed.
Wear gloves to protect your hands from sharp edges and metal parts.
Get Help To Lift
Washers and dryers are heavy. Ask someone to help you lift and move the machines.
Lift with your legs, not your back. Keep the machines balanced to avoid falls.
Clear The Area
Remove obstacles around the machines. This gives you space to work safely and move freely.
Make sure floors are dry and not slippery to prevent falls.
Secure The Dryer Before Removing
Check that the dryer is firmly attached to the washer. Remove any screws or brackets slowly.
Hold the dryer steady while unfastening it to stop it from tipping over.
Protect The Machines And Floor
Use blankets or pads to protect the machines from scratches during unstacking.
Place cardboard or mats on the floor to avoid damage or slipping.
Credit: www.realtor.ca
Frequently Asked Questions
How Do I Safely Unstack A Washer And Dryer?
To unstack, first unplug both units. Remove stacking bolts carefully. Use a helper to lift the dryer off the washer. Place the dryer on a flat, stable surface to avoid damage or injury.
What Tools Are Needed To Unstack Washer And Dryer?
You’ll need a socket wrench or screwdriver to remove bolts. Gloves and a helper ensure safety. A sturdy surface is also required to place the dryer after unstacking.
Can I Unstack A Washer And Dryer Alone?
It’s not recommended to unstack alone. The dryer is heavy and awkward to lift. Always have a second person to help prevent injury or damage.
How Do I Prepare Washer And Dryer Before Unstacking?
Unplug both units and turn off water supply. Disconnect hoses and power cords. Clear the area around the machines for safe movement and access.
Conclusion
Unstacking your washer and dryer is easier than it seems. Follow each step carefully and stay safe. Take your time and keep tools close. Double-check connections before moving any heavy parts. Doing this right helps avoid damage and injury. Now, you can clean or repair your machines freely.
Enjoy the extra space and easy access. Simple actions make big differences in home care. Keep these tips handy for future use. Your laundry routine just got more manageable.