
Are you ready to transform your DIY projects with precision and ease? If you’ve ever struggled with getting the perfect angle cut on wood, plastic, or even soft metals, then miter shears are about to become your new best friend.
Imagine completing tasks faster and with greater accuracy, all while saving yourself the frustration of uneven cuts. In this guide, we’ll break down everything you need to know about using miter shears effectively. Whether you’re a seasoned craftsman or just getting started, mastering this tool can elevate your projects to a whole new level.
Keep reading to discover the secrets to making sharp, clean cuts like a pro. Don’t miss out on transforming your craftsmanship and impressing yourself with what you can achieve!
Choosing The Right Miter Shears
Miter shears help you cut materials at precise angles. Picking the right shears makes your work easier and cleaner.
Look at the types, material, and handle design. These features affect how well the shears work for your project.
Types Of Miter Shears
There are several types of miter shears. Each type fits different cutting needs and materials.
- Manual miter shears: Simple and easy to use for light tasks.
- Compound miter shears: Can cut angles on two planes for complex cuts.
- Powered miter shears: Use electricity or batteries for heavy-duty work.
Material And Blade Quality
Good materials make shears last longer and cut better. Steel blades stay sharp and resist rust.
Look for blades with sharp edges and strong metal. Soft metals dull quickly and need more care.
- High-carbon steel blades offer durability and sharpness.
- Stainless steel resists rust and needs less cleaning.
- Blades should be easy to replace or sharpen.
Handle Design And Comfort
Comfortable handles reduce hand fatigue during long use. Look for padded grips or ergonomic shapes.
Handles should give good control and fit your hand size well. Non-slip materials improve safety.
- Ergonomic handles fit the hand shape for easy use.
- Padded grips soften pressure on fingers and palms.
- Non-slip surfaces prevent accidents during cutting.
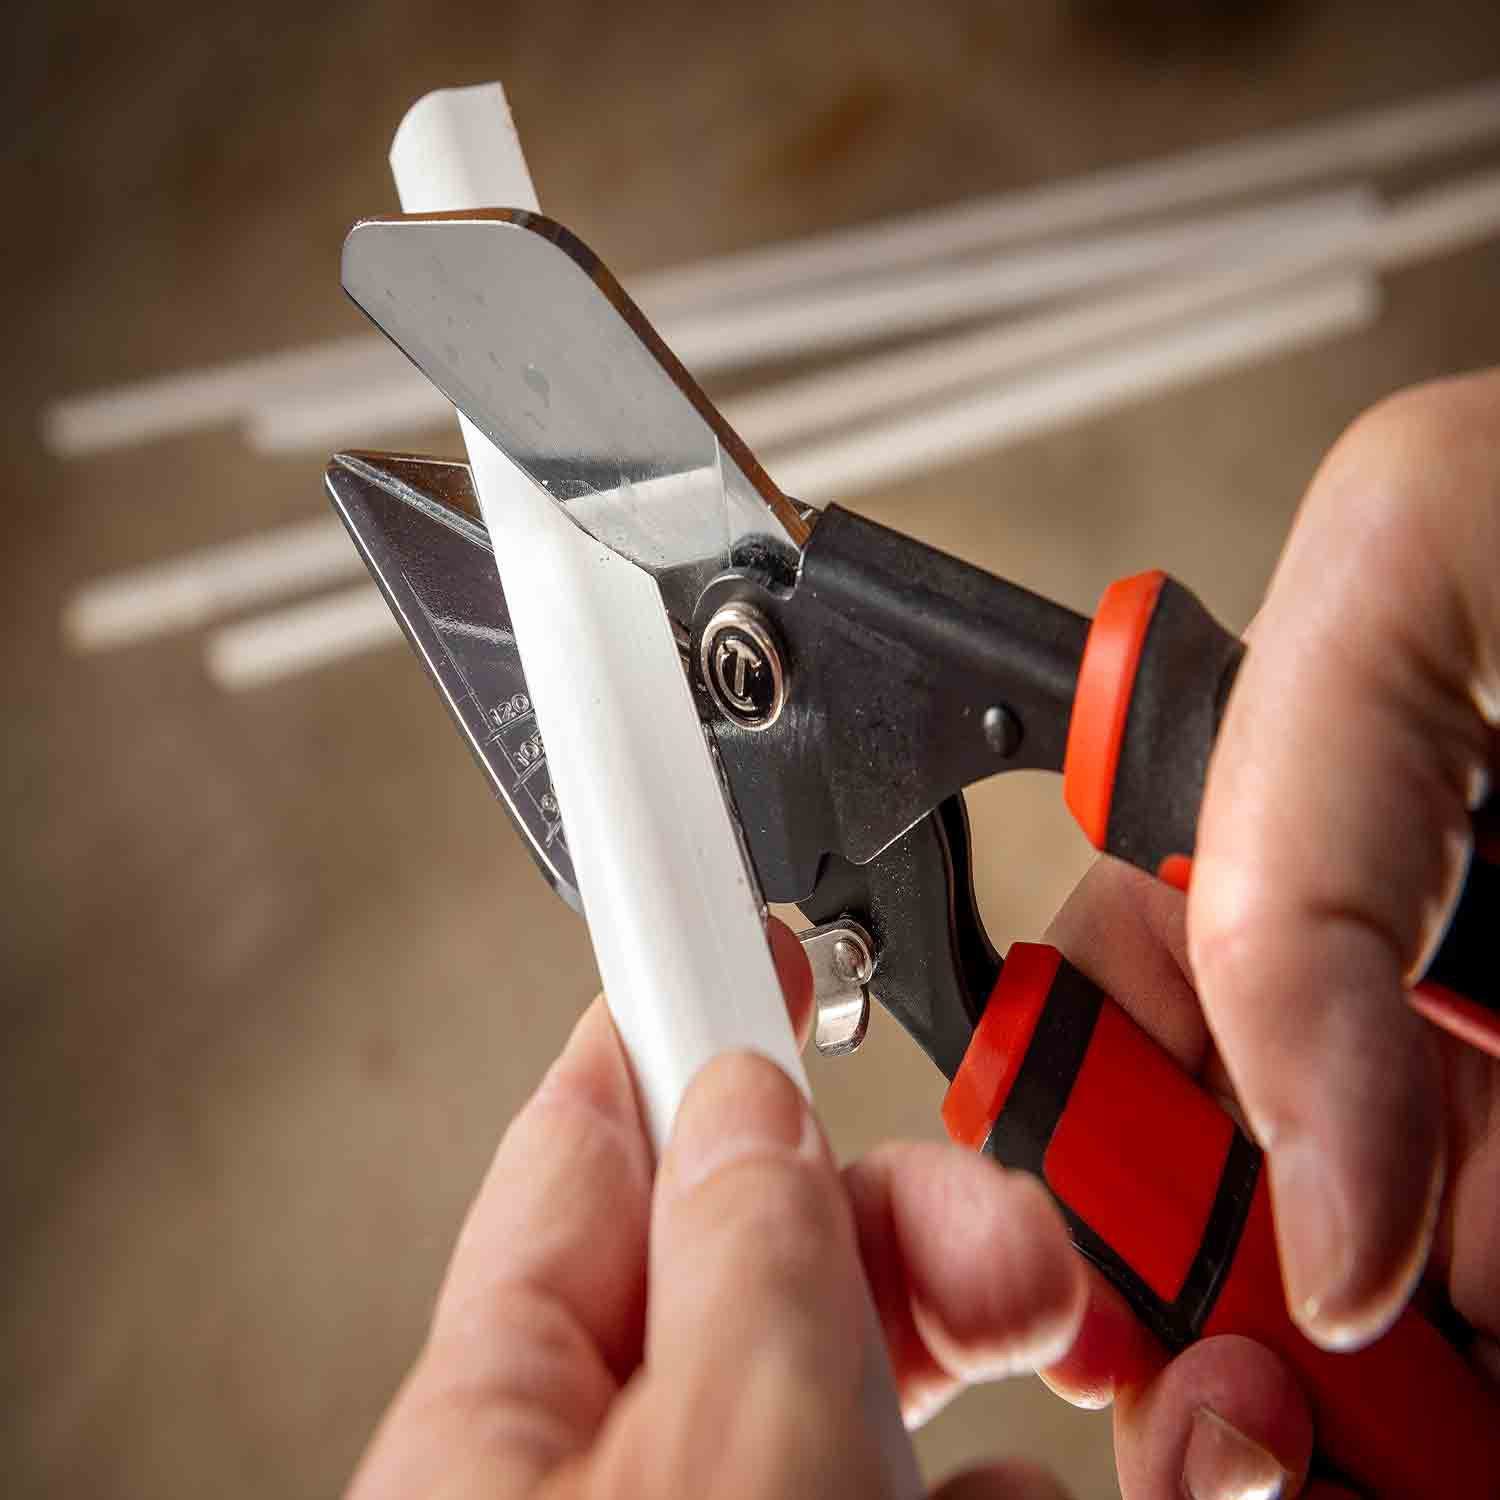
Credit: kent.ca
Setting Up For Accurate Cuts
Using miter shears correctly helps you make clean, precise cuts. Setting up your tools and materials right is key.
This guide explains how to prepare your miter shears for accurate cutting tasks.
Measuring And Marking Angles
Start by measuring the angle you need to cut. Use a protractor or angle finder for accuracy.
Mark the line clearly on your workpiece with a pencil or fine marker. This line guides your cut.
- Use a ruler to draw straight lines
- Double-check measurements before marking
- Mark both sides if needed for better guidance
Adjusting The Shear Angle
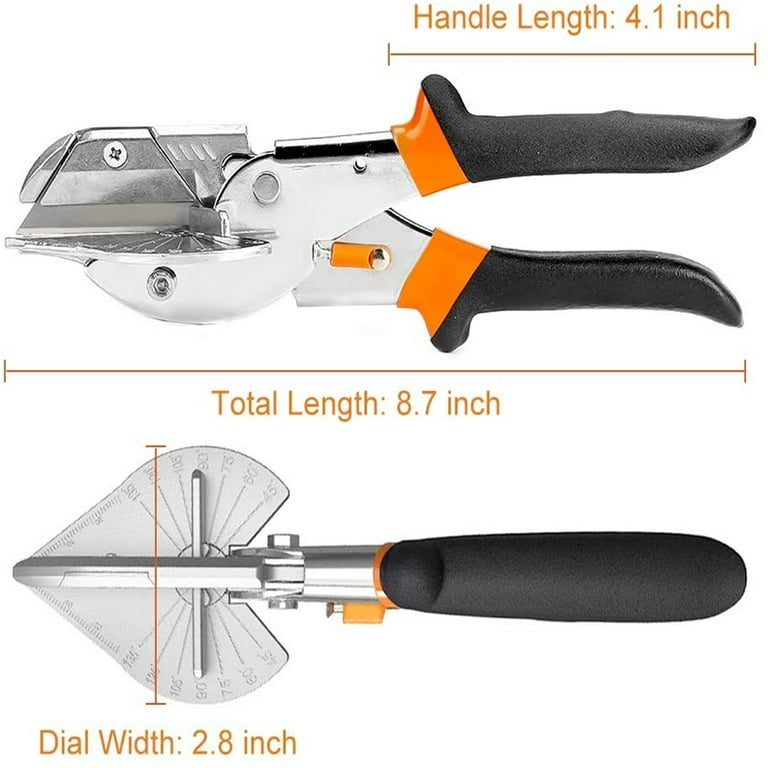
Set the miter shear to the angle you want to cut. Most shears have a rotating base or angle guide.
Lock the shear at this angle to keep it steady during the cut. This ensures the cut matches your mark.
- Check the angle scale on the shear
- Turn the base until it matches your marked angle
- Secure the lock tightly to prevent movement
Securing Your Workpiece
Hold your workpiece firmly in place before cutting. Use clamps if your shear does not have built-in clamps.
Keeping the material steady prevents slipping and uneven cuts. It also improves safety.
- Place the workpiece against the shear’s fence
- Use clamps or a vise for extra hold
- Make sure the piece is flat and steady
Cutting Techniques For Clean Edges
Using miter shears correctly helps you get clean, precise cuts. Clean edges improve the look of your projects and make assembly easier.
Good cutting techniques reduce mistakes and save material. This guide explains how to use miter shears for the best results.
Proper Hand Positioning
Hold the miter shears with a firm, comfortable grip. Place your hand so you control the blade without strain.
Keep your fingers away from the cutting edge. Use your dominant hand to guide the shears smoothly through the material.
- Grip handles near the pivot point for more control
- Use your other hand to steady the material
- Keep wrists straight to avoid fatigue
Applying Even Pressure
Press the shears down evenly to avoid jagged edges. Uneven pressure can cause rough or angled cuts.
Start cutting slowly and increase pressure as the blade moves through the material. This helps keep the cut clean.
- Apply steady force from start to finish
- Avoid stopping mid-cut to prevent rough edges
- Use smooth, continuous motion when cutting
Cutting Different Materials
Miter shears work well on wood, plastic, and thin metal. Each material needs a slightly different approach.
Harder materials require slower cutting and more pressure. Softer materials cut easily but need careful handling to avoid crush marks.
- Wood:Use slow, steady cuts to avoid splintering
- Plastic:Cut gently to prevent cracking
- Thin metal:Use firm pressure and check blade sharpness

Credit: www.amazon.co.uk
Maintaining Your Miter Shears
Proper care keeps your miter shears working well for a long time. Regular maintenance stops rust and dull blades. It also ensures smooth cutting action every time.
Follow simple steps for cleaning, sharpening, and storing your shears. These steps help keep the tool safe and ready to use.
Cleaning And Lubrication
Clean your miter shears after each use to remove dirt and sap. Use a damp cloth for wiping the blades and handles. Avoid soaking the shears in water to stop rust.
- Wipe blades with a dry cloth after cleaning.
- Apply a drop of light oil to the pivot point.
- Open and close the shears several times to spread the oil.
- Remove excess oil with a clean cloth.
Sharpening The Blades
Keep blades sharp for clean cuts. Use a sharpening stone or fine file. Sharpen at the same angle as the blade edge. Avoid over-sharpening to prevent damage.
| Tool | How to Use | Frequency |
| Sharpening Stone | Rub along blade edge evenly | Every 3 months or as needed |
| Fine File | File gently on beveled side | When blades feel dull |
| Sandpaper | Polish edge lightly | After sharpening |
Storage Tips
Store miter shears in a dry place to avoid rust. Keep the blades closed and locked if possible. Use a protective cover or case if you have one.
- Clean and dry shears before storing.
- Lock blades to prevent accidents.
- Store away from moisture and dust.
- Check shears monthly for any signs of rust.
Common Mistakes To Avoid
Miter shears help make clean, angled cuts on materials like wood and plastic. Using them wrong can damage your work and tools.
Avoid these common mistakes to get the best results and keep your miter shears in good shape.
Incorrect Angle Settings
Setting the wrong angle on your miter shears leads to poor cuts that do not fit properly. Always check the angle before cutting.
- Verify the angle setting matches your project needs.
- Do test cuts on scrap material first.
- Adjust the angle slowly to avoid overshooting.
- Use a protractor or angle guide if needed.
Forcing The Cut
Applying too much pressure damages both the miter shears and the material. Let the blade do the work.
| Wrong Action | Effect |
|---|---|
| Forcing the blade through thick material | Blade dulls quickly and may bend |
| Cutting too fast without steady pressure | Uneven and rough edges |
| Ignoring the blade’s sharpness | Increased effort and poor cut quality |
Neglecting Tool Maintenance
Failing to clean and oil your miter shears causes rust and dull blades. Regular care keeps them sharp and effective.
- Wipe blades clean after each use.
- Apply light oil to the pivot and blades regularly.
- Store shears in a dry place to avoid rust.
- Sharpen blades when you notice dullness.
Advanced Tips For Precision Cuts
Using miter shears correctly helps create clean and accurate cuts. Precision is key for professional-looking results.
These tips focus on improving your cutting skills with guides, complex shapes, and solving common problems.
Using Guides And Jigs
Guides and jigs keep your material steady and aligned. They ensure cuts stay at the exact angle you need.
- Clamp a straight edge to the work surface for repeat cuts.
- Use a miter box to hold the shears at set angles.
- Create custom jigs for unique shapes to maintain consistency.
- Mark your material clearly before cutting to avoid mistakes.
Combining Cuts For Complex Shapes
Complex shapes require multiple cuts combined precisely. Plan each cut step-by-step before starting.
| Cut Type | Description | Tip |
| Miter Cut | Angled cut usually at 45 degrees | Use a miter gauge for accuracy |
| Bevel Cut | Angled cut through thickness | Adjust blade angle carefully |
| Compound Cut | Combination of miter and bevel cuts | Check both angles twice before cutting |
Troubleshooting Cutting Issues
If cuts are uneven or rough, check the blade and setup. Small adjustments fix most problems.
- Inspect the blade for dullness or damage.
- Clean the cutting edges to remove debris.
- Ensure the material is firmly clamped and does not move.
- Adjust the angle settings and test on scrap material.
- Use steady, controlled pressure when cutting.
Credit: www.walmart.com
Frequently Asked Questions
What Are Miter Shears Used For?
Miter shears are designed to cut precise angles on materials like wood, plastic, or metal. They help create clean, angled cuts for framing or molding projects. Their adjustable blades ensure accuracy, making them ideal for DIY tasks and professional carpentry.
How Do I Adjust Miter Shears For Different Angles?
Most miter shears have a rotating base or angle guide. Loosen the adjustment knob, set the desired angle, and tighten securely. This allows you to cut materials at precise angles, improving the accuracy of your project.
What Safety Tips Should I Follow Using Miter Shears?
Always wear safety goggles and gloves before cutting. Keep fingers away from blades and use steady, controlled pressure. Ensure the shears are sharp and in good condition to avoid slips and uneven cuts.
Can Miter Shears Cut Materials Other Than Wood?
Yes, miter shears can cut various materials like plastic, vinyl, and thin metal sheets. However, check the manufacturer’s guidelines for compatibility to avoid damaging the blades or the material.
Conclusion
Using miter shears can make cutting angles easy and precise. Always measure twice before cutting to avoid mistakes. Keep your shears sharp and clean for better results. Practice on scrap material to build your confidence. With patience, you will cut perfect corners every time.
Safety matters—wear gloves and work carefully. This tool helps create neat, professional-looking projects. Try different angles to see what fits best. Soon, using miter shears will feel natural and quick. Your projects will look cleaner and more polished. Enjoy the process and take your time.