
If you love baking cupcakes or muffins, using a silicone cupcake pan can change the way you bake for the better. You might be wondering how to get the best results with it or if it’s really worth switching from your old metal pan.
This guide will show you simple, practical tips to use your silicone pan like a pro. By the end, you’ll feel confident and excited to bake perfect treats every time—no sticking, no mess, just easy cleanup and delicious results. Ready to unlock the full potential of your silicone cupcake pan?
Let’s dive in!
Credit: kitchenpluse.com
Choosing The Right Silicone Pan
Using a silicone cupcake pan makes baking easy and fun. Choosing the right pan helps you bake better cupcakes.
Consider size, shape, quality, and material before buying a silicone pan.
Size And Shape Options
Silicone pans come in many sizes and shapes. Pick one that fits your baking needs and oven space.
- Standard cupcake size pans hold 12 cupcakes.
- Mini cupcake pans make small, bite-sized treats.
- Muffin pans have larger cups for bigger cakes.
- Special shapes like hearts or stars add fun designs.
Quality And Material Considerations
Look for high-quality silicone that is durable and safe. Check if the pan is BPA-free and heat resistant.
| Feature | What to Look For |
| Material | 100% food-grade silicone |
| Heat Resistance | Safe up to 450°F (232°C) |
| Flexibility | Easy to bend but holds shape |
| Non-stick | Allows easy cupcake removal |
| Cleaning | Dishwasher safe for convenience |

Credit: www.amazon.ca
Preparing The Pan
Using a silicone cupcake pan is easy, but some preparation helps your cupcakes bake well. This guide covers cleaning and greasing the pan for best results.
Before baking, take a few steps to make sure your silicone pan works smoothly and your cupcakes come out perfectly.
Cleaning Before First Use
New silicone pans may have residues from manufacturing. Cleaning before the first use removes these and helps your pan last longer.
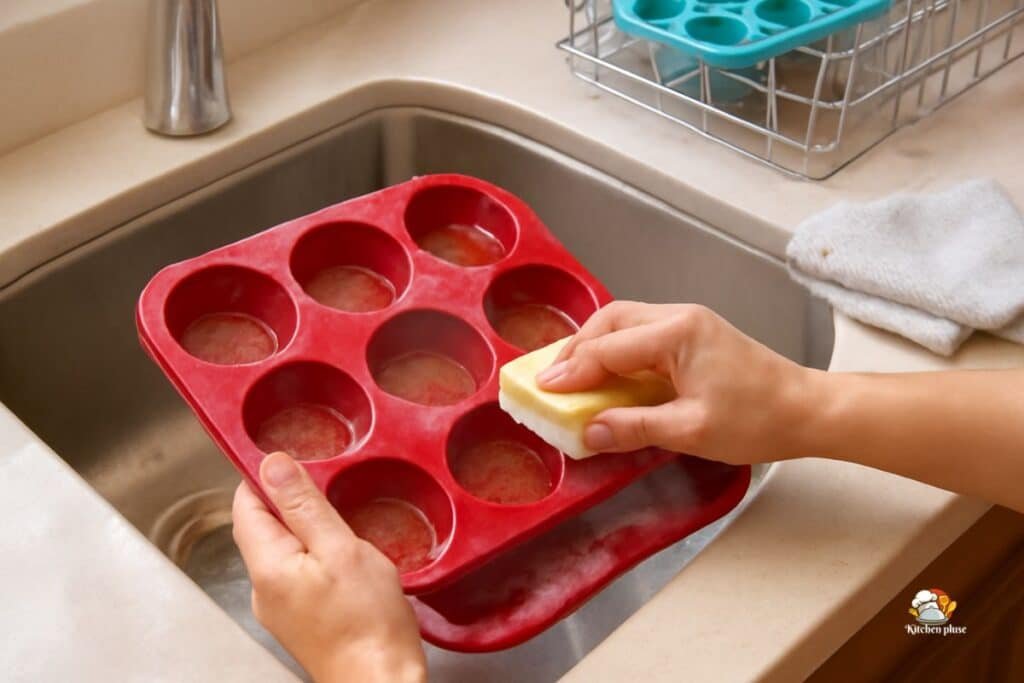
- Wash the pan with warm water and mild dish soap.
- Use a soft sponge to avoid scratching the silicone.
- Rinse thoroughly to remove all soap.
- Dry the pan completely with a clean towel or air dry.
Greasing Tips For Easy Release
Even though silicone is naturally non-stick, greasing the pan helps cupcakes release easily and keeps edges smooth.
| Grease Type | Usage Tip |
| Vegetable oil | Lightly brush each cup before adding batter. |
| Butter | Softened butter works well for a rich flavor and easy release. |
| Non-stick spray | Spray evenly on all baking cups for quick greasing. |
Filling The Cups
Using a silicone cupcake pan is easy and fun. Filling the cups the right way helps your cupcakes bake well.
Too little batter makes cupcakes small. Too much batter causes spills and messes. Learn how to fill cups correctly.
Proper Batter Amount
Fill each silicone cup with the right amount of batter. Usually, fill the cup about two-thirds full.
This amount lets the cupcakes rise without spilling over the edge. Use a spoon or scoop for even filling.
- Use a 2/3 full cup for best results
- Use a measuring scoop for even portions
- Leave space for rising batter
Avoiding Overflows
Overflows happen when batter fills cups too much. This makes cupcakes stick to the pan and creates a mess.
To avoid this, do not overfill. Also, avoid shaking the pan after filling to keep batter in place.
- Do not fill cups beyond two-thirds
- Place the pan on a flat surface when filling
- Do not shake or move the pan after filling
- Use silicone pans that are flexible but stable

Credit: www.youtube.com
Adjusting Baking Time And Temperature
Silicone cupcake pans need a different baking approach than metal pans. You should adjust time and temperature for best results.
This guide explains how to set the right temperature and watch your cupcakes closely while baking.
Temperature Settings For Silicone
Silicone pans hold heat differently than metal pans. Lower the oven temperature slightly to avoid overbaking.
Try baking cupcakes at about 10 to 25 degrees Fahrenheit lower than the recipe suggests for metal pans.
- Set oven 10-25°F lower than usual
- Use moderate heat to prevent burning
- Check your oven’s actual temperature with a thermometer
Monitoring Baking Progress
Check cupcakes early and often to avoid overbaking. Silicone pans bake faster, so start testing before the recipe time ends.
Use a toothpick or cake tester. Insert it in the cupcake center to check if it comes out clean.
- Start checking 5-7 minutes before recipe time
- Look for golden tops and firm edges
- Remove cupcakes as soon as they pass the toothpick test
Removing Cupcakes From The Pan
Silicone cupcake pans are flexible and non-stick, making cupcake removal easier. Still, careful steps help keep cupcakes whole.
Knowing how to cool and remove cupcakes properly prevents damage and keeps their shape.
Cooling Tips
Let cupcakes cool in the pan for a short time. This helps them firm up and reduces breakage.
Avoid removing cupcakes while hot. Warm cupcakes are soft and can fall apart easily.
- Cool cupcakes in the pan for 10 to 15 minutes.
- Place the pan on a cooling rack for air circulation.
- Let cupcakes cool completely outside the pan if possible.
Safe Removal Techniques
Use gentle pressure to push cupcakes out from the bottom. Silicone pans allow you to flex them for easy release.
If cupcakes stick, use a small offset spatula or butter knife to loosen edges carefully.
- Gently press the bottom of the silicone cup to pop out the cupcake.
- If stuck, slide a thin spatula around the cupcake edges.
- Do not pull cupcakes forcefully to avoid breaking them.
Cleaning And Maintenance
Silicone cupcake pans need proper cleaning and care. This keeps them safe and lasts longer.
Learn easy ways to wash and store your silicone pan correctly.
Washing Methods
Wash your silicone cupcake pan with warm, soapy water. Use a soft sponge or cloth to avoid damage.
For stuck-on food, soak the pan in warm water before washing. Avoid harsh scrubbers or sharp tools.
- Use mild dish soap
- Rinse thoroughly to remove soap
- Dry completely before storing
- Dishwasher safe but check manufacturer advice
Storage Recommendations
Store your silicone cupcake pan in a cool, dry place. Avoid folding or bending it to keep shape.
Keep the pan away from sharp objects that could cut or tear the silicone.
- Stack with other silicone pans carefully
- Use a drawer or shelf with enough space
- Do not store near heat sources
- Keep away from direct sunlight
Troubleshooting Common Issues
Using a silicone cupcake pan can make baking easier and cleaner. Still, some common issues may occur. This guide helps you fix those problems quickly.
We focus on two main issues: sticking problems and uneven baking. Understanding these can improve your baking results.
Sticking Problems
Silicone pans are non-stick but cupcakes can sometimes stick. This happens if the pan is not prepared well or the batter is too sticky.
- Lightly grease the pan before adding batter.
- Use a non-stick spray or brush with a little oil.
- Let cupcakes cool completely before removing.
- Remove cupcakes gently by pushing from the bottom.
- Avoid using sharp tools to take out cupcakes.
Uneven Baking Solutions
Uneven baking causes some cupcakes to cook more than others. This can be due to oven heat or pan placement.
| Cause | Solution |
| Oven hot spots | Rotate pan halfway through baking |
| Overcrowded pan | Use one pan at a time |
| Wrong oven temperature | Check with an oven thermometer |
| Too much batter in cups | Fill cups only two-thirds full |
Creative Uses Beyond Cupcakes
Silicone cupcake pans are not just for baking cupcakes. They can be used in many creative ways in the kitchen.
These flexible pans help you make small treats and snacks easily. They are great for both cooking and freezing.
Mini Quiches And Savory Bites
Use silicone cupcake pans to make mini quiches. They hold the shape well and cook evenly.
You can also make other savory snacks like meatloaf bites or stuffed mushrooms. The pans make portion control simple.
- Beat eggs with cheese and veggies for mini quiches
- Fill with ground meat mixtures for mini meatloafs
- Use for baked stuffed mushrooms or peppers
- Easy to pop out and serve
Frozen Treats And More
Silicone cupcake pans work great for making frozen treats. Fill them with juice, yogurt, or fruit puree.
You can also use the pans to freeze herbs in oil or make small ice cream bites. The pans make clean removal easy.
- Freeze juice or smoothie mixtures for pops
- Make yogurt bites with fruit pieces
- Freeze herbs in olive oil for cooking
- Create mini ice cream or sorbet cups
Frequently Asked Questions
How Do I Prepare A Silicone Cupcake Pan?
To prepare a silicone cupcake pan, lightly grease each cup with cooking spray or oil. This helps in easy release. Preheat your oven according to the recipe. Place the silicone pan on a baking sheet for stability during baking. Now, you’re ready to fill the cups with your batter.
Can I Put A Silicone Cupcake Pan In The Oven?
Yes, you can put a silicone cupcake pan in the oven. Silicone pans are oven-safe and can withstand high temperatures. Always check the manufacturer’s guidelines for specific temperature limits. They typically withstand temperatures up to 450°F. Place the pan on a baking sheet for added stability.
Do Silicone Cupcake Pans Need Greasing?
Yes, silicone cupcake pans should be lightly greased. Although silicone is non-stick, greasing ensures easy removal of cupcakes. Use a small amount of cooking spray or oil. This helps maintain the quality of your cupcakes. Greasing also makes cleaning the pan easier afterward.
How Do I Clean A Silicone Cupcake Pan?
To clean a silicone cupcake pan, use warm soapy water and a soft sponge. Avoid using abrasive cleaners or pads. Rinse thoroughly and let it air dry. For stubborn stains, soak the pan in warm water with baking soda. Ensure it’s completely dry before storing to prevent mold.
Conclusion
Using a silicone cupcake pan makes baking easier and cleaner. It heats evenly, so cupcakes cook just right. The flexible material helps you remove cupcakes without breaking them. Cleaning is quick since the pan is non-stick. Remember to place the pan on a baking sheet for stability.
With these tips, your baking will be smooth and fun. Try it out and enjoy tasty cupcakes every time!