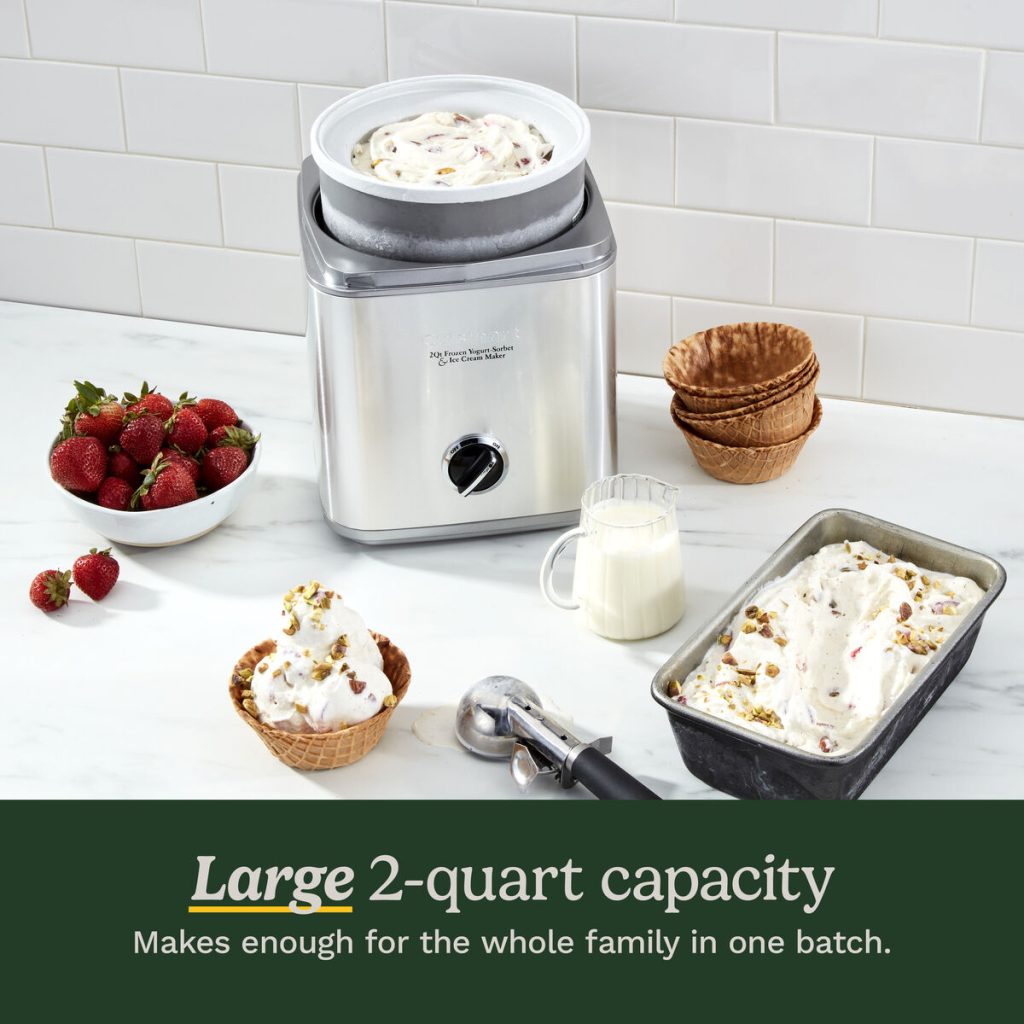
Craving creamy, homemade ice cream but unsure where to start? Your Cuisinart Ice Cream Maker is the perfect tool to turn simple ingredients into delicious, refreshing treats right in your kitchen.
Imagine the joy of creating your favorite flavors, customized just the way you like them. In this guide, you’ll discover easy, step-by-step tips to get the most out of your ice cream maker. Ready to impress your family and friends with mouthwatering desserts?
Let’s dive in and make your ice cream dreams a reality!

Credit: www.cuisinart.com
Choosing The Right Model
Choosing the right Cuisinart ice cream maker can change your dessert game entirely. You want a model that fits your kitchen space, matches your ice cream cravings, and suits how often you plan to use it. Picking the perfect one means looking beyond just the brand name and price tag.
Features To Consider
Not all Cuisinart ice cream makers are built the same. Some come with built-in compressors, which means you don’t have to freeze a bowl ahead of time. This feature is a huge time-saver if you often crave ice cream on short notice.
Other models might offer simple paddle designs with removable bowls that you freeze separately. These are usually more affordable but require planning ahead. Think about what matters more to you: convenience or budget.
Also, check if the machine has easy-to-clean parts. Nobody enjoys scrubbing after making a batch of ice cream. A dishwasher-safe bowl or paddle can make your experience much smoother.
Capacity Options
How much ice cream do you want to make in one go? Cuisinart offers models ranging from small 1.5-quart machines to larger 2-quart versions. If you’re usually making treats just for yourself or a small family, a smaller capacity might be perfect.
But if you often entertain guests or have a big family, consider a larger capacity. Making multiple batches can get tiring, and bigger machines save you time. Think about your typical serving size and how often you want to make ice cream.
Ask yourself: Do you want to experiment with different flavors frequently, or stick to classic vanilla? The right size and features can support your ice cream adventures without overwhelming your kitchen or budget.
Preparing Ingredients
Gather fresh ingredients for your ice cream recipe. Measure precisely for the best taste and texture. Chop fruits or nuts, ensuring even distribution.
Preparing ingredients is a crucial step in crafting the perfect homemade ice cream with your Cuisinart Ice Cream Maker. Getting the ingredients right can mean the difference between a creamy delight and a frozen mishap. Whether you love classics like vanilla or adventurous flavors like lavender honey, your choices will shape your ice cream experience.Selecting Flavors
Choosing the right flavor is the heart of your ice cream adventure. Think about what excites your taste buds. Are you a fan of rich chocolate, or does the tangy zest of lemon call your name? Consider seasonal fruits like strawberries in summer or pumpkin in fall. Fresh ingredients not only enhance flavor but also add a vibrant color to your creation. Don’t shy away from mixing flavors. Pairing caramel with a sprinkle of sea salt can transform a simple base into a gourmet treat. What unique combinations have you always wanted to try?Mixing The Base
Once you’ve settled on flavors, it’s time to blend your base. Typically, this involves cream, milk, and sugar. The balance is key; too much cream can make it too rich, while too little can make it icy. Mix your sugar thoroughly into the milk and cream until it’s fully dissolved. This ensures a smooth texture without any graininess. Experiment with adding your chosen flavors at this stage. Whether it’s a vanilla bean paste or a swirl of melted chocolate, ensure it integrates well with the base. How will you make your base unique? Remember, practice makes perfect. Each time you use your Cuisinart Ice Cream Maker, you’ll become more adept at balancing flavors and textures. What will you create next?Freezing The Bowl
Freezing the bowl correctly is crucial for the Cuisinart Ice Cream Maker to deliver creamy, smooth ice cream. The bowl contains a special gel that freezes and helps churn your mixture evenly. Without proper freezing, you risk ending up with icy, inconsistent texture that no one enjoys.
Proper Storage Tips
Store the bowl in the coldest part of your freezer, ideally at or below 0°F (-18°C). Avoid placing it near the freezer door where temperature fluctuates often.
Keep the bowl upright to prevent the gel inside from shifting. Wrapping it in a plastic bag helps protect it from absorbing freezer odors.
Have you noticed your ice cream isn’t as creamy as before? It might be time to check how you store your bowl.
Timing For Best Results
Freeze the bowl for at least 12 to 24 hours before you plan to make ice cream. This ensures the gel inside is fully solidified and ready to churn your mix effectively.
Short freezing times often lead to partially frozen bowls, causing the mixture to freeze unevenly. Never rush this step if you want perfect texture.
Think about your schedule: can you freeze the bowl overnight? This simple timing adjustment can dramatically improve your homemade ice cream.

Credit: www.goodhousekeeping.com
Operating The Machine
Operating the Cuisinart Ice Cream Maker is simple and fun. Understanding each step helps you create smooth, creamy ice cream every time. Follow these instructions carefully for the best results.
Assembling The Parts
Start by placing the freezer bowl in the machine’s base. Make sure it is stable and secure. Attach the paddle inside the freezer bowl. The paddle helps mix the ice cream evenly. Finally, put the lid on top. Check that the lid fits tightly to avoid spills.
Starting The Churning Process
Plug in the machine and switch it on. Pour your ice cream mixture into the freezer bowl through the lid’s opening. The paddle will begin to churn the mixture. Let it run for about 20-30 minutes. The ice cream thickens as it freezes. Turn off the machine once the desired texture is reached. Remove the bowl carefully and enjoy your homemade treat.
Timing And Texture
Timing and texture are key to making perfect ice cream with your Cuisinart Ice Cream Maker. The churning process controls how creamy and smooth your ice cream will be. Too little time leaves it soft and slushy. Too much can make it hard and icy. Paying attention to timing helps you get the best texture every time.
Texture depends on how the ingredients freeze and mix. The machine churns and adds air, giving ice cream its soft, rich feel. Watch the process closely to stop at the right moment. This way, your ice cream will be just right for serving or freezing.
How Long To Churn
Churning usually takes between 20 and 40 minutes. The exact time depends on your recipe and freezer bowl temperature. Start checking around 20 minutes. Most recipes suggest 25 to 30 minutes for a creamy texture. Avoid over-churning to prevent a hard, icy result.
Checking Consistency
Check the ice cream’s consistency by its thickness. It should look soft, like thick yogurt. Use a spoon to test. If it is still liquid or very soft, churn longer. If it holds its shape and pulls away from the sides, it is ready.
Remember, ice cream will firm up more after freezing. Stop churning slightly before it feels fully firm. This ensures a smooth, scoopable texture when served.
Adding Mix-ins
Adding mix-ins to your Cuisinart Ice Cream Maker batch can take your homemade ice cream to the next level. It’s a simple way to customize flavors and textures exactly how you like them. But timing and choice of mix-ins are key to getting the perfect bite every time.
When To Add Ingredients
You should add mix-ins toward the end of the churning process, usually in the last 5 minutes. This helps them spread evenly without getting crushed or sinking to the bottom. Adding them too early can make your ice cream too soft or cause chunky bits to break down too much.
Think about the texture you want. Do you want crunchy nuts, gooey swirls, or soft fruit chunks? Add nuts and candies just before finishing. Softer ingredients like berries or cookie dough can be folded in gently after churning if you want them more intact.
Popular Mix-in Choices
- Nuts:Pecans, almonds, walnuts – add crunch and a toasty flavor.
- Chocolate:Chips, chunks, or fudge swirls add rich bursts of sweetness.
- Fruit:Fresh berries or chopped fruit add freshness but add carefully to avoid excess moisture.
- Cookie pieces:Crushed Oreos or brownie bits create fun, chewy textures.
- Candies:Mini M&Ms or toffee bits add color and crunch.
Have you ever experimented with unexpected mix-ins like chili flakes or espresso beans? These can surprise your taste buds and make your ice cream uniquely yours. What flavor combo will you try next?
Serving And Storage
Serving and storing your homemade ice cream properly can make all the difference in taste and texture. Once your Cuisinart Ice Cream Maker has done its magic, knowing how to scoop and store your creation ensures every bite is just as delightful as the first. Let’s look at some practical tips to help you enjoy your frozen treat to the fullest.
Scooping Tips
Ice cream fresh from the machine is soft and creamy, which can make scooping tricky if you’re not prepared. Try dipping your scoop in warm water before serving—it slides through the ice cream much easier. This simple trick helps you create perfect, round scoops without the struggle.
Another tip is to let the ice cream sit at room temperature for a minute or two before scooping. This softens it slightly, making the texture smoother and easier to serve. Have you ever noticed how hard ice cream can break apart when too frozen? This quick pause prevents that problem.
Storing Leftovers
Leftover ice cream needs careful storage to keep its flavor and texture intact. Transfer it to an airtight container and press a piece of plastic wrap directly onto the surface before sealing the lid. This prevents ice crystals from forming and keeps the ice cream creamy.
Store your ice cream in the coldest part of your freezer, not the door, to avoid temperature fluctuations. If you plan to eat it within a few days, this method keeps it fresh and delicious. Wondering how long you can keep it? Typically, homemade ice cream lasts about 1-2 weeks when stored properly.
Cleaning And Maintenance
Keeping your Cuisinart Ice Cream Maker clean is essential for both hygiene and performance. Proper cleaning prevents flavors from mixing and ensures your machine lasts for many delicious batches. Let’s break down how to clean and maintain your ice cream maker effectively.
Disassembling The Machine
Start by unplugging the machine to ensure safety. Remove the mixing bowl carefully; it’s often the coldest part and might be fragile. Detach the paddle and lid, which hold most of the leftover ice cream and ingredients.
Have you noticed how dried ice cream can get stuck in the crevices? Taking your time to separate these parts makes cleaning easier and prevents build-up. Remember, don’t force any parts apart—check the user manual if something feels stuck.
Washing And Care Instructions
Wash all removable parts with warm, soapy water. Avoid using abrasive scrubbers that can scratch the surfaces. Rinse well to remove any soap residue that might affect the taste of your next batch.
The motor base should never be submerged or washed under running water. Instead, wipe it down with a damp cloth and dry it immediately. This simple step keeps the electronics safe and functioning properly.
- Dry all parts thoroughly before reassembling to avoid mold or mildew.
- Store the machine in a dry place to keep it in top condition.
- Regularly check for cracks or wear in the paddle and bowl to replace parts when necessary.
Have you ever skipped cleaning the paddle and noticed a strange flavor in your ice cream? That’s why thorough washing matters. Your taste buds will thank you for the fresh, clean start every time.
Troubleshooting Tips
Troubleshooting your Cuisinart ice cream maker is simple. Small problems can stop your ice cream from freezing or mixing well. Knowing common issues and their quick fixes saves time and frustration. This guide helps you fix problems fast and enjoy smooth, creamy ice cream every time.
Common Issues
- The ice cream is too soft or runny.
- The motor does not start or stops suddenly.
- The paddle does not spin properly.
- The mixture freezes unevenly or forms ice crystals.
- The machine makes strange noises during operation.
Quick Fixes
- Check if the freezer bowl is fully frozen. It needs 12-24 hours in the freezer.
- Ensure the machine is plugged in and the power switch is on.
- Remove any blockages around the paddle and clean the bowl thoroughly.
- Stir the mixture before pouring it in to avoid lumps and ice crystals.
- Make sure the lid is securely locked in place to avoid noise and disruption.

Credit: www.cuisinart.com
Frequently Asked Questions
How Do I Prepare The Cuisinart Ice Cream Maker?
First, freeze the bowl for 12-24 hours. Assemble the machine according to the manual. Pour your ice cream mixture into the frozen bowl and start the machine.
How Long Does The Ice Cream Maker Take?
The Cuisinart ice cream maker typically takes 20-30 minutes to churn ice cream. Time varies based on mixture and temperature.
Can I Use The Cuisinart For Sorbet Or Frozen Yogurt?
Yes, the Cuisinart ice cream maker works well for sorbets and frozen yogurts. Use the same process as with ice cream.
How Do I Clean The Cuisinart Ice Cream Maker?
Disassemble all removable parts. Wash the bowl, paddle, and lid with warm soapy water. Dry thoroughly before reassembling or storing.
Conclusion
Using the Cuisinart Ice Cream Maker brings fun to your kitchen. You can create fresh, tasty ice cream anytime. The process is simple and quick. Just follow the steps carefully. Experiment with flavors to find your favorite. Cleaning the machine is easy too.
Enjoy making desserts that everyone will love. Homemade ice cream tastes better and feels special. Give it a try and enjoy sweet treats at home.