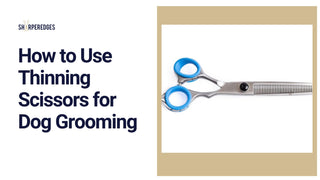
If you want your dog’s coat to look neat and natural, thinning shears are a must-have tool. But using them the wrong way can leave your furry friend’s fur uneven or patchy.
You might be wondering how to handle these special scissors without causing any damage. In this guide, you’ll learn simple, step-by-step tips to use thinning shears like a pro. By the end, you’ll feel confident giving your dog a gentle, polished look that highlights their best features.
Keep reading to discover how to make grooming easier and more enjoyable for both you and your pet.

Credit: www.clipit-grooming.com
Choosing The Right Thinning Shears
Thinning shears help groom your dog by removing thick fur evenly. Picking the right shears makes grooming easier and safer.
Different shears suit different fur types and grooming needs. Learn about the main features before buying.
Types Of Thinning Shears
There are several types of thinning shears for dogs. Each type cuts fur differently to create smooth layers or reduce bulk.
Some shears have straight blades, while others have curved or serrated edges. Choose based on your dog’s coat and grooming style.
- Straight Thinning Shears:Good for general thinning and blending.
- Curved Thinning Shears:Follow the dog’s body shape for a natural look.
- Serrated Thinning Shears:Prevent hair from slipping while cutting.
Blade Sizes And Teeth Count
Blade size affects how much fur you remove in one cut. Teeth count controls the thinning amount and texture.
More teeth mean finer thinning, fewer teeth remove thicker fur faster. Pick sizes based on your dog’s coat thickness.
| Teeth Count | Effect on Fur | Best For |
|---|---|---|
| 6-8 Teeth | Removes more hair quickly | Very thick or matted fur |
| 10-14 Teeth | Balanced thinning and blending | Most coat types |
| 15-20 Teeth | Light thinning, smooth finish | Fine or thin coats |
Material And Quality Considerations
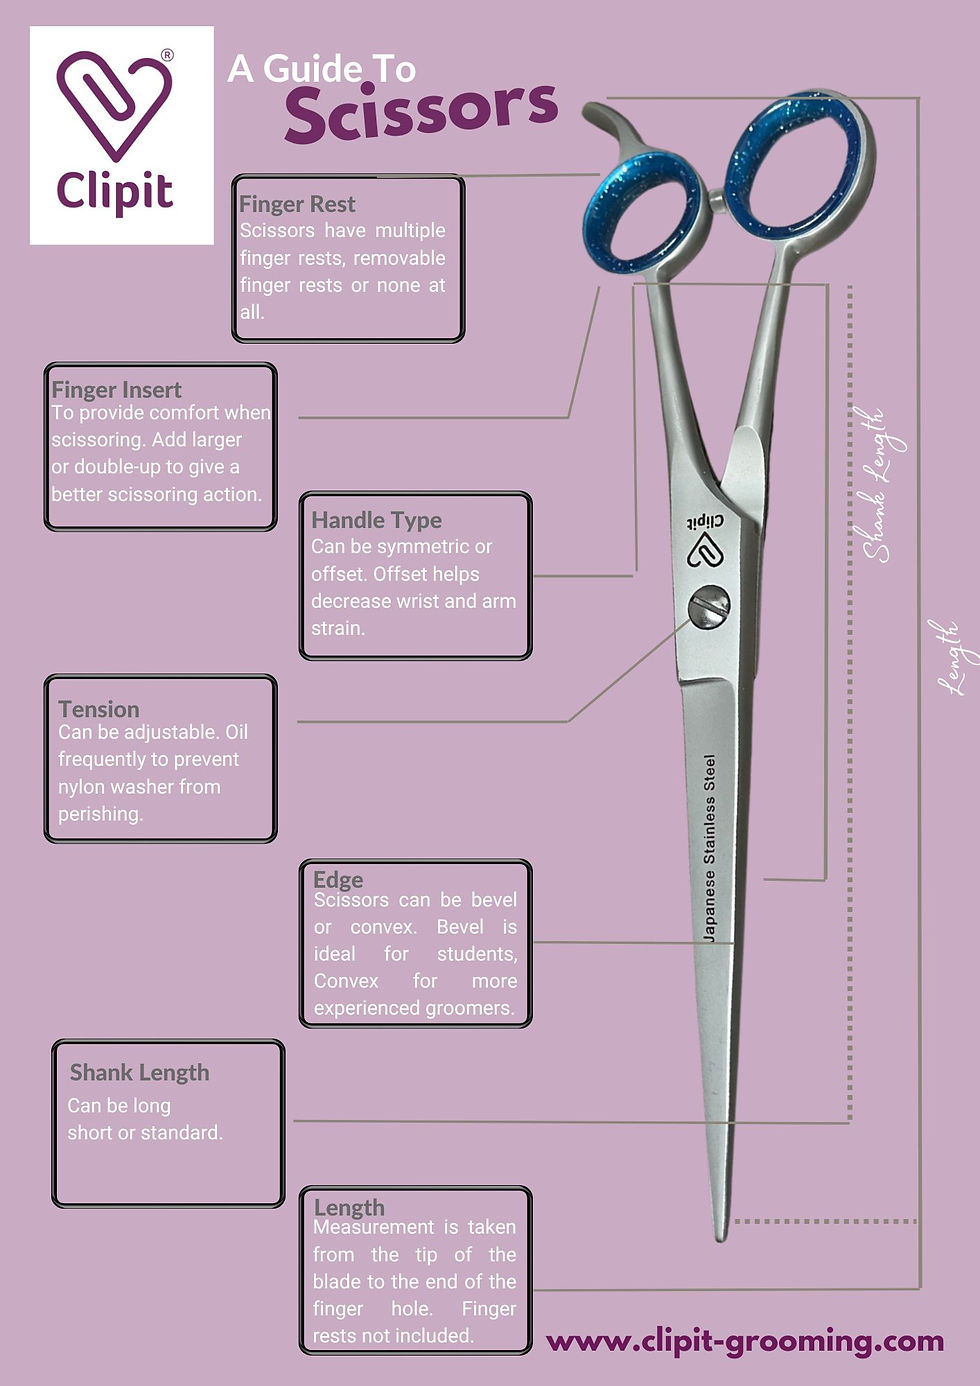
Good thinning shears are made from strong, sharp materials. This keeps them sharp longer and reduces pulling on fur.
Stainless steel is common because it resists rust and stays sharp. Higher quality shears feel balanced and comfortable in your hand.
- Stainless steel for durability and sharpness
- Ergonomic handles reduce hand fatigue
- Smooth tension screw for easy adjustment
- Proper blade alignment prevents uneven cuts
Preparing Your Dog For Grooming
Getting your dog ready for grooming helps make the process smooth. A calm and clean dog is easier to work with. Preparing well reduces stress for both you and your pet.
This guide covers three key parts: bathing and drying, brushing and detangling, and calming techniques. Follow these steps before using thinning shears on your dog.
Bathing And Drying
Give your dog a bath to clean the coat and skin. Use dog-friendly shampoo and lukewarm water. Rinse well to avoid irritation. Dry your dog completely to prevent matting.
- Brush out loose hair before the bath
- Wet your dog’s coat thoroughly
- Apply shampoo gently and avoid eyes
- Rinse the shampoo fully
- Towel dry first, then use a dryer on low heat
- Check the coat for damp spots
Brushing And Detangling
Brushing removes dirt and loose hair. It also helps find tangles and mats. Use the right brush for your dog’s coat type. Detangle gently to avoid hurting your dog.
| Brush Type | Coat Type | Use |
|---|---|---|
| Slicker Brush | Long or curly | Removes tangles and loose hair |
| Bristle Brush | Short-haired | Removes dirt and smooths coat |
| Comb | All types | Finds mats and tangles |
Calming Techniques
Keep your dog relaxed before grooming. Calm dogs stay still and allow better work. Use soothing voices and gentle petting. Offer breaks if your dog feels stressed.
Try these calming tips:
- Speak softly and slowly
- Give treats during grooming
- Use a favorite toy as distraction
- Massage your dog’s neck and ears
- Take short breaks for play or rest
Basic Thinning Shear Techniques
Thinning shears are tools for grooming your dog’s coat. They help to thin out thick fur without changing the overall length. Learning to use them properly can make your dog look neat and tidy.
Understanding the basic techniques of using thinning shears is essential. Proper use ensures your dog’s coat remains healthy and well-groomed.
Holding The Shears Correctly
Start by holding the shears comfortably in your hand. Your thumb and ring finger should be in the loops. This grip gives you better control.
Position your index and middle fingers to support the shears. This helps you guide the shears smoothly through the fur.
Angle And Pressure Tips
Always keep the shears at a slight angle to the coat. This prevents cutting too much fur at once. Apply gentle pressure to avoid pulling on the hair.
Practice using light pressure. This ensures you do not damage the coat. The goal is to thin, not to cut chunks.
Common Cutting Patterns
Use a natural cutting pattern following the dog’s coat. This creates a more natural look. Avoid cutting in a straight line.
Start by thinning the areas where the fur is thickest. These are usually around the neck and back. Move to other areas as needed.
- Focus on thick areas first
- Follow the direction of hair growth
- Check your progress frequently

Credit: magixshears.com
Target Areas For Thinning
Thinning shears help shape a dog’s coat by removing bulk and adding texture. Using them in the right spots keeps your dog looking neat and natural.
Focus on key areas where hair often gets too thick or uneven. Careful thinning helps your dog stay comfortable and stylish.
Face And Around The Ears
Thinning near the face softens harsh lines and blends coat growth. This makes your dog’s expression clearer and friendlier.
Use thinning shears around the ears to remove excess hair. This helps air flow and prevents matting in tight spaces.
Legs And Paws
Leg hair can get thick and block movement. Thinning here keeps legs looking slim and tidy without cutting too short.
Around the paws, thinning shears remove bulky fur between the toes. This stops dirt from collecting and improves walking comfort.
Body And Tail
Thinning the body fur reduces bulk and evens out the coat. It helps your dog stay cool and look smooth.
Tail hair can become thick and heavy. Use thinning shears to shape the tail and keep it light and fluffy.
Avoiding Common Mistakes
Using thinning shears on a dog can help keep its coat neat. You must use them carefully to avoid mistakes.
Common errors can make your dog’s coat look uneven or damage the hair. Read on to learn how to avoid these problems.
Over-thinning Risks
Using thinning shears too much can make the coat too thin. This can cause patches of skin to show.
Over-thinning also weakens the hair. It can cause the dog’s coat to look unhealthy or uneven.
- Use the shears on small sections at a time.
- Check the coat often to avoid removing too much hair.
- Stop thinning if the coat looks too sparse.
Uneven Cuts
Uneven cuts make the dog’s coat look messy. This happens if you cut hair at different lengths.
Uneven thinning can also cause lumps or patches in the coat. It is important to keep the length consistent.
- Work slowly and carefully over the entire coat.
- Use a comb to lift hair evenly before cutting.
- Check your work from different angles.
Safety Precautions
Safety is very important when using thinning shears on dogs. Sharp blades can hurt your pet or you.
Always keep your dog calm and still during grooming. This lowers the chance of accidents or cuts.
- Hold the shears firmly to control every cut.
- Keep your fingers away from the blades.
- Do not rush; take breaks if your dog moves too much.
- Use proper lighting to see clearly.
Credit: www.clipit-grooming.com
Maintenance Of Thinning Shears
Thinning shears need good care to work well and last long. Keeping them clean and sharp helps cut your dog’s fur smoothly.
Proper storage also protects the shears from damage. Follow these tips to keep your thinning shears in top shape.
Cleaning After Use
Clean your thinning shears after every grooming session. Dirt and hair can dull the blades and cause rust.
Use a soft cloth to wipe off hair and debris. You can also use a small brush to reach tiny spaces between the blades.
- Remove hair stuck between the blades.
- Wipe blades with a dry or slightly damp cloth.
- Dry the shears completely to stop rust.
- Use blade oil to keep them smooth.
Sharpening Tips
Sharp blades cut better and hurt your dog less. Check the sharpness regularly and sharpen when needed.
You can sharpen thinning shears using a sharpening stone or send them to a professional sharpener. Avoid using dull shears to prevent pulling your dog’s fur.
- Test sharpness by cutting a small hair section.
- Use a sharpening stone designed for scissors.
- Keep the blade angle steady while sharpening.
- Clean blades after sharpening.
Storage Recommendations
Store thinning shears in a safe, dry place. This stops damage and keeps them clean for the next use.
Use a protective case or pouch to avoid drops or bumps. Keep them away from moisture and dust.
- Store shears in a padded case.
- Keep them dry to prevent rust.
- Avoid placing heavy items on top.
- Keep out of reach of children.
Frequently Asked Questions
What Are Thinning Shears Used For On Dogs?
Thinning shears remove bulk and blend thick fur without cutting length. They create a natural, smooth finish and prevent harsh lines.
How Do You Properly Hold Thinning Shears?
Hold thinning shears like regular scissors, with your thumb and ring finger. Keep your wrist relaxed for better control and precision.
When Is The Best Time To Use Thinning Shears?
Use thinning shears after trimming to shape and blend coat layers. Avoid using them on wet hair for best results.
Can Thinning Shears Harm My Dog’s Coat?
If used incorrectly, thinning shears can cause uneven patches. Proper technique ensures a gentle, safe grooming experience without damaging fur.
Conclusion
Thinning shears help keep your dog’s coat neat and healthy. Use them gently to avoid cutting too much hair. Work slowly and check your progress often. This tool blends fur, making trims look natural. Practice makes it easier and less stressful for your dog.
Always keep your pet calm and comfortable. With care, thinning shears improve your dog’s grooming routine. Try these tips to make grooming simple and safe. Your dog will look great and feel happy.