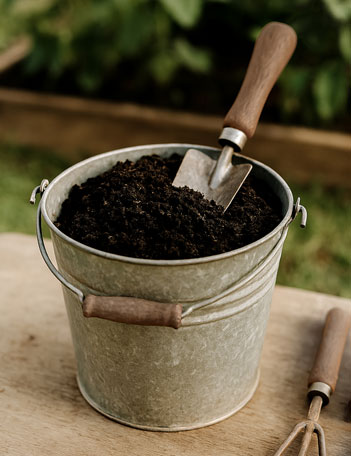
Are you looking for an easy and effective way to turn your kitchen scraps and yard waste into rich, nutrient-packed compost? A tumbler compost bin might be just what you need.
It makes composting simple, fast, and clean—no more hassle with pests or unpleasant smells. In this guide, you’ll discover exactly how to use your tumbler compost bin to create healthy soil for your garden. Keep reading, and you’ll learn the insider tips that will help you compost like a pro in no time!
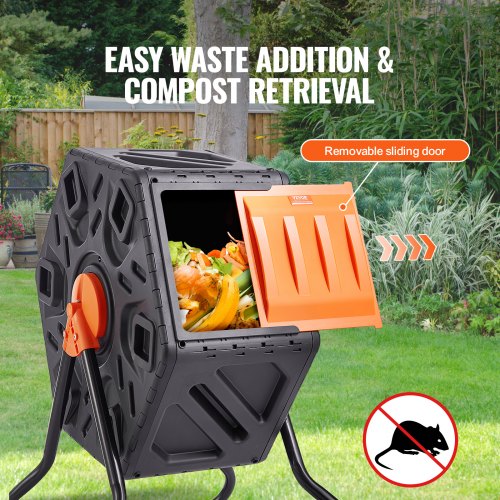
Credit: www.vevor.com
Choosing The Right Tumbler
Using a tumbler compost bin makes composting easier and faster. Picking the right tumbler helps you get good compost without much effort.
There are many types of tumblers. Knowing what to look for helps you choose one that fits your needs and space.
Material And Size Options
Tumbler bins come in different materials like plastic or metal. Each has pros and cons to think about.
Size matters too. A bigger tumbler holds more waste but needs more space.
- Plastic:Lightweight and rust-free but may crack in cold weather.
- Metal:Very strong but can rust if not coated.
- Small Size:Good for small yards or beginners.
- Large Size:Fits more waste, good for big families or gardens.
Features To Consider
Some tumblers have useful features that make composting easier. Look for these features before buying.
- Easy-to-turn handles for quick mixing
- Secure lids to keep pests out
- Good ventilation for faster composting
- Sturdy frame to hold the bin steady
- Drip tray to collect excess liquid
Placement Tips
Where you put your tumbler affects how well it works. Choose a good spot to get the best results.
Place your tumbler in a sunny spot to help speed up composting. Make sure it is easy to reach for adding waste and turning.
- Keep it on level ground to avoid tipping
- Place near your garden or kitchen for easy access
- Allow space around it for air flow
- Keep it away from strong winds or heavy rain

Credit: www.amazon.com
Setting Up Your Compost Bin
Using a tumbler compost bin is an easy way to recycle kitchen and garden waste. Setting it up correctly helps speed up composting and reduces odors.
Follow the steps below to prepare your tumbler compost bin for the best results.
Assembling The Tumbler
Start by putting together the tumbler compost bin parts. Most tumblers come with clear instructions and simple tools.
Make sure the drum spins freely and the lid fits tightly to keep pests out.
- Attach the drum to the frame securely
- Check that the handle turns the drum easily
- Tighten screws and bolts firmly
- Ensure the lid seals well to prevent smells
Preparing The Base Layer
Place a base layer of coarse material inside the tumbler. This layer improves airflow and drainage.
Good base materials help the compost break down faster and stop it from smelling bad.
- Use small twigs or straw as the base
- Spread a 2 to 3 inch layer evenly
- Make sure the base layer is dry and loose
Adding Initial Materials
After the base, add your first mix of compost materials. Balance green and brown waste for best results.
Green materials add nitrogen, and brown materials add carbon to the compost.
- Green: fruit scraps, vegetable peels, coffee grounds
- Brown: dry leaves, shredded paper, cardboard
- Chop larger items into smaller pieces
- Mix materials well inside the tumbler
Adding Compost Ingredients
Using a tumbler compost bin is a great way to make compost. Adding the right ingredients is key to success.
This guide will help you understand what to add to your compost bin. Learn about balancing greens and browns, avoiding mistakes, and materials to skip.
Balancing Greens And Browns
Compost needs a balance of green and brown materials. Greens are moist and rich in nitrogen, while browns are dry and rich in carbon.
Greens include kitchen scraps like fruit peels and vegetable waste. Browns include leaves, straw, and cardboard.
- Greens: Fruit peels, vegetable scraps, coffee grounds
- Browns: Dry leaves, straw, shredded paper
Avoiding Common Mistakes
People often make mistakes when adding compost ingredients. One mistake is adding too much of one type of material.
Another mistake is not turning the compost enough. This can cause bad smells and slow decomposition.
- Balance your greens and browns
- Turn the compost regularly
- Keep compost moist but not wet
Materials To Skip
Some materials should not go into your compost bin. These can cause issues or attract pests.
Avoid meats, dairy products, and oils. These can smell bad and attract animals.
- Meat and fish scraps
- Dairy products
- Greasy or oily foods
Operating The Tumbler
Using a tumbler compost bin is simple and effective. It speeds up the composting process by mixing materials inside.
Proper operation helps break down waste faster and keeps your compost healthy. Let’s look at key steps.
Turning Frequency
Turn the tumbler regularly to mix the compost materials. This adds air, which helps microbes work.
Usually, turning the tumbler two to three times a week works well. Avoid leaving it still for too long.
- Turn every 2 to 3 days for fast composting
- Turn less if compost is very wet
- Turn more if compost smells bad
Monitoring Moisture Levels
Keep the compost moist like a damp sponge. Too dry or too wet slows down composting.
Check moisture by squeezing some compost. Add water if dry, or add dry material if wet.
- Moisture helps microbes break down waste
- Dry compost slows decomposition
- Too much water causes bad smell
Temperature Checks
Check the compost temperature to see how active it is. Warm compost means good microbial activity.
Use a compost thermometer to measure inside temperature. Ideal temperature is between 130°F and 160°F.
- Temperatures above 130°F kill weed seeds
- Below 100°F means compost is slow
- High temperature means fast breakdown
Troubleshooting Common Issues
Using a tumbler compost bin is easy, but sometimes problems can arise. These issues can slow down composting or cause unwanted side effects.
This guide helps you fix common tumbler compost bin problems. It covers bad odors, slow decomposition, and pest control.
Bad Odors
Bad smells often mean the compost is too wet or lacks air. This creates a sour or rotten odor.
- Turn the tumbler more often to add oxygen.
- Add dry materials like leaves or shredded paper.
- Check for excess water and remove if needed.
- Do not add meat, dairy, or oily foods.
Slow Decomposition
Slow composting happens if the bin is too dry, too cold, or lacks nitrogen.
| Cause | Fix |
| Too Dry | Spray water lightly and mix well. |
| Too Cold | Move bin to a warmer spot. |
| Low Nitrogen | Add kitchen scraps like vegetable peels. |
Pest Control
Pests come from food scraps or holes in the bin. Keep pests out to protect your compost.
- Use a bin with tight-fitting lids and no holes.
- Cover food scraps with dry leaves or soil.
- Do not add meat, dairy, or oily foods that attract pests.
- Keep the area around the bin clean and free of spilled scraps.
Harvesting Finished Compost
Harvesting compost from your tumbler bin is easy and rewarding. Finished compost enriches your soil and helps plants grow strong.
Knowing when and how to collect compost ensures you get the best quality for your garden.
Signs Compost Is Ready
Finished compost looks dark and crumbly. It smells earthy and fresh, not rotten or sour. You will not see food scraps or original materials.
- Dark brown or black color
- Crumbly texture like soil
- Earthy, pleasant smell
- No visible food or yard waste
- Cool to touch, not warm
How To Collect Compost
To collect compost, open the tumbler bin carefully. Use a garden fork or shovel to remove the finished material. Avoid taking wet or unfinished parts.
- Place a tarp or container nearby for easy transfer.
- Turn the tumbler upside down or open the hatch.
- Remove the dark, crumbly compost first.
- Separate unfinished bits and return them to the bin.
- Store finished compost in a dry place until use.
Using Compost In Your Garden
Use finished compost to improve soil health. It adds nutrients, improves texture, and helps retain moisture.
| Method | How to Use |
| Soil Amendment | Mix compost into garden beds before planting |
| Mulch | Spread a layer around plants to keep soil moist |
| Potting Mix | Add compost to pots for better growth |
| Lawn Top Dressing | Spread thinly over grass to improve soil |
Maintaining Your Tumbler
Keeping your tumbler compost bin in good shape helps it work well. Regular care stops bad smells and pests.
Simple maintenance extends your bin’s life. It also makes composting easier and cleaner.
Cleaning Tips
Clean your tumbler often to avoid buildup of old compost. This keeps the bin fresh and safe.
Use water and a mild soap to wash the inside and outside. Rinse well to remove soap.
- Empty the bin before cleaning
- Scrub with a soft brush or cloth
- Let it dry fully before adding new waste
- Clean at least once every few months
Storage Suggestions
Store your tumbler in a dry, shaded place when not in use. This protects it from sun and rain damage.
Keep it on a flat surface to avoid tipping. Cover the bin if you expect heavy rain or snow.
- Place tumbler on level ground
- Use a cover to protect from weather
- Keep away from strong winds
- Store near your garden for easy access
Extending Bin Lifespan
Check the tumbler for cracks or loose parts regularly. Fix small problems before they grow bigger.
Turn the compost as often as recommended. This prevents the bin from getting stuck or damaged.
- Tighten screws and bolts when loose
- Avoid overloading the bin
- Keep sharp tools away from the plastic
- Rotate the tumbler gently to avoid strain

Credit: www.youtube.com
Frequently Asked Questions
What Materials Can I Compost In A Tumbler Bin?
You can compost fruit scraps, vegetable peels, coffee grounds, eggshells, and yard waste. Avoid meat, dairy, and oily foods to prevent odors and pests.
How Often Should I Rotate The Tumbler Compost Bin?
Rotate your tumbler compost bin every 2-3 days. Regular turning speeds up decomposition and aerates the materials for better composting.
How Long Does Compost Take In A Tumbler Bin?
Compost in a tumbler bin typically takes 4-8 weeks to mature. Proper moisture, balance, and regular turning help speed up the process.
Can I Compost In Winter Using A Tumbler Bin?
Yes, you can compost in winter with a tumbler bin. Insulate the bin or place it in a sunny spot to maintain heat.
Conclusion
Using a tumbler compost bin makes composting easy and clean. Turn the bin often to help break down waste fast. Add kitchen scraps, leaves, and small yard waste. Keep the compost moist but not too wet. Soon, rich soil will form for your garden.
This method saves trash space and helps the environment. Start today and enjoy fresh compost at home. Simple steps bring big benefits to your plants and earth. Give your garden the boost it needs with tumbler composting.