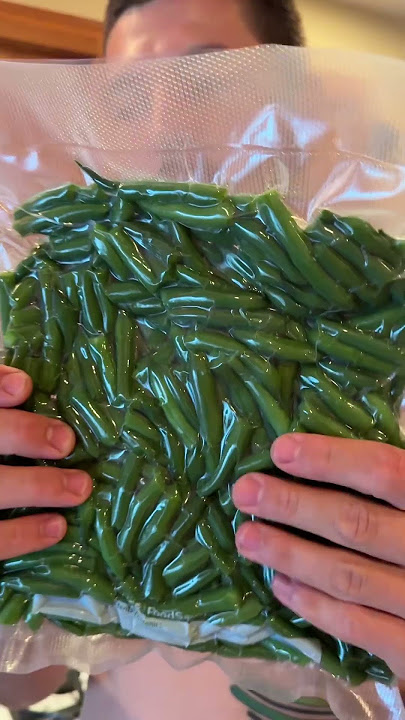
Are you looking to keep your green beans fresh for longer? Vacuum sealing might be the solution you need.
Imagine opening your freezer to find vibrant, flavorful green beans ready to be cooked at a moment’s notice. By mastering the art of vacuum sealing, you can extend the shelf life of your green beans, lock in their nutrients, and prevent freezer burn.
But how exactly do you vacuum seal green beans effectively? Don’t worry, we’ve got you covered. In this guide, we’ll walk you through each step, ensuring you can preserve your green beans like a pro. Ready to keep your veggies fresh and delicious? Let’s dive in!
Benefits Of Vacuum Sealing Green Beans
Vacuum sealing green beans offers many benefits for home cooks and gardeners. It keeps the beans fresh and tasty for a longer time. This method also protects the natural nutrients inside the beans. Plus, it helps reduce food waste by storing beans safely.
Extending Shelf Life
Vacuum sealing removes air from the packaging. Without air, green beans stay fresh much longer. This slows down spoilage caused by bacteria and mold. Vacuum sealed beans can last months in the freezer. This saves money by reducing the need to buy fresh beans often.
Preserving Nutrients And Flavor
Green beans keep more vitamins and minerals when vacuum sealed. The sealed environment limits exposure to oxygen. Oxygen can break down important nutrients over time. The flavor and texture also stay closer to fresh beans. This means better taste for your meals.
Reducing Food Waste
Vacuum sealing allows you to store green beans in smaller portions. You can open only what you need and keep the rest sealed. This prevents beans from going bad quickly after opening. It helps you use up all your green beans without throwing any away.

Credit: www.tasteofhome.com
Preparing Green Beans For Sealing
Preparing green beans properly before vacuum sealing helps keep them fresh longer. It improves taste and texture after storage. Following simple steps ensures you store high-quality beans safely.
Selecting Fresh Beans
Choose green beans that are firm and bright green. Avoid beans with brown spots or wrinkles. Pick ones that snap easily when bent. Fresh beans have the best flavor and nutrients.
Washing And Drying
Rinse green beans under cold running water to remove dirt. Gently rub the surface to clean thoroughly. Use a salad spinner or pat dry with a clean towel. Dry beans prevent moisture buildup inside the vacuum bag.
Blanching Process
Blanching stops enzyme activity and preserves color and texture. Boil water in a large pot. Add green beans and cook for 2-3 minutes. Immediately transfer beans to ice water to cool quickly. Drain and dry beans well before sealing.
Choosing The Right Vacuum Sealer
Choosing the right vacuum sealer is a key step to keep your green beans fresh and flavorful for a long time. The effectiveness of the seal can vary depending on the type of sealer and the quality of the bags you use. Understanding your options helps you pick a tool that fits your needs and budget.
Types Of Vacuum Sealers
There are two main types of vacuum sealers: external and chamber. External sealers are great for home use because they are affordable and easy to operate.
Chamber sealers work by removing air from the entire chamber, making them ideal if you plan to seal liquids or large quantities. Think about how often you’ll seal green beans and if you might want to preserve other items too.
Best Bags And Rolls For Green Beans
Choosing the right bags is just as important as the sealer. Look for BPA-free, food-grade bags designed for vacuum sealing to avoid contamination.
Textured or embossed bags allow better air extraction, which helps maintain a tight seal around your green beans. Rolls give you flexibility in bag size, which can reduce waste if you seal small portions.
Maintenance Tips
Regular cleaning extends the life of your vacuum sealer and keeps it working efficiently. Wipe the sealing strip and vacuum channel after each use to prevent residue build-up.
Check the sealing strip for wear and replace it if you notice uneven seals. Proper maintenance saves you money and ensures every bag is sealed perfectly, protecting your green beans from freezer burn.

Credit: www.numberanalytics.com
Step-by-step Vacuum Sealing Process
Vacuum sealing green beans is a simple process that helps keep them fresh longer. It removes air that causes spoilage and preserves flavor and texture. This step-by-step guide will make vacuum sealing easy and effective.
Filling The Bags
Start with clean, dry green beans. Place the beans loosely in the vacuum bag. Avoid overfilling to allow air removal. Leave enough space at the top for sealing. Spread beans evenly in a single layer if possible.
Removing Air Effectively
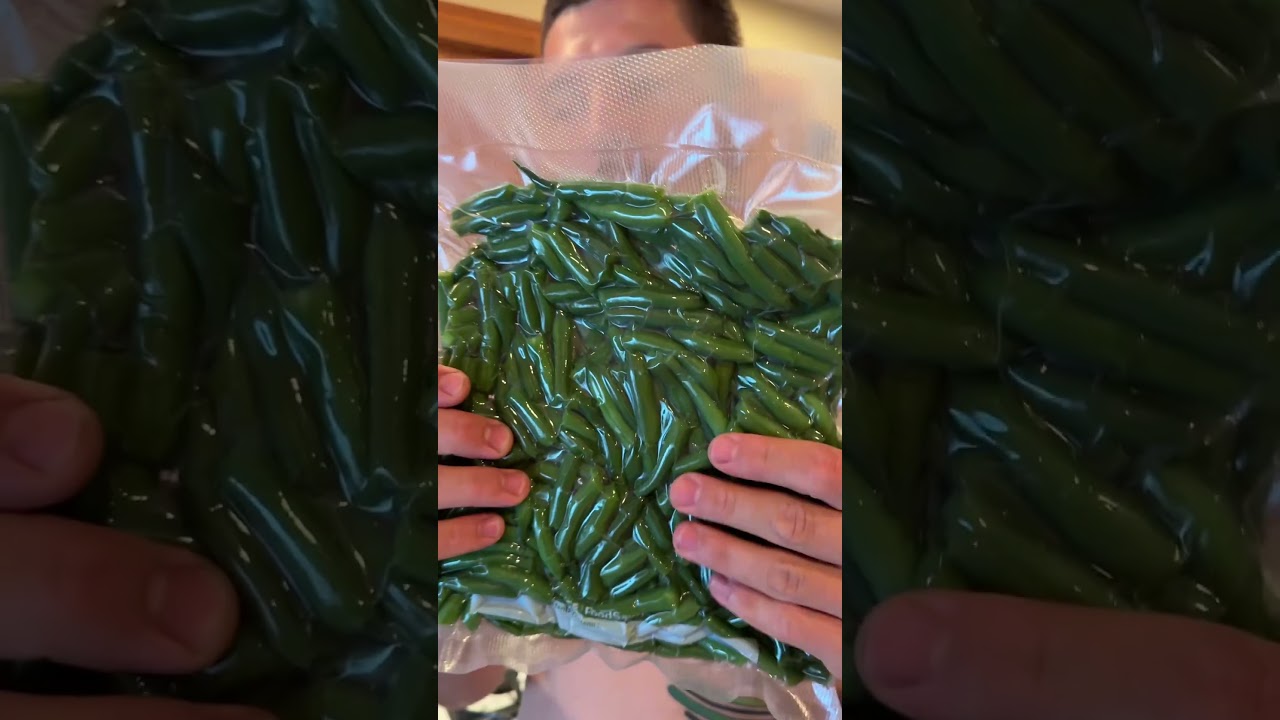
Place the open end of the bag into the vacuum sealer. Ensure the bag’s opening is flat and free of wrinkles. Turn on the vacuum sealer to remove all air. Watch the bag shrink around the beans. This step prevents freezer burn and extends shelf life.
Sealing The Bags
Once the air is removed, the vacuum sealer will seal the bag tightly. Make sure the seal is even and complete across the bag’s opening. Check for any gaps or leaks. A strong seal keeps green beans fresh and protected.
Storing Vacuum-sealed Green Beans
Storing vacuum-sealed green beans keeps them fresh longer and preserves their flavor. Proper storage helps maintain texture and nutrients. It also prevents freezer burn and spoilage. Follow these simple tips to get the best results.
Freezing Tips
Freeze vacuum-sealed green beans immediately after sealing. Keep the freezer temperature at or below 0°F (-18°C). Avoid thawing and refreezing, as it reduces quality. Store green beans flat to save space and ensure even freezing. Use airtight containers or bags to avoid moisture buildup.
Labeling And Dating
Always label vacuum-sealed bags with the packing date. Use a permanent marker for clear, legible writing. Include the type of vegetable and any special notes. This helps track freshness and avoid confusion. Rotate older bags to the front for easy use.
Shelf Life Expectations
Vacuum-sealed green beans last longer than fresh ones. In the freezer, expect up to 12 months of quality. In the refrigerator, use within 1 to 2 weeks. Watch for signs of spoilage like discoloration or off smells. Proper sealing and freezing extend shelf life significantly.
Credit: www.youtube.com
Common Mistakes To Avoid
Vacuum sealing green beans is a smart way to keep them fresh longer. Yet, some common errors can spoil your efforts. Avoiding these mistakes ensures your green beans stay crisp and tasty.
Sealing Moisture Issues
Too much moisture inside the bag can cause problems. Wet green beans may freeze into clumps. Excess water also leads to poor seals. Always dry green beans well before sealing. Use a paper towel to remove surface water.
Overfilling Bags
Stuffing too many green beans in one bag makes sealing hard. The vacuum may not remove all the air. Overfilled bags can tear or leak. Leave space at the top for a tight seal. Smaller portions seal better and last longer.
Ignoring Proper Blanching
Skipping blanching causes green beans to lose color and taste. Blanching stops enzyme action that leads to spoilage. Boil green beans for 2-3 minutes, then cool in ice water. Dry beans completely before vacuum sealing. This step keeps beans fresh and vibrant.
Using Vacuum-sealed Green Beans
Using vacuum-sealed green beans keeps them fresh and flavorful for longer. The sealing process locks out air, slowing down spoilage. This method preserves the beans’ texture and nutrients. It makes storage simple and convenient. You can enjoy green beans anytime without waste.
Thawing Methods
Thaw vacuum-sealed green beans carefully to keep taste and texture. One easy way is to place the sealed bag in the fridge overnight. This slow thaw keeps the beans crisp. For faster thawing, submerge the sealed bag in cold water. Avoid warm water to prevent cooking the beans. You can also thaw by microwaving on low power in the sealed bag for a short time. Always check the beans after thawing to ensure they are ready to cook.
Cooking Tips For Freshness
Cook thawed green beans quickly to keep their fresh taste. Steaming or sautéing works best. Use a little oil or butter for better flavor. Avoid overcooking, which makes beans soft and dull. Add salt near the end of cooking to keep beans firm. Bright green color shows freshness and good cooking. Try to keep cooking time under 5 minutes for best results.
Incorporating Into Recipes
Vacuum-sealed green beans fit many dishes easily. Toss them in salads for a crisp bite. Mix with garlic and almonds for a simple side. Add to soups or stews for extra nutrition. Stir into pasta dishes for color and crunch. Green beans also work well in casseroles and stir-fries. Their preserved freshness enhances every meal.
Frequently Asked Questions
How Do You Prepare Green Beans Before Vacuum Sealing?
Wash and trim green beans by removing ends. Blanch them in boiling water for 2-3 minutes. Cool immediately in ice water. Dry thoroughly to prevent freezer burn before vacuum sealing.
What Is The Best Vacuum Sealing Method For Green Beans?
Use a vacuum sealer designed for vegetables. Place blanched, dried green beans in a vacuum bag. Seal tightly to remove air. Store bags flat in the freezer for best results.
How Long Do Vacuum Sealed Green Beans Last?
Vacuum sealed green beans last 1 to 2 years in the freezer. Proper sealing and blanching prevent spoilage and preserve flavor. Always label bags with the date.
Can You Vacuum Seal Raw Green Beans Without Blanching?
It’s not recommended to vacuum seal raw green beans. Blanching stops enzyme activity that causes spoilage. Without blanching, beans may lose texture and flavor faster.
Conclusion
Vacuum sealing green beans keeps them fresh longer and saves space. It stops air and moisture from spoiling your beans quickly. You only need a few easy steps to seal them well. This method helps keep the flavor and nutrients intact.
Store your sealed green beans in the freezer or fridge. Enjoy fresh-tasting beans anytime you want. Try vacuum sealing to reduce food waste at home. It’s a simple way to make your food last. Give it a try and see the difference yourself.