
Have you ever noticed your microwave getting too hot or smelling a bit strange while cooking? Proper ventilation is the key to keeping your microwave running smoothly and safely.
But how exactly do you vent a microwave oven? If you want to avoid overheating, reduce odors, and extend your microwave’s life, you’re in the right place. Keep reading, and you’ll discover simple, step-by-step tips that anyone can follow to make sure your microwave stays cool and fresh every time you use it.
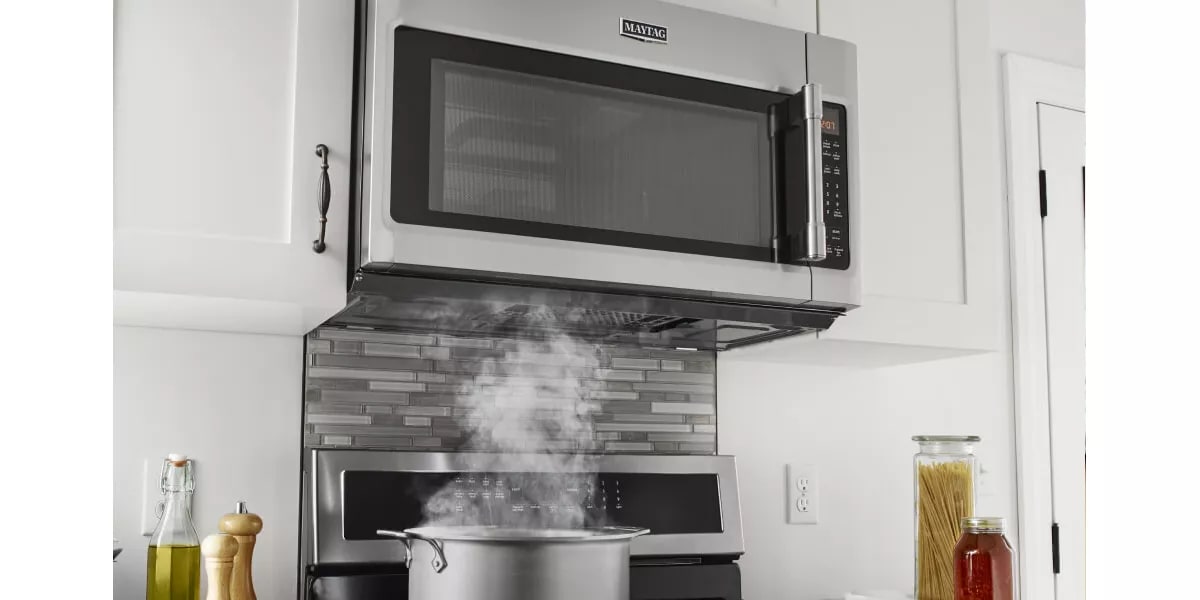
Credit: www.maytag.com
Reasons To Vent A Microwave
Venting a microwave is crucial for maintaining a healthy kitchen environment. It helps in managing heat, reducing odors, and preventing potential damage. Discover the key reasons why venting your microwave can make a difference.
Heat And Steam Build-up
Microwaves generate heat and steam during cooking. Without proper venting, this heat builds up. It can make your kitchen uncomfortable and stuffy. Venting helps in circulating air and reducing temperature.
Odor Control
Cooking strong-smelling foods can leave lasting odors. These odors linger if not vented out. Proper venting helps remove unpleasant smells. It keeps your kitchen smelling fresh and clean.
Preventing Kitchen Damage
Excess steam and heat can damage kitchen surfaces. Cabinets, walls, and ceilings can warp or discolor. Venting prevents moisture build-up. It protects your kitchen from unnecessary wear and tear.
Types Of Microwave Venting
Understanding the types of microwave venting is key to improving kitchen air quality and keeping your cooking area fresh. Each venting type serves a unique purpose and fits different kitchen setups. Knowing these options helps you pick the best solution for your space and cooking habits.
Recirculating Vent
Recirculating vents pull air through a filter before releasing it back into the kitchen. They don’t require ductwork, making them ideal if you can’t install external vents. However, their filters need regular cleaning or replacement to avoid odors and grease buildup.
If you live in an apartment or have limited space, this type might be your best friend. Just ask yourself, do you prefer convenience over maximum air removal? This choice often fits kitchens without easy access to outside walls.
External Venting
External venting pushes air outside your home through ducts. It’s the most effective way to remove smoke, steam, and odors from your kitchen. Installing it might need professional help, especially if your kitchen walls don’t already have duct openings.
Think about how often you cook greasy or strong-smelling foods. If it’s frequent, external venting can dramatically improve your kitchen environment. Are you willing to invest time and effort for cleaner, fresher air?
Downdraft Venting
Downdraft vents pull air downwards and vent it outside or recirculate it. They are built into the cooktop or countertop, saving overhead space. This type works well in open kitchens or where you want a sleek, modern look without a bulky hood.
Consider your kitchen layout and style preferences. Would a hidden venting system enhance your cooking experience without clutter? Downdraft venting offers flexibility but sometimes lacks the power of traditional hoods.
Tools And Materials Needed
Venting a microwave oven requires specific tools and materials to ensure the job is done safely and correctly. Having the right equipment makes the process smoother and helps prevent damage to your kitchen or appliance. Prepare all items before starting the vent installation.
Basic Hand Tools
- Screwdrivers (both flathead and Phillips) to remove and secure screws
- Measuring tape for accurate vent placement
- Drill with bits to create holes for vent openings
- Utility knife to cut drywall or vent materials
- Pliers to grip and bend metal parts
- Level to ensure vents are straight
Venting Kits
- Microwave vent hood or exhaust kit designed for your model
- Flexible or rigid ductwork to connect the microwave to outside vent
- Wall or roof vent cap to prevent rain and pests from entering
- Metal tape or clamps to seal duct connections securely
- Foil tape for extra sealing and insulation
Safety Equipment
- Safety goggles to protect eyes from debris
- Work gloves to prevent cuts and scrapes
- Dust mask to avoid inhaling dust or insulation particles
- Ear protection if using loud power tools
- Flashlight for better visibility in dark spaces

Credit: www.reddit.com
Step-by-step Venting Process
Properly venting your microwave oven is key to keeping your kitchen fresh and free from excess heat and odors. The process might seem technical, but breaking it down into manageable steps can help you handle it confidently. Let’s walk through each stage to ensure your microwave’s ventilation works efficiently and safely.
Measuring And Planning
Start by measuring the space around your microwave and the area where the vent will go. Accurate measurements help you avoid mistakes like cutting too large or too small an opening.
Think about where the vent will lead. Will it exhaust outside, or connect to an existing duct? Planning your vent path early saves you from unnecessary adjustments later.
Cutting Ventilation Openings
Use a pencil to mark the exact spot for your vent on the wall or cabinet. Double-check your measurements before you start cutting.
Cut carefully with the right tools—usually a jigsaw or hole saw works best. Remember, clean edges make installation easier and prevent damage to the microwave or surrounding surfaces.
Installing Vent Covers And Ducts
Attach vent covers to protect the duct and improve airflow. These covers keep out pests and debris while ensuring your vent looks neat.
Next, install ducts that fit snugly between the microwave and vent cover. Avoid bending or crimping the duct, as this can reduce airflow and cause noise.
Connecting To Existing Vent System
If your kitchen already has a vent system, connect your microwave vent securely to it. Use appropriate connectors and seal any gaps with foil tape.
Check for leaks by turning on the microwave fan. If you feel air escaping from places it shouldn’t, tighten connections or add more tape. A well-connected vent system enhances your kitchen’s air quality and comfort.
Common Mistakes To Avoid
Venting a microwave oven might seem straightforward, but many stumble over avoidable errors that reduce efficiency or even cause damage. Recognizing these common mistakes can save you time, money, and frustration. Are you sure your microwave vent setup is done right? Let’s look at key pitfalls you should steer clear of.
Incorrect Vent Placement
Placing the vent in the wrong spot can cause poor airflow and increased heat buildup. If your vent blows air directly into a cabinet or corner, it will trap moisture and grease, leading to mold or damage over time.
Think about the path your vent air takes. It should lead outside or into a dedicated duct space, not a confined area. I once helped a friend who installed the vent too close to the ceiling, causing steam to collect and peel off paint. Position your vent carefully to avoid such issues.
Using Improper Duct Materials
Not all duct materials are suitable for microwave vents. Using flexible plastic ducts instead of metal can cause grease buildup and fire hazards. Plastic ducts also tend to sag, which traps moisture and reduces vent efficiency.
Metal ducts, preferably rigid or semi-rigid aluminum, ensure smooth airflow and easier cleaning. Have you checked the duct material in your setup? Using the right material protects your home and improves the microwave’s performance.
Ignoring Manufacturer Guidelines
Every microwave model has specific venting requirements detailed by the manufacturer. Overlooking these instructions can void warranties and cause the microwave to malfunction.
Manufacturers provide clear specs on vent size, placement, and compatible duct types. Skipping these guidelines is a common mistake I’ve seen lead to repeated vent blockages and overheating. Do you have the manual handy? Following it closely helps you avoid costly repairs and keeps your microwave running safely.
Maintenance Tips For Microwave Vents
Keeping your microwave vents in top shape is key to ensuring your appliance runs smoothly and lasts longer. Regular maintenance not only prevents overheating but also improves air circulation and efficiency. Let’s look at some simple yet effective ways to take care of those vents.
Regular Cleaning
Dust and grease can quickly build up on your microwave vents, blocking airflow. Clean the vents every few weeks using a soft brush or a vacuum cleaner with a brush attachment. Wiping down the vent area with a damp cloth and mild detergent helps remove stubborn grime without damaging the surface.
Have you noticed your microwave getting hotter than usual? It might be time to give those vents some attention.
Checking For Blockages
Blocked vents can cause your microwave to overheat and even affect cooking times. Check the vent openings regularly to ensure nothing is stuck inside, such as food particles or small objects. If you find any blockage, gently remove it with a soft tool—avoid using sharp items that could damage the vent.
Do you know what’s lurking inside your microwave vents right now? A quick inspection can save you from costly repairs.
Replacing Filters
Many microwaves have charcoal or grease filters that need replacement over time. These filters trap odors and grease, so a clogged filter reduces vent efficiency. Check your microwave’s manual for filter replacement guidelines and schedule replacements every 6 to 12 months depending on usage.
Ignoring filter changes might seem harmless, but it can lead to unpleasant smells and poor ventilation. Are you due for a filter swap?
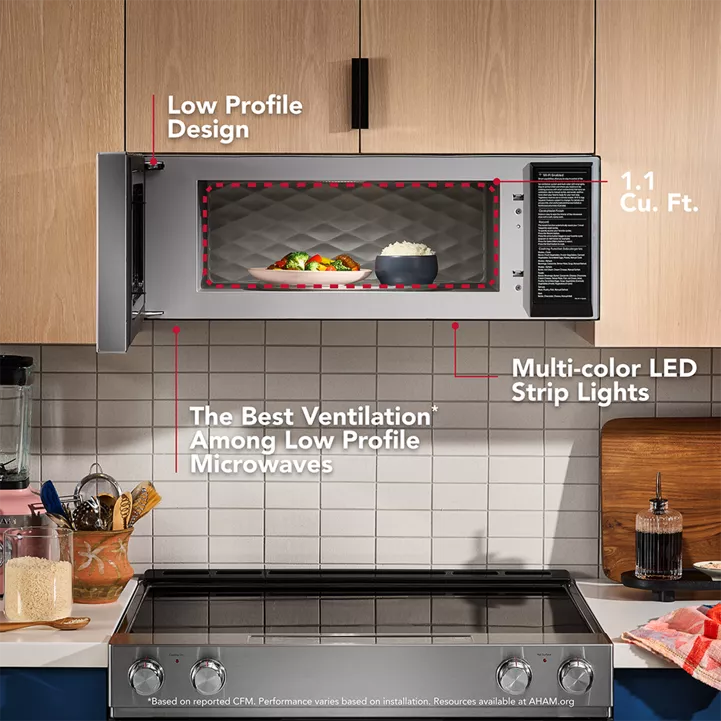
Credit: www.kitchenaid.com
Frequently Asked Questions
How Do You Vent A Microwave Oven Properly?
To vent a microwave oven properly, ensure the vent openings are clear. Use an external vent fan if possible. Regularly clean the vent filters to maintain airflow and prevent overheating. Proper venting helps avoid moisture buildup and extends your microwave’s lifespan.
Why Is Venting A Microwave Oven Important?
Venting a microwave oven is important to remove heat, steam, and odors. It prevents moisture damage to cabinets and walls. Proper ventilation also ensures the microwave runs efficiently and safely, reducing the risk of overheating and malfunction.
Can I Vent A Microwave Without An External Exhaust?
Yes, you can vent a microwave without an external exhaust using a recirculating vent system. This system filters air through charcoal filters and recirculates it back into the kitchen. It’s ideal when external venting isn’t possible but requires regular filter replacement.
How Often Should Microwave Vent Filters Be Cleaned?
Microwave vent filters should be cleaned every one to three months. Regular cleaning prevents grease buildup and maintains efficient airflow. Remove the filters and wash them with warm, soapy water, then dry thoroughly before reinstalling.
Conclusion
Venting your microwave oven helps keep your kitchen fresh and safe. It removes steam, smoke, and smells quickly. Proper venting also protects your microwave from damage. Follow the steps carefully for best results. Regular cleaning keeps vents clear and working well.
A well-vented microwave lasts longer and works better. Take your time and check all parts fit right. Enjoy cooking with less worry about smoke or smells. Simple venting makes a big difference in your kitchen.