
Your refrigerator with an ice maker is a trusty helper all year round. But when winter comes, it needs special care to keep working smoothly.
If you don’t winterize your fridge properly, you might face leaks, broken parts, or spoiled food. Don’t worry—this guide will show you simple steps to protect your appliance and save you time and money. Keep reading to learn how you can winterize your refrigerator with an ice maker and avoid costly repairs.
Prepare The Refrigerator
Preparing your refrigerator before winterizing is a crucial step that sets the stage for effective maintenance. Taking time to properly prepare helps avoid damage and ensures your appliance stays in good condition during colder months. Let’s focus on the key tasks you need to do to get your fridge ready.
Empty And Clean Interior
Start by removing everything inside your refrigerator, including shelves and drawers if possible. This makes it easier to clean every corner and prevents leftover food from spoiling.
Use a mild detergent mixed with warm water to wipe down all surfaces. Pay special attention to crevices where crumbs and spills tend to hide. Dry everything thoroughly to prevent mold or mildew growth.
Remove Perishables
Check your fridge for any perishable items that won’t last through the winter. These can spoil and create unpleasant odors or even damage the fridge if left inside.
Consider donating unopened food items that you won’t use or simply discard anything close to expiration. This helps keep your appliance clean and reduces waste.
Defrost The Freezer
If your freezer has ice buildup, defrosting it is essential before winterizing. Thick ice can reduce efficiency and cause the ice maker to malfunction.
Turn off the freezer and leave the door open. Place towels or a shallow pan underneath to catch melting water. This process may take several hours, so plan accordingly.
Once defrosted, clean the freezer interior with a baking soda solution to neutralize odors. Dry it completely before closing the door to avoid ice buildup when you restart the appliance.

Credit: www.wickfordappliance.com
Shut Off Water Supply
Shutting off the water supply is a crucial step in winterizing a refrigerator with an ice maker. It prevents water from freezing inside the lines, which can cause damage and costly repairs. Taking the time to properly shut off and drain the water system protects your appliance throughout the cold months.
Locate Water Valve
Start by finding the water valve that controls the flow to your refrigerator’s ice maker. This valve is usually located behind the fridge or under the sink nearby. Knowing exactly where it is helps you act quickly and avoid any water leaks.
Disconnect Water Line
Once the valve is shut off, carefully disconnect the water line from the back of the refrigerator. Use a wrench if necessary but avoid forcing it to prevent damage. Disconnecting the line stops any remaining water from entering the ice maker during winter.
Drain Water From Ice Maker
After disconnecting the water line, drain any water left inside the ice maker’s tubing. You can do this by gently tilting the fridge or using a towel to catch drips. Removing trapped water stops ice from forming and ensures your ice maker stays safe until you restart it.
Protect Ice Maker Components
Drain water from the ice maker to stop freezing and damage. Disconnect the water supply line and clean the ice tray thoroughly. Protect components by keeping them dry and insulated during winter.
Winter is approaching, and your refrigerator with an ice maker needs attention. Protecting ice maker components ensures it works efficiently during cold months. Proper winterization can prevent damage and costly repairs. Follow these steps to keep your ice maker in top shape.Remove Ice Tray
Start by removing the ice tray. This helps prevent any ice from forming while the ice maker is off. Make sure to empty the ice tray completely. Store the ice tray in a safe place. This prevents it from cracking during freezing temperatures.Clean Ice Maker Parts
Cleaning is crucial for maintaining your ice maker. Use a soft cloth and mild detergent. Wipe down all accessible parts. Pay special attention to the ice chute and mold. Remove any residue or build-up. Rinse with warm water and dry thoroughly. This keeps the ice maker hygienic and ready for use.Use Antifreeze Solutions
Consider using an antifreeze solution. This helps protect the ice maker’s water lines. Choose a non-toxic, food-safe antifreeze. Follow the manufacturer’s instructions carefully. Pour the solution into the water inlet. This prevents any water left inside from freezing. Ensure all parts are covered to avoid damage.Manage Power Settings
Managing power settings is crucial when winterizing a refrigerator with an ice maker. Adjusting power helps protect the appliance from damage and saves energy during colder months. Proper handling prevents frozen water lines and other issues that can cause costly repairs.
Unplug Or Adjust Thermostat
Decide if unplugging the refrigerator is best based on usage. If you keep it off, unplug to avoid electrical risks. For refrigerators still in use, lower the thermostat to a safe setting. This reduces power consumption while keeping food fresh. Always check the manufacturer’s guide for specific temperature recommendations.
Avoid Mold And Odors
Power adjustments can lead to moisture build-up inside. Moist areas cause mold and bad smells. Clean the refrigerator thoroughly before changing power settings. Leave the doors slightly open if unplugged. This allows air to circulate and stops mold growth. Use baking soda inside to absorb odors during storage.
Store Refrigerator Properly
Storing your refrigerator properly during the winter months is crucial, especially when it has an ice maker. The right storage conditions prevent damage and keep your appliance ready for use once the cold season ends. Paying attention to where and how you store it can save you from costly repairs and headaches later on.
Choose A Dry Location
Pick a spot that stays dry throughout winter. Moisture can cause rust and electrical issues inside your refrigerator. A dry basement or garage corner away from leaks and puddles works well.
Have you checked your storage area for dampness before placing your fridge? Even slight humidity can harm the appliance over time. Using a moisture absorber nearby helps keep the air dry.
Keep Doors Slightly Open
Leaving the doors slightly open prevents mold and odors from building up inside. It allows air to circulate, reducing moisture trapped in the fridge and ice maker compartments.
Try placing a small wooden block or a thick cloth between the door and frame to keep it ajar. This simple trick keeps your refrigerator fresh and ready to use again.
Cover With Protective Material
Cover your refrigerator with a breathable protective cloth or tarp to shield it from dust and debris. Avoid using plastic covers, as they trap moisture and can cause damage.
Think about how you protect other appliances or furniture in storage—your fridge deserves similar care. A well-covered unit stays cleaner and lasts longer through winter storage.
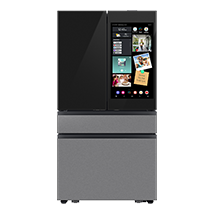
Credit: www.samsung.com
Restart After Winter
Restarting your refrigerator with an ice maker after winter requires careful attention. The goal is to make sure everything works smoothly and avoid any surprises like leaks or malfunctions. Taking time to inspect and prepare your appliance can save you frustration and costly repairs down the road.
Inspect For Damage
Begin by checking the exterior and interior of your refrigerator for any signs of damage. Look closely at the water lines, seals, and ice maker components. Small cracks or worn-out seals can cause leaks or inefficiency, so catch these issues early.
Don’t forget to examine the power cord and plug for wear. If you notice any fraying or corrosion, replace them before powering on the unit. A quick inspection helps you avoid bigger problems once the fridge is running again.
Reconnect Water Supply
Next, carefully reconnect the water supply line to the ice maker. Make sure all connections are tight but avoid over-tightening, which can damage fittings. If your water line has a valve, open it slowly to prevent sudden pressure spikes.
Check for leaks around the connections by placing a dry paper towel underneath. If it gets wet, tighten the fittings or replace faulty parts. A secure water supply is essential for consistent ice production and preventing water damage.
Run Test Cycle
After reconnecting everything, turn on your refrigerator and ice maker. Run a test cycle to verify the ice maker fills and produces ice properly. Listen for unusual noises and watch for any water leaks during this process.
If the ice maker doesn’t start, try resetting it according to the manufacturer’s instructions. Sometimes, an ice maker needs a manual reset after being off for months. Testing early helps you catch issues before you rely on your ice supply for daily use.

Credit: codysappliancerepair.com
Frequently Asked Questions
How Do I Prepare My Refrigerator For Winter?
To winterize your refrigerator, unplug it and empty all contents. Clean thoroughly and defrost the freezer. Remove and dry the ice maker parts. Leave doors slightly open to prevent odors and mold growth during long inactivity.
Should I Disconnect The Ice Maker During Winterization?
Yes, disconnect the ice maker to avoid water leaks and freezing. Turn off the water supply and remove ice trays. Clean and dry the ice maker components completely before storing or leaving unused.
How Can I Prevent Freezer Odors When Winterizing?
Clean your freezer with a baking soda solution to remove odors. Leave the door open slightly to air out the space. Ensure no food remains inside to prevent mold and unpleasant smells during winter.
Is It Necessary To Defrost The Freezer Before Winterizing?
Defrosting is crucial to remove ice buildup that can cause malfunctions. Unplug the refrigerator and let ice melt naturally. Clean and dry the freezer before closing it for winter storage.
Conclusion
Winterizing your refrigerator with an ice maker keeps it safe during cold months. Clean the ice maker and drain water to avoid damage. Unplug the appliance and leave the door slightly open to prevent mold. Check the user manual for any special instructions.
Taking these simple steps saves money and hassle later. Your fridge will be ready to use again when warmer weather returns. Stay prepared and protect your appliance all winter long. Easy care makes a big difference.