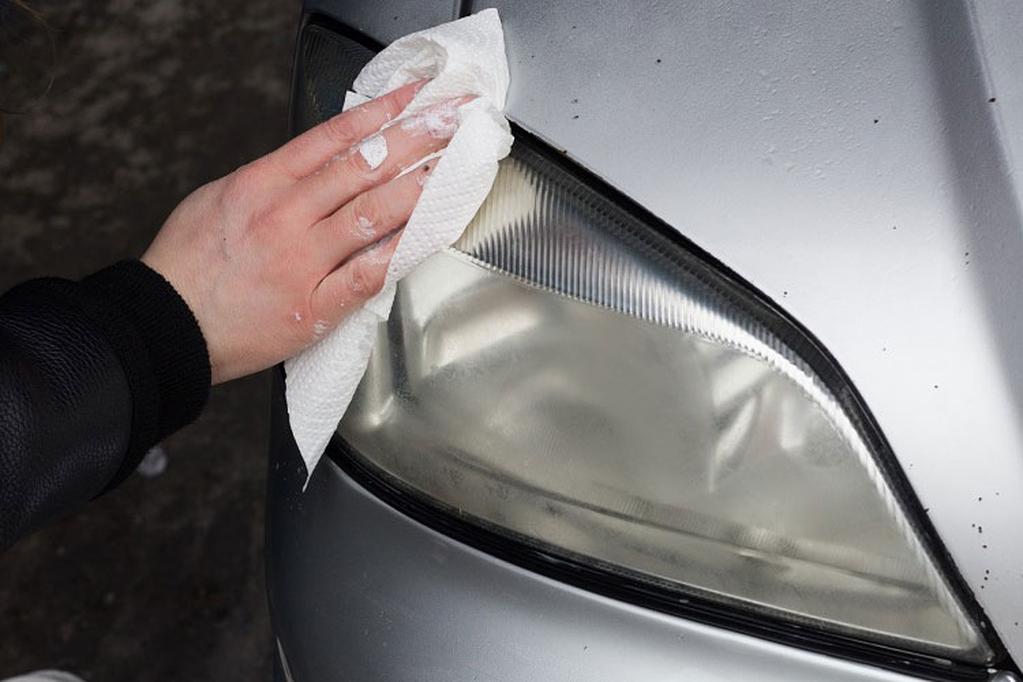
Are your car headlights looking dull or foggy? You might not realize it, but dirty or cloudy headlights can reduce your visibility and make driving at night unsafe.
The good news is, you don’t have to spend a fortune or take your car to a shop to fix this. You can clean your headlights yourself using simple items you probably already have at home. Keep reading, and you’ll discover easy, effective ways to restore the brightness of your headlights quickly and safely.
Your car—and your safety—will thank you!
Causes Of Headlight Cloudiness
Car headlights can become cloudy over time. This makes them less bright and harder to see through. Several factors cause this cloudiness to appear.
Understanding these causes helps you clean your headlights better. It also helps protect them from damage in the future.
Exposure To Sunlight And Uv Rays
Sunlight and UV rays break down the plastic on headlights. This causes the surface to become dull and yellow. It also makes the plastic brittle and weak.
Over time, UV damage leads to a cloudy look. This reduces how much light shines through the headlights. It also makes driving at night less safe.
Environmental Factors
Dirt, dust, and grime build up on headlights from the environment. Rain and road salt can cause stains or corrosion. These make headlights look foggy and unclear.
Pollution in the air can also stick to the headlight surface. Over time, this layer thickens and blocks the light. Cleaning helps, but some damage stays.
- Dirt and dust collect on headlights
- Rain and road salt cause stains
- Air pollution adds a sticky layer
Wear And Tear Over Time
Headlights face daily wear from driving and weather. Scratches from small rocks and debris create tiny cracks. These cracks trap dirt and moisture inside.
Over many years, this damage adds up. The plastic becomes cloudy and less clear. Regular cleaning and care can slow this process down.

Credit: www.carsales.com.au
Household Items For Headlight Cleaning
Car headlights can get cloudy or dirty over time. You can clean them using things found at home. These items help remove dirt and restore clarity.
Using household items is an easy and low-cost way to keep headlights bright. Let’s look at some common options.
Baking Soda And Vinegar
Baking soda and vinegar work well to clean headlights. Baking soda acts as a mild abrasive. Vinegar helps remove grime and stains.
Mix baking soda with vinegar to make a paste. Apply the paste on the headlight and scrub gently. Rinse with water and dry with a cloth.
- Mix 2 tablespoons of baking soda with 1 tablespoon of vinegar
- Spread the paste on the headlights
- Use a soft cloth or sponge to scrub in circles
- Rinse thoroughly with clean water
- Dry with a clean towel
Toothpaste As A Polishing Agent
Toothpaste can polish headlights and remove haze. It contains mild abrasives that clean the surface. Use white toothpaste without gel or whitening agents.
Apply a small amount of toothpaste to the headlight. Rub it in circular motions with a soft cloth. Wipe off the toothpaste with a damp cloth, then dry.
- Use plain white toothpaste
- Apply it directly to the headlight lens
- Rub gently in circles with a cloth
- Rinse with water and wipe clean
- Dry the surface completely
Using Dish Soap And Water
Dish soap and water help remove surface dirt and grime. This simple mix cleans headlights without harsh chemicals. It works best for regular maintenance.
Mix dish soap with water in a bucket. Use a sponge or cloth to wash the headlights. Rinse with water and dry to prevent streaks.
- Fill a bucket with warm water
- Add a few drops of dish soap
- Use a sponge to scrub headlights gently
- Rinse with clean water
- Dry with a soft towel
Commercial Headlight Cleaners
Car headlights can get cloudy or yellow over time. This reduces visibility at night. Commercial headlight cleaners help restore clarity quickly.
These products are made to remove grime, oxidation, and dirt safely. They come in many forms and strengths for different needs.
Types Of Cleaners Available
There are several types of commercial headlight cleaners you can buy. Each type works in a unique way to clean and protect your headlights.
- Polishing Compounds: These use mild abrasives to remove surface haze.
- Sprays and Wipes: Easy to apply products for light dirt and dust.
- Restoration Kits: Include multiple steps like sanding, polishing, and sealing.
- Gel Cleaners: Thick gels that cling to headlights for deep cleaning.
- UV Sealants: Protect headlights from sun damage after cleaning.
Benefits Of Specialized Products
Specialized headlight cleaners offer better results than household items. They are made to work on car plastics and glass safely.
| Benefit | Explanation |
| Safe for Headlights | Do not damage plastic or glass surfaces. |
| Effective Cleaning | Remove tough oxidation and stains. |
| Long-lasting Protection | Include UV blockers to slow future damage. |
| Easy Application | Designed for simple use at home or shop. |
How To Choose The Right Cleaner
Select a cleaner based on your headlight condition and your skill level. Some products need more effort than others.
- Check the headlight material: plastic or glass.
- Consider the damage level: light haze or heavy yellowing.
- Decide if you want a quick fix or full restoration.
- Read product instructions and safety guidelines.
- Look for products with UV protection for longer results.
Diy Headlight Restoration Kits
Cloudy and yellow headlights reduce your car’s visibility at night. DIY headlight restoration kits help you clean and restore them. These kits come with tools and materials you need to make headlights clear again.
Using these kits saves money and time compared to replacing headlights. You can do the job yourself with simple steps. Let’s explore what is inside a typical kit and how to use it.
Components Of A Typical Kit
- Sandpaper in different grits to smooth the headlight surface
- Polishing compound to remove haze and scratches
- Microfiber cloths for cleaning and buffing
- Protective sealant to guard against future damage
- Instruction manual with step-by-step directions
- Optional: Applicator pads or sanding blocks for easier handling
Step-by-step Usage Guide
- Clean the headlights with soap and water to remove dirt.
- Use masking tape around the headlight to protect car paint.
- Wet sand the headlight with the lowest grit sandpaper.
- Progressively use finer grit sandpapers to smooth the surface.
- Dry the headlight and apply polishing compound with a cloth.
- Buff the headlight until it becomes clear and shiny.
- Apply the protective sealant to keep headlights clear longer.
- Remove the masking tape and let the sealant dry fully.
Pros And Cons
| Pros | Cons |
|---|---|
| Cost-effective compared to headlight replacement | Requires time and effort to complete properly |
| Improves night driving safety by restoring clarity | Results may vary depending on headlight condition |
| Simple process that most car owners can do | Some kits may lack long-lasting protective sealants |
| Includes all needed materials in one package | Incorrect use can cause scratches or uneven finish |
Natural Remedies And Alternatives
Car headlights can get dirty or cloudy over time. Cleaning them helps improve visibility and safety. You can use simple natural remedies to clean your headlights at home.
These alternatives are easy to find and gentle on your car’s surface. Let’s explore some popular natural options for cleaning headlights.
Lemon Juice And Baking Soda Mix
Lemon juice is a natural cleaner with mild acidity. Baking soda adds gentle scrubbing power. Together, they help remove dirt and yellowing from headlights.
Mix lemon juice and baking soda to form a paste. Apply it on the headlight, rub gently, then rinse with water. This mix can brighten headlights without harsh chemicals.
- Mix 2 tablespoons lemon juice with 1 tablespoon baking soda
- Apply paste on headlights using a soft cloth
- Rub gently in circular motions for 5 minutes
- Rinse thoroughly with clean water
- Dry with a soft towel
Using Wd-40 Or Other Lubricants
WD-40 and similar lubricants can clean headlights by removing grime and haze. They create a thin protective layer that can help prevent fogging temporarily.
Spray a small amount on a soft cloth and wipe the headlights. Avoid using too much liquid to prevent streaks. This method works well for quick cleaning.
- Spray WD-40 lightly on a microfiber cloth
- Wipe headlights evenly with the cloth
- Buff the surface until clear and shiny
- Use this method occasionally for best results
Olive Oil For Temporary Shine
Olive oil can add a quick shine to your headlights. It helps hide minor scratches and gives a fresh look. This is only a temporary fix and needs reapplication.
Apply a small amount of olive oil on a clean cloth. Rub it gently on the headlights to spread the oil evenly. Wipe off excess oil to avoid attracting dust.
- Put a few drops of olive oil on a soft cloth
- Rub headlights in small circular motions
- Remove extra oil with a dry cloth
- Repeat as needed for a shiny finish
Tools And Equipment Needed
Cleaning car headlights requires the right tools to get clear results. Using proper equipment makes the job easier and safer.
This guide covers the tools you need to clean and polish your headlights effectively.
Microfiber Cloths And Sponges
Microfiber cloths are soft and gentle on headlights. They help remove dirt without scratching the surface.
Sponges with a smooth texture work well to apply cleaning solutions evenly. Use sponges that are non-abrasive to avoid damage.
- Microfiber cloths pick up dust and grime effectively
- Soft sponges help spread polish or cleaner
- Avoid rough or abrasive materials
Sandpaper Grades For Polishing
Sandpaper is used to smooth out scratches and haze on headlights. Choosing the right grit level is important.
Start with coarser grits and move to finer ones for a clear finish. Wet sanding is often recommended to reduce dust.
- 800 to 1000 grit for removing heavy damage
- 1500 to 2000 grit for smoothing the surface
- 2500 grit or higher for final polishing
Protective Gear
Protective gear keeps you safe during the cleaning process. It stops dust and chemicals from harming your skin and eyes.
Wear gloves to protect your hands. Use safety glasses to shield your eyes from splashes or particles.
- Rubber or latex gloves prevent skin irritation
- Safety glasses protect eyes from dust and chemicals
- A mask helps avoid inhaling fine dust
Preventing Future Headlight Damage
Car headlights can get dull or yellow over time. This happens because of sun and dirt. Taking care of your headlights helps you see better at night.
Here are some tips to keep your headlights clear and safe for a longer time.
Applying Uv Sealants
UV sealants protect headlights from sun damage. They stop yellowing and cracking. You apply them after cleaning your headlights well.
- Clean headlights with soap and water first.
- Dry the surface completely.
- Apply a thin layer of UV sealant evenly.
- Let it dry before driving.
- Repeat every few months for best protection.
Regular Cleaning Routine
Cleaning headlights often stops dirt build-up. It also keeps the lens clear. Use gentle cleaners that do not scratch.
| Cleaning Step | Recommended Product | Frequency |
| Rinse dirt off | Water | Every week |
| Wash headlights | Mild soap | Every 2 weeks |
| Dry headlights | Soft cloth | After washing |
Parking Tips To Avoid Damage
Where you park affects your headlights. Sun and weather can cause damage. Choose parking spots that protect your car.
- Park in shaded areas to avoid sun exposure.
- Use a car cover if parking outside for long times.
- Avoid parking under trees that drop sap or debris.
- Keep away from areas with heavy dust or pollution.

Credit: www.youtube.com

Credit: www.meguiars.com
Frequently Asked Questions
What Household Items Can Clean Car Headlights Effectively?
Common household items like baking soda, toothpaste, and vinegar can clean headlights. They remove grime and minor oxidation safely. Use a soft cloth to apply and rinse thoroughly with water for best results.
How Does Toothpaste Help Clean Cloudy Headlights?
Toothpaste contains mild abrasives that polish the headlight surface. It removes dirt and light oxidation, restoring clarity. Apply gently with a cloth, then rinse and dry for a clearer, brighter headlight.
Can I Use Commercial Headlight Restoration Kits?
Yes, commercial kits are designed specifically for headlight cleaning. They often include sanding pads and polish to remove heavy oxidation. Follow the instructions carefully for a professional-looking finish and improved visibility.
Is It Safe To Use Wd-40 On Headlights?
WD-40 can temporarily clean headlights by removing grime and moisture. However, it doesn’t provide long-term protection or restore clarity. Use it sparingly and consider proper cleaning methods for lasting results.
Conclusion
Cleaning car headlights is easy with common household items. Use toothpaste, baking soda, or vinegar for good results. These materials remove dirt and restore clarity fast. Regular cleaning keeps headlights bright and improves safety. Remember to protect your headlights from harsh sun and road grime.
Clean headlights help you see better at night. Try simple methods before buying expensive products. Keep your car looking fresh and drive safely every day.