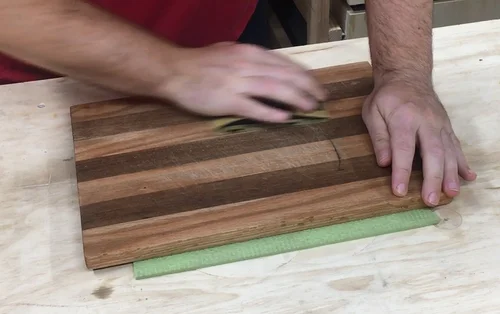
If you’ve ever tried to sand a cutting board, you know it’s not as simple as just picking up any sandpaper. Choosing the right grit can make all the difference between a smooth, beautiful finish and a rough, uneven surface.
But how do you know which grit to use? You’ll discover exactly what grit to sand your cutting board with, step by step. By the end, you’ll have the confidence to bring out the best in your wood, making your cutting board safe, smooth, and ready for years of use.
Keep reading—you don’t want to miss these essential sanding tips!
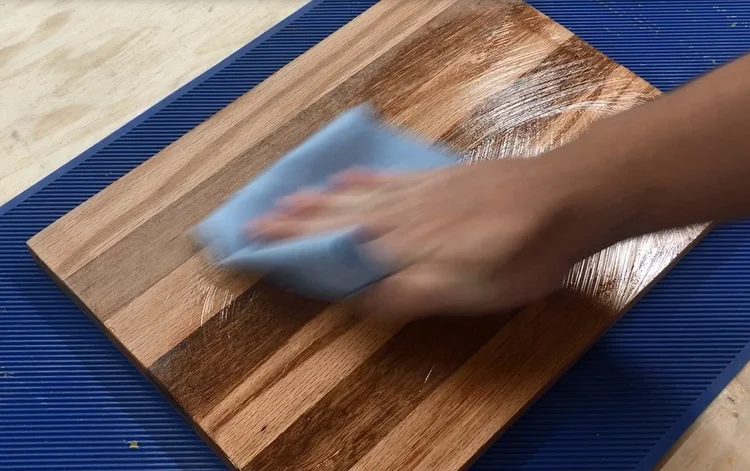
Credit: www.slightlycrookedworkshop.com
Choosing The Right Grit
Choosing the correct grit for sanding a cutting board helps get the best results. Grit size affects how smooth or rough the surface will become.
Using the wrong grit can damage the wood or leave it uneven. Learn which grit suits each sanding stage.
Coarse Grit For Initial Shaping
Coarse grit sandpaper removes rough spots and shapes the board. It works fast on uneven surfaces and deep scratches.
Use grit sizes between 40 and 60 for this step. Avoid pressing too hard to keep control.
Medium Grit For Smoothing
Medium grit sandpaper smooths the surface after coarse sanding. It removes marks left by rough grit.
- Choose grit between 80 and 120
- Sand evenly to reduce scratches
- Check the surface often to avoid over-sanding
Fine Grit For Polishing
Fine grit sandpaper polishes the cutting board to a smooth finish. It prepares the wood for oil or sealant.
| Grit Size | Purpose |
| 150 to 180 | Light smoothing |
| 220 to 320 | Fine polishing |
| 400+ | Extra smooth finish |
Preparing The Cutting Board
Before sanding a cutting board, you need to prepare it well. Proper preparation helps get smooth results and keeps the board safe to use.
Cleaning and checking the board for damage are important steps. These ensure the surface is ready for sanding and free from problems.
Cleaning And Drying
Clean the cutting board to remove dirt, food, and oils. Use warm water and mild soap for this.
Dry the board completely before sanding. A wet board can clog the sandpaper and cause uneven sanding.
- Wash with a soft sponge, not harsh scrubbers
- Rinse off all soap to avoid residue
- Pat dry with a clean towel
- Let it air dry for a few hours
Inspecting For Damage
Look closely for cracks, deep cuts, or warping. These issues can make sanding difficult or unsafe.
If you find damage, decide if you can fix it or if you need a new board. Small cracks may fill with wood filler before sanding.
- Check all sides of the board
- Look at edges and corners carefully
- Press gently to test for soft spots
- Note any chips or deep scratches
Sanding Techniques
Sanding is key to smoothing your cutting board surface. Using the right techniques helps you get the best finish. Choose the correct grit sandpaper for each step.
This guide covers sanding with the grain, using circular motions, and avoiding over-sanding. Each method improves the wood’s look and feel.
Sanding With The Grain
Always sand in the direction of the wood grain. This prevents scratches that go across the wood fibers. Sanding with the grain keeps the surface smooth and even.
Use long, steady strokes. This helps remove rough patches without damaging the board. Start with coarse grit and move to finer grit sandpaper.
Using Circular Motions
Circular sanding works well on edges and corners. It helps blend rough spots smoothly. But keep the pressure light to avoid uneven areas.
- Use a fine grit sandpaper for circular sanding
- Keep your hand moving in small circles
- Check the surface often to avoid gouges
- Finish by sanding with the grain again
Avoiding Over-sanding
Too much sanding can thin your board and ruin its shape. Watch the surface carefully as you work. Stop sanding once the wood is smooth.
| Signs of Over-Sanding | How to Prevent |
|---|---|
| Uneven surface | Sand lightly and check often |
| Rounded edges | Focus on flat areas first |
| Thin spots | Use the right grit and pressure |

Credit: www.slightlycrookedworkshop.com
Step-by-step Sanding Process
Sanding a cutting board is important to make it smooth and safe. Using the right grit sandpaper helps remove rough spots and prepares the surface.
This guide explains the sanding process using different grit levels. Follow these steps for the best finish.
Starting With 80 Grit
Begin sanding with 80 grit sandpaper. This coarse grit removes deep scratches and rough areas quickly.
Sand evenly across the entire board. Use a circular or back-and-forth motion to avoid uneven spots.
- Use light pressure to avoid gouging the wood
- Focus on edges and corners that may be rough
- Remove any old finish or stains completely
Progressing To 120 Grit
Switch to 120 grit sandpaper after the board feels smooth. This medium grit removes the scratches left by 80 grit.
Sand all surfaces again, following the wood grain. This step starts to refine the texture for a nicer finish.
- Keep sanding until the surface feels even and soft
- Pay attention to any spots missed with 80 grit
- Remove all dust before moving to finer grit
Finishing With 220 Grit Or Higher
Finish sanding with 220 grit or finer sandpaper. This fine grit smooths the board and prepares it for sealing.
Use gentle, even strokes. The wood will feel soft and ready for use after this step.
- Remove all sanding dust with a damp cloth
- Check for any rough areas and sand lightly if needed
- Apply oil or finish to protect the cutting board
Tools And Materials Needed
Choosing the right grit for sanding a cutting board is important. It helps to smooth the surface without damaging the wood. You need the right tools and materials to get good results.
This guide explains the types of sandpaper, sanding blocks or machines, and safety gear you need for sanding a cutting board.
Types Of Sandpaper
Sandpaper comes in different grits. The grit number tells you how rough or smooth the paper is. Lower numbers mean rougher grit. Higher numbers mean finer grit.
- Coarse grit (40-60) removes rough spots fast.
- Medium grit (80-120) smooths the surface.
- Fine grit (150-220) prepares wood for finishing.
- Extra fine grit (320+) polishes the wood.
Sanding Blocks And Machines
Sanding blocks help you hold sandpaper flat and even. They give better control than just using sandpaper by hand. Electric sanders make sanding faster but need care to avoid damage.
| Tool | Description | Use |
| Sanding Block | Handheld block to hold sandpaper | Manual sanding with control |
| Orbital Sander | Electric sander with circular motion | Faster sanding on large surfaces |
| Belt Sander | Power sander with moving belt | Removes rough wood quickly |
Safety Gear
Safety gear protects you from dust and injury. Sanding wood creates fine dust that can harm your lungs and eyes.
- Wear a dust mask or respirator.
- Use safety goggles to protect your eyes.
- Wear gloves to protect your hands.
- Work in a well-ventilated area.

Credit: www.findbuytool.com
Finishing Touches
Sanding a cutting board is only part of the process. The final steps ensure a smooth, protected surface. These steps help your board last longer and look great.
Removing dust, applying oil or sealant, and allowing curing time are key to finishing your board properly. Each step needs care and attention.
Removing Dust
After sanding, tiny dust particles remain on the board. Removing this dust is important before applying any finish. Use a soft brush or a clean cloth to wipe the surface well.
- Use a dry cloth to wipe away dust.
- Brush dust out of any grooves or cuts.
- Use compressed air for hard-to-reach spots.
- Make sure the surface feels smooth and clean.
Applying Oil Or Sealant
Applying oil or sealant protects the wood and brings out its natural color. Use a food-safe finish made for cutting boards. Apply evenly with a clean cloth or brush.
| Type of Finish | Benefits | Application Tips |
| Mineral Oil | Non-toxic, easy to apply | Apply multiple coats, let soak in |
| Beeswax | Creates a water-resistant barrier | Warm before applying, buff after drying |
| Tung Oil | Durable and water-resistant | Thin coats, allow to dry fully |
Curing Time
Let the finish cure fully before using the cutting board. This time allows the oil or sealant to soak in and harden. Avoid rushing this step to keep the board safe and durable.
- Place the board in a dry, well-ventilated area.
- Wait at least 24 hours after the first coat.
- Apply additional coats if needed, with curing time in between.
- Do not use the board until the finish feels dry and firm.
Common Mistakes To Avoid
Sanding a cutting board takes patience and care. Avoiding common mistakes helps get a smooth finish.
Learn what errors to watch for during sanding. These tips keep your board safe and looking great.
Skipping Grit Levels
Do not jump from rough to fine grit. This can leave scratches and uneven surfaces on the board.
- Start with coarse grit to remove rough spots.
- Use medium grit to smooth out scratches.
- Finish with fine grit for a polished surface.
Ignoring Grain Direction
Sanding against the wood grain causes scratches and rough patches. Sand with the grain for best results.
| Wrong Way | Right Way |
| Across the grain | Along the grain |
| Leaves scratches | Leaves smooth surface |
| Hard to fix | Easier to finish |
Applying Too Much Pressure
Pressing hard while sanding can damage wood and wear out sandpaper fast. Use light, even strokes instead.
Tips for Pressure:
- Let the sandpaper do the work.
- Move the sander evenly across the surface.
- Check your progress often.
Frequently Asked Questions
What Grit Sandpaper Is Best For Cutting Boards?
Start with 120 grit sandpaper for initial smoothing. Then, progress to 220 grit for a finer finish. Use 320 grit for a polished surface. This process ensures a smooth and safe cutting board surface.
Can I Use Coarse Grit On Cutting Boards?
Avoid using coarse grit sandpaper on cutting boards. Coarse grit can damage the board’s surface. It may leave deep scratches that are hard to remove. Stick to finer grit for a smooth finish.
How Often Should I Sand My Cutting Board?
Sand your cutting board every few months. Regular maintenance keeps the surface smooth and hygienic. If you notice deep cuts or a rough texture, sanding can restore its condition.
Is Sanding Necessary For Bamboo Cutting Boards?
Yes, sanding is necessary for bamboo cutting boards. Bamboo can splinter over time. Regular sanding helps maintain a smooth, safe surface for food preparation.
Conclusion
Choosing the right grit to sand your cutting board matters a lot. Start with coarse grit to remove rough spots and scratches. Then, use finer grit to make the surface smooth and safe for food. Sanding well helps your board last longer and look better.
It also keeps it clean and easy to use. Take your time and follow the steps carefully. Your cutting board will thank you with every meal you prepare. Simple sanding makes a big difference.