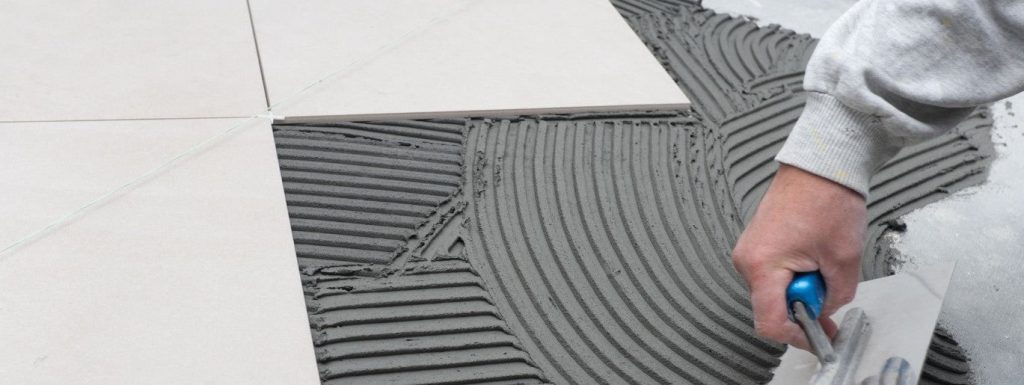
Choosing the right trowel size for your 24×48 tile can make all the difference between a smooth, lasting installation and a frustrating, uneven mess. If you want your tiles to stick perfectly and look professional, you need to know exactly which trowel will give you the best results.
You’ll discover the ideal trowel size for your large-format tiles and learn tips that save you time, effort, and money. Keep reading to make sure your next tile project turns out flawless and hassle-free.
Choosing The Right Trowel
Picking the right trowel is important for laying 24×48 inch tiles. It helps spread adhesive evenly. The right size prevents tile shifting and uneven surfaces.
Using the wrong trowel can cause weak bonds or lippage. Understanding trowel types and tile size impact guides your choice.
Trowel Types Explained
Trowels have different notch sizes and shapes. They control how much adhesive you apply. Common notches include square, V-shaped, and U-shaped.
- Square notch spreads adhesive evenly in ridges
- V-notch creates thinner adhesive layers
- U-notch holds more adhesive for large tiles
Choosing a trowel depends on tile thickness and surface texture. Larger tiles need more adhesive and bigger notches.
Impact Of Tile Size On Trowel Choice
24×48 inch tiles are large and heavy. They need enough adhesive to support weight. Smaller notches do not hold enough adhesive.
A 1/2 inch x 1/2 inch square notch trowel is best for these tiles. It spreads enough mortar for strong adhesion and helps prevent tile movement.
| Tile Size | Recommended Trowel Notch | Reason |
|---|---|---|
| 12×12 inch | 1/4 inch x 1/4 inch square notch | Smaller tiles need less adhesive |
| 24×24 inch | 1/2 inch x 1/2 inch square notch | Medium size needs moderate adhesive |
| 24×48 inch | 1/2 inch x 1/2 inch square notch | Large tiles need more adhesive |

Credit: www.homedepot.com
Recommended Trowel Size For 24×48 Tiles
Choosing the right trowel size is important for installing 24×48 inch tiles. The correct trowel helps hold the tiles firmly in place.
Using the wrong trowel size can cause poor adhesion or uneven surfaces. Large tiles need more adhesive coverage for support.
Common Notch Sizes
Trowels come with different notch sizes to spread the adhesive. Common notch sizes are 1/2 inch x 1/2 inch and 1/2 inch x 3/4 inch.
For large tiles like 24×48, bigger notches help create a thicker layer of mortar. This holds the tile better.
- 1/2 inch x 1/2 inch notch
- 1/2 inch x 3/4 inch notch
- 3/4 inch x 3/4 inch notch
Why Larger Notches Work Best
Larger notches spread more adhesive under the tile. This gives strong support to heavy, large tiles.
Thicker mortar helps fix uneven floors. It also prevents tiles from cracking or moving over time.
- Ensures full coverage under tile
- Provides better adhesion and grip
- Compensates for floor irregularities
- Reduces tile movement and breakage
Factors Affecting Trowel Selection
Choosing the right trowel size for 24×48 tiles is crucial for successful installation. Several factors influence this decision, ensuring a strong bond between the tile and the substrate.
Understanding these factors helps in achieving a smooth, durable finish. Let’s explore the main considerations.
Tile Thickness And Weight
Tile thickness and weight play a significant role in selecting the right trowel. Thicker and heavier tiles usually need a larger notch size for better adhesive coverage.
- Thin tiles: Use a smaller notch size
- Thick tiles: Opt for a larger notch size
- Heavy tiles: Ensure full adhesive contact
Substrate Conditions
The condition of the substrate impacts trowel choice. A flat, even surface requires a different trowel than an uneven one.
| Substrate Type | Recommended Trowel |
| Flat and Smooth | Smaller notch |
| Uneven or Textured | Larger notch |
Adhesive Type
The type of adhesive used can dictate the trowel size. Different adhesives have varying bonding properties and thickness requirements.
Techniques For Applying Adhesive
Applying adhesive properly is key for installing 24×48 tiles. The right technique helps tiles stick well and stay flat.
Using the correct trowel size and method ensures a strong bond. This guide covers important tips for adhesive application.
Proper Trowel Angle
Hold the trowel at a 45-degree angle for best results. This angle creates even ridges in the adhesive.
Keep the angle steady as you spread. Tilting too much or too little can cause uneven coverage.
Ensuring Full Coverage
Make sure the tile’s back gets full contact with the adhesive. This prevents hollow spots under the tile.
- Use a 1/2 inch x 1/2 inch square-notch trowel for 24×48 tiles.
- Apply adhesive in straight lines, then comb it with the trowel’s notches.
- Press the tile firmly into the adhesive to spread it evenly.
- Check for voids by lifting the tile slightly after placement.
Avoiding Common Mistakes
| Mistake | Effect | How to Avoid |
| Using wrong trowel size | Poor adhesive coverage | Use 1/2″ x 1/2″ square-notch for large tiles |
| Incorrect trowel angle | Uneven adhesive ridges | Maintain 45-degree angle while spreading |
| Not pressing tiles firmly | Air pockets under tiles | Press tiles evenly into adhesive |
| Applying too much adhesive | Messy installation and slow drying | Spread a thin, even layer |
Tips For Handling Large Format Tiles
Large format tiles like 24×48 inches need careful handling. They are heavy and can break if not managed well.
Using the right trowel size and good techniques helps place these tiles correctly. This guide shares useful tips.
Cutting And Measuring
Measure the tile space accurately before cutting. Large tiles require precise cuts to fit properly.
Use a wet saw with a diamond blade for clean cuts. Mark the tile clearly before cutting to avoid mistakes.
- Measure twice to avoid errors
- Use a reliable tile cutter or wet saw
- Wear safety gear while cutting
- Cut slowly to prevent tile cracking
Lifting And Positioning
Lift large tiles carefully to prevent damage or injury. These tiles are bulky and require steady handling.
Use suction cups or tile carriers for better grip. Position the tile gently onto the adhesive without sliding it too much.
- Ask for help when lifting heavy tiles
- Keep the tile flat while moving
- Place tile straight to avoid uneven edges
- Do not force tiles into place
Maintaining Even Spacing
Even spacing between tiles ensures a neat look and proper grout lines. Large tiles need consistent gaps for expansion.
Use large tile spacers or wedges to keep spaces uniform. Check spacing frequently as you lay the tiles.
- Choose spacers sized for the grout width you want
- Place spacers at tile corners and edges
- Remove spacers only after adhesive sets
- Double-check spacing before grout application

Credit: www.floortrendsmag.com
Troubleshooting Installation Issues
Installing 24×48 tiles requires care and attention. Problems can happen if you do not use the right tools or techniques.
This guide helps you fix common issues like hollow spots, tile lippage, and adhesive problems.
Dealing With Hollow Spots
Hollow spots occur when there is no full contact between the tile and the adhesive. These spots cause weak bonding and may lead to tile cracking.
To avoid hollow spots, use a 1/2 inch x 1/2 inch square-notched trowel for 24×48 tiles. This size spreads enough adhesive for proper coverage.
Preventing Tile Lippage
Tile lippage happens when adjacent tiles are not level with each other. This can cause tripping hazards and look uneven.
- Use a leveling system to keep tiles flat.
- Check the subfloor for flatness before installation.
- Apply adhesive evenly with the correct trowel size.
- Press tiles firmly to ensure full contact.
Fixing Adhesive Problems
| Problem | Cause | Solution |
|---|---|---|
| Adhesive dries too fast | High temperature or thin application | Work in cooler conditions and use thicker adhesive |
| Tiles do not stick well | Wrong trowel size or dirty surface | Use 1/2″ square-notched trowel and clean surface |
| Uneven adhesive layer | Poor troweling technique | Spread adhesive evenly and use proper trowel angle |

Credit: www.homedepot.com
Frequently Asked Questions
What Size Trowel Is Best For 24×48 Tiles?
A 1/2-inch by 1/2-inch square-notched trowel works best for 24×48 tiles. It ensures proper mortar coverage and strong adhesion.
Why Use A Larger Trowel For Big Tiles?
Larger tiles need more mortar. A bigger trowel helps spread mortar evenly and prevents tile movement or hollow spots.
Can I Use A 3/8-inch Trowel For 24×48 Tiles?
A 3/8-inch trowel may not provide enough mortar for large tiles. Using a 1/2-inch trowel is recommended for better support.
How Does Trowel Size Affect Tile Installation?
Trowel size controls mortar thickness. The right size ensures tile stability, proper bonding, and prevents cracking or uneven surfaces.
Conclusion
Choosing the right trowel size for 24×48 tiles ensures a strong, even bond. A 1/2 inch by 1/2 inch square-notched trowel often works best. It spreads adhesive well and supports large tiles properly. Using the wrong trowel can cause tiles to loosen or crack.
Proper tools make your tiling job easier and last longer. Remember, small details matter in tile installation. This simple step helps your floor or wall look smooth and stay durable.