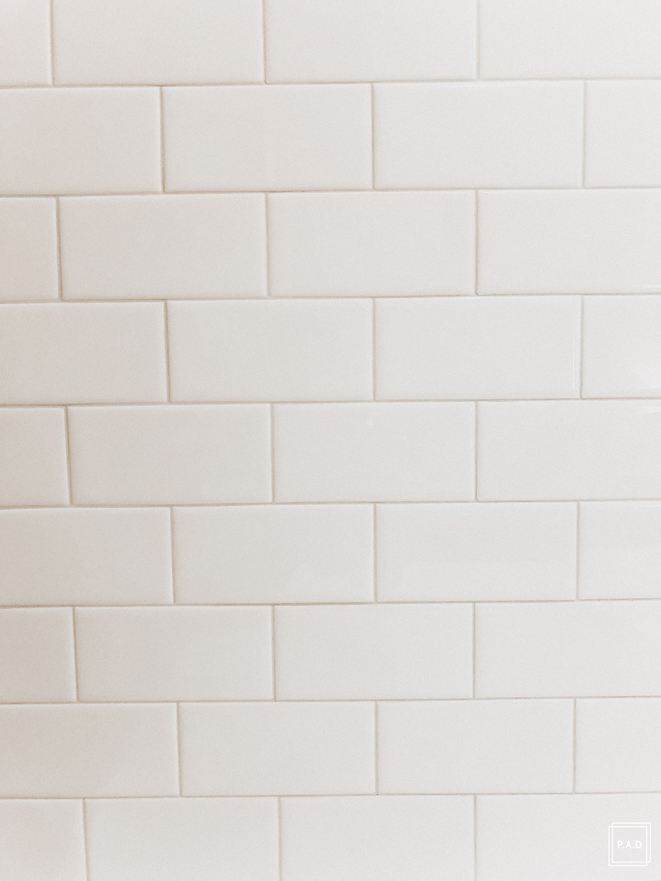
Choosing the right trowel size for your 3×6 subway tile can make all the difference in how your project turns out. If you’ve ever struggled with uneven tiles, messy grout lines, or tiles that just don’t stick well, you’re not alone.
The good news? Picking the perfect trowel is simpler than you think—and it can save you time, money, and frustration. You’ll discover exactly what size trowel works best for your 3×6 subway tile and why it matters for a flawless finish.
Keep reading to make sure your next tiling project looks professional and lasts for years.

Credit: www.floortrendsmag.com
Choosing The Right Trowel
Picking the correct trowel size is important for setting 3×6 subway tile. The right size helps spread adhesive evenly. It also makes tile installation easier and stronger.
Different tile sizes need different trowel sizes. This guide explains what size works best for 3×6 subway tiles.
Trowel Size Basics
Trowels have notched edges that hold and spread thinset mortar. The size of the notches controls the amount of mortar applied. Larger notches leave more mortar on the surface.
- Smaller notches are for small or thin tiles
- Larger notches work for bigger or thicker tiles
- Notch size is measured in inches, like 1/4″ x 1/4″
- Choose a size that fits the tile thickness and surface
Why Trowel Size Matters
| Trowel Notch Size | Use For | Benefits |
|---|---|---|
| 1/4″ x 1/4″ | Thinset for 3×6 subway tiles | Even coverage and strong bond |
| 1/4″ x 3/8″ | Thicker tiles or uneven surfaces | Better mortar coverage on rough areas |
| 1/2″ x 1/2″ | Large or heavy tiles | Extra mortar for heavy tiles |
Choosing the wrong trowel size can cause poor adhesion or uneven tiles. Too little mortar may cause tiles to loosen. Too much mortar makes cleanup hard.
Tile Dimensions And Impact
The size of a tile affects how you install it. For 3×6 subway tiles, the shape and size guide your tool choice.
Choosing the right trowel helps spread adhesive evenly. This prevents tiles from shifting or falling off the wall.
Characteristics Of 3×6 Subway Tile
These tiles measure 3 inches by 6 inches. They have a rectangular shape with a smooth surface.
- Size: 3 inches wide, 6 inches long
- Shape: Rectangular with sharp edges
- Surface: Smooth and flat
- Thickness: Usually about 1/4 inch
- Weight: Light enough for easy handling
Effect On Adhesive Application
The tile size changes how much adhesive you need. Small tiles like 3×6 require less adhesive per tile.
| Trowel Notch Size | Recommended Size | Reason |
| Width | 1/4 inch | Matches tile size for good coverage |
| Depth | 1/4 inch | Allows proper adhesive thickness |
| Spacing | 3/16 inch | Helps spread adhesive evenly |
Using a 1/4 inch by 1/4 inch notch trowel works best. It spreads enough adhesive for strong tile hold.
Recommended Trowel Sizes
Choosing the right trowel size is crucial for setting 3×6 subway tiles. The trowel size affects the adhesive application and the tile’s stability.
Understanding standard notch sizes can help you make an informed decision. Let’s explore the options available for 3×6 tiles.
Standard Notch Sizes For 3×6 Tiles
Standard notches help achieve the right adhesive coverage for tiles. For 3×6 subway tiles, common notch sizes ensure proper adhesion.
| Tile Size | Recommended Notch Size |
| 3×6 Subway Tile | 1/4-inch |
| 3×6 Subway Tile | 3/16-inch |
Comparing 1/4-inch And 3/16-inch Trowels
Choosing between a 1/4-inch and a 3/16-inch trowel can impact the final look of your tile installation. Here’s what you need to consider.
- A 1/4-inch trowel provides more adhesive, useful for uneven surfaces.
- A 3/16-inch trowel is suitable for flat, even surfaces, reducing excess adhesive.
- Consider the tile’s weight and size when choosing your trowel.

Credit: shop.six3tile.com
Factors Influencing Trowel Choice
Choosing the right trowel size is key for installing 3×6 subway tiles. The trowel controls how much thinset mortar spreads under the tiles. This affects tile adhesion and the final look.
Several factors affect which trowel size to use. These include the surface you work on, tile shape, and the installation setting. Understanding these helps pick the best trowel.
Substrate Type And Condition
The type and condition of your substrate impact how the mortar spreads. Smooth, flat surfaces need less mortar than rough or uneven ones.
If the substrate is porous or damaged, use a larger trowel notch. This ensures enough mortar fills gaps and holds the tiles firmly.
- Smooth concrete: smaller notch size (1/4″ x 1/4″)
- Uneven or rough surface: medium notch size (1/4″ x 3/8″)
- Very rough or damaged substrate: larger notch size (1/2″ x 1/2″)
Tile Back Profile
The back of 3×6 subway tiles can vary in texture and shape. Some have flat backs, others have ridges or grooves.
Tiles with grooves or ridges need a larger trowel notch. This helps fill the voids and increases mortar coverage for a strong bond.
- Flat-backed tiles: smaller notch (1/4″ x 1/4″)
- Tiles with grooves: medium notch (1/4″ x 3/8″)
- Deeply grooved backs: larger notch (1/2″ x 1/2″)
Installation Environment
Environment affects how mortar behaves during tile installation. Hot or windy places dry mortar fast, needing more mortar for coverage.
Indoor, controlled environments allow for smaller notches. Outdoor or warm locations require larger notches to keep tiles secure.
- Indoor, stable climate: smaller notch (1/4″ x 1/4″)
- Outdoor or warm areas: medium notch (1/4″ x 3/8″)
- Windy or very hot spots: larger notch (1/2″ x 1/2″)
Tips For Proper Adhesive Coverage
Using the right trowel size is key for good adhesive coverage on 3×6 subway tiles. Proper coverage helps tiles stick well and last longer.
Here are some tips to spread adhesive evenly and check its thickness for best results.
Spreading Techniques
Choose a trowel with a notch size that matches the tile size. For 3×6 subway tiles, a 1/4 inch by 1/4 inch square-notch trowel works well.
- Hold the trowel at a 45-degree angle to the surface.
- Spread the adhesive smoothly in straight lines.
- Comb the adhesive with the notched side to create ridges.
- Work in small sections to prevent drying before tile placement.
Checking Adhesive Thickness
Correct adhesive thickness ensures strong tile bonding and prevents hollow spots under tiles.
| Aspect | Ideal Thickness | Reason |
| Adhesive Bed | 3/32 to 1/8 inch | Allows full tile coverage and grip |
| Coverage Percentage | 95% or more | Reduces tile movement and gaps |
| Trowel Notch Size | 1/4 inch square | Matches 3×6 tile size for proper spread |
Common Mistakes To Avoid
Choosing the right trowel size for 3×6 subway tile is important. Using the wrong size causes problems during installation.
Uneven mortar application can lead to loose tiles and a poor finish. Avoid these common mistakes to get better results.
Using Incorrect Trowel Size
Many people use a trowel that is too large or too small for 3×6 subway tile. This causes too much or too little mortar on the wall.
- Too small trowel: Not enough mortar to hold tile properly.
- Too large trowel: Excess mortar squeezes out and makes a mess.
- Right size trowel: Usually 1/4 inch x 1/4 inch square notch for 3×6 tiles.
Uneven Mortar Application
Uneven mortar causes tiles to sit at different heights. This looks bad and weakens the bond.
| Problem | Effect | Solution |
| Too much mortar | Tiles stick out unevenly | Use correct trowel size and spread evenly |
| Too little mortar | Tiles may fall off | Apply enough mortar to cover tile back |
| Uneven spreading | Gaps under tiles | Use the flat side of trowel to smooth mortar |
Tools And Accessories
Choosing the right tools is key for installing 3×6 subway tile. The correct trowel size helps spread adhesive evenly.
Using proper accessories makes the installation smoother and more precise.
Choosing Quality Trowels
For 3×6 subway tiles, use a 1/4 inch by 1/4 inch square notch trowel. This size holds enough mortar for good coverage.
- Ensures even adhesive spread
- Prevents tile slippage
- Reduces voids under tiles
- Makes setting tiles easier
Additional Installation Tools
| Tool | Purpose |
| Rubber Mallet | Tap tiles gently into place |
| Tile Spacers | Keep uniform grout lines |
| Level | Check tile alignment |
| Notched Trowel | Spread thinset mortar evenly |
| Grout Float | Apply grout between tiles |

Credit: www.ceramic-walltiles.com
Maintenance And Cleanup
Keeping your trowel clean helps you work better. Dirt and dried mortar can ruin the tile job.
Regular cleaning also protects your tools. It saves money by avoiding early replacements.
Cleaning Your Trowel
Clean your trowel right after use. Use water and a stiff brush to remove mortar.
- Rinse the trowel with warm water.
- Scrub off all mortar with a wire brush.
- Dry the tool with a clean cloth to stop rust.
- Store in a dry place to keep it safe.
Extending Tool Lifespan
Proper care makes your trowel last longer. Avoid dropping or bending it.
| Care Tip | Why It Helps |
|---|---|
| Clean after each use | Prevents mortar build-up and damage |
| Dry thoroughly | Stops rust and corrosion |
| Store in a dry place | Keeps metal from weakening |
| Handle with care | Avoids bending or breaking |
Frequently Asked Questions
What Size Trowel Is Best For 3×6 Subway Tile?
A 1/4 inch by 1/4 inch square notch trowel is ideal. It provides enough mortar coverage and grip for 3×6 subway tiles.
Can A Smaller Trowel Work For 3×6 Subway Tiles?
Using a smaller trowel may reduce mortar coverage. This can lead to weak adhesion and tile movement over time.
Why Is Trowel Size Important For 3×6 Tiles?
Correct trowel size ensures proper mortar thickness. It prevents tile slippage and ensures a strong, even bond.
How Does Trowel Size Affect Tile Installation Quality?
Proper trowel size guarantees consistent mortar spread. This improves tile stability and reduces the risk of cracking or detachment.
Conclusion
Choosing the right trowel size makes tiling easier and neater. For 3×6 subway tiles, a 1/4-inch notch trowel works best. It spreads adhesive evenly and holds tiles firmly. Using the correct trowel saves time and avoids tile slipping. Remember, small tools make big projects smoother.
Keep this tip in mind for your next tile job. Simple steps lead to great results.