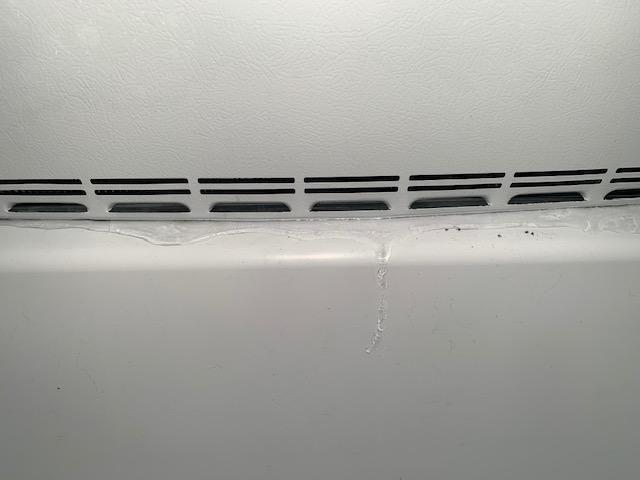
Is your KitchenAid refrigerator leaking water from the bottom, leaving you puzzled and a little frustrated? You’re not alone.
Many homeowners face this common issue, which can lead to bigger problems if not addressed quickly. The good news is, understanding the root cause can help you fix it easily, saving you time and potentially costly repairs. Imagine the relief you’ll feel when your refrigerator is back to its efficient self, no longer leaving puddles on your kitchen floor.
Ready to uncover the mystery behind the leaks and learn how to stop them for good? Let’s dive in and get your KitchenAid running smoothly again.
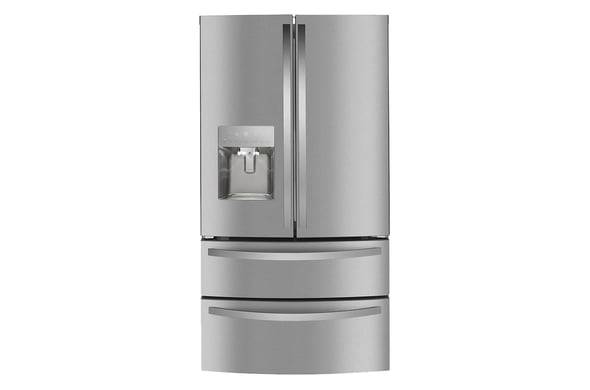
Credit: www.searspartsdirect.com
Common Causes Of Bottom Leaks
Water leaking from the bottom of a KitchenAid refrigerator can cause frustration and damage. Understanding common causes helps in fixing the issue quickly. Most leaks come from problems inside the fridge’s drainage and water supply systems.
Leaks often start small but can worsen over time. Identifying the source early prevents costly repairs and water damage. Below are the usual reasons why water pools under your refrigerator.
Clogged Defrost Drain
The defrost drain removes melted ice from inside the fridge. If it gets clogged, water builds up and leaks out the bottom. Food debris or frost can block the drain. Clearing the clog restores proper drainage and stops leaks.
Damaged Drain Pan
The drain pan collects water from the defrost cycle under the fridge. Cracks or holes in the pan cause water to drip on the floor. Inspecting and replacing a damaged drain pan stops leaks and protects your floor.
Faulty Water Filter
A loose or damaged water filter can leak inside the fridge. Water may pool under the filter or drip down to the bottom. Replacing or reseating the filter ensures a tight seal and prevents leaks.
Leaking Water Supply Line
The water supply line feeds the ice maker and water dispenser. Cracks or loose connections cause leaks at the refrigerator base. Checking and tightening or replacing the supply line fixes this common problem.
Ice Maker Issues
Ice makers can leak if their fill tube is cracked or misaligned. Overflow during ice production also causes water to drip down. Inspecting the ice maker and repairing any damage stops leaks from this source.

Credit: www.yahoo.com
How To Locate The Leak Source
Finding the source of a water leak in your KitchenAid refrigerator can feel like a puzzle. Pinpointing exactly where the water is coming from is crucial before you attempt any fixes. Let’s break down how you can locate the leak with simple checks that don’t require special tools.
Checking The Drain Pan
The drain pan is the first place to inspect. It sits under your fridge and collects water that drips during the defrost cycle. If the pan is cracked or overflowing, water will leak onto the floor.
Pull out the refrigerator carefully and look underneath. Is the pan full or damaged? Clean out any debris and make sure it’s sitting correctly. A misplaced or clogged drain pan often causes leaks.
Inspecting The Water Filter Area
Your KitchenAid fridge’s water filter can also be a culprit. A loose or incorrectly installed filter can drip water. Sometimes the O-ring seal wears out, causing water to escape.
Open the filter compartment and check for moisture or cracks. Remove and reseat the filter firmly. If you spot damage on the seal, replacing the filter might stop the leak immediately.
Examining The Ice Maker
The ice maker connects to a water line, and leaks here are common. Look around the ice maker for any signs of dripping or pooling water. A loose hose or cracked connection could be the problem.
Check the water line for cracks or kinks. Tighten any loose fittings you find. Sometimes a tiny leak goes unnoticed until water accumulates at the bottom of the fridge.
Looking Behind The Refrigerator
Don’t forget to check behind the fridge. Water lines and drains run along the back wall and can leak if damaged. Pull the fridge away from the wall and inspect for wet spots or pooling water.
Feel the floor and walls for dampness. A slow leak might drip down and cause water damage over time. Catching it early here can save you from bigger repairs later.
Quick Fixes For Drain Problems
Dealing with water pooling at the bottom of your KitchenAid refrigerator can be frustrating. Often, the culprit lies in the drain system. Fortunately, you can try some quick fixes yourself before calling a technician.
Clearing The Defrost Drain
The defrost drain can get clogged with food particles or ice buildup, causing water to leak inside. Start by locating the drain hole, usually at the back or bottom of the fridge compartment.
Use warm water and a turkey baster or a small pipe cleaner to flush out the blockage gently. If ice is blocking the drain, carefully melt it with a hairdryer on a low setting—just be cautious not to overheat any plastic parts.
Have you checked this simple step yet? Many overlook it, but it often stops the leak immediately.
Replacing The Drain Pan
Your refrigerator has a drain pan underneath that collects defrost water. If it’s cracked or overflowing, water can leak onto your floor.
Slide out the drain pan and inspect it for damage or excessive dirt buildup. Clean it thoroughly or replace it if cracked.
Keep in mind that a well-maintained drain pan prevents water damage and unpleasant odors in your kitchen.
Resetting The Drain System
Sometimes, the drain system’s sensors or controls might need a reset to work properly again. Unplug your fridge for about 5 minutes and then plug it back in.
This simple reset can clear minor electronic glitches affecting the defrost cycle and drainage.
Have you tried resetting your appliance after troubleshooting? It’s a quick step that can save you a service call.
Addressing Water Supply Issues
Water leaking from the bottom of your Kitchenaid refrigerator can often be traced back to issues with the water supply. This problem isn’t just annoying—it can cause damage to your floors and affect the appliance’s performance. By focusing on the water supply, you can pinpoint common causes and take clear steps to stop the leak.
Tightening Water Line Connections
Loose water line connections are a frequent culprit for leaks. Over time, vibrations and normal use can cause fittings to loosen slightly. Check the connections where the water line attaches to the refrigerator and the wall valve.
Use a wrench to gently tighten these connections without overdoing it. If you’ve ever noticed water pooling after adjusting the connection, you’re likely on the right track. Are your tools ready for a quick fix?
Replacing Damaged Water Lines
Cracks or holes in the water line can cause persistent leaks even if connections are tight. Look closely for any visible damage or worn spots, especially if your water line is older. Clear signs like discoloration or stiffness in the hose indicate it’s time for replacement.
Replacing the water line is straightforward and inexpensive. Make sure to buy a compatible line designed for Kitchenaid refrigerators. Have you checked your water line’s condition recently?
Testing Water Pressure
Water pressure that is too high or too low can also lead to leaks. High pressure might cause the line or connections to fail, while low pressure can affect water flow, potentially leading to clogs and leaks. Use a pressure gauge to measure the water pressure at the supply valve.
Ideal home water pressure usually falls between 40 and 60 psi. If your reading is outside this range, you might need a pressure regulator or to call a plumber. What if adjusting pressure could be the missing piece in your leak puzzle?
Ice Maker Leak Solutions
Water leaking from the bottom of your KitchenAid refrigerator can often trace back to the ice maker. Addressing ice maker leaks quickly prevents water damage and keeps your fridge working smoothly. Let’s look at practical ways you can fix these leaks yourself.
Checking Ice Maker Connections
Start by inspecting the water line connected to your ice maker. A loose or cracked connection can cause water to drip inside the fridge. Make sure the water supply tube is firmly attached and free of any holes or kinks.
Don’t forget to check the fill tube that directs water into the ice mold. If it’s misaligned or cracked, water might spill where it shouldn’t. Tightening or repositioning these connections often stops leaks immediately.
Replacing Faulty Ice Maker Parts
If connections look good but water still leaks, some parts might be worn out. The water inlet valve, for example, can fail and cause continuous water flow, leading to pooling at the bottom. Replacing this valve is usually straightforward and saves you from bigger repairs later.
Also, check the ice mold thermostat and the ejector blades. Damaged parts can cause overfilling or improper water release. Ordering exact replacements for your KitchenAid model ensures compatibility and lasting results.
Ensuring Proper Ice Maker Alignment
Sometimes, the ice maker itself is not sitting correctly inside the fridge. If it’s tilted or not level, water can overflow and leak out. Adjust the ice maker assembly so it sits flat and aligns perfectly with the water fill tube.
Test your adjustments by running a few ice cycles and watching for leaks. This simple fix often goes overlooked but can make a big difference in stopping water from pooling under your fridge.
Preventive Tips To Avoid Future Leaks
Preventing water leaks from the bottom of your Kitchenaid refrigerator saves time and money. Simple steps help keep your fridge in good shape. Consistent care avoids many common issues.
Regular Maintenance Routines
Clean the drip pan and drain hole often. Check door seals for cracks or dirt. Keep the coils dust-free to improve efficiency. Inspect water lines and connections for leaks or damage. Regular checks catch problems early.
Using Genuine Replacement Parts
Always choose parts made by Kitchenaid. Genuine parts fit properly and last longer. Non-original parts may cause leaks or damage. Using the right parts keeps your fridge working well.
Monitoring Water Filter Changes
Change the water filter every six months or as recommended. A clogged filter can cause pressure buildup and leaks. Follow instructions carefully during replacement. Keep a reminder to avoid missed changes.

Credit: www.angi.com
Frequently Asked Questions
Why Is My Kitchenaid Refrigerator Leaking Water?
Water leaks usually result from clogged or frozen defrost drain lines. Check the drain for blockages or ice. Also, inspect the water filter and door seals for damage.
How Do I Fix A Leaking Defrost Drain?
Unclog the defrost drain by flushing it with warm water. Use a pipe cleaner or a soft brush if needed. This clears blockages causing leaks at the bottom.
Can A Faulty Water Filter Cause Leaks?
Yes, a damaged or improperly installed water filter can leak water. Replace the filter regularly and ensure it fits correctly to prevent leaks.
Is A Damaged Door Seal Causing Water Leakage?
A broken or worn door seal lets warm air in. This causes condensation and water pooling. Inspect and replace damaged seals promptly.
Conclusion
Water leaking from the bottom of your Kitchenaid refrigerator can cause damage. Small clogs or broken parts often cause this issue. Cleaning the drain hole and checking the drip pan helps. Regular maintenance keeps your fridge working well. Taking quick action can save you money and stress.
Remember, a little care goes a long way. Stay attentive to signs of leaks for a trouble-free fridge.