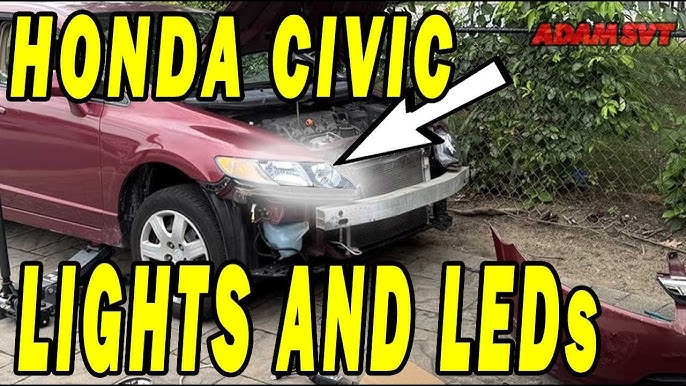
Is your Honda Civic’s headlight flickering or burnt out? Changing it might seem tricky, but you can do it yourself quickly and safely.
Imagine saving time and money by fixing your car at home without waiting for a mechanic. In this guide, you’ll find simple, step-by-step instructions that anyone can follow. By the end, your headlights will shine bright again, giving you better visibility and peace of mind on the road.
Ready to get started? Let’s dive in!
Tools Needed
Changing the headlight on your Honda Civic doesn’t require a garage full of tools. However, having the right tools at hand makes the task smoother and faster. You don’t want to be halfway through and realize you’re missing a key item.
Gathering the necessary tools beforehand saves you time and frustration. It also ensures you handle the job safely and correctly. Have you ever started a project only to pause because of missing equipment? This is exactly what you want to avoid.
Basic Tools For Headlight Replacement
- Screwdrivers:Both Phillips and flat-head screwdrivers are essential. They help remove screws holding the headlight assembly or covers in place.
- Socket Wrench Set:A small socket set, typically 8mm or 10mm, fits most bolts securing the headlight housing. Using a ratchet makes the job easier.
- Gloves:Protect your hands and prevent oils from your skin from touching the new bulb, which can shorten its life.
Optional But Helpful Items
- Trim Removal Tool:Useful for popping off plastic clips or covers without breaking them. This avoids damage to your car’s trim.
- Flashlight:If you’re working in low light or tight spaces, a flashlight or headlamp can help you see screws and connectors clearly.
- Owner’s Manual:It guides you through specific steps and shows exact locations of fasteners for your Honda Civic model year.
Why Having The Right Tools Matters
Imagine trying to loosen a bolt with the wrong size wrench—frustrating and risky. Using the right tools prevents stripped screws and broken clips. It also keeps your headlight assembly intact and aligned properly.
Do you want the job done once and done right? Investing a little time in preparing tools ensures a smooth and successful headlight change. Your Honda Civic will thank you with brighter, safer drives ahead.

Credit: www.amazon.ca
Preparing Your Vehicle
Preparing your Honda Civic for a headlight change is essential for a smooth and safe process. Taking time to set up your vehicle correctly helps avoid damage and injury. It also makes the task faster and easier.
Safety Precautions
Start by parking your car on a flat surface. Turn off the engine and remove the keys from the ignition. Engage the parking brake to prevent any movement. Allow the headlights to cool down if they were recently on. Wear gloves to protect your hands from sharp edges and dirt. Use safety glasses to shield your eyes from dust and debris.
Accessing The Headlight Area
Open the hood by pulling the release lever inside the car. Secure the hood with the prop rod to keep it open. Locate the headlight assembly at the front of the vehicle. Clear any objects or covers blocking access to the headlight. Check your Honda Civic’s manual for specific details on headlight placement. Make sure you have enough light to see all parts clearly.
Removing The Old Headlight
Removing the old headlight from your Honda Civic is a straightforward task, but it requires careful attention to detail. Taking the right steps ensures safety and prevents damage to your car’s electrical system. Let’s break down the process into clear actions you can follow with confidence.
Disconnecting The Battery
Before touching any electrical parts, disconnect your car’s battery to avoid shocks or short circuits. Open the hood and use a wrench to loosen the negative terminal first. This simple safety step protects you and your vehicle.
Have you ever skipped this step and faced a blown fuse? It’s a small precaution that saves you from bigger headaches later.
Unfastening The Headlight Assembly
Locate the screws or bolts holding the headlight assembly in place. These are usually found around the perimeter of the headlight. Use a screwdriver or socket wrench to carefully remove them.
Gently pull the assembly forward once it’s loose. Sometimes, clips secure the assembly—press or lift them as needed. Avoid using excessive force to prevent breaking any plastic parts.
Removing The Bulb
With the headlight assembly free, you can now access the bulb. Twist the bulb socket counterclockwise to release it. Pull the bulb straight out without touching the glass part to avoid reducing its lifespan.
If your bulb looks cloudy or damaged, it’s a clear sign it’s time for replacement. Handling bulbs carefully ensures your new ones last longer and shine brighter.
Installing The New Headlight
Installing the new headlight on your Honda Civic is a straightforward process, but it requires attention to detail to ensure everything fits perfectly and works safely. Taking your time during installation helps prevent issues like loose connections or misaligned beams. Let’s walk through the key steps to get your new headlight shining bright again.
Inserting The New Bulb
Start by carefully handling the new bulb. Avoid touching the glass part with your fingers, as oils can shorten its lifespan.
Align the bulb with the socket and gently push it in until it clicks or fits snugly. If it feels stuck, check the orientation instead of forcing it.
Have you ever struggled with a bulb that just wouldn’t seat properly? Taking a moment to double-check alignment saves frustration later.
Securing The Assembly
Once the bulb is in place, secure the headlight assembly back into its housing. Use the screws or clips you removed earlier to fasten it firmly.
Check for any gaps or loose parts—your headlight should sit flush with the car’s body to prevent moisture from entering.
Think about how a loose assembly might affect your visibility on the road. Tightening everything properly is more than just a formality.
Reconnecting The Battery
After securing the headlight, reconnect your Honda Civic’s battery to restore electrical power. This step reactivates the headlight system.
Make sure the battery terminals are clean and tightly connected to avoid any starting issues.
Once connected, test your new headlight by turning it on. Does the light shine clear and steady? If not, double-check your installation steps.
Testing The New Headlight
After installing the new headlight on your Honda Civic, it’s crucial to test it thoroughly. Proper testing ensures your replacement works correctly and keeps you safe on the road. Don’t skip these checks—poorly functioning headlights can reduce visibility and increase accident risk.
Checking Light Functionality
Start by turning on your car’s headlights and observing the new bulb closely. Make sure the light turns on immediately and shines steadily without flickering. Flickering or dim light may indicate a poor connection or a faulty bulb.
Check both low and high beams to confirm each setting works as expected. It’s a good idea to test the turn signals and parking lights too, especially if your headlight assembly includes these functions. If any light doesn’t operate correctly, recheck your wiring and bulb seating.
Adjusting Headlight Aim
Proper headlight aim is essential for safe driving at night. Misaligned headlights can blind oncoming drivers or leave you with poor visibility. Park your Civic about 25 feet from a flat wall and switch on the headlights.
Use the adjustment screws on the headlight housing to align the beam so it hits the wall slightly below the center of the headlight lens. Aim for a clear, even light pattern on the wall without any sharp cutoffs or bright spots. Take your time here—it’s easy to overlook but makes a big difference on dark roads.
Do you know how many accidents happen because of poor headlight alignment? Taking a few extra minutes to adjust your headlights correctly can prevent dangerous situations and keep you confident behind the wheel.

Credit: www.youtube.com
Tips For Longevity
Keeping your Honda Civic’s headlights in good condition saves money and keeps you safe. Simple care habits extend the life of your headlights and avoid frequent replacements. Follow these tips to make the most of your headlight system.
Regular Maintenance
Check headlights often for dirt, cracks, or cloudiness. Clean lenses with a soft cloth and mild cleaner. Replace bulbs before they burn out completely. Inspect the headlight assembly for moisture or damage. Tighten any loose parts to prevent shaking or misalignment.
Common Issues To Watch
- Dim or flickering lights can signal electrical problems.
- Yellowing lenses reduce brightness and visibility.
- Water inside the headlight can cause corrosion.
- Burnt-out bulbs need immediate replacement.
- Loose connections may cause intermittent lighting.
Address these problems quickly to keep headlights working well longer.

Credit: www.youtube.com
Frequently Asked Questions
How Do I Change A Honda Civic Headlight Bulb?
To change a Honda Civic headlight bulb, first, turn off the engine and open the hood. Locate the headlight assembly, remove the dust cover, and disconnect the wiring harness. Carefully remove the old bulb and replace it with a new one.
Reconnect the wiring and secure the dust cover.
What Tools Are Needed For Headlight Replacement?
For replacing a Honda Civic headlight, you generally need basic tools: a screwdriver and pliers. These tools help remove the headlight assembly and secure new parts. Always ensure you have the right replacement bulb before starting.
How Often Should Headlights Be Replaced?
Headlights should be replaced every 500-1,000 hours of use or when they dim. Regular checks ensure optimal visibility. Replacing them timely can prevent unexpected failures. Always refer to your owner’s manual for specific guidance.
Can I Upgrade Honda Civic Headlights To Led?
Yes, you can upgrade Honda Civic headlights to LED. LED headlights offer better brightness and energy efficiency. Ensure compatibility with your vehicle model and follow installation instructions. Upgrading can improve visibility and enhance the car’s appearance.
Conclusion
Changing the headlight on a Honda Civic is simple and quick. Follow the steps carefully for best results. Make sure the new bulb fits well and works properly. Always handle bulbs with clean hands to avoid damage. Keep your headlights bright for safe night driving.
This small task saves time and money at the mechanic. Try it yourself and feel confident maintaining your car. Regular checks keep your vehicle in good shape. Ready to see the road clearly?