
Is your wooden cutting board looking worn out, cracked, or stained? Don’t toss it away just yet.
You can bring it back to life with a few simple steps. Imagine slicing your veggies on a smooth, clean surface that feels almost brand new. In this guide, you’ll discover easy ways to fix your wooden cutting board and keep it safe and strong for years to come.
Ready to save your kitchen favorite and make it shine again? Let’s get started!
Credit: www.thekitchn.com
Assessing Damage
Before fixing a wooden cutting board, you must check how damaged it is. This helps you decide what repairs are needed.
Look closely at the board to find cracks, warping, stains, or deep cuts. Each problem needs a different fix.
Identifying Cracks And Splits
Cracks and splits can let bacteria hide inside the wood. Check for thin or wide cracks on the board’s surface.
Run your fingers along the edges and surface to feel for breaks. Look for areas where the wood is separating.
- Small cracks are usually thin lines on the surface
- Splits are deeper and may open up when pressed
- Cracks near the edges weaken the board’s strength
Checking For Warping
Warping happens when the board bends or twists out of shape. This can make the board unstable for cutting.
Place the board on a flat surface. See if it rocks or if gaps appear under the edges.
- A warped board will not sit flat on a table
- Warping can cause uneven cutting surfaces
- Boards with serious warping may need replacement
Detecting Deep Stains And Cuts
Deep stains and cuts can trap food and germs. Look carefully for dark marks or deep grooves on the board.
Use a bright light to see inside the cuts. If they go deep, cleaning and sanding may be necessary.
- Deep cuts are often wider and feel rough
- Stains may discolor the wood and spread over time
- Severe stains might need special cleaning solutions

Credit: www.reddit.com
Gathering Tools And Materials
Fixing a wooden cutting board needs the right tools and materials. Preparing these items makes the repair easier and better.
This guide covers the essential tools, wood glue and fillers, and sanding supplies for the job.
Essential Repair Tools
You need some basic tools to fix cracks or chips on your cutting board. These tools help you clean and prepare the wood for repair.
- Clamps to hold pieces together
- Putty knife to apply fillers
- Utility knife for trimming edges
- Small brush to clean dust
- Rags for wiping excess glue
Recommended Wood Glue And Fillers
Choose wood glue that is safe for kitchen use and waterproof. It should dry clear and strong.
Fillers fix small cracks or holes. Use food-safe wood fillers that match your board’s color.
- Food-safe waterproof wood glue
- Clear drying wood glue
- Non-toxic wood filler
- Colored wood filler matching your board
Sanding Supplies
Sanding helps smooth the board after repairs. It removes rough spots and old glue.
Use different grit sandpapers to get a smooth finish. Start with coarse and finish with fine grit.
- Coarse grit sandpaper (80-100 grit)
- Medium grit sandpaper (120-150 grit)
- Fine grit sandpaper (220 grit or higher)
- Sanding block or sponge for even sanding
Cleaning The Cutting Board
Cleaning a wooden cutting board is important before fixing it. Dirt and stains can hide damage. Proper cleaning prepares the board for repair.
Use gentle methods to protect the wood. Avoid soaking or harsh chemicals. Clean the board carefully to keep it strong and safe.
Removing Surface Dirt
Start by scraping off any food bits with a plastic scraper. Then wipe the board with a damp cloth to remove loose dirt.
Use mild soap and warm water to clean the surface. Do not soak the board in water. Rinse quickly and dry it well with a towel.
Eliminating Odors
Wood can absorb smells from food. To remove odors, sprinkle baking soda on the board. Let it sit for a few minutes.
Scrub the board gently with a damp sponge. Rinse with warm water and dry it. This removes smells without damaging the wood.
Preparing For Repair
Before fixing cracks or scratches, make sure the board is dry. Check for deep stains or damage that might need special care.
Sanding the surface smooth can help repair. Use fine sandpaper to avoid removing too much wood. Clean off dust after sanding.
Repairing Cracks And Splits
Wooden cutting boards can crack or split after heavy use. Fixing these cracks keeps the board safe and usable. Small repairs can extend the life of your cutting board.
Repairing cracks needs careful steps. You must glue, clamp, and let the board dry properly. Each step is important for a strong fix.
Applying Wood Glue
Choose a food-safe wood glue for your cutting board. Apply glue inside the crack or split carefully. Use enough glue to fill the gap but not too much to overflow.
Use a small brush or toothpick to spread the glue evenly inside the crack. This helps the glue reach deep areas. Wipe off extra glue from the surface with a damp cloth.
Clamping Techniques
Clamping holds the cracked wood tightly while the glue dries. Use clamps that fit the size of your cutting board. Avoid too much pressure to prevent new damage.
- Place a soft cloth between the clamp and wood to avoid marks
- Apply even pressure along the crack
- Check the clamp position to keep the crack closed fully
If clamps are not available, use heavy objects that press the crack firmly. Make sure the pressure is steady and consistent during drying.
Drying Time And Tips
Let the glue dry for at least 24 hours before removing clamps. Longer drying improves strength, especially for deep cracks. Keep the board in a warm, dry place.
- Avoid moving the board during drying
- Check the glue instructions for exact drying time
- After drying, sand the repaired area smooth if needed
Proper drying ensures the repair lasts longer. Do not use the cutting board until the glue is fully cured.
Filling Deep Cuts And Gouges
Wooden cutting boards can develop deep cuts and gouges over time. These damages can trap food and bacteria. Fixing them keeps your board safe and smooth.
Filling these cuts requires choosing the right filler, applying it correctly, and sanding the surface smooth afterward.
Choosing The Right Filler
Select a filler that is food safe and matches your board’s wood color. Avoid fillers that contain harmful chemicals or toxins.
- Use food-safe wood fillers or epoxy resins.
- Pick a color that blends well with the board.
- Avoid fillers with strong odors or toxic ingredients.
- Check if the filler dries hard and durable.
Application Process
Clean the damaged area before applying filler. Remove loose wood and dust. Use a putty knife to press the filler deep into cuts.
Follow these steps:
- Clean the board with warm water and mild soap. Let it dry completely.
- Remove any loose wood fibers from the cuts.
- Use a putty knife to apply filler into the deep cuts and gouges.
- Press firmly to fill all gaps and smooth the surface.
- Let the filler dry as per the product instructions.
Sanding For Smoothness
After the filler dries, sand the surface to make it even. Use fine-grit sandpaper and sand gently along the wood grain.
| Sandpaper Grit | Purpose |
| 120 | Remove excess filler and rough edges |
| 220 | Smooth the surface for finishing |
| 320 | Final polish for a soft touch |
Fixing Warped Boards
Wooden cutting boards can warp over time. Warping happens when wood dries unevenly.
You can fix warped boards with simple tools and care. This guide shows easy ways to flatten your board.
Methods To Flatten
Start by sanding the warped side lightly. Use medium grit sandpaper to remove high spots.
You can also use a hand plane to shave thin layers of wood. This helps to level the surface.
- Sand the convex side of the board
- Use a hand plane for large warps
- Check flatness regularly during work
Using Moisture And Weight
Moisture helps wood regain shape. Apply a damp cloth to the concave side of the board.
After moistening, place a flat, heavy object on the board. Leave it for several hours or overnight.
- Wet the concave side with a damp towel
- Cover the board to keep moisture in
- Put a heavy flat weight on top
- Wait 12 to 24 hours before checking
Preventing Future Warping
Keep your cutting board dry after washing. Do not soak it in water or put it in a dishwasher.
Store the board flat or standing on its edge in a dry place. Oil it regularly to keep moisture balance.
- Wash with mild soap and warm water only
- Dry board immediately with a towel
- Apply food-safe mineral oil monthly
- Store in a cool, dry area
Sanding And Refinishing
Fixing a wooden cutting board by sanding and refinishing helps restore its surface. This process removes scratches and stains and brings back a smooth finish.
Proper sanding and applying oil or finish protects the wood and makes the board safer to use for food preparation.
Selecting Sandpaper Grit
Choose the right sandpaper grit to avoid damage and get the best results. Start with a coarser grit to remove deep scratches and finish with a fine grit for smoothness.
- 80 grit: Removes deep scratches and old finish
- 120 grit: Smooths surface after coarse sanding
- 220 grit: Prepares wood for finishing
Sanding Techniques
Sand the board evenly and with care. Always sand along the wood grain to avoid rough spots.
- Start with 80 grit sandpaper to remove old stains and scratches.
- Switch to 120 grit to smooth the surface evenly.
- Finish with 220 grit sandpaper for a fine, smooth finish.
- Wipe the board clean between each sanding step.
Applying Oil Or Finish
Apply oil or a food-safe finish to protect the wood and keep it from drying out. Use a clean cloth to spread the oil evenly on the surface.
| Type of Finish | Key Features | Use |
| Mineral Oil | Non-toxic, easy to apply | Regular maintenance |
| Beeswax | Adds water resistance | Use with oil for extra protection |
| Tung Oil | Penetrates deeply, durable | Long-term finishing |

Credit: mowryjournal.com
Maintenance Tips For Longevity
Wooden cutting boards need care to last a long time. Proper maintenance keeps them clean and safe for food. This guide shares simple tips to help your board stay strong and useful.
Follow these steps to avoid cracks, stains, and warping. Taking good care of your board saves money and keeps your kitchen healthy.
Regular Cleaning Practices
Clean your wooden board after each use. Use warm water and mild soap. Avoid soaking it in water or using the dishwasher. Dry it well with a towel to stop moisture damage.
- Wash with warm, soapy water immediately after use
- Rinse and dry with a clean towel
- Disinfect with vinegar or diluted bleach if needed
- Never soak or put in a dishwasher
Oiling Schedule
Oiling keeps the wood from drying out and cracking. Use food-safe mineral oil or beeswax. Apply oil once a month or when the board looks dry.
| Condition | Oiling Frequency |
| New board | Once a week for the first month |
| Regular use | Once a month |
| Dry or cracked board | Apply oil more often until healed |
Avoiding Common Damages
Wooden boards can get damaged by heat, cuts, and moisture. Avoid putting hot pots on the board. Use both sides of the board to prevent deep cuts. Keep it dry and store in a cool place.
- Do not place hot pans or pots on the board
- Use both sides to spread out knife marks
- Store in a dry area away from direct sunlight
- Sand out deep cuts if needed to keep surface smooth
Frequently Asked Questions
How To Clean A Wooden Cutting Board?
To clean a wooden cutting board, use warm, soapy water. Rinse thoroughly and dry immediately with a towel. Avoid soaking it in water to prevent warping. For deeper cleaning, apply a mixture of vinegar and water, then wipe clean. Regular maintenance helps extend the board’s lifespan.
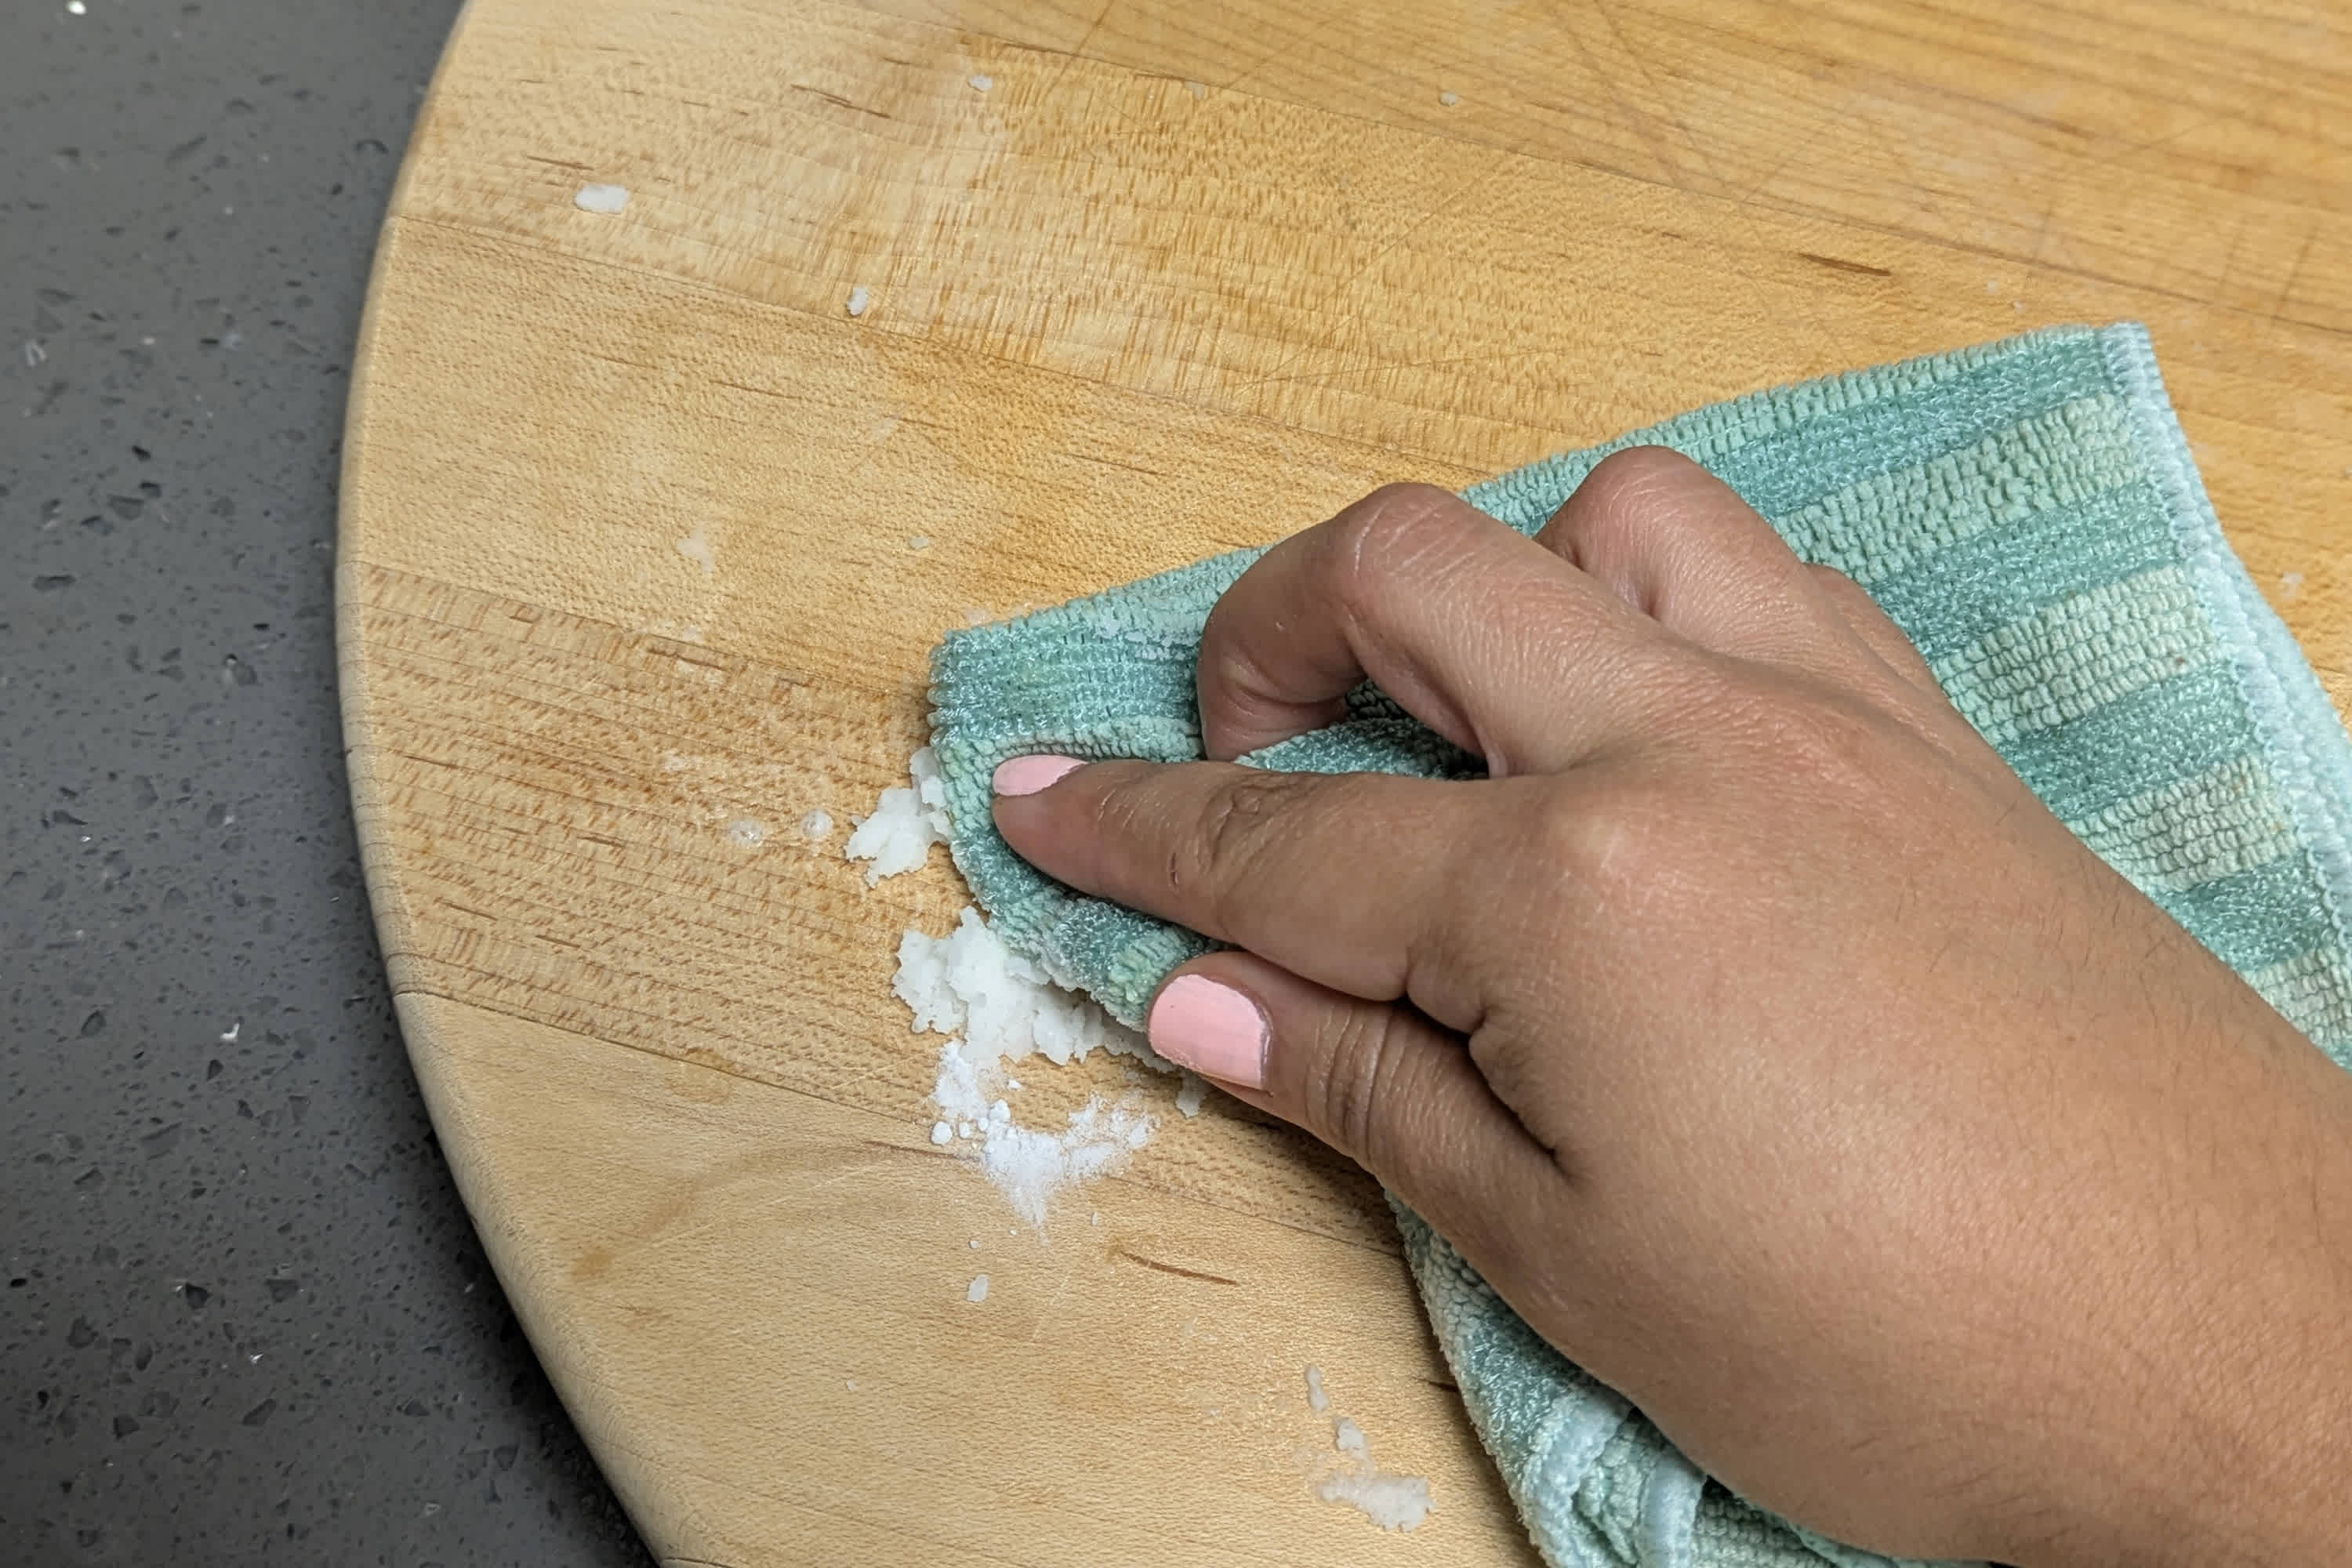
How To Remove Odors From A Cutting Board?
To remove odors, sprinkle coarse salt on the board’s surface. Rub it with a lemon half, squeezing gently. Let it sit for a few minutes, then rinse with warm water. This method helps neutralize odors and leaves your board smelling fresh.
What Oil To Use On A Wooden Board?
Use food-grade mineral oil to condition your wooden cutting board. It penetrates the wood, preventing it from drying out and cracking. Apply a generous amount, let it soak for a few hours, then wipe off excess. Regular oiling keeps your board in top condition.
How To Repair Scratches On A Wooden Board?
To repair scratches, sand the board’s surface with fine-grit sandpaper. Sand in the direction of the grain until smooth. After sanding, apply food-grade mineral oil to condition the wood. This process can restore the board’s appearance and prolong its usability.
Conclusion
Fixing a wooden cutting board is simple and worth the effort. Clean it well, sand rough spots, and apply mineral oil. These steps help keep your board safe and lasting longer. Treat your board gently to avoid cracks and stains.
Regular care brings back its smooth surface and natural beauty. Enjoy cooking with a well-maintained cutting board every day. Small actions make a big difference in kitchen tools. Keep your wooden board ready for many meals to come.