
If you love cooking or woodworking, building your own end grain cutting board is a rewarding project you don’t want to miss. Imagine having a beautiful, sturdy board that’s gentle on your knives and lasts for years.
You might think it’s complicated, but with the right steps, you can create a professional-looking board right at home. In this guide, you’ll discover simple tips and tricks to make your cutting board strong, durable, and unique. Ready to impress yourself and your guests?
Let’s get started on building your perfect end grain cutting board.

Credit: www.youtube.com
Choosing The Right Wood
Choosing the right wood is important for building a strong end grain cutting board. The wood affects how the board looks and how long it lasts. You need wood that can handle cutting without damage.
Good wood also stays safe for food use and resists stains and smells. Let’s look at wood types, quality, and how to find good wood for your project.
Best Wood Types For End Grain
Some woods work better than others for end grain cutting boards. Choose hardwoods that are dense and have tight grain. They last longer and are gentle on knives.
- Maple – Hard, fine grain, light color
- Walnut – Durable, dark color, rich grain
- Cherry – Strong, reddish color, smooth grain
- Beech – Hard, pale color, close grain
- Teak – Natural oils, water-resistant, golden color
Wood Quality And Grain Patterns
Good wood quality means no cracks, knots, or large pores. These flaws weaken the board and can trap food particles. Look for straight grain patterns that run evenly.
| Quality Factor | Why It Matters |
| No Cracks or Knots | Prevents weak spots and bacteria buildup |
| Tight Grain | Creates a smooth, durable surface |
| Dry Wood | Reduces warping and shrinking |
| Food Safe | Protects health and prevents odor |
Sourcing Sustainable Lumber
Using sustainable wood helps protect forests and the environment. Choose lumber from responsible sources that manage trees well. This supports healthy forests and future wood supply.
- Look for FSC or PEFC certifications
- Buy from local sawmills or lumberyards
- Avoid endangered or rare wood species
- Consider reclaimed wood for unique boards

Credit: m.youtube.com
Tools And Materials Needed
Building an end grain cutting board requires specific tools and materials. This guide covers what you need to prepare before starting.
Having the right items will help you work safely and create a quality board. Read through the sections below to know what to gather.
Essential Woodworking Tools
You need some basic woodworking tools to cut and shape the wood properly. These tools help you measure, cut, and smooth the pieces.
- Table saw or circular saw
- Planer or hand plane
- Jointer for flattening edges
- Clamps to hold pieces tight
- Random orbital sander
- Measuring tape and square
- Wood glue
- Brush or roller for glue application
Recommended Finishes And Adhesives
Choosing the right finish and adhesive is key to a durable cutting board. Use food-safe products to keep it safe for kitchen use.
| Item | Description |
| Wood glue | Waterproof, strong, and food safe |
| Mineral oil | Protects wood and enhances grain |
| Beeswax | Seals and adds a smooth finish |
| Cutting board conditioner | Combination of oil and wax |
Safety Gear And Workstation Setup
Protect yourself and organize your workspace before starting. Safety gear and a tidy area reduce accidents and improve work quality.
- Safety glasses to protect your eyes
- Dust mask to avoid inhaling sawdust
- Ear protection against loud tools
- Well-lit and clean workbench
- Non-slip mat under your tools
- Proper ventilation in the room
Preparing The Wood
Preparing the wood is the first step to build an end grain cutting board. You need strong and straight wood pieces. Good preparation helps the board last longer and work better.
This part focuses on cutting the wood into strips, flattening the edges, and planning how the board will look. Each step is important for a smooth process.
Cutting Lumber Into Strips
Start by cutting the lumber into strips that will form the board’s surface. Strips should be about the same width for a neat look. Use a table saw or circular saw for straight cuts.
Cut strips wider than the final width. You will trim them later for perfect fit. Keep safety in mind and wear protective gear.
Flattening And Jointing Edges
Flatten each strip to make sure the surface is smooth and even. Use a planer or sanding tool. Flat surfaces help the strips glue tightly together.
Joint the edges of each strip so they fit perfectly side by side. A jointer or hand plane works well. Check for gaps and fix them before gluing.
Planning The Board Layout
Arrange the strips in a pattern before gluing. Think about color and grain direction. This step helps create a beautiful and balanced board.
- Mix light and dark wood for contrast
- Place strips with grain going in different directions
- Test the layout by dry-fitting the pieces
Gluing And Clamping
Gluing and clamping are key steps in making an end grain cutting board. These steps hold the wood pieces tightly while the glue dries. Proper technique helps avoid weak spots and cracks.
Follow simple tips to apply glue well and clamp the board firmly. This will make your cutting board last longer and stay strong.
Applying Glue Properly
Use a good amount of glue to cover all the end grain surfaces. Spread the glue evenly with a brush or a small roller. Avoid putting too much glue that can squeeze out excessively.
- Work quickly before glue starts to dry.
- Apply glue on all edges that touch other boards.
- Use waterproof wood glue for the best hold.
- Check for missed spots and add glue if needed.
Effective Clamping Techniques
Clamping puts pressure on glued boards to join them tightly. Use enough clamps to keep the board flat. Place clamps evenly from end to end to avoid gaps.
| Clamp Type | Best Use | Pressure Level |
| Bar clamps | Long edges | High |
| Pipe clamps | Wide boards | Medium |
| Spring clamps | Small sections | Low |
| Cauls | Even pressure across surface | Variable |
Use cauls, which are wooden strips, to spread clamp pressure evenly. Tighten clamps enough to squeeze glue lines but not too much to bend the wood.
Allowing Proper Drying Time
Let the glued board dry fully before removing clamps. Drying time depends on glue type and temperature but usually needs 6 to 24 hours.
- Keep the board flat while drying.
- Do not disturb or move clamps during drying.
- Check glue instructions for exact drying times.
- After drying, remove clamps carefully.
Cutting And Rearranging Blocks
Building an end grain cutting board requires careful cutting and arranging of wood blocks. This process helps create a strong and attractive pattern.
You start by cutting a glued-up panel into strips. Then, you rearrange the pieces to show the end grain on the surface.
Crosscutting The Glue-up
After the first glue-up dries, cut the panel into strips across the grain. Use a table saw for straight, even cuts.
Make sure each strip is the same width. This keeps the blocks uniform and easy to arrange later.
- Use a sharp blade to avoid tear-out
- Cut strips about 1 to 2 inches wide
- Label strips to remember their order
Arranging Blocks For End Grain
Take the strips and rotate them 90 degrees so the end grain faces up. This shows the wood’s growth rings.
Arrange the strips in a pattern that looks good and fits together tightly. You can alternate colors or grains for a nice effect.
- Keep blocks aligned with no gaps
- Mix different wood types for contrast
- Dry fit before gluing to check the pattern
Second Glue-up Process
Apply glue to the edges of the blocks after arranging them. Clamp the assembly firmly to keep the blocks in place.
Let the glue dry completely before sanding or finishing. This second glue-up holds the end grain blocks tightly together.
- Use waterproof wood glue for durability
- Apply even pressure with clamps
- Clean excess glue before it dries
Shaping And Sanding
Shaping and sanding are key steps in making an end grain cutting board. These steps give the board a nice look and feel. You will learn how to trim the wood, smooth the surface, and round the edges.
Careful work here makes the cutting board safe and comfortable to use. It also helps the board last longer and look great.
Trimming Excess Wood
After glueing the wood pieces, some parts may stick out. You need to trim these excess pieces to make the board even. Use a sharp saw or a planer to do this.
Cut along the edges carefully to avoid removing too much wood. Keep the board flat and square by checking with a ruler or square tool.
Sanding For Smoothness
Sanding removes rough spots and makes the surface smooth. Start with coarse sandpaper to remove big bumps. Then use finer sandpaper to get a soft finish.
- Begin with 80-grit sandpaper
- Move to 120-grit for medium smoothness
- Finish with 220-grit for a fine, smooth surface
Always sand along the wood grain to avoid scratches. Clean off dust between sanding steps for better results.
Creating Rounded Edges
Rounded edges make the board safer and nicer to hold. Use a router or sandpaper to round the corners and edges gently.
Round all sides evenly. This helps avoid sharp corners that can hurt hands or damage surfaces.
- Use a router with a round-over bit for clean curves
- If no router, sand edges by hand with 120-grit sandpaper
- Check edges by touch to make sure they feel smooth and round
Finishing Touches
Finishing your end grain cutting board is key to its durability and appearance. Proper finishing protects the wood and makes it safe for food use.
After building the board, focus on applying the right finish, curing the wood, and adding features that improve safety and use.
Applying Food-safe Finish
Use finishes that are safe for cutting boards. These finishes keep the wood from drying out and resist stains and smells.
- Apply mineral oil evenly using a clean cloth.
- Let the oil soak into the wood for several hours.
- Wipe off any excess oil to avoid a sticky surface.
- Repeat oiling several times for best protection.
- Consider using beeswax for a smooth, water-resistant finish.
Curing And Maintenance Tips
After applying finish, allow the board to cure. This step helps the finish set and protects the wood longer.
| Maintenance Task | Frequency | Purpose |
| Oil the board | Once a month | Keep wood hydrated |
| Clean with mild soap | After each use | Remove food residue |
| Dry immediately | After washing | Prevent warping |
| Avoid soaking in water | Always | Protect wood integrity |
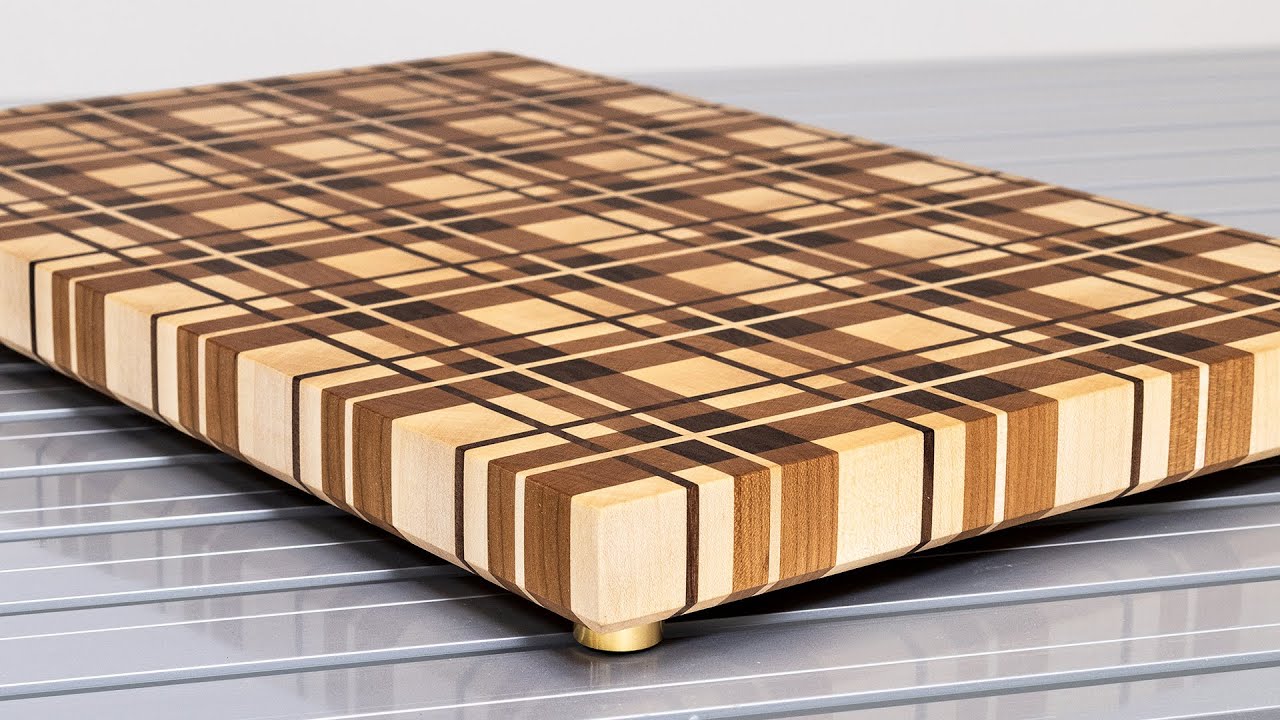
Adding Non-slip Features
Non-slip features keep your cutting board stable while in use. This improves safety and makes cutting easier.
Here are simple ways to add non-slip features:
- Attach rubber feet to the bottom corners.
- Use silicone pads under the board.
- Carve shallow grooves on the bottom edges.
Credit: www.youtube.com
Common Mistakes To Avoid
Building an end grain cutting board takes care and skill. Many beginners make mistakes that cause problems later. Knowing common errors helps you avoid them.
This guide covers key mistakes in glue-up, wood movement, and finish application. Fixing these issues makes your cutting board last longer and look better.
Glue-up Errors
One common glue-up error is not applying glue evenly. Too little glue causes weak joints. Too much glue creates a mess and weakens the bond.
Also, clamping pressure matters. Uneven pressure can cause gaps or warping. Make sure clamps press the board evenly during drying.
- Apply glue evenly on all surfaces
- Use the right amount of glue—enough to cover but not drip
- Clamp with even pressure across the entire board
- Clean excess glue before it dries
Wood Movement Issues
Wood expands and shrinks with humidity changes. Not accounting for this can cause cracks or warping in your cutting board.
Using different wood species with different movement rates can cause stress where they join. Select woods that move similarly to avoid problems.
- Use stable wood species for end grain boards
- Match wood pieces with similar expansion rates
- Seal all sides of the board to reduce moisture changes
- Allow wood to acclimate before starting
Finish Application Problems
Applying finish unevenly can leave some areas unprotected. This invites water damage and stains. Make sure to cover the entire surface well.
Using the wrong finish can make the board unsafe for food use. Choose finishes that are food-safe and designed for cutting boards.
- Apply finish evenly on all board surfaces
- Use food-safe finishes like mineral oil or beeswax
- Let each coat dry fully before adding more
- Reapply finish regularly to keep the board protected
Frequently Asked Questions
What Materials Are Needed For An End Grain Cutting Board?
To build an end grain cutting board, you’ll need hardwood like maple or walnut. You’ll also require wood glue, a saw, clamps, and sandpaper. These materials ensure durability and a smooth finish. Using quality wood and tools is essential for a long-lasting cutting board.
How Do You Prepare Wood For The Cutting Board?
Start by cutting the wood into strips. Ensure each strip is of equal width. Sand the edges to remove any roughness. This preparation ensures a smooth assembly. Properly prepared wood results in a sturdy and attractive cutting board.
Why Choose End Grain For Cutting Boards?
End grain cutting boards are durable and gentle on knives. They resist cuts and scratches better than edge grain boards. This design also minimizes wear on your knife edges. Choosing end grain ensures longevity and functionality in your kitchen.
How Do You Glue The Cutting Board Pieces?
Apply wood glue to the edges of each strip. Align them tightly together. Use clamps to hold them in place while the glue dries. Ensure a tight bond for durability. Proper gluing is crucial for a sturdy cutting board.
Conclusion
Building an end grain cutting board takes time and care. Choose good wood and cut it into pieces. Glue the pieces tightly and press well. Sand the board smooth for a nice finish. Apply oil to protect the wood and keep it strong.
A well-made board lasts for years. It is safe and easy to clean. Enjoy your new cutting board every day. A simple project with great results. Try it yourself and see the difference.