If you love camping, you know how important it is to stay dry inside your tent. But did you know that even a tiny gap in the seams can let water in and ruin your trip?
Sealing the seams on your tent is a simple step that can save you from uncomfortable nights and soggy gear. You’ll learn easy, effective ways to keep your tent waterproof and protect yourself from unexpected rain. Keep reading to discover how a few quick fixes can make all the difference on your next adventure.
Choosing Seam Sealant
Seam sealants protect your tent from water leaks. They keep seams strong and dry in rain.
Picking the right sealant helps your tent last longer. It also stops water from soaking inside.
Types Of Sealants
There are different sealants for tents. Some come in liquid, tape, or paste form.
Choose sealants that fit your tent material and how you use your tent.
- Liquid sealants:Easy to apply with a brush or tube.
- Seam tape:Sticky tape that covers seams quickly.
- Paste sealants:Thick and good for heavy fabrics.
Waterproof Vs Water-resistant
Waterproof sealants stop all water from passing through seams. They make tents fully dry inside.
Water-resistant sealants reduce water entry but may let small amounts pass in heavy rain.
- Waterproof is best for wet climates and long trips.
- Water-resistant works for mild weather and short camping.
Eco-friendly Options
Eco-friendly sealants use safe, natural ingredients. They harm the environment less.
These sealants avoid strong chemicals and reduce pollution during use and disposal.
- Look for water-based sealants without solvents.
- Choose products labeled biodegradable or non-toxic.
- Eco-friendly sealants work well for most camping tents.

Credit: www.yahoo.com
Preparing The Tent
Sealing the seams on your tent is crucial. This prevents water from leaking inside during rain. Proper preparation is the first step in this process.
Before sealing, ensure the tent is clean and dry. A well-prepared tent will make the sealing process more effective.
Cleaning The Seams
Cleaning the seams is essential. Dirt and debris can prevent the sealant from sticking properly. Use a mild soap and water solution.
Gently scrub the seams with a soft brush or cloth. Make sure all dirt is removed for a clean application surface.
- Mix soap and water in a small bowl
- Use a soft brush to clean the seams
- Rinse thoroughly with clean water
Drying And Inspection
After cleaning, let the tent dry completely. This is important because moisture can affect the sealing process. Inspect the seams for any damage or wear.
Look for any holes or frayed areas. These need to be repaired before you apply the sealant.
- Ensure the tent is fully dry
- Inspect seams carefully for any damage
- Repair holes or frayed areas
Setting Up A Workspace
Choose a spacious area to work. An open space allows you to spread out the tent completely. Make sure the area is clean and free of debris.
A well-organized workspace will help you apply the sealant evenly. Gather all necessary materials like sealant, brushes, and rags before starting.
- Select a clean, open space
- Lay the tent flat on the ground
- Gather all sealing materials
Applying Seam Sealant
Sealing the seams on a tent protects you from rain and wind. It keeps your tent dry and comfortable.
Applying seam sealant is a simple process. It only takes a few tools and some care.
Tools Needed
- Seam sealant suitable for your tent fabric
- Small brush or applicator
- Clean cloth or paper towels
- Soap and water for cleaning seams
- Rubber gloves to protect your hands
- Masking tape (optional, for neat edges)
Step-by-step Application
- Clean the tent seams with soap and water. Let them dry completely.
- Put on rubber gloves to keep your hands clean.
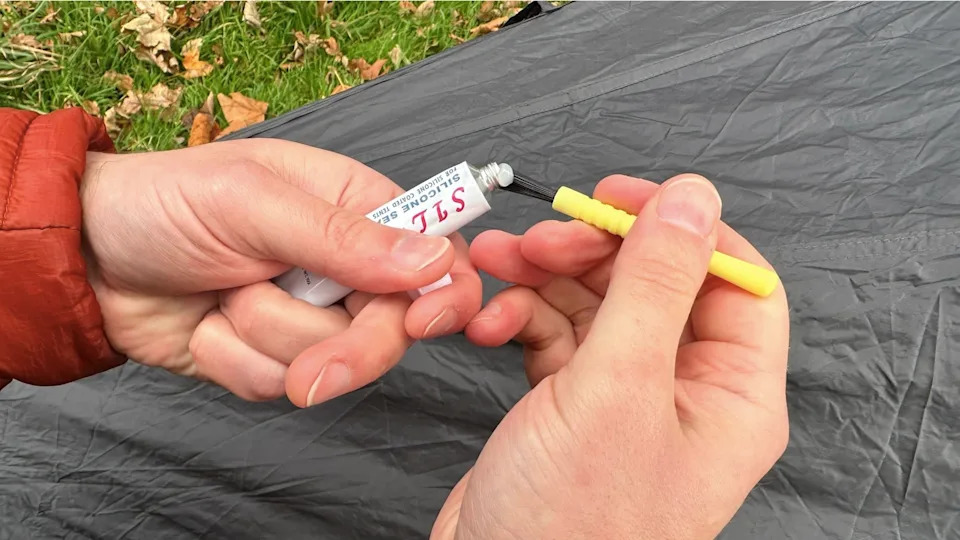
- Shake the seam sealant bottle well before use.
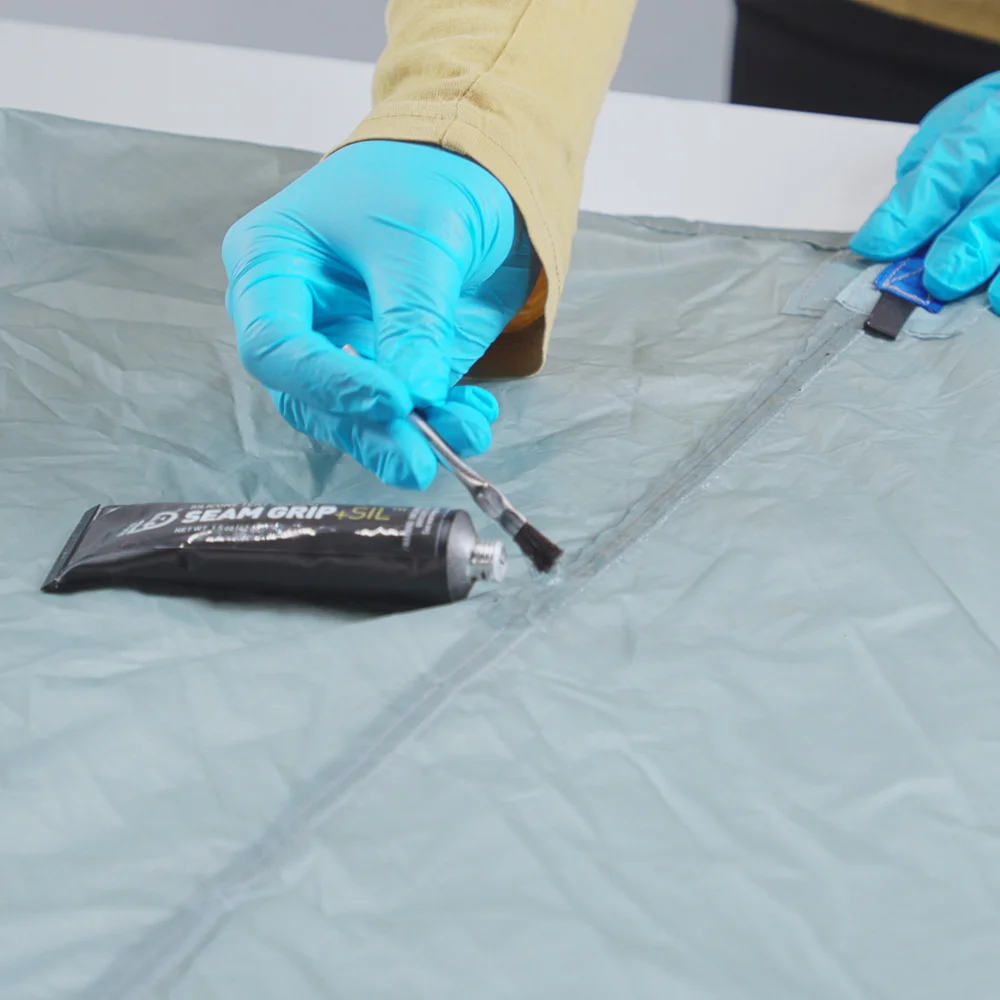
- Apply a thin, even layer of sealant along the seams using the brush.
- Use masking tape on the sides of the seam if you want clean edges.
- Let the sealant dry for the time recommended on the bottle.
- Check the seams for any missed spots and apply more sealant if needed.
- Allow the tent to dry fully before packing it away.
Common Mistakes To Avoid
| Mistake | Why to Avoid |
|---|---|
| Sealing dirty or wet seams | Sealant won’t stick well and may peel off |
| Applying too much sealant | Can cause sticky, uneven seams and slow drying |
| Not letting sealant dry fully | Reduces waterproofing and can damage fabric |
| Using wrong sealant for tent fabric | May harm fabric or fail to seal properly |
| Skipping reapplication after heavy use | Seams can weaken and leak over time |
Drying And Curing Time
Sealing the seams on a tent helps keep it waterproof. Proper drying and curing make the seal strong and long-lasting.
Knowing how long to wait and testing the seal ensures your tent stays dry during your trips.
Optimal Conditions
Seam sealant works best in warm, dry weather. Avoid sealing when it is cold or humid.
Good airflow helps the sealant dry and cure faster. Keep your tent in a shaded, ventilated area.
- Temperature between 60°F and 80°F (15°C to 27°C)
- Low humidity below 50%
- Shade or indirect sunlight
- Good air circulation
How Long To Wait
Drying time depends on the sealant type and weather. Usually, it takes 4 to 24 hours to dry.
Full curing may take 24 to 72 hours. Waiting this long ensures the sealant bonds well.
- Touch dry: 4 to 6 hours
- Ready for light use: 12 to 24 hours
- Fully cured: 24 to 72 hours
Testing The Seal
Check the seal by gently pressing on the seams. It should feel dry and flexible, not sticky.
Spray water or use a damp cloth to test for leaks. Look inside the tent for any wet spots.
- Press seams to check dryness and flexibility
- Spray water on sealed seams
- Inspect inside tent for leaks
- Reapply sealant if leaks appear
Maintaining Seam Seals
Seam seals keep your tent waterproof and safe from leaks. Maintaining them helps your tent last longer and stay dry.
Regular care of seam seals prevents damage and keeps your camping experience comfortable. Learn how to inspect, repair, and store your tent properly.
Regular Inspections
Check your tent seams before and after each camping trip. Look for cracks, peeling, or worn areas on the sealant. Early spotting stops leaks from forming.
- Feel the seams for rough or dry spots
- Look for any loose threads or fabric damage
- Check for water stains or damp patches inside
- Inspect corners and high-stress areas closely
Touch-ups And Repairs
Fix small seam seal problems quickly to avoid bigger issues. Use a tent seam sealer product that matches your tent fabric type.
Clean the area first, let it dry, then apply the sealant smoothly. Allow enough drying time before packing or using the tent again.
| Repair Tip | What to Do | Dry Time |
| Minor cracks | Apply one thin coat of seam sealer | 6 hours |
| Peeling sealant | Remove old sealant, then reapply | 12 hours |
| Thread damage | Use waterproof tape under sealant | 8 hours |
Storage Tips To Preserve Seals
Store your tent properly to keep seam seals strong. Avoid folding seams in tight creases, which can crack the sealant.
- Clean and dry tent completely before storage
- Store in a cool, dry place away from sunlight
- Use a loose storage bag instead of a tight sack
- Unfold and air out the tent every few months
Credit: www.velocolour.com
Additional Waterproofing Tips
Sealing the seams of your tent helps keep water out. There are extra ways to protect your tent from rain and moisture.
These tips help your tent stay dry and last longer during camping trips.
Using Waterproof Sprays
Waterproof sprays add a layer of water resistance to your tent fabric. They help stop rain from soaking through the material.
Choose sprays made for outdoor gear. Spray evenly on clean, dry fabric for best results.
- Test spray on a small area first
- Apply in a well-ventilated space
- Let the tent dry completely before packing
- Repeat spraying every camping season
Protective Tent Accessories
Using accessories can shield your tent from water damage. They add extra defense against rain and ground moisture.
Common accessories include rain flies, footprint ground covers, and tent tarps. These protect seams and fabric better.
- Rain fly covers the tent top to block rain
- Footprints prevent ground moisture from seeping in
- Tarps create an extra barrier under or over the tent
- Use guy lines to keep accessories tight and secure
Seasonal Waterproofing Strategies
Weather changes with the seasons. Adjust your waterproofing to fit the conditions you expect.
In wet seasons, check and reseal seams more often. In dry seasons, clean the tent to remove dirt and debris.
- Inspect seams before rainy seasons start
- Reapply seam sealer as needed
- Store tent dry to prevent mold in off-season
- Use waterproof sprays before long trips
- Pack accessories suited to the season’s weather

Credit: www.yahoo.com
Frequently Asked Questions
How Do I Prepare Tent Seams For Sealing?
Clean the seams thoroughly to remove dirt and dust. Use rubbing alcohol on a cloth. Let the seams dry completely before applying any sealant.
What Type Of Seam Sealer Is Best For Tents?
Silicone-based sealers work well on most tent fabrics. Seam grip sealants are popular for durability. Always check your tent’s material before choosing a sealer.
How Long Does Tent Seam Sealant Take To Dry?
Most seam sealants dry within 24 hours. Drying times may vary by brand and weather conditions. Avoid packing the tent until the sealant cures fully.
Can I Seal Tent Seams Myself At Home?
Yes, sealing tent seams is easy with proper tools. Follow instructions carefully for the best results. DIY sealing saves money and extends tent life.
Conclusion
Sealing tent seams keeps your shelter dry and strong. Small cracks let water inside and cause damage. Use the right sealant and clean seams first. Take your time applying it carefully and evenly. Let the sealant dry completely before camping again.
Regular checks help spot leaks early. A well-sealed tent means a more comfortable trip. Protect your gear and enjoy the outdoors fully. Simple steps make a big difference in tent care. Stay dry and happy on every adventure.