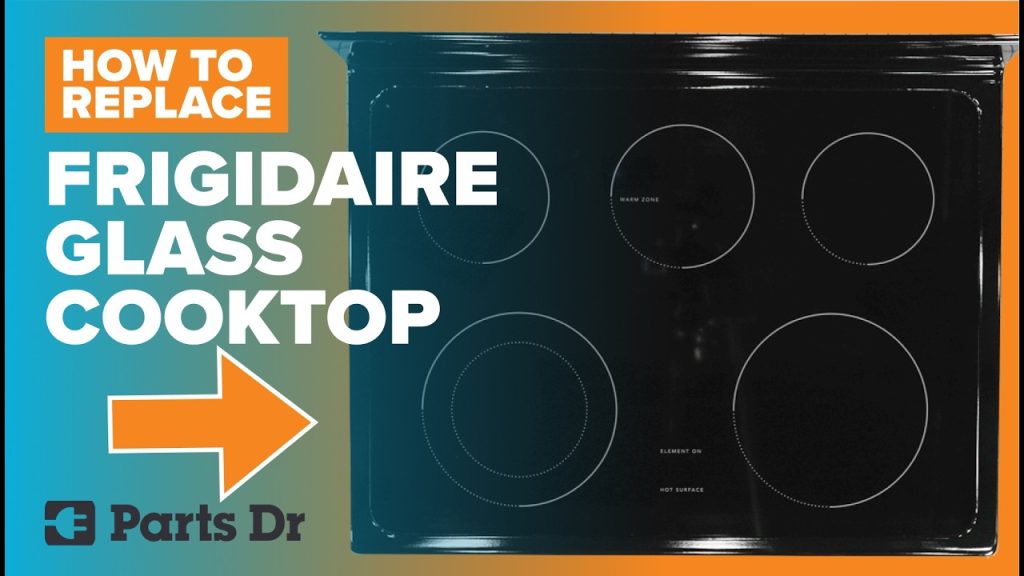
Have you ever found yourself staring at your glass cooktop, wondering if it’s time for a change? Maybe it’s scratched, cracked, or just not performing like it used to.
You might be asking yourself, “Can glass cooktops be replaced? ” You’re not alone. Many homeowners face the same dilemma, weighing the pros and cons of replacing their cooktop. The good news is, you’re about to discover everything you need to know about this process.
This article will delve into whether replacing a glass cooktop is feasible, what the costs might be, and how it could impact your kitchen’s functionality. Get ready to explore your options and make an informed decision that suits your lifestyle and cooking needs. Keep reading to uncover the answers you’ve been searching for and find out just how simple it might be to refresh your kitchen space.
Signs You Need A Replacement
Knowing when to replace a glass cooktop keeps your kitchen safe and efficient. Some signs show your cooktop may need a swap. Watch for damage or performance issues. A fresh cooktop can improve cooking and style.
Cracks And Chips
Cracks or chips on the glass surface are serious problems. They can cause heat to spread unevenly. Sharp edges may hurt your hands. Small cracks often grow larger with use. Replacing the cooktop stops accidents and further damage.
Heating Issues
Cooktops that heat unevenly or take too long to warm up need attention. Burners that fail to reach high temperatures affect cooking results. Flickering or inconsistent heat signals internal problems. These issues lower energy efficiency and cooking quality.
Outdated Design
Old cooktops may lack modern features and look worn out. Newer models offer better controls and safer materials. Updating your cooktop improves kitchen aesthetics and usability. An outdated design can also be harder to clean.

Credit: www.angi.com
Choosing The Right Replacement
Choosing the right replacement for a glass cooktop requires careful thought. The new cooktop must fit well and meet your cooking needs. Picking the right type and size ensures smooth installation and daily use. Energy efficiency also plays a key role in reducing electricity bills and environmental impact.
Types Of Glass Cooktops
Glass cooktops come in several types. Radiant cooktops heat coils beneath the glass surface. Induction cooktops use magnetic fields to heat pots directly. Induction models are faster and safer but need compatible cookware. Knowing these types helps select the best for your kitchen style and cooking habits.
Size And Compatibility
Measure the current cooktop before buying a replacement. Sizes vary between brands and models. Check the cutout dimensions in your countertop. The new cooktop must fit the existing space without extra modifications. Also, ensure the electrical connections match your home setup to avoid costly changes.
Energy Efficiency
Energy-efficient cooktops save money over time. Induction cooktops generally use less energy than radiant ones. Look for models with good energy ratings. Efficient cooktops heat faster and maintain temperature better. Choosing an energy-saving cooktop benefits both your wallet and the planet.
Tools And Materials Needed
Replacing a glass cooktop requires more than just a new panel. You need the right tools and materials to do the job safely and effectively. Having everything prepared before you start can save you from frustration and potential damage.
Basic Tools
- Screwdrivers:Both flathead and Phillips screwdrivers are essential for removing screws securing the cooktop and its components.
- Putty Knife:Useful for gently prying and loosening sealed edges without cracking the glass.
- Multimeter:Helps you check electrical connections and ensure the cooktop is properly powered off before working.
- Pliers:Handy for gripping wires or small parts during disassembly.
- Socket Wrench Set:Some cooktops use bolts that require socket wrenches for removal.
Having these tools ready helps you work confidently and avoid unnecessary delays or damage.
Safety Gear
- Cut-resistant Gloves:Glass cooktops can have sharp edges, especially if damaged. Protect your hands from cuts.
- Safety Glasses:Prevent any glass shards or dust from getting into your eyes during removal or installation.
- Dust Mask:Useful if you’re working in a dusty environment or cleaning up broken glass particles.
- Non-slip Shoes:Maintain steady footing while handling heavy or fragile parts to avoid accidents.
Ignoring safety gear can lead to injuries that might delay your project or cause serious harm. Are you prepared to protect yourself properly?
Replacement Parts
- Exact Glass Cooktop Panel:Make sure the replacement matches your stove’s model number for proper fit and function.
- Sealing Gasket or Adhesive:These ensure a tight seal between the cooktop and countertop, preventing spills or heat loss.
- New Screws or Clips:Sometimes the original fasteners get stripped or damaged, so having extras helps secure the new panel firmly.
- Instruction Manual or Installation Guide:Even if you’re experienced, specific steps for your model make the process smoother.
Have you checked if your replacement parts are genuine and compatible? Using the wrong parts can affect performance or safety.
Step-by-step Replacement Process
Replacing a glass cooktop might seem intimidating at first, but breaking the process into clear steps makes it manageable. Each phase requires care and attention to safety, especially when dealing with electrical components. Let’s walk through the essential actions to get your new cooktop installed smoothly and safely.
Turning Off Power
Before you touch any electrical parts, make sure to cut the power supply to your cooktop. Locate your home’s circuit breaker panel and switch off the breaker linked to the cooktop. This simple step protects you from electric shock and prevents damage to your new appliance.
Have you checked twice to confirm the power is truly off? A voltage tester can give you peace of mind before proceeding.
Removing The Old Cooktop
Start by carefully lifting any trim or screws holding the old cooktop in place. You might need a screwdriver or a putty knife to loosen the edges gently.
Once unsecured, lift the cooktop straight up, being cautious of any wires underneath. If the cooktop is glued in, a bit of patience and gentle prying will help avoid damage to your countertop.
Remember to disconnect the wiring carefully, noting how the connections were made. Taking a photo here can save confusion later.
Installing The New Cooktop
Position your new cooktop into the opening, ensuring it fits snugly without forcing it. Align it with any screw holes or brackets provided.
Reconnect the wiring exactly as it was on the old unit, matching colors and terminals. Secure the cooktop with screws or clips as instructed in the manual.
Don’t skip sealing the edges if your cooktop requires it — this prevents spills from seeping underneath.
Testing Functionality
Once installed, restore power at the breaker panel and test each burner. Turn them on individually to check for proper heating and control responsiveness.
Listen and watch closely—any strange smells, flickering lights, or unusual noises should be addressed immediately.
Is your cooktop heating evenly? If not, revisiting the installation steps or consulting a professional might be necessary.
Common Challenges And Solutions
Replacing a glass cooktop can seem straightforward, but it often comes with its own set of challenges. Understanding these common obstacles and knowing how to address them can save you time and frustration. Let’s look at some typical issues you might face and practical solutions to keep your replacement project on track.
Dealing With Stubborn Screws
One of the first hurdles you might encounter is stubborn screws holding the cooktop in place. These screws can be tight, stripped, or even rusted after years of use.
Try using a screwdriver with a good grip and apply firm, steady pressure. If screws are stripped, a rubber band placed between the screw and the screwdriver can provide extra traction.
Another trick is to use penetrating oil to loosen rusted screws—let it sit for 10-15 minutes before attempting removal. Have a few screwdrivers and pliers on hand to handle different screw types and sizes.
Aligning The New Cooktop
Aligning your new cooktop perfectly can be trickier than it looks. Even a small misalignment can cause uneven cooking or damage to the glass surface.
Before securing the new cooktop, place it gently on the countertop to check fit and alignment. Use a level to ensure it sits perfectly flat, and adjust the mounting brackets if needed.
Take your time during this step; rushing can lead to poor installation and costly repairs later. If the new cooktop doesn’t fit exactly, you might need to trim the countertop opening or choose a different model.
Electrical Connection Issues
Electrical problems often arise during cooktop replacement, especially if you’re unfamiliar with wiring. Incorrect connections can lead to malfunction or safety hazards.
Always turn off power at the circuit breaker before starting work. Check the cooktop’s wiring diagram and match wires carefully—color codes usually indicate their purpose.
If you feel unsure, it’s wise to consult a professional electrician. A small mistake here can cost more than a service call, and your safety is paramount.
Credit: www.searspartsdirect.com
Maintenance Tips For Longevity
Proper care extends the life of glass cooktops. Regular maintenance keeps them looking new and working well. Follow simple tips to avoid costly replacements and enjoy cooking safely.
Cleaning Techniques
Clean the cooktop after each use. Use a soft cloth or sponge with warm, soapy water. Avoid abrasive pads that can scratch the surface. For stubborn stains, use a cleaner made for glass cooktops. Wipe gently in circular motions to remove residue.
- Use a scraper designed for glass surfaces to remove burnt food.
- Dry the surface with a soft towel to prevent streaks.
- Do not pour cold water on a hot cooktop to avoid cracks.
Avoiding Damage
Handle cookware with care on glass cooktops. Avoid sliding pots and pans to prevent scratches. Use flat-bottomed cookware for even heat distribution. Do not place heavy items on the cooktop. Avoid dropping utensils or sharp objects on the surface.
- Turn off burners before moving pots to reduce accidents.
- Keep sugar and acidic spills away; they can cause damage if not cleaned fast.
- Never use the cooktop as a cutting board or work surface.
Regular Inspections
Check the cooktop regularly for cracks or chips. Inspect the seals around the edges for wear. Address small damages early to avoid bigger problems. Test the burners to ensure they heat evenly. Replace faulty parts promptly to maintain safety and performance.
- Look for discoloration or unusual marks on the glass.
- Listen for unusual sounds when burners operate.
- Schedule professional inspections if unsure about damage.
Credit: www.consumerreports.org
Frequently Asked Questions
Can Glass Cooktops Be Replaced Easily?
Yes, glass cooktops can be replaced with proper tools. It requires careful handling to avoid damage. Hiring a professional ensures safety and correct installation. Replacement is straightforward but varies by model.
How Much Does It Cost To Replace A Glass Cooktop?
The cost to replace a glass cooktop ranges from $200 to $800. It depends on the brand, size, and labor charges. Higher-end models cost more. DIY replacement may reduce expenses but carries risks.
Can I Replace A Glass Cooktop Myself?
You can replace a glass cooktop yourself if you have technical skills. It involves disconnecting power and removing the old unit carefully. However, professional help is recommended to avoid damage and ensure safety.
How Long Does It Take To Replace A Glass Cooktop?
Replacing a glass cooktop typically takes 1 to 2 hours. Time depends on the cooktop model and installer experience. Proper preparation can speed up the process. Delays occur if wiring or fitting issues arise.
Conclusion
Glass cooktops can be replaced with the right tools and care. Choose a cooktop that fits your kitchen size and style. Check the electrical or gas connections before starting. Replacement may take time but improves your cooking space. Simple steps help avoid damage and extra costs.
Consult a professional if you feel unsure. Enjoy a fresh, clean cooking area after replacement. Your kitchen will look new and work better.