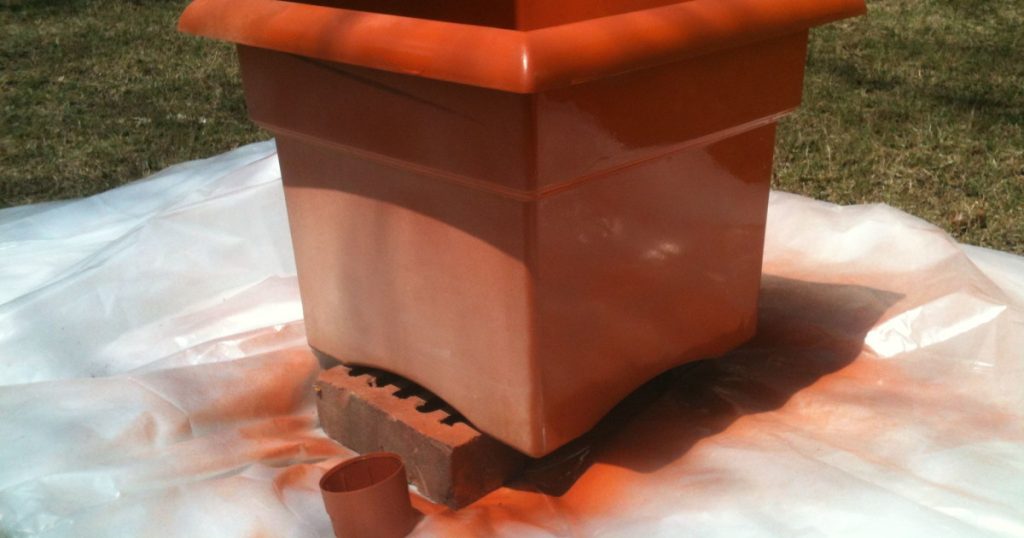
Have you ever looked at your plain plastic planters and wished they had a fresh, vibrant look? Maybe you’re wondering if spray painting them is a good idea.
The truth is, giving your plastic planters a new color can completely transform your space. But can you actually spray paint plastic planters without ruining them? If you want to know the secret to making your planters look stunning and long-lasting, keep reading.
This guide will show you exactly how to do it right, so your plants get the style they deserve.

Credit: www.yahoo.com
Choosing The Right Paint
Spray painting plastic planters can give them a fresh new look. Picking the right paint is key to a good finish.
Not all spray paints work well on plastic. You need paint that sticks and lasts outdoors.
Types Of Spray Paint For Plastic
Some spray paints are made specifically for plastic surfaces. These paints bond better and resist peeling.
Common types include acrylic, enamel, and specialty plastic spray paints. Each has different qualities for your planter.
- Acrylic Spray Paint:Dries fast and is water-resistant.
- Enamel Spray Paint:Offers a hard, durable finish but takes longer to dry.
- Plastic-Specific Spray Paint:Formulated to stick well on plastic and resist cracking.
Benefits Of Spray Paint Vs. Other Paints
Spray paint covers plastic evenly and smoothly. It reaches small details on the planter better than brushes.
Spray paint dries faster and needs fewer coats. It also reduces brush marks and blotches.
- Quick and easy application
- Even coverage on curved surfaces
- Less chance of streaks or bubbles
- Good for outdoor use with proper paint type

Credit: craftivitydesigns.com
Preparing Plastic Planters
Spray painting plastic planters is a fun way to add color to your garden. Preparing the planters well is key for a smooth finish.
Here are some simple steps to get your plastic planters ready for painting. Follow these to ensure the paint sticks well and lasts longer.
Cleaning And Drying
Start by cleaning your plastic planters. Use soap and water to remove dirt and grime.
Rinse thoroughly and let them dry completely. This step prevents dust from ruining the paint job.
- Use a soft brush for scrubbing
- Ensure no soap residue remains
- Dry in a sunny spot for faster results
Sanding For Better Adhesion
Sanding helps the paint stick better to the plastic surface. Lightly sand the planter using fine-grit sandpaper.
This creates a slightly rough surface, which the paint can grip onto. Wipe away any dust before moving to the next step.
Using A Primer
A primer prepares the surface for painting. Apply a plastic-friendly primer evenly on the planter.
Let the primer dry completely. This step ensures the paint color shows vibrantly and lasts longer.
- Choose a primer designed for plastic
- Spray in light, even coats
- Wait until fully dry before painting
Spray Painting Techniques
Spray painting plastic planters can give them a fresh new look. It is important to use the right techniques to get a smooth, lasting finish.
Good preparation and careful painting will help the paint stick well and look even. Below are key steps to follow for best results.
Setting Up Your Workspace
Choose a well-ventilated area to spray paint. Outdoors is best, but a garage with open doors works too.
Cover surfaces with newspapers or plastic sheets. This will protect from overspray and paint stains.
- Work on a flat, stable surface
- Wear gloves and a mask for safety
- Keep the planter clean and dry before painting
Shaking And Testing The Spray Paint
Shake the spray paint can well for about one to two minutes. This mixes the paint inside for even color.
Test the spray on a scrap piece of paper or cardboard. This helps check the spray pattern and paint flow.
- Shake can firmly up and down
- Spray test area with short bursts
- Adjust distance if paint is too thick or thin
Applying Thin, Even Coats
Hold the spray can about 8 to 12 inches from the planter. Spray with smooth, side-to-side motions.
Apply several thin coats instead of one thick coat. Thin coats dry faster and avoid drips or runs.
- Start spraying off the edge, then move across
- Keep the can moving steadily
- Overlap each pass slightly for full coverage
Drying Time Between Coats
Let each coat dry fully before applying the next. This usually takes 15 to 30 minutes but check the can instructions.
Proper drying time prevents smudging and helps the paint bond to the plastic.
- Place planters in a dust-free area to dry
- Avoid touching the surface until dry
- Wait for the paint to feel dry to the touch before next coat

Credit: www.yahoo.com
Finishing Touches
Spray painting plastic planters can give them a fresh, new look. To keep that look lasting, some final steps help protect the paint. These steps make your planters look better and last longer.
After spray painting, pay attention to sealing and drying. These finishing touches add strength and beauty to your project.
Adding A Protective Clear Coat
A clear coat protects the paint from scratches and fading. It creates a strong shield against water and sunlight. Use a spray clear coat made for plastic surfaces for the best results.
Apply the clear coat in thin, even layers. Let each layer dry before adding the next. This prevents drips and uneven coverage.
- Choose a clear spray labeled for plastic
- Spray from 6-12 inches away
- Use light, even coats
- Allow drying between coats
Curing Time For Durability
Curing time lets the paint harden fully. Without enough curing, the paint can peel or chip easily. Wait at least 24 hours before handling the planters.
For outdoor use, wait 48 to 72 hours. This ensures the paint and clear coat stick well and resist weather damage.
- Keep planters in a dry, dust-free area
- Avoid touching the surface during curing
- Longer curing improves paint strength
Common Mistakes To Avoid
Spray painting plastic planters can give them a fresh look. Many people make mistakes that hurt the finish. Knowing what to avoid saves time and effort.
This guide covers common errors and how to prevent them. Avoid these mistakes for a smooth, lasting paint job.
Overapplying Paint
Applying too much paint at once causes drips and runs. Thick paint takes longer to dry and may peel off later.
Spray light, even coats. Let each coat dry before adding more. This method helps the paint stick better and look smooth.
- Hold the spray can 6-8 inches away
- Spray in thin layers, not one heavy coat
- Wait 10-15 minutes between coats
Ignoring Surface Preparation
Paint does not stick well to dirty or glossy plastic. Skipping cleaning and sanding leads to peeling and uneven color.
Clean the planter with soap and water. Lightly sand the surface to help paint grip better. Remove dust before painting.
- Wash with mild soap and water
- Use fine sandpaper to roughen the surface
- Wipe off sanding dust with a dry cloth
Painting In Poor Conditions
Painting in very cold, hot, or humid weather affects drying time. Paint may not cure correctly and can bubble or crack.
Choose a dry day with mild temperatures around 50-85°F (10-29°C). Avoid windy places that blow dust onto wet paint.
- Check weather before starting
- Paint in a shaded, sheltered area
- Do not spray if rain is expected soon
Creative Ideas For Painted Planters
Spray painting plastic planters is a fun way to add color and style. You can make plain planters look unique with simple tools and paint. Using different designs helps your plants stand out in any space.
Try creative ideas to transform your plastic planters. Using stencils, mixing colors, and matching themes can make your garden or home more lively.
Using Stencils And Patterns
Stencils help create clean and sharp designs on plastic planters. Patterns like stripes, dots, or leaves add a decorative touch. You can use tape or paper cutouts as stencils for easy shapes.
- Choose simple stencil shapes for quick painting
- Place stencil firmly on the planter surface
- Use light spray paint layers for even coverage
- Remove stencil carefully after paint dries
- Add details with a small brush if needed
Combining Colors And Textures
Mixing colors and textures makes planters more interesting. Matte and glossy paints create contrast. You can also add sand or small stones to paint for rough texture.
| Color Combination | Texture Effect | Use Idea |
|---|---|---|
| Blue and White | Matte with Glossy Stripes | Beach-themed planter |
| Green and Brown | Rough Sand Texture | Natural, earthy look |
| Yellow and Orange | Glossy with Pebble Dots | Bright, cheerful design |
Seasonal And Themed Designs
Paint planters to match holidays or seasons. Spring flowers, fall leaves, or winter snowflakes create festive vibes. You can change designs with new paint each season.
Seasonal Design Tips:
- Use pastel colors for spring and Easter
- Choose warm tones like red and gold for fall
- Paint snowflakes or stars for winter holidays
- Try tropical themes with bright colors for summer
Frequently Asked Questions
Can You Spray Paint Plastic Planters Safely?
Yes, you can spray paint plastic planters safely. Use spray paint designed for plastic surfaces. Clean and dry the planter before painting. Apply thin, even coats to avoid drips. Allow proper drying time between coats for best results.
What Type Of Spray Paint Works On Plastic Planters?
Use spray paint labeled for plastic or multi-surface use. Acrylic-based and enamel spray paints work well. These paints adhere better and provide durable, long-lasting finishes on plastic surfaces.
Do I Need To Prime Plastic Planters Before Painting?
Priming is recommended but not always necessary. Use a plastic primer to improve paint adhesion and durability. It helps prevent peeling and ensures a smooth, even finish on the planter.
How Long Does Spray Paint Take To Dry On Plastic?
Spray paint typically dries to the touch within 15-30 minutes. Full curing on plastic surfaces can take 24-48 hours. Drying time depends on paint type, coat thickness, and environmental conditions.
Conclusion
Spray painting plastic planters can brighten up your garden space. Choose the right paint made for plastic surfaces. Clean and dry the planter before you start painting. Apply thin, even coats for the best finish. Let each coat dry fully to avoid peeling.
This simple step brings new life to old planters. You can enjoy colorful pots without buying new ones. A small effort leads to big changes in your garden’s look. Give your plastic planters a fresh, vibrant style today.