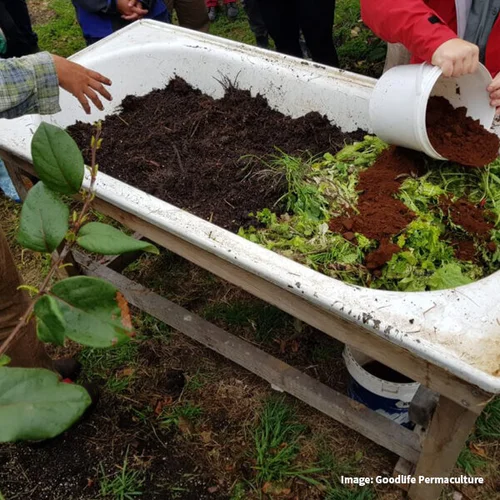
Are you looking for a simple way to turn your kitchen scraps into rich, natural fertilizer? A DIY worm compost bin could be just what you need.
Not only will it help reduce your waste, but it will also give your plants a healthy boost. Imagine having your own mini recycling system right at home, working quietly to create nutrient-packed compost. You’ll discover how easy it is to build your own worm bin, what materials you need, and how to keep your worms happy and productive.
Ready to get started and watch your waste disappear while your garden thrives? Keep reading to learn all the steps!

Credit: www.youtube.com
Benefits Of Worm Composting
Worm composting is an easy way to reduce waste at home. It uses worms to turn food scraps into rich soil.
This process helps the environment and supports healthy plants. Worm composting is good for gardens and the planet.
Reducing Kitchen Waste
Worm composting cuts down the amount of food waste sent to landfills. Worms eat vegetable scraps, fruit peels, and coffee grounds.
- Less garbage means less trash pickup and fewer landfill problems.
- Worms break down waste quickly and cleanly.
- This method keeps your kitchen scraps useful instead of trash.
Enriching Soil Naturally
Worm castings, the waste from worms, make soil healthy. They add nutrients that plants need to grow strong.
| Soil Benefit | Effect |
| Improves soil texture | Makes soil loose and easy to work |
| Adds nutrients | Feeds plants naturally without chemicals |
| Increases water retention | Helps soil hold water longer |
| Supports beneficial microbes | Boosts soil life for healthier plants |
Eco-friendly Gardening
Worm composting lowers the need for chemical fertilizers. It reduces pollution and helps keep the earth clean.
Key eco-friendly reasons to choose worm composting:
- Reduces greenhouse gases by cutting landfill waste
- Uses natural processes without harmful chemicals
- Supports sustainable gardening practices
Choosing The Right Worms
Picking the right worms is key for a good worm compost bin. Not all worms work well for composting. You need worms that eat organic waste fast and live well in small spaces.
Many types of worms exist, but only some are best for compost bins. Learning about them helps you choose the right ones for your project.
Types Of Composting Worms
Several worm species work well in compost bins. Each type has its own habits and needs. The most popular worms for composting are:
- Red Wigglers (Eisenia fetida):These worms are the best for compost. They eat a lot and breed fast.
- European Nightcrawlers (Eisenia hortensis):Bigger than red wigglers and good for deeper bins.
- Tiger Worms (Eisenia andrei):Similar to red wigglers but with stripes. They work well in warm climates.
- African Nightcrawlers (Eudrilus eugeniae):Large worms that compost quickly but need warm temperatures.
Red wigglers are the easiest to find and care for. They stay near the surface, which is perfect for most worm bins.
Where To Buy Worms
You can buy composting worms from many places. Choose a source that sells healthy, active worms.
| Source | Details |
|---|---|
| Local garden centers | They often sell red wigglers and can give advice. |
| Online worm farms | Good for buying large numbers or special types of worms. |
| Farmers markets | Sometimes offer compost worms during growing seasons. |
| Community compost programs | May provide worms for free or low cost. |
Materials Needed
Creating a worm compost bin is a fun project. You need the right materials to start.
Here are the key items you will need to make your own compost bin at home.
Container Options
Choose a sturdy container to hold your compost. Size matters based on your space and needs.
- Plastic bins with lids
- Wooden boxes
- Old drawers or crates
Bedding Supplies
Bedding is where your worms will live and work. It should be moist and breathable.
- Shredded newspaper or cardboard
- Peat moss
- Chopped leaves
Tools And Accessories
Having the right tools makes the process easier. Basic items are usually enough.
- Hand drill for ventilation holes
- Spray bottle for moisture control
- Garden trowel for turning the compost
Setting Up The Bin
Setting up a worm compost bin is simple and fun. It helps recycle food scraps naturally.
You need to prepare the container, add bedding, and introduce worms carefully.
Preparing The Container
Choose a plastic or wooden bin with a lid. It should be about 10 to 20 gallons.
Drill small holes on the sides and bottom for air and drainage. Place the bin in a cool, shaded spot.
- Use a bin with a tight-fitting lid
- Make holes about 1/8 inch wide
- Keep the bin out of direct sunlight
- Place a tray underneath to catch liquid
Adding Bedding
Bedding gives worms a comfortable home. Use materials like shredded paper, cardboard, or dried leaves.
Moisten the bedding so it feels like a wrung-out sponge. Fluff it up and fill the bin halfway.
- Shred paper or cardboard into small pieces
- Mix in some soil or coconut coir for nutrients
- Keep bedding moist but not wet
- Fill the bin to about 50% full
Introducing Worms
Red wigglers are the best worms for composting. Gently place them on top of the bedding.
Cover the worms with a small layer of damp newspaper. Let them adjust before adding food scraps.
- Buy or find red wiggler worms
- Handle worms gently to avoid harm
- Cover worms with damp paper or leaves
- Wait 1-2 days before feeding
Feeding Your Worms
Feeding your worms the right way helps them produce rich compost. Good food keeps them healthy and active.
Knowing what to feed and when is important for a successful worm compost bin.
What To Feed
Worms eat many types of kitchen scraps and garden waste. They like soft, moist food that breaks down fast.
- Vegetable peels and scraps
- Fruit scraps (except citrus in small amounts)
- Used coffee grounds and filters
- Tea bags (without plastic)
- Crushed eggshells for calcium
- Shredded newspaper or cardboard
- Small amounts of bread or grains
What To Avoid
Some foods harm worms or attract pests. Avoid these to keep your bin healthy and clean.
- Meat, bones, and fish scraps
- Dairy products like cheese and milk
- Oily or greasy foods
- Citrus fruits in large amounts
- Onions and garlic
- Spicy or salty foods
- Pet waste or chemicals
Feeding Schedule
Feed your worms regularly but not too much. Start small and watch how they eat.
Adding food every few days helps worms digest well and keeps the bin fresh.
- Add small amounts every 3 to 4 days
- Remove uneaten food if it stays too long
- Keep the bin moist but not wet
- Mix food with bedding to avoid bad smells
- Adjust feeding based on worm activity
Credit: medium.com
Maintaining The Bin
Keeping your worm compost bin healthy helps worms work better. Proper care stops problems and speeds up composting.
Check your bin often. Small changes can keep worms happy and your bin clean.
Moisture Control
Worms need a moist home but not too wet. Too much water can drown worms. Too little water dries them out.
Keep the bedding damp like a wrung-out sponge. Add water if it feels dry. Add dry bedding if it feels wet.
- Spray water lightly to moisten
- Use shredded paper or dry leaves to absorb extra moisture
- Avoid water pooling at the bottom
Temperature Tips
Worms work best between 55°F and 77°F (13°C and 25°C). Too hot or cold slows them down or harms them.
Keep the bin in a shaded spot away from direct sun and cold drafts. Bring it indoors during extreme weather.
- Place bin in a cool, shaded area
- Move bin indoors if temperatures drop below 40°F (4°C)
- Use insulation or blankets in winter
Handling Odors
Good worm bins should not smell bad. Rotten smells mean too much food or poor airflow.
Remove extra food scraps and mix the bedding to add air. Avoid overfeeding your worms.
- Feed small amounts at a time
- Mix bedding to improve airflow
- Add dry bedding to absorb smells
- Check for rotting food and remove it
Harvesting Worm Castings
Worm castings are the rich soil left behind by composting worms. They are full of nutrients that help plants grow strong. Knowing how and when to harvest these castings keeps your worm compost bin healthy and productive.
Harvesting worm castings is simple if you follow a few clear steps. This guide shows you when to harvest, how to separate castings from worms, and ways to use the compost.
When To Harvest
Harvest worm castings when the bin looks full and the bedding is dark and crumbly. Usually, this takes about 3 to 6 months. The castings should smell earthy and not sour or rotten.
- Look for fewer food scraps in the bin
- Check if the worm population is healthy
- Ensure the compost is dry but moist to the touch
- Notice a dark, soil-like texture of the castings
How To Separate Castings
Separating castings from worms is important to avoid harming them. You can do this by moving the worms to fresh food and collecting the castings from the old bedding.
- Push the old compost to one side of the bin
- Add fresh food and bedding to the empty side
- Wait 1 to 2 weeks for worms to move
- Remove the castings from the side without worms
Using The Compost
Worm castings improve soil health and boost plant growth. Use them in many ways to help your garden thrive.
| Use | How to Apply |
| Potting Mix | Mix castings with soil in pots |
| Top Dressing | Sprinkle on garden beds around plants |
| Seed Starting | Mix with seed soil to help germination |
| Compost Booster | Add to regular compost piles |

Credit: savvygardening.com
Troubleshooting Common Issues
Building a worm compost bin is simple, but problems can happen. Knowing how to fix them helps your worms thrive.
This guide covers common troubles like worm health, bad smells, and pests. Fix these to keep your bin working well.
Worm Health Problems
Worms can get sick or die if the bin is too wet or dry. They also need the right temperature and food.
Check for signs like worms crawling out or staying still. Fix problems by adjusting moisture or food types.
- Keep the bin moist but not soaking wet
- Feed worms small pieces of fruit and vegetable scraps
- Avoid citrus, onions, and spicy foods
- Keep the bin between 55°F and 77°F (13°C to 25°C)
- Turn the bedding gently to add air
Bin Smells
Bad smells usually happen from too much food or poor air flow. Worms need fresh air to stay healthy.
Remove extra food and mix the bedding to improve air flow. Avoid adding meat or dairy to the bin.
- Do not overfeed worms
- Mix bedding to add air
- Use dry bedding like shredded paper to absorb moisture
- Keep the bin in a cool, shaded area
Pest Prevention
Pests like fruit flies and ants can appear if the bin is not managed well. Cleanliness helps keep pests away.
Cover food scraps with bedding and close the bin lid tightly. Check the bin often and remove pests if found.
- Cover food with dry bedding
- Keep the bin lid closed
- Remove excess moisture to stop pests
- Use a tray under the bin to catch leaks
Frequently Asked Questions
What Materials Do I Need For A Worm Compost Bin?
You need a plastic or wooden container with a lid, bedding like shredded paper, red wiggler worms, and kitchen scraps. Ensure proper drainage and airflow in the bin for effective composting.
How Do I Start A Diy Worm Compost Bin?
Begin by preparing the bin with bedding, then add red wiggler worms. Feed them small amounts of kitchen scraps regularly. Keep the bin moist and in a cool, dark place for best results.
What Types Of Food Can Worms Eat In Compost?
Worms eat fruit and vegetable scraps, coffee grounds, and crushed eggshells. Avoid meat, dairy, oily foods, and citrus, as these can harm worms or cause odors.
How Often Should I Feed Worms In The Compost Bin?
Feed worms small portions every 2-3 days. Overfeeding can cause odors and attract pests. Monitor worm activity and adjust feeding amounts accordingly.
Conclusion
Creating your own worm compost bin helps reduce waste at home. It saves money on fertilizers and enriches your soil naturally. Worm composting is simple and fits small spaces well. Start with basic materials and watch worms turn scraps into rich compost.
Keep the bin moist and feed worms regularly. Enjoy fresh compost for your plants and a cleaner environment. Try it today and see how easy worm composting can be. Small steps make a big difference in gardening and waste management.