Have you noticed your pinking shears aren’t cutting as smoothly as they used to? When those zigzag edges start looking ragged, it’s a sign your shears need sharpening.
But how do you sharpen pinking shears without ruining their unique blades? If you want clean, precise cuts every time, you’re in the right place. Keep reading, and you’ll learn simple, effective ways to bring your pinking shears back to life—making your sewing projects easier and more professional.
Choosing The Right Tools
Sharpening pinking shears needs the right tools. Using proper tools makes the job easier and safer.
Choosing the right sharpening tools keeps the blades sharp and lasts longer.
Essential Sharpening Equipment
You need special tools to sharpen pinking shears well. These tools help keep the blade edges in good shape.
- Small diamond file for detailed sharpening
- Sharpening stone for smoothing edges
- Fine grit sandpaper for finishing touches
- Soft cloth to clean blades after sharpening
- Lubricating oil to keep shears moving smoothly
Choose tools that fit the size and shape of your pinking shears. This helps you sharpen evenly.
Safety Gear To Use
Wear safety gear to protect your hands and eyes while sharpening. Sharp blades can cause accidents.
- Protective gloves to prevent cuts
- Safety glasses to guard your eyes
- Clean workspace to avoid slips
- Good lighting to see blade edges clearly
Use safety gear every time you sharpen your pinking shears. It helps you work with confidence.
Preparing The Shears
Pinking shears are essential for fabric cutting. Proper maintenance ensures their longevity and effectiveness.
Before sharpening, prepare your shears by following a few key steps. This preparation makes the sharpening process smoother and more effective.
Cleaning The Blades
Cleaning the blades removes dirt and debris. This step is crucial for accurate sharpening.
- Use a soft cloth to wipe down the blades.
- Apply a mild soap solution for stubborn dirt.
- Dry thoroughly to prevent rust.
Disassembling The Shears
Disassembling the shears allows you to clean and sharpen each blade individually. This process enhances precision.
Handle the blades with care to avoid injury and damage. Keep track of all small parts for easy reassembly.
Sharpening Techniques
Keeping your pinking shears sharp helps them cut fabric cleanly. Dull blades can damage material and make cutting harder. This guide shows easy ways to sharpen your pinking shears at home.
Different tools and methods work well depending on what you have. Choose the right option to keep your shears working smoothly.
Using A Sharpening Stone
A sharpening stone can restore the sharp edges of pinking shears. Use a fine-grit stone for best results. Clean the blades before starting to remove dirt and fabric bits.
- Open the shears and hold the blade steady.
- Place the stone at the angle of the blade edge.
- Move the blade across the stone in a smooth motion.
- Repeat this several times on each blade.
- Wipe the blades clean and test the sharpness.
Employing A Diamond File
A diamond file is good for small, precise sharpening on pinking shears. It is especially useful for fixing small nicks and maintaining the zigzag edges.
| Tool | Use | Tip |
| Diamond File | Fine edge sharpening | File gently along blade edges |
| Sharpening Stone | Broad edge sharpening | Keep even pressure and angle |
| Sandpaper | Quick edge touch-up | Use fine grit and light strokes |
Alternative Methods
If you lack special tools, some household items help sharpen pinking shears. These can work in a pinch but use with care.
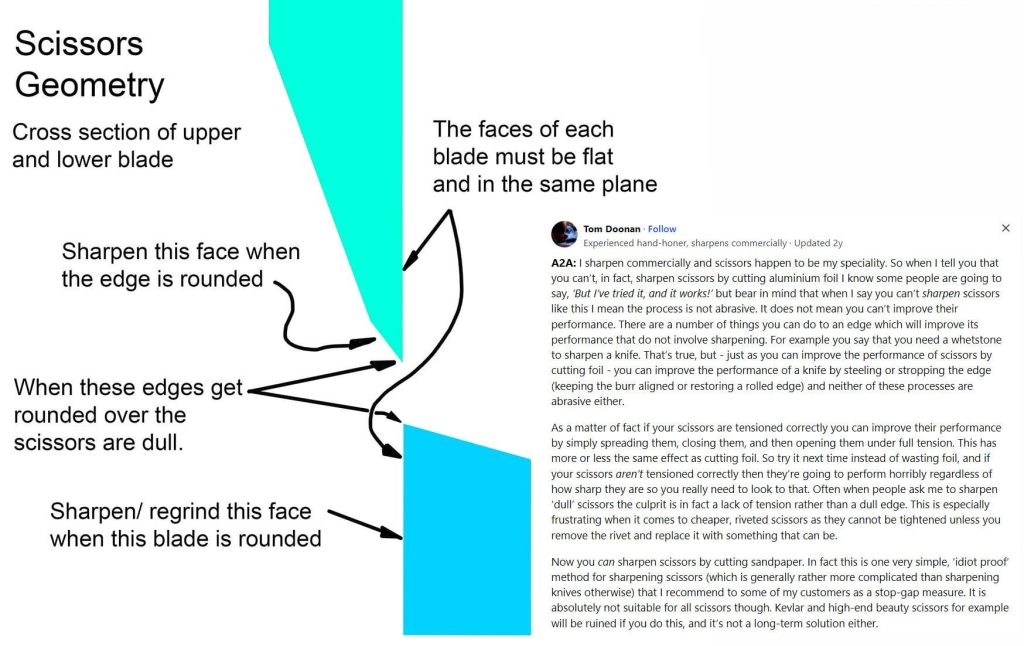
- Use aluminum foil folded several times. Cut it with the shears to sharpen edges.
- Rub the blades gently with fine sandpaper to restore sharpness.
- Try a piece of leather to polish and remove small burrs from the blades.

Credit: www.youtube.com
Reassembling And Testing
After sharpening your pinking shears, you need to put them back together. Then, check if they cut well. This step is important to make sure your shears work properly.
Careful reassembly and testing will help you get the best results from your sharpening work.
Putting The Shears Back Together
Start by aligning the blades carefully. Make sure the teeth fit into each other perfectly. This ensures smooth cutting.
Secure the blades with the screw or bolt you removed earlier. Tighten it just enough to keep the blades firm but able to move.
- Align blades so teeth interlock evenly
- Insert screw or bolt through the blade holes
- Tighten the screw until blades move smoothly without wobbling
- Check the handles fit comfortably
Checking The Cutting Performance
Test your pinking shears by cutting a piece of fabric. Use a scrap fabric to avoid damage to your project.
Look for clean, even zigzag cuts. If the edges are rough or the blades skip, you may need to adjust the blade tension or sharpen again.
- Cut a scrap piece of fabric
- Check if the zigzag edges are clean and even
- Adjust blade tension if blades are too loose or tight
- Sharpen again if cuts are uneven or dull
Maintenance Tips
Keeping your pinking shears sharp makes cutting easier and cleaner. Regular care helps the blades last longer.
Follow simple maintenance steps to keep your pinking shears in good condition.
Regular Cleaning Routine
After each use, clean your pinking shears to remove fabric fibers and dirt. Use a soft cloth to wipe the blades carefully.
- Open the shears fully before cleaning.
- Use warm, soapy water and a soft brush to clean the blades.
- Dry the blades completely to prevent rust.
- Apply a drop of sewing machine oil to the pivot point for smooth action.
Proper Storage Practices
Store your pinking shears safely to avoid damage and keep them sharp. Protect the blades and keep them dry.
| Storage Method | Benefit |
|---|---|
| Use blade covers or sheaths | Protects blades from nicks and dulling |
| Keep in a dry, cool place | Prevents rust and corrosion |
| Store separately from other tools | Avoids accidental damage |
When To Seek Professional Help
If your pinking shears become very dull or damaged, a professional sharpening service is best. They have the right tools to restore the blades.
- Blades that do not cut smoothly after cleaning.
- Visible chips or cracks on the blade edges.
- Difficulty opening or closing the shears.
- Rust spots that cannot be removed by cleaning.

Credit: blog.treasurie.com

Credit: www.youtube.com
Frequently Asked Questions
How Often Should I Sharpen Pinking Shears?
Sharpen pinking shears after every 6-12 months of use. Frequent sharpening keeps blades clean and cuts precise. Avoid dull blades to maintain fabric integrity and shear longevity.
What Tools Are Needed To Sharpen Pinking Shears?
You need a sharpening stone, fine file, or diamond sharpening tool. Use a soft cloth to clean blades before and after sharpening for best results.
Can I Sharpen Pinking Shears At Home?
Yes, you can sharpen pinking shears at home using a sharpening stone or file. Follow the blade angle carefully and sharpen each blade evenly for proper cutting.
Why Do Pinking Shears Become Dull Quickly?
Pinking shears dull faster due to cutting thick fabrics and improper use. Regular cleaning and proper storage help maintain blade sharpness and extend their life.
Conclusion
Sharpening pinking shears keeps your cuts clean and precise. Regular care helps them last longer and work better. Use simple tools like a sharpening stone or fine file. Take your time and follow the blade’s edge carefully. Avoid rushing to prevent damage or dullness.
Clean your shears after sharpening to remove metal dust. Practice this routine to enjoy smooth, zigzag cuts every time. Sharp pinking shears make sewing and crafting easier and more fun. Keep them sharp, and your projects will look great.