Are you struggling to get the most out of your engine’s performance? Adjusting your carburetor with a vacuum gauge might be the key to unlocking smoother rides and better fuel efficiency.
Imagine driving down the road with a perfectly tuned engine, feeling the power and smoothness that come with optimal performance. In this guide, you’ll discover how easy it is to adjust your carburetor using a vacuum gauge. This simple tool provides clear, accurate feedback, helping you fine-tune your engine like a pro.
Keep reading to learn the step-by-step process, and soon, you’ll be experiencing the thrill of driving with a perfectly adjusted carb.
Credit: www.vintage-mustang.com
Carburetor Basics
Understanding the basics of a carburetor is key before you start adjusting it with a vacuum gauge. The carburetor plays a vital role in mixing air and fuel in the right proportions to keep your engine running smoothly. Knowing how it works helps you make precise tweaks that improve performance and fuel efficiency.
Role Of A Carburetor
The carburetor controls the mix of air and fuel that enters your engine. Too much fuel makes the engine run rich, wasting gas and causing smoke. Too little fuel makes it run lean, which can lead to poor performance and engine damage.
Your carburetor must maintain a balance that matches engine demands at different speeds and loads. It does this using jets, needles, and the throttle plate, all working together to deliver the right mix. Adjusting any of these parts without understanding their role can cause more harm than good.
Why Tuning Matters
Tuning your carburetor with a vacuum gauge lets you see how well your engine breathes. The gauge measures the vacuum pressure inside the intake manifold, giving you clues about the engine’s efficiency. If the reading is off, it signals that your carburetor needs adjustment.
You might feel your engine sputter or hesitate during acceleration—these are signs tuning is needed. I once ignored a low vacuum reading and ended up with poor fuel mileage and rough idle. Fixing the carburetor based on vacuum readings made a noticeable difference in engine smoothness and power.
Have you noticed your engine’s behavior changing with the seasons? Temperature and altitude can affect the air-fuel mix, making tuning a necessary part of maintenance. Using a vacuum gauge helps you make these adjustments accurately without guesswork.
Vacuum Gauge Essentials
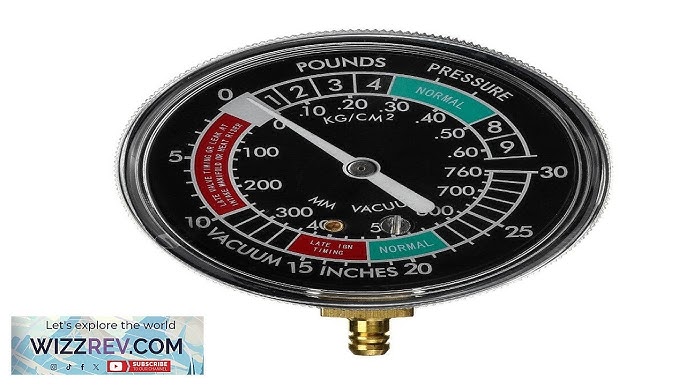
Understanding vacuum gauge essentials is key to adjusting carburetors properly. A vacuum gauge measures engine vacuum, helping detect air-fuel mixture issues. It guides tuning for smooth idling and better performance.
Choosing The Right Gauge
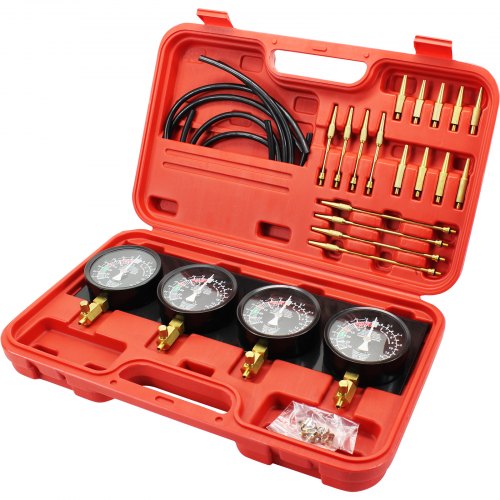
Select a gauge with clear, easy-to-read markings. Choose one that fits your vehicle’s vacuum hose size. Mechanical gauges are common and reliable for basic tuning. Digital gauges offer precise readings but cost more. Consider durability and ease of use. A good gauge lasts long and resists damage.
How It Works
The vacuum gauge connects to the intake manifold or carburetor. It reads pressure created when the engine pulls air. Higher vacuum means efficient engine operation. Lower vacuum signals leaks or poor carburetor settings. Watch the needle’s movement during idle and acceleration. Steady, smooth needle action indicates proper tuning.
Preparation Steps
Before you start adjusting the carburetor with a vacuum gauge, preparation is key to getting accurate results and avoiding any mishaps. Taking the time to gather the right tools and follow safety precautions can save you from frustration and potential damage. Ready to get your hands dirty? Let’s make sure you’re fully prepared.
Gathering Tools
Having the correct tools on hand is essential. You’ll need a reliable vacuum gauge, screwdrivers (usually flathead and Phillips), and a wrench set. Don’t forget a clean rag and some carburetor cleaner to wipe down surfaces as you work.
It’s also helpful to have your vehicle’s service manual nearby. This guide provides specific vacuum readings and adjustment points tailored to your engine. Imagine trying to tune without this—it’s like flying blind.
Safety Precautions
Safety should never be an afterthought. Make sure your engine is cool before starting to avoid burns. Working near a running engine means you must keep loose clothing and hair secured to prevent accidents.
Always work in a well-ventilated area. Exhaust fumes can build up quickly and pose serious health risks. Also, disconnect the battery if you’ll be working close to electrical components to prevent shorts or shocks.
Connecting The Vacuum Gauge
Connecting the vacuum gauge correctly is crucial to getting accurate readings for adjusting your carburetor. If you miss this step or do it incorrectly, your adjustments might lead to poor engine performance rather than improvement. Let’s focus on how to connect the gauge properly to avoid common pitfalls and ensure precise measurements.
Locating The Vacuum Port
Start by finding the vacuum port on your engine. This is usually a small nipple or fitting on the intake manifold or carburetor body. Sometimes it’s capped or plugged, so you may need to remove a cap carefully.
Look for a port labeled “vacuum” or check your vehicle’s manual if you’re unsure. If you don’t find a dedicated port, you can tap into a vacuum line, but make sure it’s not connected to an accessory like the brake booster. Have you ever tried connecting the gauge without knowing the right port? It often leads to false readings, which can waste your time.
Proper Attachment
Once you find the port, attach the vacuum gauge securely. Use a rubber hose that fits snugly over the vacuum port; it should create an airtight seal to prevent leaks. Avoid using cracked or brittle hoses because they can let air in, causing inaccurate readings.
Hold the gauge steady and check for any hissing sounds that indicate leaks. Sometimes using a small clamp or zip tie can keep the hose firmly in place during your adjustments. Remember, a loose connection means you’re working blind—how confident are you in your setup?
Adjusting The Carburetor
Adjusting the carburetor is key to improving engine performance. It controls the air and fuel mix for smooth running. Using a vacuum gauge helps find the best setting by showing engine vacuum changes. This process needs patience and small adjustments for accuracy.
Identifying Adjustment Screws
Locate the screws on the carburetor body. Usually, there are two types:
- Idle mixture screw:Controls fuel flow at idle speed.
- Idle speed screw:Adjusts the throttle plate position.
Check your carburetor manual to confirm screw locations. Use the right tools to avoid damage.
Reading Vacuum Levels
Connect the vacuum gauge to the intake manifold. Start the engine and let it warm up. Watch the gauge needle for stable readings. Higher vacuum means better engine efficiency.
Note the current vacuum level before adjusting. A steady vacuum indicates the engine runs well.
Making Incremental Changes
Turn the idle mixture screw slowly in small steps. Wait a few seconds after each turn to let the engine react. Watch for changes in vacuum level.
Stop adjusting when vacuum reaches its highest steady point. Then, fine-tune the idle speed screw for smooth engine operation.
Test the engine by revving slightly. Adjust again if needed for the best performance.
Fine-tuning For Performance
Fine-tuning your carburetor using a vacuum gauge improves engine performance and fuel efficiency. Precise adjustments help your engine run smoothly and respond better under different conditions. A vacuum gauge provides real-time feedback on how well the carburetor is balanced.
Small changes can make a big difference in idle stability and air-fuel mixture. Careful tuning avoids rough idling and poor fuel economy. The goal is to reach the best balance between power and smooth running.
Achieving Stable Idle
Stable idle means the engine runs evenly without shaking or stalling. Use the vacuum gauge to check the engine’s vacuum level at idle. A steady and consistent reading shows a healthy idle.
Adjust the idle screw slowly while watching the gauge. Aim for the highest steady vacuum value. Avoid rapid movements to prevent overshooting the ideal setting. This process reduces engine vibrations and keeps it running smoothly at low speeds.
Balancing Air-fuel Mix
The air-fuel mix controls engine power and emissions. A vacuum gauge helps detect if the mixture is too rich or too lean. Rich means too much fuel; lean means too much air.
Adjust the mixture screw while observing the vacuum reading. The best setting is where the vacuum reaches its peak and stays steady. This balance improves acceleration and fuel efficiency. It also prevents engine knocking and rough running.
Troubleshooting Tips
Troubleshooting is key when adjusting carbs with a vacuum gauge. Problems can arise from simple mistakes or faulty tools. Knowing common issues helps fix them fast. Understanding gauge reading anomalies ensures accurate adjustments. This section helps you spot and solve these problems smoothly.
Common Issues
- Vacuum gauge does not hold steady readings.
- Engine stalls or runs rough after adjustment.
- Gauge hose leaks or disconnects during use.
- Incorrect gauge placement on the carburetor.
- Dirty or clogged carburetor affecting vacuum.
- Ignoring engine temperature during adjustment.
- Using a damaged or low-quality vacuum gauge.
Gauge Reading Anomalies
- Fluctuating needle despite steady engine speed.
- Sudden drops in vacuum indicating air leaks.
- Gauge reading too high or too low for engine type.
- Inconsistent vacuum due to faulty gauge hose.
- Needle sticking or moving sluggishly.
- Readings change when other accessories run.
- Unusual readings at idle versus higher RPMs.
Credit: www.vevor.ca
Maintenance After Tuning
Maintenance after tuning your carburetor with a vacuum gauge keeps your engine running smoothly. Proper upkeep ensures the adjustments last longer. It prevents future performance problems and saves repair costs.
Regular care helps spot issues early. It also keeps fuel efficiency at its best. Follow simple steps to maintain your carburetor correctly after tuning.
Regular Checks
Check the vacuum gauge reading often. Look for sudden drops or unstable readings. Inspect vacuum lines for cracks or leaks. Clean the carburetor exterior to avoid dirt buildup. Verify throttle linkage moves freely and smoothly. Test engine idle speed and adjust if needed.
Use a checklist to track all checks. Regular monitoring helps catch small problems fast. It keeps your carburetor working at peak performance.
When To Recalibrate
Recalibrate the carburetor with the vacuum gauge after these signs:
- Engine stalls or runs rough at idle
- Reduced fuel efficiency or increased emissions
- Engine hesitation or poor throttle response
- After replacing carburetor parts or vacuum hoses
- Following long storage or seasonal changes
Recalibration restores correct air-fuel mix. It improves engine power and smoothness. Regular tuning checks avoid costly repairs and extend engine life.

Credit: www.vevor.ca
Frequently Asked Questions
What Is A Vacuum Gauge For Carb Adjustment?
A vacuum gauge measures engine vacuum to help tune the carburetor. It shows how efficiently air and fuel mix in the engine. Using it ensures smooth idle and better fuel economy by indicating the correct carburetor settings.
How Do You Connect A Vacuum Gauge To A Carburetor?
Connect the vacuum gauge hose to a vacuum port on the carburetor or intake manifold. Ensure a tight seal to avoid leaks. This connection allows the gauge to read the engine’s vacuum level for accurate carburetor adjustments.
What Vacuum Reading Indicates A Properly Adjusted Carburetor?
A stable vacuum reading around 17-22 inches of mercury (inHg) at idle indicates a well-tuned carburetor. Fluctuations or low vacuum suggest the need for adjustment. Aim for the highest steady vacuum for optimal engine performance.
How To Adjust Carburetor Using Vacuum Gauge Readings?
Adjust the idle mixture screw while watching the vacuum gauge. Turn slowly to find the highest steady vacuum reading. This ensures the best air-fuel ratio, improving engine idle smoothness and fuel efficiency.
Conclusion
Adjusting a carburetor with a vacuum gauge improves engine performance. It helps you find the right air and fuel mix. Use the gauge to check vacuum levels carefully. Small changes make big differences in how the engine runs. Keep tuning slowly and watch the gauge closely.
This simple tool saves time and avoids guesswork. Practice often to build your confidence. Your engine will run smoother and use fuel better. Simple steps lead to better rides and less engine trouble.