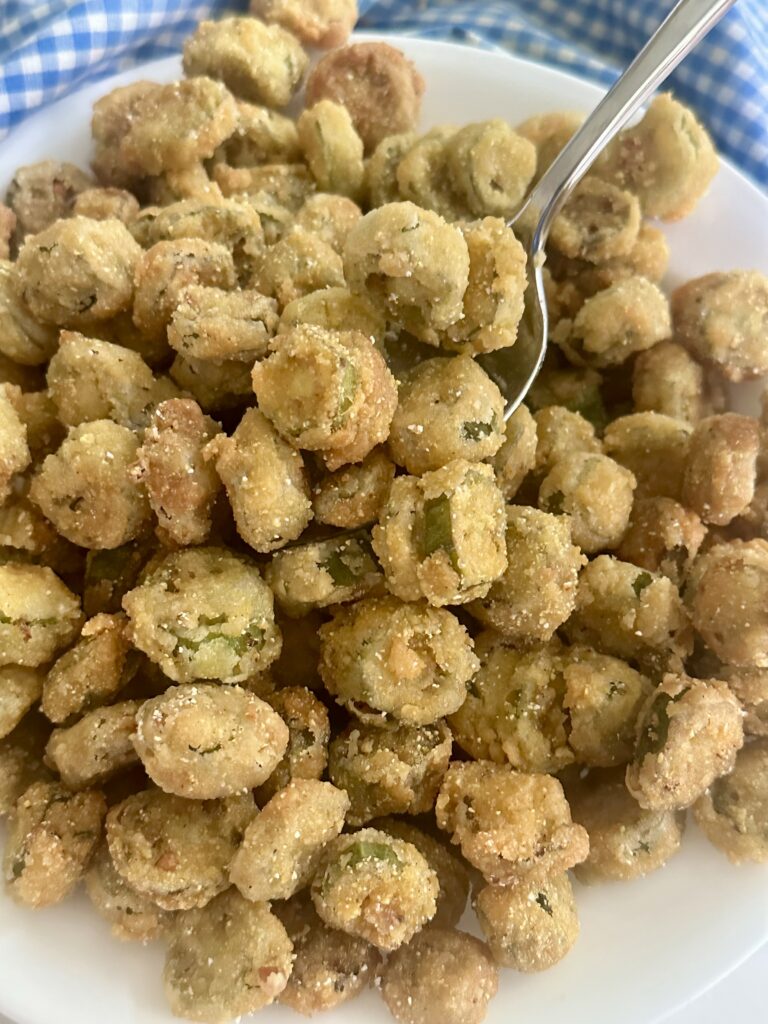
Do you love okra and want to enjoy its fresh taste all year round? Freezing okra is the perfect solution, and breading it before freezing adds an extra layer of texture and flavor that you’ll love.
Imagine reaching into your freezer to pull out crispy, breaded okra that tastes just like it was freshly prepared. It’s easier than you think, and you can do it right in your kitchen. In this guide, you’ll discover the simple steps to bread okra for freezing, ensuring that your favorite vegetable remains delicious and ready for quick meals whenever you crave it.
Get ready to transform how you store okra and keep that summer taste alive, even in the depths of winter. Dive in to learn the secrets of perfectly breaded, freezer-ready okra!

Credit: www.youtube.com
Choosing Fresh Okra
Choosing fresh okra is the key to getting the best results when breading and freezing it. Fresh okra holds its texture and flavor better, which means your frozen okra will taste almost like the day you picked it. Knowing how to spot fresh pods can save you time and disappointment later.
Selecting The Right Pods
Look for okra pods that are small to medium in size. These tend to be more tender and less fibrous. Avoid pods that look swollen or have dark spots, as these are signs they may be overripe or damaged.
Pick pods that feel firm when you gently squeeze them. Soft or mushy okra won’t hold up well during freezing and cooking.
Checking For Freshness
Fresh okra has a bright green color with a slight sheen. Dull or brownish pods indicate age or poor quality. You can also snap one pod to test freshness—a fresh pod breaks cleanly with a crisp snap.
Smell the okra as well. It should have a mild, earthy scent. Any sour or off smells suggest the okra is past its prime and not suitable for freezing.
Preparing Okra For Breading
Preparing okra properly before breading is key to achieving that perfect crispy texture once frozen and cooked. The right preparation helps the breading stick better and keeps the okra from becoming slimy. Let’s dive into the essential steps to get your okra ready for breading.
Washing And Drying
Start by rinsing your okra pods under cold running water to remove any dirt or residues. Avoid soaking them as okra absorbs water quickly, which can make the breading soggy later on.
Pat each pod dry thoroughly with a clean kitchen towel or paper towels. If the okra isn’t dry, the breading won’t adhere properly, and you’ll end up with clumps or a mushy texture after freezing.
Cutting Tips
Decide whether you want whole okra or sliced pieces. Sliced okra freezes and cooks faster but can release more slime if cut too thick or unevenly.
- Trim off the stem ends but keep the pods intact if you prefer whole pieces.
- For slices, aim for uniform thickness—about ½ inch works well to maintain crunch without overcooking.
- Use a sharp knife to make clean cuts; jagged edges increase slime release.
Have you noticed how unevenly cut okra affects your cooking results? Taking a few extra minutes to cut carefully will make a noticeable difference in texture and flavor after freezing.
Breading Ingredients
Breading okra before freezing helps keep it crispy and flavorful. The right ingredients create a crunchy coating. This coating protects the okra during freezing and cooking. Choosing simple, fresh ingredients improves the taste and texture. Below are the key ingredients for breading okra.
Essential Coating Components
- All-purpose flour: Forms the base layer for the breading.
- Cornmeal: Adds crunch and a slightly sweet flavor.
- Salt: Enhances the natural taste of okra.
- Black pepper: Provides a mild, spicy kick.
- Eggs or buttermilk: Helps the dry coating stick to the okra.
Optional Seasonings
- Paprika: Gives a subtle smoky flavor and color.
- Garlic powder: Adds a savory taste.
- Onion powder: Boosts the depth of flavor.
- Cayenne pepper: For a bit of heat.
- Dried herbs (like oregano or thyme): Introduce herbal notes.

Credit: www.youtube.com
Step-by-step Breading Process
Breading okra correctly before freezing is essential to preserve its texture and flavor. The process might seem simple, but setting up your station and mastering coating techniques can make a huge difference. Let’s break it down so you can achieve perfectly breaded okra every time.
Setting Up A Breading Station
Start by organizing your workspace with three separate shallow dishes. One for flour, one for beaten eggs, and one for your breading mixture. This setup keeps the process clean and efficient.
Choose a sturdy table or countertop where you can move easily between dishes. Have paper towels or a wire rack ready to place the breaded okra on afterward. This helps keep the coating crisp and prevents sogginess.
What flour works best? I prefer all-purpose flour for its light coating, but you can mix in cornmeal for extra crunch. For breading, seasoned breadcrumbs or a mix of cornmeal and spices work wonders. Don’t forget to beat your eggs well; they act as the glue holding everything together.
Coating Techniques
First, dip each okra piece into the flour, making sure it’s fully covered. Shake off the excess to avoid clumps in your final product. Then, dip it into the beaten eggs, letting any extra drip off gently.
Finally, roll the okra in your breading mix, pressing lightly so the coating sticks firmly. Avoid piling on too much breading; a thin, even layer crisps up better after freezing and frying. If you want extra crunch, double-dip by repeating the egg and breadcrumb steps.
Try to bread only a few pieces at a time to keep the coatings from getting soggy. How often do you find your breading falling off? This technique keeps it intact, even after freezing. Once breaded, lay the okra on a baking sheet in a single layer before freezing to prevent sticking.
Freezing Breaded Okra
Freezing breaded okra keeps its crispy texture and fresh flavor. Proper freezing prevents sogginess and preserves taste. Preparing okra correctly before freezing is key to great results.
Arranging For Freezing
Place breaded okra pieces on a baking sheet in one layer. Make sure pieces do not touch each other. This prevents them from sticking together during freezing. Freeze the tray for 1-2 hours until okra is firm. Once frozen, transfer the pieces into a freezer-safe container or bag.
Proper Storage Methods
Use airtight containers or heavy-duty freezer bags for storage. Remove as much air as possible before sealing. Label the container with the date to track freshness. Store the breaded okra at 0°F (-18°C) or lower. Frozen okra stays good for up to 3 months. Avoid thawing and refreezing to keep quality intact.

Credit: littlesproutslearning.co
Cooking Frozen Breaded Okra
Cooking frozen breaded okra is simple and fast. It keeps the okra crispy and tasty. Proper cooking methods make sure the okra is cooked evenly and stays crunchy.
Choose the right cooking style for your taste. Each method has benefits and small tricks to improve the result.
Baking Tips
- Preheat the oven to 425°F (220°C) for crispiness.
- Place okra in a single layer on a baking sheet.
- Use parchment paper to prevent sticking.
- Bake for 15-20 minutes, turning halfway.
- Watch closely near the end to avoid burning.
Air Frying Guide
- Set air fryer to 400°F (200°C).
- Arrange okra in one layer without overlap.
- Cook for 10-12 minutes, shaking basket once.
- Check for a golden brown color.
- Remove immediately to keep crisp texture.
Deep Frying Advice
- Heat oil to 350°F (175°C) in a deep pot.
- Fry small batches to avoid cooling oil.
- Cook okra for about 3-4 minutes.
- Drain on paper towels to remove excess oil.
- Serve hot for best crunch and flavor.
Troubleshooting Common Issues
Troubleshooting common issues helps improve your breaded okra for freezing. Simple mistakes can cause soggy or limp coating after thawing. Knowing how to fix these problems saves time and ensures tasty results.
Avoiding Soggy Coating
Soggy coating often happens if okra is wet before breading. Dry okra well with paper towels to remove moisture. Use cold water to rinse okra, then pat completely dry. Avoid stacking okra pieces before freezing to stop moisture buildup.
Use a light layer of coating. Thick batter traps moisture and makes soggy crust. Choose dry coatings like cornmeal or breadcrumbs instead of wet batters. Freeze okra on a single layer on a baking sheet first. After freezing, transfer to bags to keep coating crisp.
Maintaining Crispiness
Freeze okra quickly to keep coating crispy. Slow freezing creates ice crystals that damage texture. Spread okra pieces evenly to allow cold air circulation. Use airtight bags to block moisture and freezer odors.
Reheat breaded okra in the oven or air fryer for best crispiness. Avoid microwaving, which softens the coating. Preheat your oven to 400°F (200°C) and bake for 15-20 minutes. Turn okra halfway through cooking for even crunch.
Frequently Asked Questions
How Do You Prepare Okra For Freezing?
Wash and dry okra thoroughly. Trim the stems without cutting pods. Slice or leave whole, then coat with seasoned flour for breading.
What Is The Best Breading For Freezing Okra?
Use a mixture of cornmeal, flour, salt, and spices. This coating crisps well and freezes without becoming soggy after cooking.
Can I Freeze Breaded Okra Without Frying First?
Yes, freeze breaded okra on a tray before bagging. Fry or bake directly from frozen for best texture.
How Long Can Breaded Okra Stay Frozen?
Properly stored, breaded okra lasts up to 6 months in the freezer. Use airtight containers or freezer bags to prevent freezer burn.
Conclusion
Breaded okra stays crisp and tasty even after freezing. This method saves time for future meals. You get a crunchy snack anytime you want. Preparing okra this way keeps it fresh longer. Try it and enjoy okra without waste. Simple steps make your cooking easier and faster.
Now, you can enjoy okra all year round. Give it a try and see the difference.