Are you looking to grow your own fresh veggies or flowers but worried about space, back pain, or cost? Building a raised garden bed with legs might be the perfect solution for you.
It keeps your plants off the ground, makes gardening easier on your knees, and can fit nicely on a patio or balcony. Best of all, you don’t need to spend a lot of money to create one yourself. In this guide, you’ll discover simple, budget-friendly steps to build a sturdy raised garden bed with legs that suits your space and needs.
Keep reading, and you’ll be planting your first seeds before you know it!
Materials Needed
Building a raised garden bed with legs is simple and affordable. You only need a few materials to get started. This guide focuses on cheap options that still last well.
Choosing the right materials helps you save money and build a sturdy garden bed. Below are the main items you will need.
Affordable Wood Options
Wood is the main material for your raised garden bed. Pick wood that is cheap but strong. Avoid wood treated with harmful chemicals since plants will grow close to it.
Common affordable wood types include pine, cedar, and fir. Pine is the cheapest but may not last as long. Cedar resists rot and insects but costs a bit more. Fir is a good middle option.
- Pine: low cost, may need sealing
- Cedar: naturally resistant, lasts longer
- Fir: affordable and durable
- Reclaimed wood: eco-friendly and cheap
Basic Tools Required
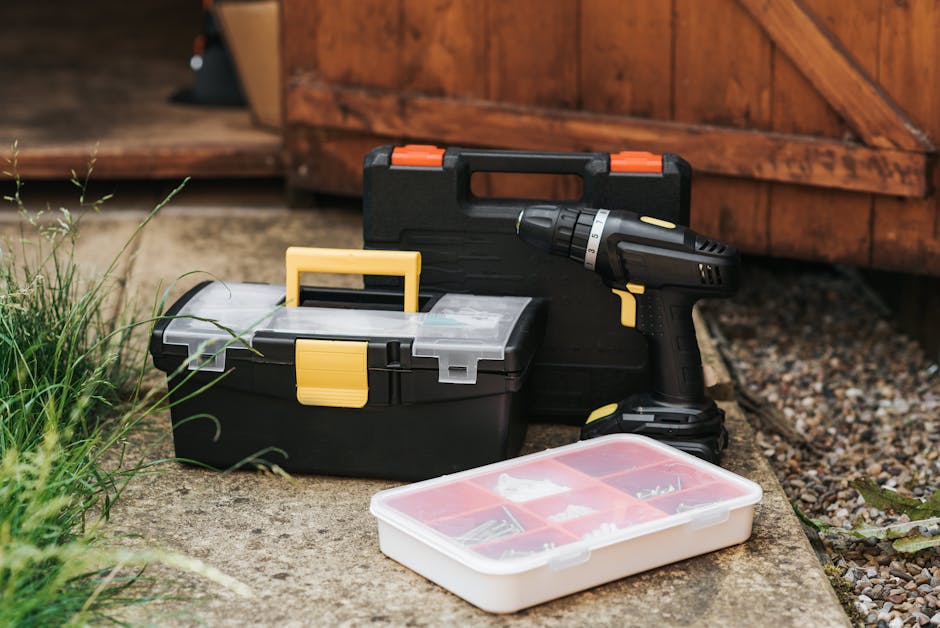
You need some basic tools to cut and assemble the wood. Most of these are common in home toolkits. Using the right tools makes the job easier and faster.
- Handsaw or circular saw for cutting wood
- Drill with screwdriver bits
- Measuring tape
- Pencil to mark cuts
- Hammer or rubber mallet
- Level to check evenness
Additional Supplies
Besides wood and tools, some extra supplies help build a strong raised bed with legs. These items improve stability and protect the wood.
- Galvanized screws or nails to prevent rust
- Wood glue for extra hold
- Sandpaper to smooth edges
- Wood sealant or non-toxic paint to protect wood
- Plastic or metal corner braces for stronger joints
- Leg supports, like 4×4 posts or sturdy scrap wood
Credit: www.hgtv.com
Choosing The Location
Picking the right spot for your raised garden bed is very important. The location affects how well your plants will grow.
This guide covers sunlight, drainage, and space to help you find the best place.
Sunlight And Drainage
Your garden bed needs enough sunlight. Most vegetables need at least six hours of sun daily.
- Choose a spot that gets morning and afternoon sun.
- Avoid shady areas near tall trees or buildings.
- Check if water drains well after rain.
- Make sure the soil does not stay wet for long.
Space Considerations
Think about the space around your garden bed. You need room to work and move.
| Space Aspect | Recommendation |
| Path Width | At least 2 feet wide for easy access |
| Bed Size | Limit width to 4 feet for reaching inside |
| Nearby Structures | Keep beds 1 foot away from fences or walls |
| Future Expansion | Leave extra space for more beds later |
Designing The Bed
Building a raised garden bed with legs is a budget-friendly project. It saves space and makes gardening easier.
Designing the bed correctly ensures it fits your needs and space. Let’s explore the ideal dimensions and leg height options.
Ideal Dimensions
The size of your garden bed depends on your available space. Most garden beds are rectangular or square in shape.
A common size for a raised bed is 4 feet by 8 feet. This size allows you to reach the center from either side easily.
- 4 feet by 4 feet for smaller spaces
- 4 feet by 8 feet for larger gardens
- Keep width under 4 feet for easy access
Leg Height Options
Leg height affects how comfortable the bed is to use. Consider your height and how you garden.
Standard leg height is around 2 feet. This is a good choice for most people. It provides a comfortable working height and allows for easy access.
- 12 inches for a low profile
- 24 inches for standard height
- 30 inches for taller individuals
Cutting The Wood
Cutting wood is an important step to build a raised garden bed with legs. You need to make sure your pieces are the right size and shape. Accurate cuts help the bed fit well and stand strong.
Safety is key while cutting. Use the right tools and follow safe practices to avoid injuries. This guide explains how to measure, mark, and cut wood safely and accurately.
Measuring And Marking
Measure your wood pieces carefully before cutting. Use a tape measure to get exact lengths. Mark the cut lines clearly with a pencil to guide your saw.
- Measure twice to avoid mistakes
- Use a square tool for straight lines
- Mark both ends of the wood
- Label each piece if needed
- Check measurements against your garden bed plan
Safe Cutting Techniques
Use safety gear like goggles and gloves before cutting. Keep your work area clean and well-lit. Hold the wood firmly or clamp it to avoid movement.
| Tool | Safety Tip |
| Handsaw | Cut slowly and steady, keep fingers away |
| Circular saw | Wear eye protection and use a guide for straight cuts |
| Miter saw | Clamp wood firmly and use the guard |
Assembling The Frame
Building a raised garden bed with legs is simple and cost-effective. The frame holds the soil and plants firmly in place. You will learn how to build strong walls and attach legs for support.
Use basic tools and affordable wood to assemble the frame. Follow clear steps to ensure your garden bed is sturdy and lasts long.
Building The Walls
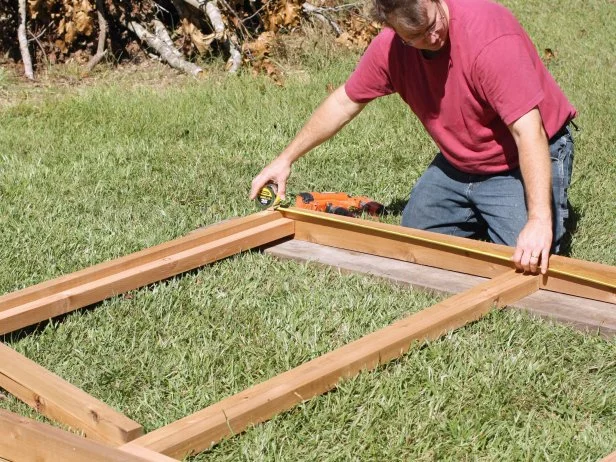
Start by cutting wood boards for the walls. The length depends on your garden bed size. Join boards to form a rectangular frame.
- Cut four boards: two long and two short for corners.
- Align boards to form a rectangle on a flat surface.
- Use screws or nails to fasten corners tightly.
- Check that the frame is square using a carpenter’s square.
- Sand edges to remove splinters for safety.
Attaching The Legs
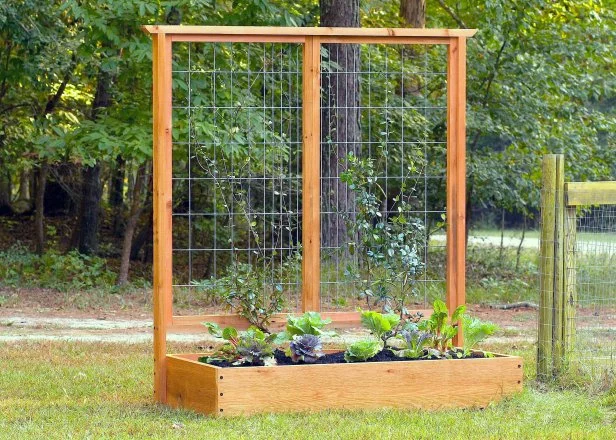
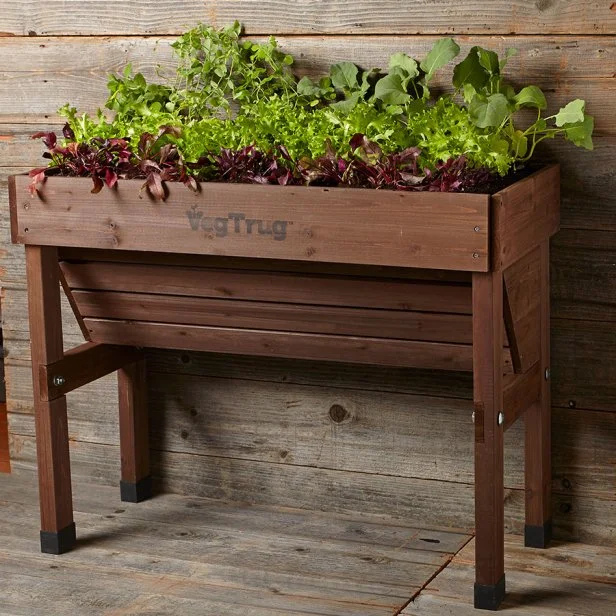
Legs lift the garden bed off the ground. This improves drainage and makes gardening easier. Attach legs firmly to each corner of the frame.
| Leg Material | Recommended Length | Attachment Method |
| Wood 2×2 | 12 inches | Screws through frame into leg |
| Metal Pipes | 12 inches | Brackets and screws |
| Recycled Wood | Varies | Nails or screws |
Credit: www.hgtv.com
Securing The Structure
Building a raised garden bed with legs needs a strong frame. Securing the structure makes it last longer. It keeps the bed steady and safe for your plants.
Use simple tools and materials to hold the parts tightly. This guide covers screws, brackets, and ways to make the bed stable.
Using Screws And Brackets
Screws hold wooden pieces better than nails. They stop the parts from moving or pulling apart. Choose screws that resist rust for outdoor use.
Brackets add extra support at corners and joints. Use L-shaped or corner brackets to connect legs and sides. This keeps the bed square and strong.
- Pick galvanized or stainless steel screws
- Pre-drill holes to avoid wood splitting
- Attach brackets on inside corners for neat look
- Tighten screws fully without cracking wood
Reinforcing Stability
Stability stops the bed from tipping or wobbling. Add cross braces between legs to hold them firm. Use strong wood or metal strips for braces.
Place the raised bed on flat ground. Check that all legs touch the soil evenly. This helps spread weight and prevents leaning.
- Install diagonal braces between legs
- Use wood glue for extra hold alongside screws
- Check and tighten screws regularly
- Level the bed before filling it with soil
Preparing The Bed
Building a raised garden bed with legs needs good preparation. This helps plants grow well and keeps the bed lasting long.
Start by making sure the bottom of the bed is ready. Use the right materials to stop weeds and keep soil in place.
Adding Landscape Fabric
Landscape fabric stops weeds from growing up into your garden bed. It also lets water pass through to the soil.
- Clear the ground of grass and rocks before placing the fabric.
- Cut the fabric to fit the size of the bed base.
- Lay the fabric flat and smooth out any wrinkles.
- Secure the edges with landscape staples or small rocks.
Filling With Soil Mix
Use a good soil mix to help your plants grow strong. A mix of different materials works best for raised beds.
| Soil Component | Purpose | Recommended Amount |
| Topsoil | Main growing medium | 50% |
| Compost | Adds nutrients | 30% |
| Peat moss or coconut coir | Retains moisture | 15% |
| Perlite or sand | Improves drainage | 5% |
Maintenance Tips
Maintaining your raised garden bed with legs is easy if you follow some simple care tips. Proper maintenance helps the bed last longer and keeps plants healthy.
Focus on protecting the wood and doing seasonal care. These steps prevent damage and keep the bed sturdy.
Protecting The Wood
Wood is the main part of your garden bed, so it needs protection from water and insects. Use natural oils or wood sealants made for outdoor use. Avoid harsh chemicals near plants.
- Apply a wood sealant every 1-2 years
- Check for cracks or splinters regularly
- Sand rough spots to prevent injury and wood damage
- Keep the wood dry by placing the bed on legs
- Use cedar or redwood for natural resistance
Seasonal Care
Season changes affect your garden bed. Prepare it for cold winters and hot summers to protect the wood and soil quality.
| Season | Care Tips |
| Spring | Remove debris, check soil drainage, and apply mulch |
| Summer | Water regularly, shade if needed, and check for pests |
| Fall | Clear dead plants, add compost, and cover soil |
| Winter | Protect wood with tarps and remove snow buildup |
Credit: www.hgtv.com
Frequently Asked Questions
What Materials Are Best For Cheap Raised Garden Beds?
Affordable wood like pine or cedar works well. Use untreated lumber to avoid chemicals. Recycled pallets or scrap wood also reduce costs and are eco-friendly options.
How Do I Build Legs For A Raised Garden Bed?
Cut sturdy wooden boards to desired leg height. Attach legs securely to bed corners with screws. Ensure stability by reinforcing legs with braces if needed.
Can I Build A Raised Garden Bed Without Tools?
Basic tools like a drill and saw help. Some kits come pre-cut for easy assembly. Otherwise, simple hand tools can suffice but may require more effort.
How Deep Should A Raised Garden Bed Be?
Aim for at least 12 inches depth. This allows roots to grow well and supports healthy plants. For root vegetables, consider 18 inches or more.
Conclusion
Building a raised garden bed with legs can save money and space. Use simple materials and follow easy steps to create one yourself. This project suits small areas and helps keep plants healthy. Raised beds with legs also protect plants from pests and improve soil drainage.
Start small and grow your garden step by step. Enjoy fresh vegetables or flowers from your own raised bed. Gardening becomes fun and affordable this way. Try it today and see the difference in your garden!