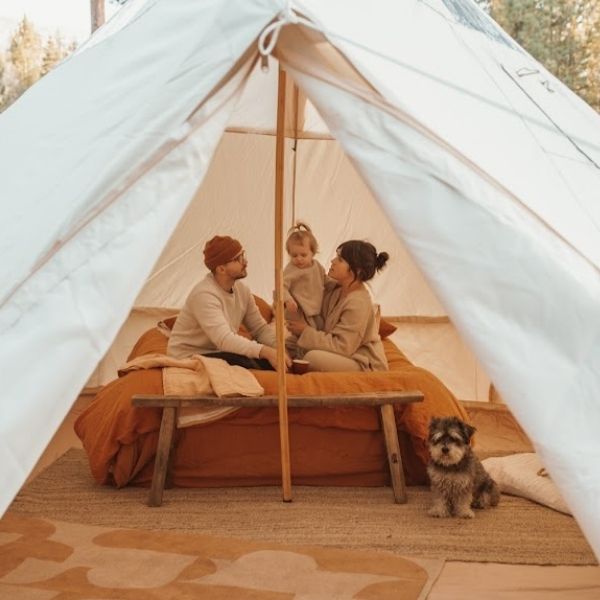
Are you tired of setting up your tent on uneven, rocky ground? Building a tent platform can change your camping experience completely.
It gives you a stable, flat surface that keeps your tent dry and comfortable. Imagine waking up without aches from sleeping on hard soil or dealing with mud after rain. In this guide, you’ll learn simple steps to create your own tent platform using basic materials.
Whether you’re a beginner or an experienced camper, this will help you enjoy your outdoor trips more. Ready to make your camping setup better? Let’s get started!
Choosing The Right Location
Building a tent platform starts with picking the best place. The right location keeps your tent safe and stable.
Look at the ground, weather, and surroundings before you build. These details help you make a good choice.
Assessing Ground Conditions
Check if the ground is flat and firm. Soft or uneven soil can make the platform unsafe.
Avoid wet or muddy areas. They can cause your platform to sink or rot over time.
- Look for flat spots with firm soil
- Stay away from soggy or swampy ground
- Clear the area of rocks and roots
Avoiding Natural Hazards
Find a place away from hazards like floods or falling branches. Safety is key for your platform.
Check for steep slopes or areas prone to landslides. These spots are risky for building.
- Avoid low spots that can flood
- Keep clear of dead trees or loose rocks
- Watch out for animal trails or nests
Considering Sun And Wind Exposure
Think about how the sun moves over the site. Shade can keep your tent cooler during the day.
Look at the usual wind direction. Place your platform where strong winds will not hit it directly.
- Choose a spot with some natural shade
- Face the platform away from strong winds
- Use trees or bushes as windbreaks

Credit: www.youtube.com
Selecting Materials
Building a sturdy tent platform starts with choosing the right materials. The materials must be strong and able to resist outdoor weather.
Good materials make the platform safe and long-lasting. You need to think about wood types and extra tools before you begin.
Types Of Wood Suitable For Platforms
Choose wood that is durable and resists rot. Cedar and pressure-treated pine are popular choices. Redwood is also good but can be costly.
- Cedar:Naturally resists insects and decay.
- Pressure-Treated Pine:Affordable and treated to resist rot.
- Redwood:Durable and looks nice but more expensive.
- Douglas Fir:Strong and widely available.
- Spruce:Lightweight but less resistant to moisture.
Additional Hardware And Tools Needed
You will need hardware and tools to build the platform. These items help hold the wood together and make the work easier.
| Hardware/Tool | Purpose |
| Galvanized Screws | Prevent rust and hold wood tightly |
| Metal Brackets | Strengthen corners and joints |
| Measuring Tape | Measure wood and space accurately |
| Power Drill | Make holes and drive screws |
| Level | Ensure platform is flat and even |
| Hand Saw or Circular Saw | Cut wood to correct sizes |
| Safety Gear | Protect eyes, hands, and ears |
Designing Your Platform
Designing a tent platform helps you create a sturdy base for your tent. A good design keeps your tent dry and level.
Think about the size and frame before building. This makes the construction easier and safer.
Determining Platform Size
Measure your tent to know the platform size. The platform should be slightly larger than the tent floor.
Leave extra space for gear and walking around the tent. This helps keep your area clean and safe.
- Measure tent length and width
- Add 1 to 2 feet on each side
- Consider extra space for gear storage
- Plan for easy entry and exit
Planning The Frame Structure
Choose strong materials like wood or metal for the frame. The frame supports the platform and keeps it level.
Plan the frame with cross beams for extra strength. Make sure the frame fits the platform size.
- Use pressure-treated wood for durability
- Place beams evenly under the platform
- Add support posts if the ground is uneven
- Check all joints for tightness

Credit: blog.whiteduckoutdoors.com
Preparing The Site
Building a tent platform starts with preparing the site. You need a flat, clean space. This makes the platform stable and safe.
Good preparation helps your tent last longer. It also keeps you comfortable during your stay.
Clearing And Leveling The Ground
Remove all plants, rocks, and debris from the area. This gives you a smooth surface to work on.
Next, check the ground for slopes. Use a shovel or rake to level the soil. A flat base prevents the platform from wobbling.
- Clear sticks, stones, and leaves
- Use a rake to smooth the soil
- Fill holes with dirt or sand
- Remove bumps for a flat surface
Marking Platform Boundaries
Mark the edges of your platform with stakes or flags. This shows where to build and keeps the shape correct.
Measure the size before marking. Use a tape measure and string to outline the exact shape. This helps avoid mistakes.
- Decide platform size
- Place stakes at corners
- Stretch string between stakes
- Check measurements twice
Building The Frame
Building a tent platform frame creates a solid base for your tent. It keeps your tent off the ground and protects it from moisture and uneven surfaces.
This guide explains how to cut and assemble the frame pieces and ensure the structure is stable and strong.
Cutting And Assembling Frame Pieces
Start by measuring the area where you want to build the platform. Use wood that is strong and weather-resistant, like cedar or treated pine.
- Cut four long beams for the outer frame to the platform size.
- Cut shorter pieces for the internal supports to add strength.
- Sand the edges to avoid splinters and improve fit.
- Pre-drill holes to prevent the wood from splitting.
- Use galvanized screws for assembly to avoid rust.
Assemble the outer frame first, then add the internal supports evenly spaced for balance.
Ensuring Stability And Support
Check that the frame is level and firm before adding the platform surface. A stable frame prevents wobbling and damage.
| Tip | Reason |
| Use corner brackets | Reinforces joints and adds strength |
| Place frame on flat ground | Prevents rocking and uneven weight |
| Add center supports | Stops sagging under weight |
| Secure frame to ground | Keeps platform in place in wind |

Credit: blog.whiteduckoutdoors.com
Installing The Decking
Building a strong tent platform needs proper decking installation. This part is key to make your platform safe and durable. Follow simple steps to space and secure the boards well.
Also, using the right weatherproofing methods will keep your platform in good shape. This guide covers both spacing and securing deck boards and weatherproofing techniques.
Spacing And Securing Deck Boards
Proper gaps between deck boards help with water drainage and wood expansion. Secure boards tightly to keep the platform steady. Use strong screws made for outdoor use.
- Leave a ¼ inch gap between each board for drainage.
- Use galvanized or stainless steel screws to avoid rust.
- Drive screws at least 1 ½ inches into the joists below.
- Check that boards lie flat before securing them.
- Space screws about every 12 inches along each board.
Weatherproofing Techniques
Protect your decking from rain and sun to extend its life. Use sealants and stains made for outdoor wood. Reapply them every year for best results.
| Method | Purpose | Frequency |
| Wood Sealer | Blocks water absorption | Every 12 months |
| UV-Resistant Stain | Prevents sun damage and fading | Every 12 months |
| Waterproof Paint | Protects from moisture and wear | Every 2 years |
Final Touches
Building a tent platform is almost done. The last steps make it safe and long-lasting.
These final touches help your platform stay stable and easy to use for years.
Adding Anchors For Stability
Anchors keep your tent platform steady during wind or rain. Secure the platform firmly to the ground.
Use strong stakes or bolts depending on the ground type. Check that all anchors are tight and not loose.
- Drive stakes deep into solid soil
- Use concrete anchors on rocky ground
- Tighten all bolts and fasteners
- Test platform stability by pushing gently
Maintaining Your Tent Platform
Keep your tent platform clean and dry. Remove dirt and leaves regularly to prevent damage.
Check for loose boards or nails each season. Repair or replace parts to avoid accidents.
- Clean surface with a brush or hose
- Inspect for cracks or splits in wood
- Tighten screws and nails if loose
- Apply wood sealant to protect from water
Frequently Asked Questions
What Materials Do I Need For A Tent Platform?
To build a tent platform, you’ll need pressure-treated lumber, screws, a saw, a drill, and a level. Consider using deck boards for the surface. Gather these materials to ensure stability and durability. Proper tools and materials make construction easier and improve the platform’s longevity.
How Do I Choose A Location For My Tent Platform?
Select a flat, elevated spot away from water sources to prevent flooding. Ensure there’s enough space for your tent and any additional equipment. Consider nearby trees for shade and wind protection. Choosing the right location enhances comfort and safety during your camping trip.
How Do I Level The Ground For A Tent Platform?
Clear debris and use a shovel to even out the ground. Use a level tool to check for flatness. Adjust as necessary for stability. A flat surface ensures a stable and comfortable platform, preventing structural issues during use. Proper leveling is crucial for a successful build.
What Size Should My Tent Platform Be?
Your tent platform should be slightly larger than your tent’s footprint. This provides space for entry and gear storage. Consider future needs or additional equipment when determining size. A well-sized platform enhances comfort and functionality, making your camping experience more enjoyable.
Conclusion
Building a tent platform makes camping safer and more comfortable. It keeps your tent dry and stable on uneven ground. Using simple tools and materials, anyone can create one. The steps are clear and easy to follow. Take your time and measure carefully.
A good platform will last for many trips. Enjoy your outdoor adventures with a solid base. Simple preparation leads to better camping experiences. Give it a try on your next trip!