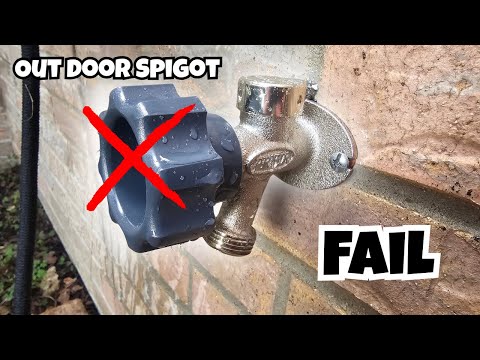
Is your garden hose faucet leaking or not working right? Changing it might seem tricky, but you can do it yourself with just a few simple steps.
Imagine having a faucet that works perfectly every time you water your plants or wash your car. In this guide, you’ll learn exactly how to change your garden hose faucet quickly and without stress. By the end, you’ll save money, avoid a plumber’s wait, and keep your garden happy.
Let’s get started!
Tools And Materials Needed
Changing a garden hose faucet is a simple task. Having the right tools and materials makes the job easier. This guide covers what you need to get started.
Gather all tools and materials before you begin. This helps you work safely and quickly.
Adjustable Wrench
An adjustable wrench fits different sizes of faucet nuts. It helps you loosen and tighten the old and new faucet securely.
Choose a wrench that feels comfortable in your hand. This tool is essential for removing the old faucet without damage.
Pipe Thread Seal Tape (teflon Tape)
Pipe thread seal tape prevents leaks by sealing the faucet threads. Wrap it around the faucet threads before installing the new faucet.
Make sure to wrap the tape clockwise to avoid unraveling during installation.
Replacement Garden Hose Faucet
Pick a new faucet that matches your hose connection and water supply size. Most garden faucets have standard sizes, but check to be sure.
Look for a durable faucet made of brass or stainless steel for long-lasting use.
Bucket Or Container
A bucket or container helps catch any water left in the pipe when you remove the old faucet. This keeps the work area dry and clean.
Rag Or Cloth
Use a rag to clean the faucet area and wipe off any water spills. It also protects the faucet threads from dirt before installation.
Plumber’s Putty Or Silicone (optional)
You can use plumber’s putty or silicone around the faucet base to prevent leaks. This is optional but helpful for extra sealing.

Credit: www.familyhandyman.com
Shutting Off The Water Supply
Before you change a garden hose faucet, you need to stop the water flow. This step keeps you safe and avoids water damage.
Turning off the water supply is simple. You just need to find and close the right valve.
Locate The Main Water Valve
Find the main water valve for your house. It usually sits near the water meter or where the pipe enters your home.
Closing this valve stops water from flowing to all faucets, including the garden hose faucet.
- Look near the basement, garage, or outside walls
- Check for a round wheel or a lever handle
- Make sure you can reach it easily
Turn Off The Water Supply Valve
Once you find the valve, turn it off to stop the water flow. Turn the wheel clockwise or flip the lever to the off position.
Turn slowly and firmly until it stops. Do not force it if it feels stuck.
- Use a wrench if the valve is hard to turn
- Turn gently to avoid breaking old valves
- Ask for help if unsure about the valve
Release Pressure From The Hose
Open the garden hose faucet to let out any water inside the hose. This step prevents leaks and spills.
Let the water drain completely before you begin removing the faucet.
- Turn on the faucet after closing the valve
- Wait until water stops flowing
- Close the faucet again once empty
Removing The Old Faucet
Changing your garden hose faucet is a simple task. First, you need to remove the old faucet. This guide will show you how to do it step by step.
Follow these instructions to disconnect the hose and unscrew the faucet. You will need basic tools and a little patience.
Disconnecting The Hose
Turn off the water supply before starting. This prevents leaks and water waste. Next, locate the hose attached to the faucet.
Grip the hose connector with your hand. Turn it counterclockwise to loosen. If it is tight, use pliers for a better grip.
- Ensure the water is completely off
- Gently twist the hose to avoid damage
- Check for any residual water in the hose
Unscrewing The Faucet
After removing the hose, focus on the faucet. Use a wrench to grip the base of the faucet. Turn it counterclockwise to unscrew.
If the faucet is stuck, apply some penetrating oil. Wait a few minutes and try again. This helps loosen any rust or debris.
- Use a pipe wrench for better leverage
- Protect the pipe with a cloth to avoid scratches
- Take note of the faucet type for replacement
Preparing The New Faucet
Before installing your new garden hose faucet, you must prepare it properly. Proper preparation helps avoid leaks and ensures a good fit.
This guide covers two key steps: checking for compatibility and applying thread seal tape.
Checking For Compatibility
Check that the new faucet matches your water supply pipe and hose size. Using the wrong size can cause leaks or damage.
| Faucet Feature | What to Check |
|---|---|
| Thread Size | Make sure threads match your pipe (e.g., 3/4 inch) |
| Material | Choose brass or metal for durability |
| Valve Type | Pick a valve that suits your watering needs |
| Hose Connection | Confirm it fits your hose size and type |
Applying Thread Seal Tape
Thread seal tape helps create a watertight seal between the faucet and pipe. Apply it carefully for best results.
- Start at the end of the faucet threads
- Wrap tape clockwise around the threads
- Cover threads evenly with 3 to 4 layers
- Press tape down to smooth it out
- Do not overlap tape onto the pipe end
Installing The New Faucet
Installing a new garden hose faucet is a simple task. It helps to replace a leaking or old faucet. This guide will explain how to attach and secure the new faucet correctly.
Make sure you have all the tools ready before you start. This will make the process smooth and safe.
Attaching The Faucet
First, prepare the faucet and the pipe. Clean the pipe threads to remove old tape or dirt. Then, wrap new plumber’s tape around the pipe threads. This helps stop leaks.
- Hold the faucet firmly.
- Turn the faucet clockwise onto the pipe threads.
- Hand-tighten the faucet until it is snug.
- Check that the faucet is straight and aligned.
Tightening And Securing
Use a wrench to tighten the faucet. Do not overtighten it to avoid damage. Make sure the faucet is secure and does not move.
| Tool | Purpose | Tip |
|---|---|---|
| Adjustable Wrench | Tighten faucet | Apply gentle pressure to avoid stripping threads |
| Plumber’s Tape | Seal pipe threads | Wrap 3-4 times around threads |
| Rag | Clean pipe threads | Remove old tape and dirt |

Credit: www.youtube.com
Testing For Leaks
After changing your garden hose faucet, it is important to check for leaks. Leaks waste water and can cause damage over time. Testing helps you find and fix problems early.
Follow the steps below to test your new faucet. Look closely at all connections and the faucet itself.
Turning The Water Back On
Slowly turn the main water supply back on after installing the faucet. Doing this gently helps prevent sudden pressure that might cause leaks.
Watch the faucet and hose as water begins to flow. Listen for any dripping sounds or see if water pools around the connections.
Inspecting Connections
Check all joints where the faucet connects to the water pipe and the hose. Tighten any loose fittings with a wrench or pliers.
- Look for water droplets or wet spots around fittings
- Feel for moisture with your hand if you do not see leaks
- Use plumber’s tape if threads look damaged or loose
Tips For Maintenance
Taking care of your garden hose faucet helps it last longer. Regular maintenance stops leaks and damage.
Use simple checks and steps to keep your faucet working well all year. This guide covers regular inspection and winterizing.
Regular Inspection
Check your garden hose faucet often for signs of wear. Look for leaks, cracks, or rust around the faucet and handle.
- Turn the faucet on and off to feel for stiffness or leaks.
- Inspect the hose connection for cracks or worn washers.
- Clear debris or dirt from the faucet area to avoid clogs.
- Replace washers or seals if water drips when the faucet is off.
Winterizing The Faucet
Prepare your faucet for cold weather to prevent freezing and bursting. Drain all water before winter comes.
| Winterizing Task | Why It Matters |
|---|---|
| Turn off the water supply to the faucet | Stops water from freezing in the pipes |
| Disconnect the garden hose | Prevents trapped water from freezing and damaging the hose |
| Drain water from the faucet and hose | Removes water that can freeze and crack the faucet |
| Cover the faucet with an insulated cover | Keeps the faucet warm and safe during cold weather |

Credit: www.youtube.com
Frequently Asked Questions
How Do I Replace A Garden Hose Faucet Step-by-step?
First, turn off the water supply. Remove the old faucet using a wrench. Apply plumber’s tape to new faucet threads. Screw on the new faucet tightly. Turn on water and check for leaks.
What Tools Are Needed To Change A Garden Hose Faucet?
You need an adjustable wrench, plumber’s tape, and a replacement faucet. Optionally, use pipe sealant for extra leak protection. A bucket and rag help with cleanup.
How Do I Prevent Leaks After Changing The Faucet?
Use plumber’s tape on all threaded connections. Tighten the faucet securely but avoid over-tightening. Check for leaks by slowly turning on water. Re-tighten if needed.
Can I Change A Garden Hose Faucet Myself Safely?
Yes, it’s safe with basic tools and precautions. Always turn off the main water supply first. Wear gloves to protect your hands. Follow instructions carefully to avoid damage.
Conclusion
Changing a garden hose faucet can save you money and time. It’s a simple task with the right tools and steps. Take safety precautions and turn off the water supply first. Follow the instructions carefully and tighten all connections well.
Check for leaks after finishing the job. A working faucet helps keep your garden healthy and your water flow steady. With a little effort, you can fix or replace your garden hose faucet yourself. Try it and enjoy a better gardening experience.