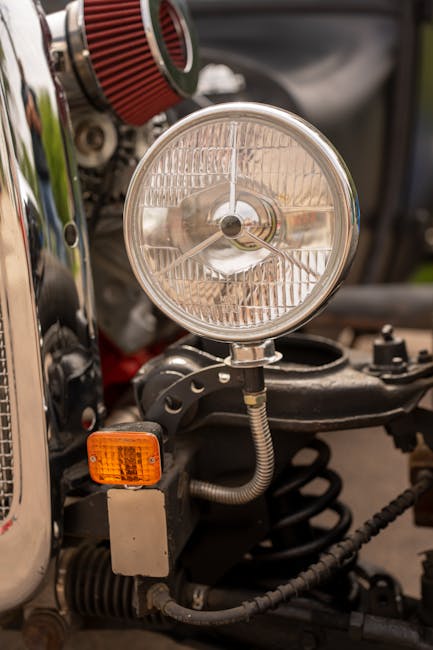
Is your car’s headlight flickering or completely out? Changing a light bulb might seem tricky, but you can do it yourself quickly and safely.
Imagine saving time and money by fixing this common issue without needing a mechanic. In this guide, you’ll learn simple steps to replace your car headlight bulb with confidence. Keep reading, and soon you’ll have bright, clear headlights lighting your way again.
Tools Needed
Changing a car headlight bulb is a simple task with the right tools. Preparing these tools before you start saves time and effort.
Below are the common tools you will need to replace a headlight bulb safely and quickly.
Screwdrivers
Screwdrivers help remove the headlight cover or parts blocking access. A flathead and a Phillips screwdriver are usually enough.
Gloves
Wear gloves to protect the bulb from oils on your skin. Gloves also protect your hands from dirt and sharp parts.
Replacement Bulb
Make sure to buy the correct bulb for your car model. Check the owner’s manual or the old bulb for the right type.
Socket Wrench Or Pliers
Some cars need a socket wrench or pliers to loosen bolts holding the headlight assembly. These tools help remove stubborn parts.
Flashlight Or Work Light
A flashlight or work light improves visibility inside the engine bay. It helps you see small parts and connectors clearly.
List Of Essential Tools
- Flathead screwdriver
- Phillips screwdriver
- Gloves (preferably latex or cotton)
- Correct replacement bulb
- Socket wrench or pliers
- Flashlight or work light
Preparing Your Car
Before changing a light bulb in your car headlight, you need to prepare your car properly. This helps keep you safe and makes the process easier.
Follow these steps to get your car ready for the bulb replacement.
Turn Off Engine And Lights
Make sure your car engine is completely off before starting. This prevents any electrical issues or accidents.
Also, turn off all lights, including headlights, to avoid electric shock or burns.
Open The Hood
Locate the hood release inside your car, usually near the driver’s seat. Pull it to unlock the hood.
Then, go to the front of the car and lift the hood. Use the support rod to keep it open safely.
Locate The Headlight Assembly
Find the headlight assembly inside the engine compartment. It is the part that holds the headlight bulb.
The assembly is usually behind the headlight lens at the front of the car. Check for a round or square cover on the back.
Removing The Old Bulb
Changing a car headlight bulb starts with safely removing the old one. Follow the correct steps to avoid damage.
Take your time and be gentle to prevent breaking parts or hurting yourself.
Disconnect The Power Connector
First, find the power connector attached to the bulb. This connector supplies electricity to the bulb.
Gently pull the connector away from the bulb. Avoid pulling the wires directly to prevent damage.
Remove The Dust Cover
Most headlights have a dust cover protecting the bulb. This cover keeps dirt and moisture out.
Turn or pull the dust cover off carefully. Set it aside safely to avoid losing it.
Release The Bulb Clip
A metal clip or wire holds the bulb in place. Locate this clip around the bulb base.
Press or unhook the clip gently to free the bulb. Do not force it as clips can break easily.
- Check for a small tab to press
- Lift or slide the clip away from the bulb
- Keep the clip for reinstallation
Take Out The Bulb
Once the clip is released, carefully pull the bulb straight out from the socket. Avoid twisting.
Hold the bulb by its base to prevent touching the glass part. Oils from skin can damage the bulb.
Choosing The Right Replacement Bulb
Changing a car headlight bulb is simple but needs the right bulb. Picking the correct replacement bulb keeps your lights bright and safe.
Learn how to check the bulb type and size. Also, understand the differences between halogen and LED bulbs.
Check Bulb Type And Size
Look at your car manual or old bulb to find the type and size. Bulbs come in many types like H1, H4, or 9005.
Using the wrong size can cause poor fit or damage. Always match the exact type and size for your car.
- Find bulb type in car manual
- Check the size printed on old bulb
- Match exactly to avoid problems
Consider Halogen Vs Led
Halogen bulbs are common and affordable. They use a filament and get warm when lit.
LED bulbs use less power and last longer. They are brighter and cooler but cost more.
| Feature | Halogen Bulbs | LED Bulbs |
|---|---|---|
| Brightness | Good | Very Bright |
| Energy Use | Higher | Lower |
| Heat | Gets Hot | Stays Cool |
| Cost | Low | Higher |
| Lifespan | Short | Long |
Installing The New Bulb
After removing the old bulb, you need to install the new one carefully. This process ensures your car’s headlight works well and lasts longer.
Follow the steps below to install the new bulb safely and correctly.
Handle Bulb With Care
Always hold the new bulb by its base. Avoid touching the glass part with your fingers.
Oils from your skin can damage the bulb or cause it to burn out faster.
Insert The New Bulb
Carefully place the new bulb into the headlight socket. Make sure it fits snugly and aligns correctly.
Do not force the bulb in. It should slide in smoothly if aligned properly.
Secure The Bulb Clip
Fasten the bulb clip or retaining spring to hold the bulb in place. This keeps the bulb secure while driving.
Check that the clip is tight and the bulb does not move.
Replace The Dust Cover
Put the dust cover back over the bulb and headlight assembly. It protects the bulb from dirt and moisture.
Make sure the cover fits tightly to keep the headlight sealed.
Reconnect The Power Connector
Attach the power connector to the new bulb. This restores the electrical connection needed for the bulb to work.
Ensure the connector clicks into place and is secure before testing the headlight.

Credit: m.youtube.com
Testing The New Headlight
After you change the light bulb in your car headlight, you need to test it. Testing makes sure the new bulb works well. It also helps you check safety on the road.
Follow simple steps to test the new headlight. Check if the light turns on and if the beam points correctly. This keeps you safe while driving at night.
Turn On The Lights
Start your car and turn on the headlights. Look at the new bulb to see if it lights up. If it does not light, check the connection and bulb again.
Check both low and high beams. Switch between them to make sure each works. This step confirms that the bulb fits and functions properly.
Check Beam Alignment
Park your car on a flat surface facing a wall. Turn on the headlights and look at the light beams on the wall. The beams should be even and point slightly downward.
If the beams are too high, they can blind other drivers. If too low, they reduce your view. Adjust the headlight alignment if needed to keep it safe.
- Park 25 feet from a flat wall
- Turn on the headlights
- Check the light beam height and direction
- Adjust screws on the headlight to align beams
- Test again after adjustment
Tips For Maintenance
Changing a car headlight bulb is simple but requires care. Proper maintenance keeps headlights bright and safe.
Follow these tips to extend bulb life and avoid common problems when changing bulbs.
Avoid Touching The Bulb Glass
Do not touch the glass part of the bulb with your fingers. Oils from your skin can cause the bulb to overheat.
If you touch the glass by accident, clean it with rubbing alcohol and a soft cloth before installing.
Regular Inspection
Check your headlights often to spot dimming or damage early. This helps avoid sudden failures while driving.
Look for cracks, moisture inside the headlight, or changes in light brightness.
- Inspect headlights every month
- Clean headlights to remove dirt and grime
- Fix any cracks or leaks promptly
Replace Bulbs In Pairs
Replace both headlight bulbs at the same time. This ensures even lighting and balance on the road.
New bulbs have similar brightness and color, which improves your safety and visibility.

Credit: www.youtube.com

Credit: www.youtube.com
Frequently Asked Questions
How Do I Safely Remove A Car Headlight Bulb?
To safely remove a car headlight bulb, first disconnect the battery. Then, remove the headlight housing cover and unplug the bulb connector. Gently twist and pull the bulb out, avoiding direct contact with the glass to prevent damage or oil contamination.
What Tools Are Needed To Change A Car Headlight Bulb?
Usually, no special tools are required to change a car headlight bulb. Some cars may need a screwdriver or socket wrench to remove the headlight housing. Always consult your car’s manual for specific tool requirements before starting the replacement.
How Can I Identify The Right Replacement Bulb?
Check your car’s owner manual or existing bulb for the specific bulb type and size. You can also use online bulb finder tools by entering your car’s make, model, and year to find the correct replacement bulb.
How Long Does It Take To Replace A Car Headlight Bulb?
Replacing a car headlight bulb typically takes 10 to 20 minutes. This varies depending on the car model and your experience. Taking time to handle the bulb carefully ensures proper installation and avoids damage.
Conclusion
Changing a car headlight bulb can seem tricky at first. But with patience, it’s manageable. Gather the right tools before starting. Follow steps carefully. Remember to handle bulbs with care. Touching them with bare hands can cause damage. Always check your owner’s manual for specific instructions.
Some cars have unique setups. Regular maintenance ensures your headlights shine bright. This boosts both safety and visibility. Now, you’re ready to tackle this simple task. Keep practicing, and it will get easier each time. Safe driving with your new, bright headlights!