
Are you looking to make your event or meeting stand out with professional-looking tent cards? Creating a tent card in Word is easier than you think.
With just a few simple steps, you can design eye-catching cards that grab attention and convey your message clearly. Whether it’s for a wedding, conference, or business gathering, this guide will help you create your own tent cards quickly and confidently.
Keep reading, and you’ll be ready to impress your guests with custom-made tent cards in no time.
Credit: www.etsy.com
Choosing The Right Size
Picking the right size for your tent card is important. The size affects how easy it is to read and how much space it takes.
Consider where you will place the tent card and what information it must show. This helps find the perfect size.
Standard Tent Card Dimensions
Standard tent cards come in common sizes. These sizes fit most uses like events, menus, or signs.
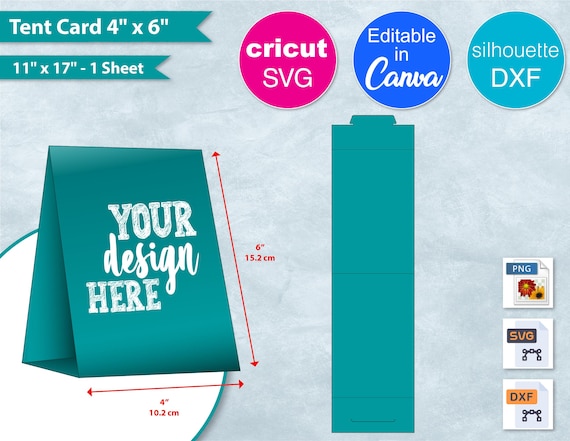
| Size | Dimensions (inches) | Use |
| Small | 4 x 6 | Place cards, small signs |
| Medium | 5 x 7 | Menu cards, info cards |
| Large | 6 x 9 | Event signs, directions |
Customizing Size For Your Needs
You can change tent card size to fit your space and message. A custom size can make your card stand out or fit a special spot.
- Measure the space where the tent card will sit
- Decide how much text and images you want to include
- Choose a size that keeps the card stable when folded
- Check your printer limits for max paper size
Credit: www.hamster.ca
Setting Up The Document
Creating a tent card in Word starts with setting up the document correctly. This helps your tent card look neat and fit well when printed.
We will focus on choosing the right page orientation and adjusting the margins and layout for a perfect tent card.
Selecting Page Orientation
Page orientation controls how your page looks: tall or wide. For tent cards, the orientation depends on the style you want.
Usually, tent cards use the landscape orientation. This lets the card stand up when folded.
- Go to the Layout or Page Layout tab in Word.
- Click on Orientation.
- Select Landscape for a wider page.
- Use Portrait only if your design needs a tall card.
Adjusting Margins And Layout
Margins are the blank spaces around the edges of your page. Setting correct margins gives your tent card a clean look.
Adjust the margins to leave room for folding and cutting the card. You want enough space so nothing gets cut off.
- Click on Margins in the Layout tab.
- Choose Narrow or Custom Margins for more control.
- Set equal margins on all sides, like 0.5 inches.
- Make sure the fold line is inside the margin area.
Designing The Tent Card
Creating a tent card in Word is easy and fun. You can design it to match your event or business style.
Start by choosing the right layout and size. Then add text, images, and shapes to make it look great.
Adding Text And Fonts
Use clear and simple text on your tent card. Choose fonts that are easy to read from a distance.
You can change font size, style, and color to highlight important information.
- Select the Text Box tool to add text
- Pick fonts like Arial or Calibri for clarity
- Use bold or italics to emphasize words
- Adjust font size to fit the space well
Inserting Images And Logos
Adding images or logos makes your tent card look professional. Choose high-quality pictures for best results.
Insert pictures by using the Insert tab and selecting Pictures from your computer.
- Use PNG or JPEG image files
- Resize images to fit your card without clutter
- Place logos near the top or bottom corners
- Make sure images do not cover important text
Using Shapes And Borders
Shapes and borders add style and structure to your tent card. Use them to separate sections or highlight details.
Word offers many shape options like rectangles, circles, and lines. Borders help frame your card neatly.
- Insert shapes from the Insert > Shapes menu
- Use borders to outline text boxes or images
- Choose colors that match your theme
- Keep shapes simple to avoid clutter

Credit: www.reddit.com
Formatting For Fold Lines
Fold lines help you create neat tent cards in Word. They show where to fold the paper accurately.
Proper formatting makes the tent card look professional and balanced. This guide covers key tips for fold lines.
Creating Guidelines
Start by adding guidelines to mark the fold lines. These help you fold the card evenly.
- Go to the “View” tab and enable “Ruler” and “Gridlines”.
- Use the ruler to measure the width and height of the card.
- Draw vertical and horizontal lines where the card will fold.
- Make sure the lines are light so they don’t print.
- Use shapes or lines with dotted style for better visibility.
Ensuring Proper Alignment
Align your text and images inside the fold lines for a clean look. Misalignment can make the card uneven.
| Alignment Tip | How to Do It |
| Center Text | Select the text, then click the center alignment button in the toolbar. |
| Use Margins | Set equal margins on left and right sides under “Layout” settings. |
| Snap Objects | Enable “Snap to Grid” to place images and shapes precisely. |
| Check Spacing | Use the ruler to keep equal space from the fold lines. |
Previewing The Design
Before printing your tent card in Word, check the design carefully. Previewing helps you avoid mistakes and saves paper.
Look at the layout and make sure all text and images fit well on the card. This step is important for a neat final product.
Checking Print Layout
Use Word’s print layout view to see how your tent card will look on paper. This view shows margins and page breaks.
- Click the “View” tab and select “Print Layout.”
- Check if the text is centered and fits inside the margins.
- Make sure images do not extend beyond the edges.
- Look for any overlapping elements or blank spaces.
- Scroll through pages if your design has front and back sides.
Making Final Adjustments
After reviewing the layout, make small changes to improve the card’s appearance. Adjust text size and spacing for clarity.
| Adjustment | Purpose | How to Do It |
| Resize Text | Fit text within the card | Select text, then change font size in the toolbar |
| Move Images | Prevent overlap and keep margins clear | Click and drag images to desired position |
| Adjust Margins | Ensure content fits on the page | Go to Layout > Margins and select a preset or custom size |
| Check Alignment | Keep design balanced and professional | Use alignment guides or the Align tool under Format |
Printing The Tent Card
Creating a tent card in Word is simple. Printing it correctly is crucial. Follow these steps for a successful print.
Ensure your printer settings are correct. This will help your tent card look professional and neat.
Choosing Paper Type
Paper type affects the card’s appearance. Choose a type that suits your needs.
Consider the thickness and texture of the paper. This can impact how the card stands.
- Cardstock is sturdy and ideal for tent cards.
- Glossy paper adds a shine but might reflect light.
- Matte paper offers a smooth finish without glare.
Printing Double-sided
Double-sided printing saves paper and looks professional. Set your printer to print on both sides.
Check your printer’s manual if unsure. Some printers may need manual paper feeding.
- Select ‘Print on Both Sides’ in print settings.
- Test print to ensure correct alignment.
- Adjust settings if the print is misaligned.
Folding And Finishing Touches
Creating a neat tent card in Word needs careful folding and nice finishing. These steps help your card look clean and professional.
Use simple tricks to fold your card sharply and add decorations that fit your style. This guide shows how to do both well.
Folding Tips For Clean Edges
Sharp folds give your tent card a tidy look. Use these tips to fold your card with clean edges every time.
- Print your design on thick paper for better sturdiness.
- Score the fold line lightly with a ruler and a dull knife.
- Fold the card slowly along the scored line to avoid creases.
- Use a bone folder or the edge of a credit card to press the fold flat.
- Make sure both sides meet evenly before pressing the fold tight.
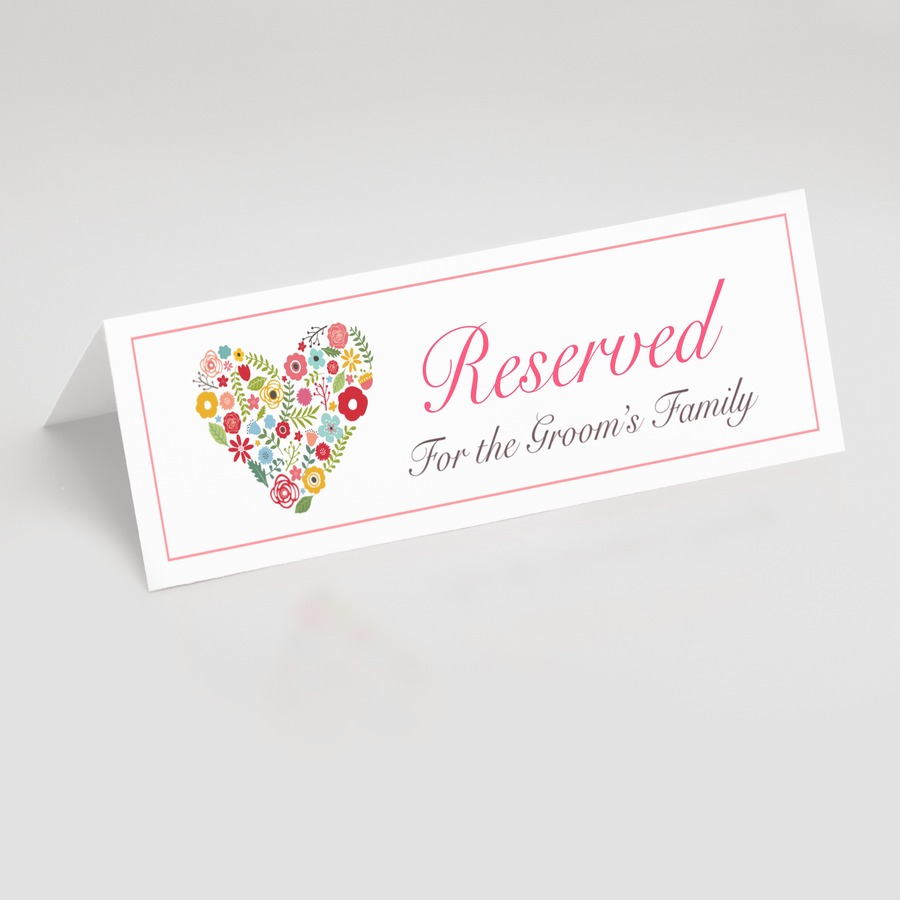
Adding Extra Decorations
Decorations help your tent card stand out. Choose simple options that fit the event or purpose.
| Decoration Type | Description | Tips |
| Stickers | Use themed stickers to add color and fun. | Place them near the card corners for balance. |
| Ribbon | Tie a small ribbon around the card for a classy look. | Pick colors that match your card design. |
| Hand-drawn Art | Add personal drawings or doodles. | Use fine markers for neat lines. |
| Printed Patterns | Insert small printed patterns inside the card. | Keep patterns subtle to avoid clutter. |
Frequently Asked Questions
How Do I Start Creating A Tent Card In Word?
Open Microsoft Word, select a blank document, and set the page size. Choose “Landscape” orientation and divide the page into two equal sections for folding.
What Dimensions Work Best For A Tent Card In Word?
A common tent card size is 4×6 inches per side. Set your page to 8×6 inches in landscape to create two 4×6 panels.
Can I Add Images To My Tent Card In Word?
Yes, you can insert images by clicking “Insert” > “Pictures”. Resize and position images as needed within each panel.
How Do I Fold The Tent Card After Printing?
Fold the printed card along the center line. Make a sharp crease so the card stands upright like a tent.
Conclusion
Creating a tent card in Word is simple and quick. Just follow the steps carefully. Choose the right size and layout for your card. Add your text and images clearly. Use easy-to-read fonts and colors. Print on sturdy paper for best results.
Fold the card neatly to stand properly. Practice a few times to get better. Tent cards work well for events and meetings. They help share information in a clear way. Try making one today and see how it helps.