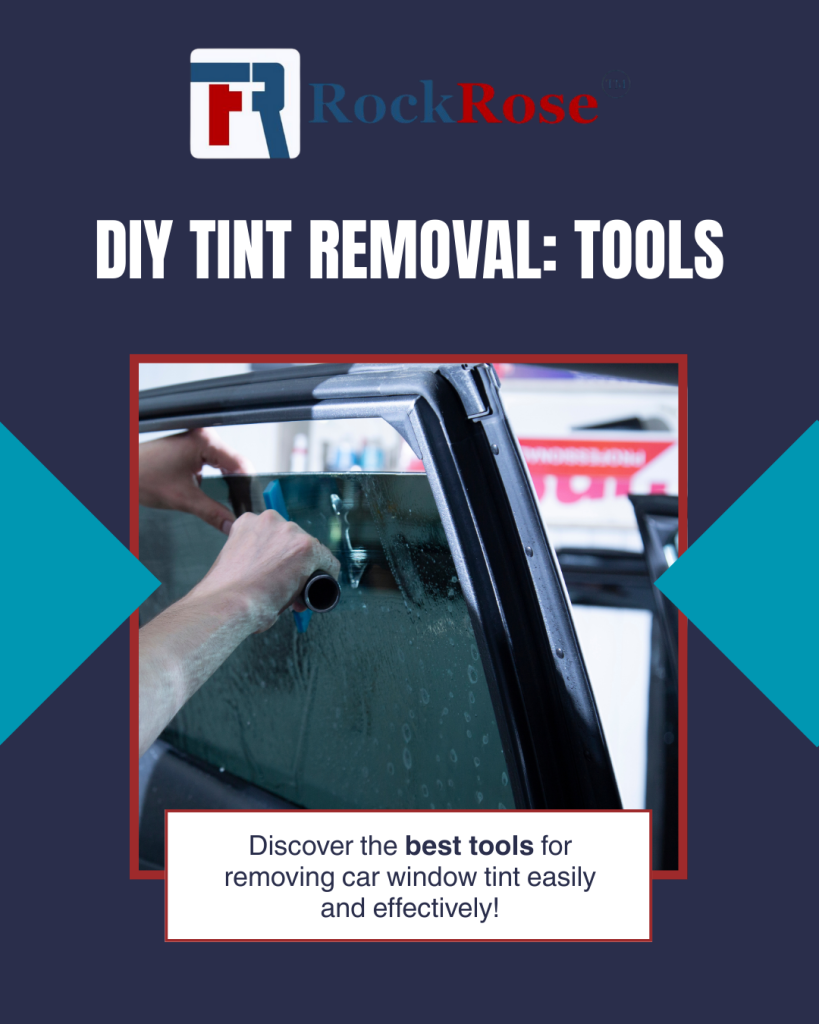
Have you ever looked at your car’s tinted windows and wondered how to remove that film yourself? Maybe the tint is peeling, bubbling, or just not the style you want anymore.
Removing auto window tint on your own might sound tricky, but with the right steps, you can do it quickly and without expensive tools. Imagine saving money, getting clearer windows, and having the satisfaction of fixing your car yourself. Keep reading, and you’ll discover simple, effective ways to strip off that tint like a pro.
Your car—and your wallet—will thank you.
Credit: www.youtube.com
Tools And Materials Needed
Removing auto window tint by yourself requires the right tools and materials to make the process smooth and effective. Without proper preparation, you might end up with a frustrating experience or even damage your glass. Gathering everything beforehand saves you time and helps you work confidently.
Essential Tools For Removing Auto Window Tint
- Heat Gun or Hair Dryer:You need heat to soften the adhesive holding the tint film. A heat gun works faster, but a hair dryer can work if you don’t have one.
- Plastic Razor Blades or Scraper:These help lift the edges of the tint without scratching the glass. Avoid metal blades to protect your windows.
- Spray Bottle with Soapy Water:Soap mixed with water helps loosen the adhesive and makes the tint easier to peel off.
- Microfiber Cloths:Useful for cleaning the glass during and after tint removal to avoid streaks and residue.
- Adhesive Remover or Ammonia-Based Cleaner:These break down sticky residue left behind after peeling the tint.
Additional Supplies That Make The Job Easier
- Gloves:Protect your hands from chemicals and sharp edges while working.
- Garbage Bags or Drop Cloths:Keep your workspace clean by catching scrap pieces of tint film.
- Mask or Respirator:Especially important if you use strong chemicals or ammonia-based cleaners in a confined space.
- Painter’s Tape:Use this to secure the edges of the tint film once you’ve started peeling, preventing it from snapping back.
Why Preparing These Materials Is Crucial
Have you ever started a project halfway and realized you lacked a key tool? That’s frustrating and can cause unnecessary damage. I once tried removing tint without a heat source and ended up scratching my window because the adhesive was too stubborn.
Gathering all these tools before you begin helps you avoid interruptions and mistakes. It also gives you a better chance to remove the tint cleanly and quickly, saving both time and effort.
Preparing Your Workspace
Preparing your workspace is a crucial step before removing auto window tint yourself. A well-organized area can make the process smoother and help you avoid damage to your car or frustration during removal. Think about the space as your project’s foundation—set it up right, and everything else will follow more easily.
Choose A Well-ventilated Area
Removing window tint involves heat and sometimes chemical sprays. You want fresh air to avoid inhaling fumes or feeling uncomfortable.
Picking an outdoor spot or a garage with open doors works best. Have a fan handy if airflow feels stagnant, ensuring safety and comfort.
Gather All Necessary Tools
Having everything ready saves time and keeps you focused. Tools like a heat gun or hairdryer, razor blade, spray bottle with soapy water, and microfiber cloths are essential.
Don’t wait until you start to realize you’re missing something. Lay out your tools on a clean table or cloth nearby, so they’re easy to reach.
Protect Your Vehicle’s Interior
Window tint removal can get messy with water, adhesive residue, and small glass shards. Shield your car seats and door panels with old towels or plastic sheets.
This simple step prevents stains and scratches, letting you concentrate on the tint rather than cleaning up afterward.
Plan For Disposal And Cleanup
Think about where you’ll put the removed tint film and any waste. Have a trash bag ready to avoid clutter.
Also, keep cleaning supplies like glass cleaner and paper towels at hand to wipe down windows immediately after removal. This keeps your workspace neat and your windows streak-free.
Heating The Window Tint
Heating the window tint is a crucial part of the removal process. Applying heat softens the adhesive, making the film easier to peel off without leaving residue or damaging your glass. It also reduces the chance of the tint tearing into small, hard-to-remove pieces.
Using A Heat Gun Safely
A heat gun works best because it produces consistent, adjustable heat. Hold the gun about 6 to 8 inches away from the window to avoid overheating. Move it slowly across the tint to warm the adhesive evenly.
Be careful not to stay in one spot too long; intense heat can crack the glass. If you don’t have a heat gun, a hairdryer on high heat can be a good alternative.
Heating With A Hairdryer
A hairdryer is a handy tool for heating window tint, especially if you don’t own a heat gun. Use the highest temperature setting and keep the dryer moving to prevent overheating any area.
Heating the tint for 1 to 2 minutes per section should soften the adhesive enough to peel. Patience is key here—rushing might cause the film to break apart.
Signs The Tint Is Ready To Peel
You’ll know the tint is ready when it feels warm and slightly flexible to the touch. The edges will lift easily without much resistance. If the film feels cool or stiff, more heat is needed.
Try gently lifting a corner with a plastic scraper or your fingernail to check. If it resists or tears immediately, apply more heat before continuing.

Credit: motorhub.club
Peeling Off The Tint Film
Peeling off the tint film is a careful process. It requires patience and the right technique to avoid damage to your window. The film can be stubborn, especially if it has been on the glass for a long time. Understanding how to start and continue removing it is key to success.
Starting At A Corner
Begin by finding a loose corner of the tint film. Use your fingernail or a plastic scraper to lift it gently. Avoid metal tools to prevent scratching the glass. Once you have a grip on the corner, pull slowly to start peeling. The film should come off in a sheet, not in small pieces.
Slow And Steady Removal
Peeling too fast can tear the film, making removal harder. Pull the tint at a low angle, close to the glass surface. Keep the film tight as you peel to reduce residue left behind. Take breaks if the film resists, allowing any heat from sunlight to soften the adhesive. This makes the process smoother and cleaner.
Removing Residual Adhesive
After peeling off your auto window tint, you might notice sticky residue left behind. Removing this residual adhesive is key to restoring your window’s clarity and smoothness. Tackling this residue doesn’t have to be frustrating if you choose the right approach.
Using Soapy Water
Soapy water is a gentle yet effective way to loosen adhesive residue. Mix warm water with a few drops of dish soap to create a sudsy solution. Apply it generously to the sticky areas and let it sit for 5-10 minutes to soften the glue.
Use a soft cloth or sponge to scrub the residue in circular motions. You’ll be surprised how much the adhesive starts to lift without harsh chemicals. If you feel stubborn patches, reapply the soapy water and keep scrubbing gently.
Have you ever tried this and found your windows cleaner than expected? Sometimes the simplest solutions work best.
Applying Adhesive Remover
If soapy water doesn’t fully do the job, adhesive removers are your next best bet. These products are designed to break down sticky residues quickly and safely on glass surfaces. Choose a remover labeled safe for auto windows to avoid damage.
Apply the remover with a microfiber cloth, focusing on small sections at a time. Let it sit for a few minutes to penetrate the glue before wiping away. You may need to repeat this process for thicker adhesive patches.
Remember to work in a well-ventilated area and wear gloves to protect your skin. After removing the residue, clean the window with glass cleaner to remove any leftover remover.

Credit: www.youtube.com
Cleaning The Window Surface
Cleaning the window surface is a crucial step in removing auto window tint effectively. Dirt, adhesive residue, and oils can make the tint removal process messy and less efficient. Taking the time to clean your window thoroughly ensures a smoother peel and prevents scratches or damage to the glass.
Gathering The Right Cleaning Supplies
Start by collecting supplies that will make cleaning easier. You will need a glass cleaner, microfiber cloths, rubbing alcohol, and a plastic scraper or old credit card. Avoid using abrasive materials that might scratch the glass during cleaning.
Removing Dust And Loose Debris
Use a dry microfiber cloth to wipe away any dust or loose dirt from the window. This step prevents particles from scratching the glass when you apply cleaning solutions. A clean surface also helps the adhesive remover work better.
Applying Rubbing Alcohol For Sticky Residue
Dampen a cloth with rubbing alcohol and gently rub the window to break down leftover adhesive or oils. This step is especially useful if the tint film has been on for a long time. Be patient and let the alcohol sit for a minute before wiping it off.
Wiping Down With Glass Cleaner
Spray a generous amount of glass cleaner on the window after the rubbing alcohol treatment. Wipe the surface with a clean microfiber cloth until the window is spotless. A clean, clear window surface makes spotting any remaining adhesive easier.
Checking For Missed Spots
Look closely at the window in different light angles to find any stubborn adhesive spots. If you spot some, repeat the rubbing alcohol and cleaning process on those areas. Ensuring a fully clean surface will save you frustration when removing the tint.
Tips For Avoiding Damage
Removing auto window tint yourself can save money, but it requires care to avoid damaging your car’s glass or interior. Taking the right precautions ensures a smooth process and keeps your windows scratch-free. Here are some practical tips to protect your vehicle while you work on removing the tint.
Use The Right Tools For The Job
Sharp blades might seem like a quick fix, but they can easily scratch your glass. Instead, opt for a plastic scraper or a specialized tint removal tool designed to lift the film gently.
Heating tools like a hairdryer or heat gun soften the adhesive, making the tint easier to peel off without force. Have you noticed how much easier it is to remove stickers from warm surfaces? The same principle applies here.
Work In A Well-ventilated Area
The adhesive remover sprays or solutions often contain strong chemicals. Using them in a closed space can be harmful to your health and may cause dizziness or headaches.
Open your car doors or work outdoors to ensure fresh air circulation. This simple step protects you and helps the adhesive break down faster.
Protect Surrounding Surfaces
During removal, adhesive and tint fragments can stick to your dashboard or door panels. Cover these areas with old towels or plastic sheets to keep them clean.
Have you ever cleaned stubborn glue from your car interior? Preventing mess is easier than fixing it later.
Be Patient And Take Your Time
Rushing can lead to scratches or leftover adhesive that’s hard to remove. Peel the tint slowly and steadily, stopping if you feel resistance.
Think of this as a delicate process—your patience will pay off with a clean window and no damage.
Test Cleaning Solutions On A Small Area First
Some adhesive removers might discolor or damage tinted glass coatings. Always try your cleaning product on a hidden spot before applying it widely.
This small test can save you from costly mistakes and preserve your window’s clarity.
When To Seek Professional Help
Removing auto window tint yourself can save money and be satisfying. However, not every tint removal project is simple or safe to handle alone. Knowing when to seek professional help ensures you don’t damage your windows or waste your time and effort.
Signs Your Tint Removal Is More Complex Than Expected
If the tint has been on your windows for many years, the adhesive may have hardened or left stubborn residue. This can make DIY methods ineffective and frustrating.
Also, if you notice bubbling, cracking, or peeling that exposes multiple layers of tint film, the removal process becomes trickier. At this point, professional tools and expertise might be necessary to avoid scratching or breaking your glass.
Handling Tinted Windows With Embedded Uv Or Safety Films
Some vehicles have specialized window films that block UV rays or add safety features. These films are often tougher to remove because they are bonded more securely.
If you’re unsure whether your window tint has these properties, it’s safer to consult a professional. Attempting removal without the right approach can lead to permanent damage or expensive repairs.
When You Lack Proper Tools Or Space
Removing tint requires specific tools like heat guns, razor blades, and cleaning solutions. Without them, the job can become messy and inefficient.
Moreover, if you don’t have a well-ventilated, spacious area to work in, fumes and debris can cause discomfort or safety risks. Professionals have equipped workshops designed to handle these challenges safely and effectively.
Risk Of Voiding Vehicle Warranty Or Insurance Coverage
Some car warranties or insurance policies include clauses about unauthorized modifications or repairs. Removing tint yourself might unintentionally void these protections.
Checking your vehicle’s documentation and discussing with a professional can help you avoid costly mistakes. Are you ready to risk your coverage for a DIY project?
When Time Is Limited And You Need Reliable Results
DIY tint removal can take hours or even days, especially for beginners. If you need your car back on the road quickly and looking perfect, professionals provide faster, cleaner results.
Consider whether your schedule allows for trial and error or if you prefer guaranteed quality. Sometimes, paying for expertise is the smarter choice.
Frequently Asked Questions
How Can I Safely Remove Window Tint?
To safely remove window tint, use a steamer or hairdryer to soften the adhesive. Carefully peel off the film starting from a corner. Clean any remaining adhesive with a mixture of soap and water or adhesive remover. Take your time to avoid damaging the glass.
What Tools Do I Need For Tint Removal?
For tint removal, you’ll need a steamer or hairdryer, a razor blade or scraper, and adhesive remover. Microfiber cloths and soapy water are also essential. These tools help in peeling and cleaning the window effectively, ensuring a smooth finish without damaging the glass.
Is It Hard To Remove Car Window Tint?
Removing car window tint is not overly difficult but requires patience. With the right tools and method, it can be done by most DIY enthusiasts. Taking your time to ensure all adhesive is removed is key to a successful job without any damage.
Can I Remove Tint Without Damaging Defrosters?
Yes, you can remove tint without damaging defrosters by using a steamer or hairdryer. Gently peel the tint off and avoid scraping near the defroster lines. If adhesive remains, use a gentle adhesive remover. Be cautious to maintain the integrity of the defroster.
Conclusion
Removing auto window tint yourself saves money and gives control. The process needs patience and care to avoid damage. Use the right tools and follow each step slowly. Clean the glass well after removing the tint for best results. This DIY task is doable even for beginners.
Take your time, and you will see clear windows again. Simple steps can make a big difference in your car’s look. Try it out and enjoy the fresh view.