
Have you ever wanted to draw a baseball bat but didn’t know where to start? Whether you’re a beginner or just looking to improve your skills, this guide will make it simple and fun for you.
By the end, you’ll have a clear, sharp drawing that looks just like the real thing. Ready to surprise yourself with what you can create? Let’s dive in and make your drawing stand out!
Materials Needed
Drawing a baseball bat is simple with the right tools. You need basic materials to create a clear and neat drawing.
Gather all your supplies before starting. This helps you focus on your drawing without interruptions.
Pencils
Use pencils to sketch the baseball bat outline. A soft pencil like 2B works well for shading and details.
Keep a harder pencil, such as HB, for fine lines and final touches.
Eraser
An eraser helps you fix mistakes and clean up your drawing. A soft eraser is best to avoid tearing the paper.
Use a kneaded eraser for light corrections and delicate areas.
Paper
Choose smooth drawing paper for better pencil marks. Standard sketch paper works fine for beginners.
Use a larger sheet to give yourself space for details.
Ruler
A ruler helps you draw straight lines on the bat handle. It keeps your drawing accurate and neat.
Use the ruler to measure the bat’s length and width before drawing.
Colored Pencils Or Markers (optional)
You can add color to your baseball bat with colored pencils or markers. This makes your drawing more lively.
Pick colors like brown or yellow to match the wood look of a baseball bat.
Basic Shapes To Start
Drawing a baseball bat begins with simple shapes. These shapes help you get the right form and size.
Using basic shapes first makes the drawing easier to improve step by step.
Draw A Long Rectangle
Start with a long rectangle for the bat’s main body. This shows the bat’s length and thickness.
Make the rectangle slightly wider at one end to show the barrel of the bat.
Add A Smaller Rectangle For The Handle
Attach a thin, smaller rectangle at the opposite end of the barrel. This is the handle.
The handle should be narrow to look like where the player holds the bat.
Use Ovals To Shape The Ends
Draw an oval at the wider end of the bat to form the rounded barrel tip.
Add a small oval at the handle’s end for the knob that stops the bat from slipping.
Sketch Guidelines For Curves
Use light curved lines inside the rectangles to shape the bat smoothly.
- Curve the sides of the long rectangle to make the bat round.
- Draw gentle curves on the handle to show its round shape.
- Keep the knob oval slightly wider than the handle.
Drawing The Bat’s Outline
Drawing a baseball bat is simple and fun. You just need to follow a few easy steps to create the outline.
Start by gathering your drawing tools. A pencil and paper are perfect for this task.
Sketch The Bat’s Shape
Begin with a long, thin oval. This will form the basic shape of your baseball bat.
Define The Handle
The handle is the narrow part of the bat. Make it slightly thinner at one end.
- Draw a straight line from the top of the oval.
- Add another line parallel to the first one.
- Connect the lines at the bottom.
Create The Barrel
The barrel is the thicker part of the bat. It is wider than the handle.
Use gentle curves to make the barrel look rounded. Connect it smoothly with the handle.
Check The Outline
Look over your bat outline. Make sure the lines are smooth and connected.
| Part | Shape | Details |
| Handle | Thin | Slightly narrower |
| Barrel | Thick | Rounded and smooth |

Credit: www.freepik.com
Adding Details And Texture
Adding details and texture brings your baseball bat drawing to life. These touches make the bat look real and interesting.
Focus on small marks, shadows, and wood grain to create a natural feel. This guide will help you add those important elements.
Adding Wood Grain Patterns
Wood grain shows the natural lines and knots in the bat. Use light, wavy lines along the bat’s length to suggest grain.
- Draw thin, curved lines that follow the bat’s shape.
- Keep lines uneven to look natural.
- Add small knots or darker spots for knots in the wood.
- Use a pencil or pen to shade between lines lightly.
Drawing Shadows And Highlights
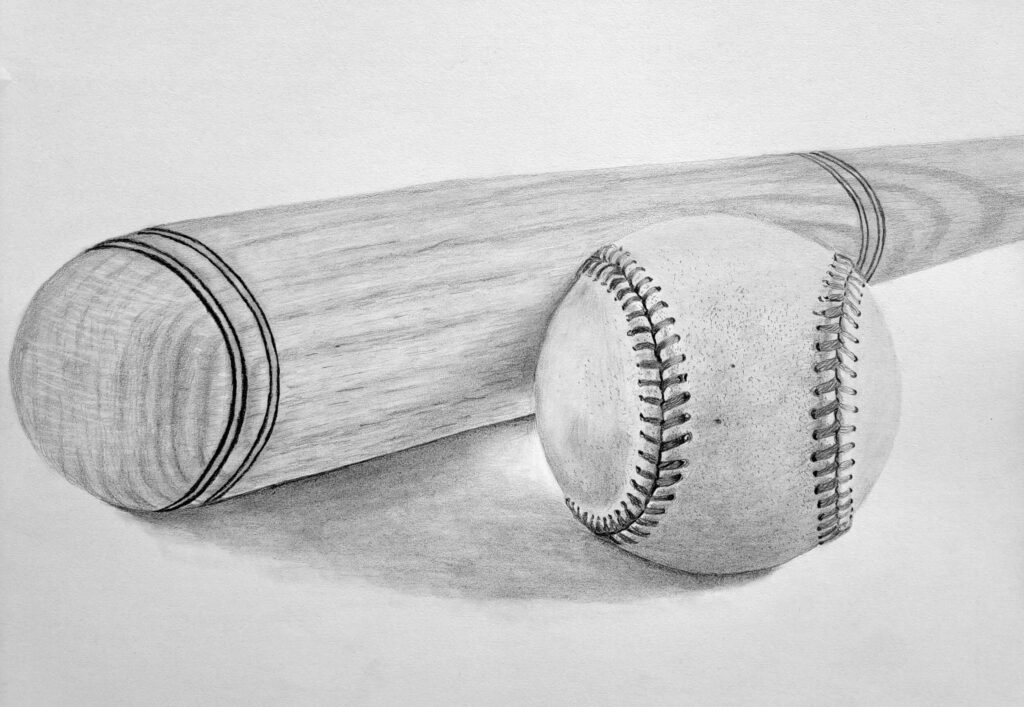
Shadows and highlights show the bat’s round shape and light source. Shade one side darker and leave the other side lighter.
| Part of Bat | Shadow | Highlight |
| Handle | Dark shading on left side | Light line on right edge |
| Barrel | Shadow under curve | Bright spot on top curve |
| Knob | Shaded bottom | Highlight on top |
Texturing The Bat Surface
Texture makes the bat feel like wood or metal. Use small dots, scratches, or rough lines to show surface details.
Texture Tips:
- Use short, light strokes for rough wood.
- Draw tiny scratches near the barrel for wear.
- Add small dots to mimic wood pores.
- Keep texture subtle so it does not overpower the drawing.
Shading Techniques
Shading makes your baseball bat drawing look real. It shows how light hits the bat.
Using different shading styles adds depth and shape to the bat.
Hatching
Hatching uses parallel lines to create shadow. Draw lines closer for darker areas.
Keep lines light where the light hits the bat. This shows the round shape well.
Cross-hatching
Cross-hatching adds lines in different directions. This makes shadows stronger.
Use this technique for darker parts like the bat’s handle or under the barrel.
Blending
Blending smooths out shading for soft shadows. Use a blending stump or finger.
This technique works well on the bat’s curved surface to show smooth light change.
Stippling
Stippling uses dots to make shadows. More dots mean darker areas.
It creates a textured look on the wood part of the bat.
Using Highlights
Leave some white spaces or use an eraser to create highlights. This shows light reflection.
Highlights make the bat look shiny and three-dimensional.
Common Mistakes To Avoid
Drawing a baseball bat seems simple, but many beginners make easy mistakes. These errors can make your drawing look less real.
Knowing what to avoid helps you create better art. Here are common mistakes and how to fix them.
Ignoring The Bat’s Shape
Many artists draw the bat too thick or too thin. The bat should be wider near the handle and slightly wider at the barrel.
A straight, even shape looks unnatural and flat.
Forgetting The Handle Details
Some forget to add the thin handle or the knob at the end. These parts are important for the bat’s look.
- Draw a narrow handle that fits the hand size.
- Include the rounded knob at the bottom.
- Add grip lines or texture if needed.
Incorrect Proportions
Proportions must be balanced. The barrel is usually about three times the handle’s length.
| Part | Proportion |
| Handle | 1 unit |
| Barrel | 3 units |
Skipping Shading And Highlights
Flat color makes the bat look fake. Adding light and shadow gives it a round shape.
Tip:Use a light source from one side. Shade the opposite side darker. Add a thin highlight on the light side.
Tips For Improving Your Drawing
Drawing a baseball bat can be simple with the right tips. You can make your bat look realistic and clear by focusing on certain details.
Practice and patience help your skills grow. Try different methods to see what works best for you.
Observe Real Baseball Bats
Look closely at real baseball bats to understand their shape and size. Notice the handle, the tapering, and the rounded end. This helps you draw more accurate lines and proportions.
Use Simple Shapes To Start
Start your drawing with basic shapes like rectangles and circles. These shapes help you build the bat’s form before adding details.
Add Details Step By Step
Add small details like wood texture, grip lines, and shadows after the main shape is done. This makes your drawing look more complete and realistic.
Practice Different Angles
- Draw the bat from the side view
- Try a slightly tilted angle
- Sketch it from the top or bottom
Practicing different angles helps you understand the bat’s 3D form. This skill improves your overall drawing ability.
Use A Table To Track Your Progress
| Date | Angle | Time Spent | Notes |
| April 10 | Side View | 20 minutes | Focus on proportions |
| April 12 | Tilted | 25 minutes | Work on shading |
| April 14 | Top View | 15 minutes | Practice handle shape |
Credit: stock.adobe.com
Credit: muusart.com
Frequently Asked Questions
How Do I Start Drawing A Baseball Bat?
Begin with a long, narrow oval for the bat’s handle. Sketch a slightly wider cylinder for the barrel. Use light strokes to outline the shape before adding details like the taper and grip.
What Materials Do I Need To Draw A Baseball Bat?
You need a pencil, eraser, paper, and optional coloring tools. A ruler helps keep the bat straight. Use fine liners for clean outlines and colored pencils or markers for shading.
How Can I Make My Baseball Bat Drawing Look Realistic?
Add shading to show light and shadow on the bat’s curved surface. Include wood grain texture and highlight the taper from handle to barrel. Use gradual color transitions for depth.
What Common Mistakes Should I Avoid When Drawing A Bat?
Avoid making the bat too thick or too short. Don’t forget the taper and rounded edges. Avoid harsh outlines; use smooth, confident lines for a natural look.
Conclusion
Drawing a baseball bat can be simple and fun. Start with basic shapes and add details step by step. Practice helps you improve your skills. Try different styles and lines to make your bat unique. Keep your pencil light at first to fix mistakes easily.
Remember, patience is key to better drawings. Enjoy the process and don’t rush. Soon, you will create great baseball bat drawings with ease. Keep practicing and have fun with your art!