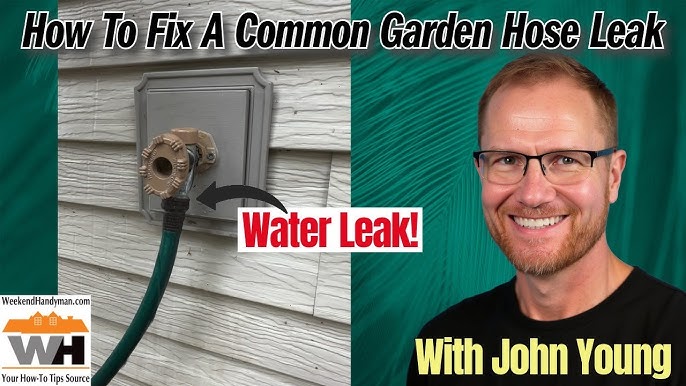
Is your garden hose leaking or not working properly? A broken hose can be frustrating, especially when you need it most.
But don’t worry—you don’t have to buy a new one or call a plumber. With a few simple steps, you can fix your garden hose quickly and save time and money. In this guide, you’ll learn easy tricks to spot the problem and get your hose back to perfect condition.
Keep reading, and you’ll be watering your garden like a pro in no time!
Common Hose Problems
Garden hoses often face issues that stop water flow or cause leaks. Fixing these problems can save water and extend the hose’s life.
Understanding common problems helps you repair your hose quickly. This guide covers leaks, kinks, and connector troubles.
Leaks And Punctures
Leaks and punctures happen from sharp objects or old hose wear. Water sprays out, reducing pressure and wasting water.
Small holes can be fixed with tape or patch kits. Larger tears might need hose replacement or a section cut out and reconnected.
- Turn off water and dry the hose before repairs
- Use waterproof tape or a rubber patch for small holes
- Cut out damaged parts for big punctures and rejoin with couplers
Kinks And Twists
Kinks and twists block water flow and strain the hose material. They often happen when you pull or store the hose incorrectly.
To avoid kinks, coil the hose loosely and use hose reels or guides. Fix existing kinks by stretching and straightening the hose.
- Store hoses in loops, not tight coils
- Use hose reels to keep the hose untangled
- Stretch hose sections to remove bends and twists
Connector Issues
Connectors can leak if loose or damaged. Dirt and rust may also block water flow at the joints.
Check connectors for cracks and tighten them firmly. Clean dirt inside connectors and replace washers if needed to stop leaks.
- Inspect connectors regularly for damage
- Tighten loose connectors by hand or with a wrench
- Replace worn washers inside connectors
- Clean connectors to remove dirt and rust
Tools And Materials Needed
Fixing a garden hose is simple with the right tools and materials. Knowing what you need saves time and effort.
This guide lists the basic tools and materials for common hose repairs. Use these to patch leaks or replace parts.
Basic Repair Tools
Having the right tools helps you fix your hose quickly. Most repairs need only a few items.
- Utility knife or scissors to cut the hose
- Screwdriver for hose clamps and connectors
- Pliers to tighten or loosen fittings
- Measuring tape to measure hose length
- Adjustable wrench for metal fittings
Materials For Patching
Patching materials fix small holes and cracks. Choose durable items that resist water and weather.
- Rubber repair tape to cover leaks
- Waterproof adhesive or sealant for sealing cracks
- Patch kits designed for garden hoses
- Rubber sleeves to reinforce weak spots
Replacement Parts
Sometimes you need to replace worn or broken parts. Keep common hose parts on hand for easy swaps.
- Hose connectors and couplings
- Spray nozzles and valves
- Hose clamps for securing fittings
- End caps to close off hose ends
Repairing Leaks And Punctures
Garden hoses often develop leaks or punctures over time. Fixing these issues stops water waste and keeps your hose working well.
There are simple ways to repair your hose using tape, menders, or by replacing damaged parts.
Using Waterproof Tape
Waterproof tape is a quick fix for small leaks and holes. It creates a tight seal around the damaged area to stop water from escaping.
- Clean the hose surface and dry it well.
- Cut a piece of waterproof tape long enough to cover the leak with extra on each side.
- Wrap the tape tightly around the hose, overlapping the edges.
- Press firmly to ensure good adhesion.
- Test the hose by turning on the water slowly.
Applying Hose Menders
Hose menders are plastic or metal connectors that join cut ends of a hose. They work well for larger holes or breaks.
To use a hose mender:
- Cut out the damaged section of the hose with a sharp knife.
- Push one end of the mender into one cut hose end.
- Push the other hose end onto the opposite side of the mender.
- Tighten the clamps or screws on the mender to hold it firmly.
- Check for leaks by turning on the water.
Replacing Damaged Sections
Sometimes a hose section is too damaged to repair. Replacing that section fixes the problem for good.
| Tool | Purpose |
|---|---|
| Utility knife | Cut damaged hose sections |
| Hose couplings | Connect new hose pieces |
| Screwdriver | Tighten hose clamps |
| Replacement hose | Replace damaged parts |
Follow these steps to replace a hose section:
- Cut out the damaged part cleanly.
- Attach hose couplings to each cut end.
- Insert the new hose section between couplings.
- Secure all clamps tightly.
- Turn on water and check for leaks.
Fixing Kinks And Twists
Garden hoses often get kinks and twists that block water flow. These problems make watering your plants hard.
Fixing these issues keeps your hose working well and lasts longer. Use simple tricks to remove kinks and prevent new ones.
Straightening Techniques
To straighten a kinked hose, lay it in the sun to warm the material. Warm hoses become soft and easier to fix.
- Pull the hose gently to straighten the kink.
- Use your hands to smooth out any twists along the hose.
- Fill the hose with water and let it sit to push out bends.
- Roll the hose back and forth on a flat surface.
Using Hose Supports
Hose supports help keep the hose off the ground and prevent kinks. Use guides or reels to hold the hose in place.
| Support Type | Benefit |
| Hose Reel | Keeps hose wound neatly to stop tangles. |
| Hose Guide | Prevents hose from bending around corners. |
| Hose Hanger | Keeps hose off the ground, reducing wear. |
Preventive Measures
Prevent kinks by storing your hose properly and handling it with care. Avoid sharp bends and pull the hose straight.
- Drain water after use to keep hose soft.
- Store the hose coiled loosely on a reel or hanger.
- Avoid stepping or driving over the hose.
- Use a hose with kink-resistant material.
Addressing Connector Issues
Garden hoses often leak or disconnect due to connector problems. Fixing these issues can save water and keep your hose working well.
Check your hose connectors regularly. Tighten loose parts, replace damaged pieces, or consider quick connect systems for easier use.
Tightening Loose Connectors
Loose connectors cause leaks and reduce water flow. Use a wrench or pliers to gently tighten them. Avoid over-tightening to prevent damage.
- Turn off water supply before tightening
- Hold the hose firmly to avoid twisting
- Use tools for better grip and control
- Test for leaks after tightening
Replacing Damaged Connectors
Cracked or broken connectors cause leaks and cannot be fixed by tightening. Replace them with new connectors to restore hose function.
| Connector Type | Signs of Damage | Replacement Tips |
| Plastic | Cracks, breaks | Choose durable plastic or metal |
| Metal | Rust, dents | Use rust-resistant materials |
| Rubber Washers | Leaks, wear | Replace washers regularly |
Using Quick Connect Systems
Quick connect systems make attaching and detaching hoses easy. They help prevent leaks by ensuring a tight fit every time.
- Fast and easy hose connection
- Reduces wear on connectors
- Minimizes water leaks
- Compatible with many hose types

Credit: www.reddit.com
Maintenance Tips
Keeping your garden hose in good shape saves money and effort. Regular care prevents leaks and cracks.
Simple maintenance steps help your hose last longer and work better in your garden tasks.
Proper Storage
Store your garden hose properly to avoid damage. Keep it away from direct sunlight and freezing temperatures.
- Drain all water from the hose before storage
- Coil the hose loosely to prevent kinks
- Use a hose reel or hanger to keep it off the ground
- Store in a cool, dry place during winter months
Regular Inspections
Check your garden hose often for signs of wear and tear. Early detection stops small issues from growing.
| Inspection Area | What to Look For |
| Fittings | Loose or cracked connectors |
| Hose Body | Cracks, holes, or soft spots |
| Spray Nozzle | Clogs or leaks |
| Couplings | Rust or corrosion |
Cleaning And Care
Cleaning your hose keeps it flexible and prevents buildup. Use mild soap and water to clean the outside.
Follow these care tips:
- Rinse inside the hose by running water through it
- Wipe the hose with a soft cloth after use
- Remove any dirt or debris from connectors
- Allow the hose to dry fully before storing
When To Replace Your Hose
Garden hoses can last for many years if cared for properly. You should replace your hose when it shows clear signs of damage or stops working well.
Replacing your hose on time saves water and prevents leaks that can waste resources and cause damage.
Signs Of Wear And Tear
Look for cracks, holes, or leaks along the hose. These signs mean the hose is losing its strength and may fail soon.
Check the hose fittings for rust or damage. If the fittings do not connect tightly, the hose may need replacement.
- Visible cracks or holes
- Water leaking from unexpected spots
- Stiff or brittle sections
- Damaged or rusty fittings
- Kinks that do not straighten
Cost Vs. Benefit Analysis
Consider how much it costs to fix your hose compared to buying a new one. Sometimes repairs cost almost as much as a new hose.
Replacing a worn hose can save money on water bills and prevent damage to your garden or home.
- Repair parts cost less but may not last long
- New hoses come with warranties
- Old hoses waste water and increase bills
- New hoses reduce risk of leaks and bursts
Choosing A New Hose
Pick a hose that fits your garden size and water needs. Longer hoses are good for big gardens, but shorter ones are easier to handle.
Look for hoses made from durable materials like rubber or reinforced vinyl. These last longer and resist cracking.
- Length that suits your garden
- Material that resists wear and weather
- Fittings that connect securely
- Hose diameter for water flow needs

Credit: www.familyhandyman.com

Credit: www.youtube.com
Frequently Asked Questions
How Do I Fix A Leaking Garden Hose?
To fix a leaking garden hose, first locate the leak. Cut out the damaged section. Use a hose repair kit to reconnect the ends securely. Tighten all fittings to prevent further leaks.
What Tools Are Needed To Repair A Garden Hose?
You need a utility knife, hose repair kit, pliers, and a screwdriver. These tools help cut, connect, and secure the hose ends properly. Having them ensures a quick and effective repair.
Can I Repair A Garden Hose Puncture At Home?
Yes, small punctures can be repaired at home using a hose patch kit or waterproof tape. Clean the area, apply the patch or tape, and let it dry before use. This method is cost-effective and easy.
How Long Does It Take To Fix A Garden Hose?
Fixing a garden hose typically takes 10 to 20 minutes. The time depends on the damage extent and your repair skills. Quick repairs prevent water wastage and extend hose life.
Conclusion
Fixing a garden hose saves money and reduces waste. Small leaks or cracks can be repaired quickly. Using basic tools and materials makes the process simple. Regular checks help keep your hose working well. A working hose means a healthy garden and less water loss.
Try these easy steps to fix your hose today. You will feel proud and ready for watering tasks. Keep your garden green without buying a new hose. Simple fixes work well and last long.