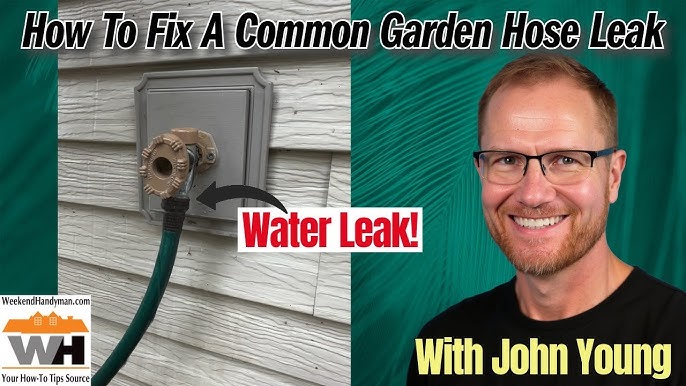
Is your garden hose leaking and wasting water every time you try to water your plants? A small drip can quickly turn into a big problem, costing you more money and leaving your garden dry when you need it most.
But don’t worry—you don’t have to buy a new hose or call a plumber just yet. You’ll discover simple, quick fixes that anyone can do. By the end, you’ll save water, protect your plants, and get back to enjoying your garden without frustration.
Keep reading to find out how to fix your leaking garden hose fast and easily!

Credit: www.familyhandyman.com
Common Causes Of Hose Leaks
Garden hoses often develop leaks that waste water and reduce pressure. Finding the cause helps fix the leak quickly.
Leaks can come from different parts of the hose. Knowing common causes makes repair easier.
Worn Out Washers
Washers are small rubber rings inside hose fittings. They stop water from leaking at connections.
Over time, washers get old and cracked. Worn washers let water drip from the hose end.
- Washers lose shape and become hard
- Damaged washers do not seal well
- Replacing washers often stops leaks
Cracks And Holes
Garden hoses can crack from sun, cold, or rough use. These cracks cause water to leak out.
Small holes let water spray in many directions. Large cracks may cause big water loss.
- Check hose length for splits or holes
- Replace hose if damage is severe
- Use patch kits for small holes
Loose Connections
Hose leaks often happen at connections. Loose fittings let water drip or spray out.
Hand tighten hose connections firmly. Use tools carefully to avoid damage.
- Inspect the couplings for tightness
- Replace damaged connectors
- Use plumber’s tape for better seals

Credit: www.reddit.com
Tools And Materials Needed
Fixing a garden hose leak is simple with the right tools. You’ll need some basic items to get started.
These items will help you repair your garden hose quickly and efficiently. Let’s explore what you need.
Essential Repair Tools
Having the right tools is crucial for a smooth repair process. These tools are commonly found in most households.
- Screwdriver
- Pliers
- Utility Knife
- Wrench
Recommended Replacement Parts
Sometimes, you need to replace parts of the hose to stop a leak. Here are some parts to consider.
| Part | Use |
| Hose Coupler | Connects two hose ends |
| O-rings | Prevents water leakage |
| Hose Repair Kit | Complete repair solution |
Step-by-step Repair Methods
Garden hoses often develop leaks that waste water and reduce pressure. Fixing them yourself saves money and extends hose life.
Below are simple repair methods you can try. Each method fits a different type of leak.
Fixing Small Holes With Tape
Small holes or cracks can be sealed quickly with waterproof tape. This method works best for tiny leaks.
- Clean and dry the damaged area thoroughly.
- Wrap waterproof tape tightly around the hole.
- Overlap the tape by at least two inches on each side.
- Press the tape to remove air bubbles and secure it.
- Test the hose by turning on the water slowly.
Replacing Washers
Leaks near hose connectors often come from worn-out washers. Replacing them stops drips at the fittings.
- Turn off the water supply and disconnect the hose.
- Unscrew the hose end or nozzle to access the washer.
- Remove the old washer and throw it away.
- Insert a new rubber washer of the same size.
- Screw the fitting back on tightly but avoid over-tightening.
- Turn on the water and check for leaks.
Patching Larger Cracks
Large cracks need a stronger fix using patch kits or silicone sealant. This method restores hose strength.
Steps to patch a large crack:
- Dry the cracked area completely.
- Apply silicone sealant inside and outside the crack.
- Wrap the area with a rubber patch or hose repair tape.
- Secure the patch with zip ties or clamps if available.
- Let the sealant cure for 24 hours before use.
Tightening Hose Fittings
Loose fittings cause leaks at connection points. Tightening them often stops the drip.
| Tool | Purpose |
| Adjustable wrench | Tighten metal hose fittings |
| Pliers | Grip and hold fittings steady |
| Rubber gloves | Improve grip and protect hands |
- Turn off water supply before adjusting.
- Hold the hose steady with pliers if needed.
- Use an adjustable wrench to tighten the fitting snugly.
- Avoid over-tightening to prevent damage.
- Turn water back on and check for leaks.

Credit: www.familyhandyman.com
Preventing Future Leaks
Fixing a garden hose leak is important, but preventing leaks saves time. Proper care can keep your hose working longer.
Follow simple tips to store and maintain your hose. Choose the right materials for better durability.
Proper Hose Storage
Store your garden hose in a cool, dry place away from sunlight. Sunlight can cause cracks and leaks over time.
- Coil the hose loosely to avoid kinks
- Use a hose reel or hanger for storage
- Avoid sharp bends or heavy objects on the hose
- Drain water from the hose before storing it
Regular Maintenance Tips
Check your hose often for small holes or cracks. Early fixes stop leaks from getting worse.
| Maintenance Task | Frequency |
| Inspect hose for damage | Monthly |
| Clean hose connectors | Every 3 months |
| Replace worn washers | As needed |
| Flush hose to clear debris | Twice a year |
Choosing Durable Hose Materials
Pick hoses made of strong materials to avoid leaks. Some types last longer in tough weather.
- Rubber hoses resist cracks and kinks well
- Reinforced vinyl hoses are lightweight and durable
- Polyurethane hoses stay flexible in cold weather
- Look for hoses with thick walls and quality fittings
When To Replace The Hose
Knowing when to replace your garden hose saves time and water. Some damages cannot be fixed easily.
It is important to check your hose regularly. This helps avoid leaks and other problems.
Signs Of Irreparable Damage
Not all hose problems can be repaired. Look for these signs that show it is time to replace your hose:
- Large cracks or holes that keep growing
- Soft, mushy spots that feel weak
- Severe kinks that block water flow
- Rust or corrosion on metal fittings
- Repeated leaks after repairs
Cost Vs. Repair Considerations
Sometimes fixing a hose costs more than buying a new one. Think about these points before repairing:
| Repair Type | Cost | Durability After Repair |
| Simple Patch | Low | Short-term |
| Replacing Fittings | Medium | Medium-term |
| Multiple Repairs | High | Low |
| Buying New Hose | Medium | Long-term |
Frequently Asked Questions
How Do I Identify The Source Of A Garden Hose Leak?
Check the hose along its entire length for wet spots or water sprays. Inspect connectors and fittings closely for cracks or loose parts causing leaks.
Can I Fix A Leaking Garden Hose Without Replacing It?
Yes, small leaks can be fixed using hose repair kits or waterproof tape. For larger holes, cutting and rejoining the hose sections is effective.
What Tools Do I Need To Repair A Garden Hose Leak?
You will need a hose repair kit, scissors or a utility knife, and possibly pliers. These tools help cut, clean, and reconnect the hose securely.
How Long Does It Take To Fix A Leaking Garden Hose?
Most repairs take between 10 to 20 minutes. Simple leaks are faster to fix, while multiple leaks may require more time.
Conclusion
Fixing a leaking garden hose saves water and money. Small leaks cause big problems over time. Use simple tools to patch or replace damaged sections. Regular checks keep your hose working well. A tight connection stops most leaks quickly. Repairing your hose helps your garden stay healthy.
Don’t ignore leaks—they waste water and reduce pressure. Keep your hose in good shape for easy watering. A little effort goes a long way in fixing leaks. Enjoy a strong, leak-free hose all season long.