If you’ve ever wanted to upgrade your kitchen and enhance your cooking experience, learning how to install a gas cooktop might just be the perfect project for you. Imagine the satisfaction of preparing your favorite meals on a sleek, efficient cooktop that you installed yourself.
But before you dive into this rewarding task, it’s essential to know the right steps to take. This guide will walk you through the process, ensuring you feel confident and equipped to handle the installation like a pro. Plus, doing it yourself can save you money and give you a sense of accomplishment.
Ready to transform your cooking space into a chef’s paradise? Let’s get started.
Preparing For Installation
Preparing to install a gas cooktop sets the foundation for a smooth, safe, and efficient process. Taking time to gather the right tools, check your gas supply, and ensure proper ventilation can save you from costly mistakes and hazards. How confident are you that your kitchen is ready for this upgrade?
Gathering Tools And Materials
Start by collecting all necessary tools and materials before you begin. Common items include an adjustable wrench, pipe sealant or Teflon tape, a screwdriver, a gas leak detector solution, and a level to ensure your cooktop sits perfectly flat.
Having everything at hand keeps your workflow steady and reduces frustration. Think about the last time you had to stop mid-project because you were missing a simple tool—avoid that by preparing fully.
Checking Gas Supply
Verify that your gas supply line is compatible with the cooktop’s requirements. Check the type of gas you use—natural gas or propane—as this affects installation fittings and pressure settings.
Turn off the main gas valve before you start to prevent leaks or accidents. If you’re unsure about your gas line’s condition or pressure, consider calling a professional to inspect it first.
Ensuring Proper Ventilation
Proper ventilation is essential to avoid buildup of harmful gases and maintain air quality. Make sure your kitchen has a range hood or exhaust fan that can handle the cooktop’s output.
Check that vents are clear and positioned to efficiently remove fumes. Poor ventilation can lead to discomfort or even health risks—does your kitchen’s airflow meet safety standards?

Credit: homebuilding.thefuntimesguide.com
Turning Off The Gas
Turning off the gas is the first and most important step before installing a gas cooktop. Safety must come first. A small leak can cause serious harm. Knowing how to stop the gas supply protects you and your home.
Understanding how to locate and shut off the gas valve is essential. This step ensures no gas flows while you work. Let’s explore how to find the gas valve and turn off the main supply safely.
Locating The Gas Valve
Start by finding the gas valve connected to your cooktop. It is usually near the appliance or under the sink. Look for a small handle or lever on the gas pipe.
The valve might be a round knob or a lever that moves side to side. It controls the gas flow to your cooktop. Knowing its exact location saves time and prevents accidents.
Shutting Off The Main Supply
Next, turn off the main gas supply to your home. This valve is often outside near the gas meter. It can also be in the basement or utility room.
Use a wrench or your hand to turn the valve 90 degrees. When the valve is perpendicular to the pipe, the gas is off. Double-check by trying to light the cooktop; no gas should flow.
Removing The Old Cooktop
Removing the old cooktop is the first step in installing a new gas cooktop. It requires careful handling to avoid damage or injury. Safety is a priority because gas and electrical parts are involved.
Start by making sure the gas supply is turned off. Also, disconnect the electrical power to the cooktop. These precautions prevent accidents during removal.
Disconnecting Gas Lines
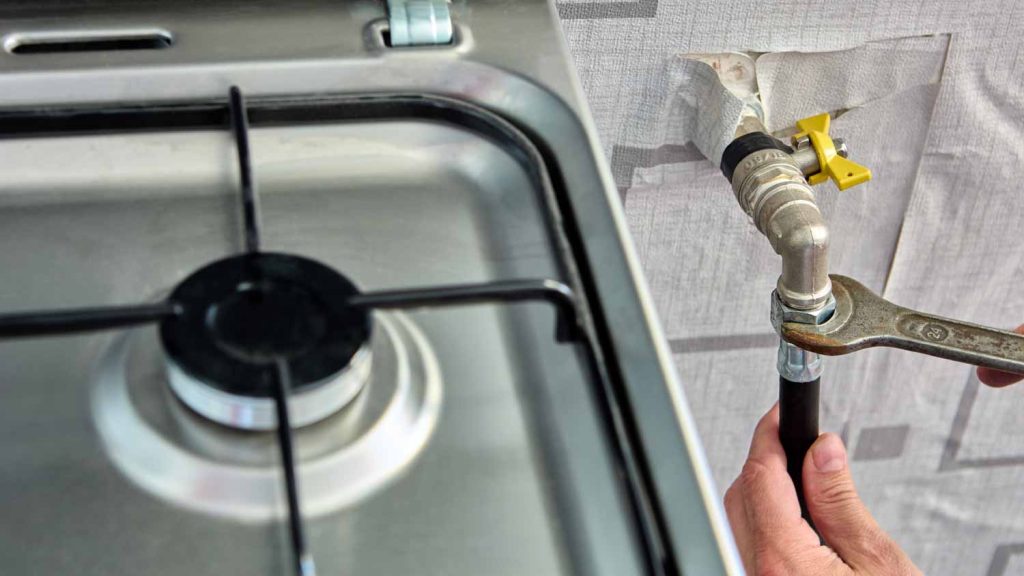
Locate the gas shut-off valve near the cooktop. Turn it off completely to stop the gas flow. Use a wrench to carefully disconnect the gas line from the cooktop. Keep a cloth nearby to catch any gas residue. Avoid forcing the connection to prevent damage.
Detaching Electrical Connections
Find the electrical connection box under the cooktop. Switch off the circuit breaker to cut power. Unscrew the electrical cover panel carefully. Disconnect the wires by loosening the wire nuts. Remember the wire colors to connect the new cooktop easily later.
Lifting Out The Cooktop
Check for any screws or brackets holding the cooktop in place. Remove all fasteners using the right tools. Lift the cooktop gently from the countertop opening. Ask for help if the cooktop is heavy or awkward. Place the old cooktop on a soft surface to avoid scratches.
Installing The New Cooktop
Installing a new cooktop requires careful attention to detail for safety and performance. This process involves placing the unit correctly, connecting the gas lines, and sealing all joints properly. Each step ensures your cooktop works efficiently without leaks or hazards.
Positioning The Cooktop
Place the cooktop into the countertop cutout gently. Align it so it fits flush with the surface. Ensure no gaps appear between the cooktop edges and countertop. Check that the cooktop is level to avoid uneven cooking. Keep the unit steady to prevent movement during use.
Connecting Gas Lines Securely
Attach the gas supply line to the cooktop’s inlet carefully. Use a flexible gas connector for easier handling. Tighten the connection with a wrench, but do not over-tighten. Confirm that the connection is firm and does not wiggle. Always turn off the gas before making connections.
Sealing Connections For Safety
Apply a gas-approved sealant or tape around threaded fittings. This prevents gas leaks at the joints. Avoid using regular tape or sealants not meant for gas lines. After sealing, test the connections with soapy water. Look for bubbles that indicate leaks. Fix any leaks before turning the gas back on.
Testing For Gas Leaks
Testing for gas leaks is a vital part of installing a gas cooktop. It ensures safety and prevents dangerous accidents. Gas leaks can cause fires or explosions if not detected early. Always perform thorough checks after connecting the gas supply. Use simple, effective methods to find leaks before turning on the appliance fully.
Using Soapy Water Method
This method is safe and easy to do at home. Mix water and dish soap in a spray bottle or bowl. Apply the soapy water to all gas connections and joints. Look closely for bubbles forming at these points. Bubbles mean gas is escaping and a leak exists.
Ensure the area is well-ventilated during this test. Do not light any flames while testing. If bubbles appear, turn off the gas immediately. Tighten connections or call a professional plumber to fix the leak.
Detecting Smells And Sounds
Natural gas has a distinct, strong odor added for safety. It smells like rotten eggs or sulfur. Carefully sniff around the gas line and cooktop area for this smell. Be alert to any unusual hissing or whistling sounds near connections.
These sounds may indicate gas escaping from a loose fitting. If you detect any odor or sound, do not use the cooktop. Turn off the gas supply and ventilate the room well. Contact a qualified technician to inspect and repair the problem.
Restoring Gas Supply
Restoring the gas supply is a crucial part of installing a gas cooktop. This process ensures your cooktop receives fuel safely and functions properly. Take your time and follow safety guidelines closely. Never rush when dealing with gas connections.
Turning On The Gas Valve
Locate the main gas valve near your cooktop. This valve controls gas flow to the appliance. Turn the valve handle slowly to the open position. Usually, the handle aligns with the pipe when open.
Ensure no gas smell is present before proceeding. If you detect any odor, stop immediately and call a professional. Safety is the top priority in handling gas.
Checking Burner Functionality
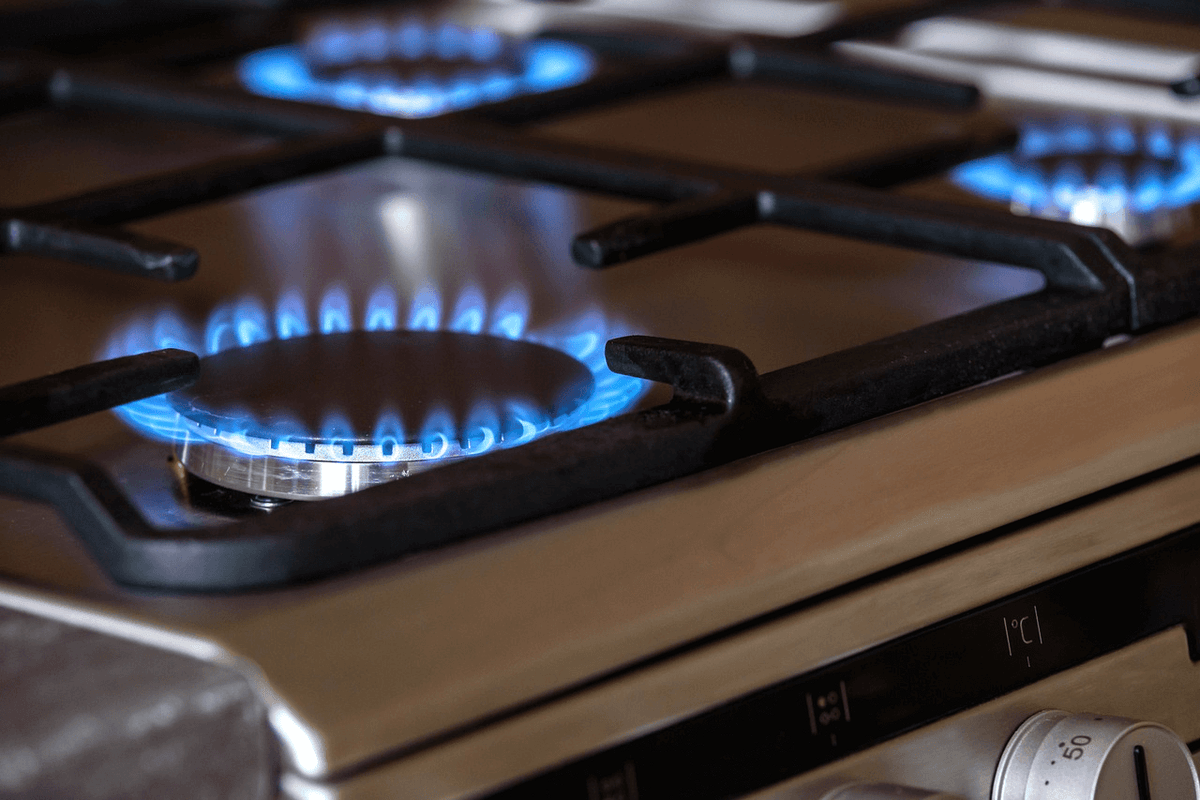
After turning on the gas, test each burner one by one. Light the burners using the ignition system or a match. Watch for a steady blue flame without yellow or orange tips.
If flames flicker or appear weak, the burner may need cleaning or adjustment. Confirm all burners light evenly and produce a consistent flame. Proper burner function ensures efficient cooking and safety.
Final Safety Checks
Final safety checks are crucial after installing your gas cooktop. They ensure the appliance works safely and efficiently. Skipping these checks may cause hazards or damage. Take time to review every detail carefully. This step protects your home and family from potential gas leaks and accidents.
Verifying Ventilation
Proper ventilation keeps the air clean and reduces gas buildup. Check that the exhaust fan or hood is working well. Make sure vents are clear of dust and blockages. Fresh air should flow freely around the cooktop area. Good ventilation prevents harmful fumes from accumulating indoors.
Ensuring Stability And Support
Confirm the cooktop is firmly placed on a stable surface. The counter or cabinet should hold the cooktop weight without wobbling. Test by gently pressing on different sides. No movement means the appliance is secure. Stability stops accidents and maintains proper gas connections.

Credit: www.amazon.com
Maintenance Tips
Maintaining your gas cooktop keeps it safe and efficient. Regular care prevents issues and extends its life. Follow simple habits to keep your cooktop clean and working well.
Regular Cleaning
Clean your cooktop after every use. Remove spills and food crumbs quickly. Use a soft cloth with warm, soapy water. Avoid harsh chemicals that can damage surfaces. Clean burner caps and grates separately. Dry all parts fully before putting them back.
Scheduling Professional Inspections
Have a professional check your gas cooktop yearly. They inspect gas connections and burner performance. Professionals spot leaks and worn parts early. This helps avoid dangerous problems and costly repairs. Keep your cooktop running smoothly and safely with routine inspections.
Credit: karinearappliances.com
Frequently Asked Questions
How Do I Safely Install A Gas Cooktop?
First, turn off the gas supply. Follow manufacturer instructions carefully. Use proper connectors and check for leaks with soapy water. Ensure ventilation and hire a professional if unsure.
What Tools Are Needed For Gas Cooktop Installation?
You need a wrench, screwdriver, pipe sealant, gas line connector, and a leak detector solution. Always have a gas shutoff valve nearby before starting.
How To Connect A Gas Cooktop To The Gas Line?
Attach the cooktop’s gas inlet to the gas supply using a flexible connector. Apply pipe sealant and tighten connections securely. Test for leaks before use.
Can I Install A Gas Cooktop Myself?
Yes, if you have basic plumbing and gas knowledge. Always follow safety protocols. For complex setups, hiring a licensed professional is recommended to avoid hazards.
Conclusion
Installing a gas cooktop can seem hard but is doable with care. Always check your gas connections and follow safety steps. Take your time and read the instructions well. Proper installation helps your cooktop work safely and well. If unsure, ask a professional for help.
Enjoy cooking on your new cooktop with confidence. Simple steps lead to great results in your kitchen.