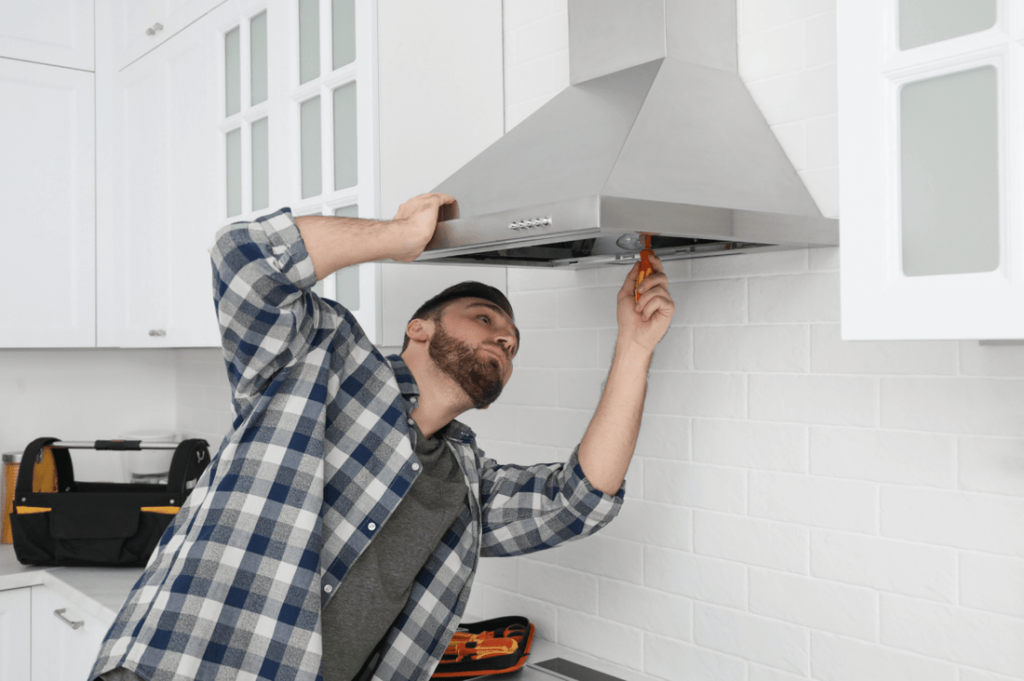
Are you ready to improve your kitchen’s air quality and keep it smelling fresh? Installing a range hood vent through your wall can make a huge difference by removing smoke, odors, and heat while you cook.
But if the thought of cutting through walls and handling vents feels overwhelming, don’t worry—you’re not alone. In this guide, you’ll discover simple, step-by-step instructions that anyone can follow. By the end, you’ll have the confidence to tackle this project yourself and enjoy a cleaner, more comfortable kitchen.
Let’s get started and transform your cooking space!
Tools And Materials Needed
Gather essential tools like a power drill, screwdriver, and measuring tape. Have materials like vent duct, wall cap, and screws ready. Ensure you have safety gear such as gloves and goggles for protection.
Installing a range hood vent through the wall can transform your kitchen by improving ventilation and removing unwanted odors. Before you jump into the installation process, it’s essential to gather the right tools and materials. Having everything you need at your fingertips will make the project smoother and more efficient. Let’s dive into the essentials you’ll need for this task.Tools Needed
A successful range hood installation starts with the right tools. Here’s a list of what you will need: – Drill: You’ll need this for making precise holes in the wall for the vent. – Saw: A reciprocating saw or a jigsaw will help you cut through the wall material. – Screwdriver: Both flathead and Phillips screwdrivers may be necessary for securing the hood and vent components. – Measuring Tape: Accurate measurements ensure a snug fit for your vent. – Level: Keeps your installation straight and aligned. – Pencil: For marking spots on the wall. – Stud Finder: To locate wall studs and avoid cutting into them. Are you equipped with these tools? If not, a quick trip to your local hardware store can save you a lot of hassle.Materials Needed
Equipping yourself with the correct materials is just as crucial as having the right tools. Here’s what you’ll need: – Range Hood: Choose one that fits your kitchen’s design and ventilation needs. – Vent Kit: This typically includes the ductwork, vent cap, and any necessary connectors. – Screws and Anchors: These will secure the range hood to the wall. – Sealant or Caulk: To ensure the vent is airtight, preventing leaks. – Electrical Wiring Supplies: If your range hood requires electrical connections, you’ll need wiring supplies, unless it’s a plug-in model. Having these materials on hand can prevent frustrating delays. It also ensures a more professional and seamless installation.Safety Gear
Safety should never be an afterthought. Protect yourself with the following gear: – Safety Glasses: Shield your eyes from dust and debris. – Gloves: Protect your hands when handling sharp tools or materials. – Dust Mask: Prevent inhalation of dust particles during cutting. Did you know that proper safety gear can not only protect you but also improve your focus on the task? It’s a small step with big benefits. Now that you’re armed with the knowledge of tools and materials needed, you’re ready to tackle the installation. Have you set aside enough time to complete the project without rushing? Taking it slow can lead to a more polished finish.Choosing The Right Range Hood
Choosing the right range hood is crucial for effective ventilation and a comfortable cooking environment. The perfect hood not only removes smoke and odors but also complements your kitchen’s style and size. Think about your cooking habits and kitchen layout before making a choice.
Understanding Different Types Of Range Hoods
Range hoods come in several styles: wall-mounted, under-cabinet, island, and insert hoods. For venting through a wall, wall-mounted hoods are often the best fit because they are designed to connect directly to an exterior wall.
Consider how much space you have above your stove and the design that suits your kitchen’s look. Do you prefer a sleek, modern hood or something more traditional? Your choice affects both function and style.
Measuring Your Kitchen And Hood Size
Size matters when selecting a range hood. The hood should be at least as wide as your cooking surface to capture smoke effectively.
Measure your stove carefully and think about the height where you will install the hood. If the hood is too small or too high, it won’t work well. Are you sure your measurements match the hood’s specs?
Choosing The Right Ventilation Power
Ventilation power is measured in CFM (cubic feet per minute). The stronger the CFM, the better it pulls out smoke and odors.
A general rule is to aim for 100 CFM per 10,000 BTUs of your stove’s power. For example, if your stove produces 40,000 BTUs, choose a hood with at least 400 CFM.
Think about how often you cook and what kind of meals you prepare. Heavy frying or grilling needs a stronger hood than boiling or simmering.
Material And Maintenance Considerations
Range hoods come in stainless steel, glass, and other materials. Stainless steel is popular because it’s durable and easy to clean.
Look for hoods with removable filters that you can wash regularly. This keeps your hood working well and your kitchen fresh.
How much time do you want to spend on cleaning your hood? This can influence your material choice.
Selecting The Vent Location
Selecting the right location for your range hood vent is crucial for both efficiency and ease of installation. The vent’s position affects how well your kitchen stays smoke-free and how much work you’ll face cutting through walls. You want to pick a spot that balances functionality with convenience.
Consider The Exterior Wall Layout
Check your kitchen’s exterior walls for the best vent placement. Avoid areas with electrical wiring, plumbing pipes, or studs that could complicate the installation.
Look for a wall section that offers a straight path outside. The shorter and more direct the vent path, the better your range hood will perform.
Check For Obstructions Inside And Outside
Inside your kitchen, make sure the vent won’t hit cabinets, shelves, or appliances. Outside, avoid placing the vent where it could be blocked by bushes, fences, or other structures.
Think about how weather might affect your vent. You don’t want it facing prevailing winds or areas where snow and debris can pile up.
Match The Vent Height With The Range Hood
The vent hole should align with the range hood’s exhaust outlet to avoid awkward bends. Measure carefully before drilling to ensure a smooth connection.
Keep in mind that too many bends or a long duct run can reduce airflow. Straight and short is the best path.
Plan For Future Maintenance Access
Choose a vent location where you can easily reach it for cleaning or repairs. A hidden or hard-to-access vent will make maintenance a hassle later on.
Consider adding a clean-out cap outside for easier duct cleaning. This small step saves time and frustration down the road.
Measuring And Marking The Wall
Measuring and marking the wall accurately is the foundation of a successful range hood vent installation. Without precise measurements, you risk misaligning the vent, which can lead to poor ventilation or even damage to your kitchen walls. Take your time with this step—it will save you frustration and extra work later.
Gather The Right Tools
Before you start, make sure you have a tape measure, a pencil, a level, and painter’s tape handy. A level helps ensure your marks are straight, which is crucial for both aesthetics and function. Using painter’s tape can protect your wall surface and make markings easier to see and erase if needed.
Identify The Vent Location
Decide where the vent will exit through the wall. Consider the position of your range hood and the path to the outside. Think about any obstacles like studs, wiring, or plumbing inside the wall that might affect placement.
Measure The Vent Dimensions
Check the vent size specified in your range hood’s manual. Measure the width and height of the vent opening you’ll need to cut. Double-check these measurements against the actual vent piece to avoid surprises.
Mark The Wall Outline
Use your tape measure and pencil to mark the center point of the vent on the wall. Then, mark the outline of the vent opening based on the dimensions you measured. Use the level to ensure your lines are perfectly horizontal and vertical.
Verify Measurements Before Cutting
Take a moment to re-measure all your marks and confirm they align with the vent unit. Ask yourself if the placement allows for proper ventilation and doesn’t interfere with wall studs or electrical wiring. It’s better to check twice than to cut once.
Cutting The Wall Opening
Cutting the wall opening is a key step for installing a range hood vent. It creates the passage for venting air outside. Accurate cutting ensures a neat fit and proper airflow. Preparation and careful execution make the process safe and effective.
Safety Precautions
Wear safety goggles to protect your eyes from dust and debris.
Use a dust mask to avoid inhaling harmful particles during cutting.
Turn off power to nearby outlets or switches to prevent electrical hazards.
Check for hidden wires, pipes, or studs inside the wall before cutting.
Work slowly and carefully to avoid damaging the wall or injuring yourself.
Cutting Techniques
Mark the opening size clearly on the wall using a pencil and level.
Use a stud finder to avoid cutting through wall studs.
Start cutting with a small drill hole at each corner for easier jigsaw entry.
Use a drywall saw or jigsaw to cut along the marked lines smoothly.
Remove the cut piece gently and clean rough edges with sandpaper.
Installing The Vent Cap
Installing the vent cap is a crucial step when venting your range hood through the wall. It protects your home from weather, pests, and drafts while allowing proper airflow for your kitchen ventilation. Getting this part right ensures your system runs efficiently and lasts longer.
Choosing The Right Vent Cap For Your Wall
Not all vent caps are created equal. You need one that fits your wall thickness and matches your vent pipe diameter perfectly.
Look for durable materials like stainless steel or heavy-duty plastic. These resist rust and damage over time.
Consider features like a built-in damper to prevent backdrafts. Have you checked if the vent cap includes a screen? It’s a simple way to stop insects from entering.
Preparing The Wall For The Vent Cap Installation
Before attaching the vent cap, make sure your wall opening is smooth and clean. Remove any debris or rough edges that could interfere with the seal.
Measure twice, cut once. Double-check the hole size to ensure the vent cap fits snugly without gaps.
Sealant is your friend here. Apply a high-quality exterior caulk around the hole to keep moisture and air leaks at bay.
Securing The Vent Cap Firmly
Attach the vent cap to the exterior wall using screws designed for outdoor use. Stainless steel screws work best to avoid rust.
Press the vent cap firmly against the wall to create a tight seal. If you’re working with siding, you may need to remove a section for a flush fit.
Once attached, add a layer of sealant around the edges to waterproof the installation. This extra step can save you from future leaks and damage.
Running The Ductwork
Running the ductwork is a key part of installing a range hood vent through a wall. It moves smoke, odors, and steam outside your home. Proper duct installation keeps your kitchen air fresh and your vent working well. Careful planning and quality materials improve airflow and reduce noise. Follow these tips for the best results.
Choosing The Right Duct Material
Choose duct materials that resist heat and corrosion. Metal ducts, like aluminum or galvanized steel, work best. They last longer and do not trap grease easily. Avoid plastic or vinyl ducts. These materials can melt or catch fire from heat.
Round ducts improve airflow more than flat or rectangular ones. Use the shortest duct length possible. Fewer bends mean better air movement and less noise.
Sealing Joints And Connections
Seal all duct joints tightly to prevent air leaks. Use metal foil tape instead of duct tape. Foil tape withstands heat and stays sealed longer. Apply a high-temperature sealant around joints for extra protection.
Check connections between the range hood and duct. Secure them with screws or clamps. Loose joints reduce vent efficiency and increase noise. Proper sealing ensures smooth airflow and safer kitchen air.

Credit: www.create-enjoy.com
Mounting The Range Hood
Mounting the range hood is a key part of installing a vent through the wall. This step ensures the hood stays secure and works well to remove smoke and odors. Proper mounting also keeps the kitchen safe from heat and grease buildup. Follow clear instructions to make this process smooth and effective.
Choose The Right Height For Mounting
Position the range hood at the correct height above the cooking surface. Usually, this is between 24 and 30 inches. Too low can block your view and cause heat damage. Too high reduces the hood’s efficiency. Measure carefully before marking the wall.
Mark The Wall For Mounting Holes
Use a level to draw a straight line where the hood will sit. Mark the points for screws or brackets based on the hood’s size. Double-check the marks to ensure the hood will be centered and level.
Attach The Mounting Bracket Securely
Fix the mounting bracket to the wall using screws and anchors. Make sure it holds firm. The bracket supports the hood’s weight, so it must be stable. Use a drill for precise holes and tight screws.
Hang The Range Hood On The Bracket
Lift the range hood and hook it onto the mounted bracket. Check that it fits well and does not wobble. Adjust screws or brackets if needed to secure the hood firmly against the wall.
Connect Electrical Wiring Safely
Turn off power before working on wiring. Connect the hood’s wires to the home’s electrical supply according to the instructions. Use wire nuts and electrical tape to secure connections. Restore power and test the hood’s light and fan.
Connecting The Vent To The Hood
Connecting the vent to the range hood is a crucial step that ensures your kitchen stays free from smoke, grease, and odors. This connection needs to be tight and secure to maintain proper airflow and prevent any leaks. Let’s break down how you can make this connection solid and efficient.
Choosing The Right Vent Connector
Start by selecting a vent connector that fits both the range hood outlet and the wall vent pipe. Most range hoods use a 6-inch or 8-inch duct size, so double-check your measurements before buying. Using a rigid metal duct is best because it resists damage and keeps airflow smooth.
Flexible ducts are easier to install but can trap grease and reduce airflow. Have you noticed how sometimes your vent seems less effective? That could be because of a poorly chosen or kinked duct. Avoid that by sticking with rigid metal wherever possible.
Securing The Vent Connector To The Hood
Attach the vent connector firmly to the range hood’s exhaust outlet. Use a metal clamp or duct tape designed for HVAC to hold the connection tight. Make sure the connection is flush without gaps that could leak air or grease.
Sometimes, the hood outlet might have a flange or a collar—slide the duct over it completely. If your hood has a built-in clamp, tighten it securely but don’t overdo it. A loose connection invites leaks; too tight could damage the duct.
Sealing The Connection For Maximum Efficiency
Seal the joint with high-quality aluminum foil tape, not regular duct tape. Regular tape loses adhesion over time, especially in hot, greasy kitchen environments. Aluminum tape stays in place and keeps air from escaping.
After taping, check for any visible gaps or holes. Can you feel air leaking out? If yes, add more tape or adjust the duct for a better fit. A well-sealed connection improves your range hood’s performance and reduces energy waste.
Testing The Airflow After Connection
Once connected and sealed, turn on your range hood to test the airflow. You should feel strong suction at the hood’s intake and air flowing smoothly out the wall vent. If airflow feels weak, double-check all connections and the duct’s path for blockages or kinks.
Have you ever experienced a vent that just didn’t seem to work right? Often, it’s because the vent connector wasn’t properly installed or sealed. Taking the time to test now can save frustration later.
Testing The Ventilation System
Testing the ventilation system is a key step after installing a range hood vent through the wall. It ensures the system works properly and removes cooking fumes efficiently. This step helps avoid smoke build-up and keeps your kitchen fresh.
Testing also confirms that the vent is sealed tightly. A good seal prevents air leaks, which reduce vent performance. Proper testing saves time and trouble later.
Check Airflow Strength
Turn on the range hood at full power. Stand near the vent outside the house. Feel the airflow with your hand. Strong airflow means the vent moves air well.
Weak airflow may mean a blockage or poor installation. Inspect the duct for bends or debris. Fix any issues before continuing.
Inspect For Air Leaks
Use a smoke stick or incense stick near vent joints inside and outside. Watch for smoke escaping from seams. Smoke escaping means leaks.
Seal leaks with high-quality caulk or metal tape. Re-test after sealing to ensure no leaks remain.
Listen For Unusual Noises
Run the range hood and listen carefully. Rattling or loud noises suggest loose parts or poor fitting. Tighten screws and check fan blades.
Quiet operation means the system is stable and secure.
Measure Ventilation Efficiency
Use an anemometer to measure airflow speed at the vent outlet. Compare readings to the range hood’s specifications. Proper airflow matches or exceeds manufacturer guidelines.
Low readings indicate duct problems or incorrect vent size. Adjust as needed for optimal performance.
Maintenance Tips For Range Hood Vents
Keeping your range hood vent in top shape is key to ensuring it works efficiently and lasts longer. Regular maintenance not only improves air quality in your kitchen but also prevents costly repairs down the line. Let’s look at practical tips that make caring for your vent straightforward and manageable.
Cleaning The Range Hood Filters
Filters trap grease and airborne particles, so they get dirty fast. You should clean them every month or two, depending on how often you cook.
- Remove the filters carefully according to your hood’s manual.
- Soak them in hot, soapy water or a degreaser for 10-15 minutes.
- Use a soft brush to scrub away any remaining residue.
- Rinse thoroughly and let them dry completely before reinstalling.
Have you noticed your vent struggling to clear smoke? Dirty filters might be the culprit.
Inspecting The Vent Duct Regularly
The duct that carries air outside can accumulate grease and debris, restricting airflow. Checking it every few months helps you catch blockages early.
- Look for visible buildup or damage on the duct exterior.
- If accessible, use a flashlight to inspect inside the duct.
- Clean or replace duct sections if grease buildup is severe.
Think about how much better your kitchen would feel with smooth, uninterrupted ventilation.
Checking The Fan And Motor Function
The fan and motor are the heart of your range hood. Over time, dust and grease can cause them to slow down or make noise.
- Turn off the power before inspecting the fan blades and motor.
- Wipe the blades gently with a damp cloth to remove dirt.
- Listen for unusual sounds when the fan runs; squeaks or rattles may signal a problem.
- Consider professional servicing if the motor seems weak or noisy.
Have you ever ignored strange noises only to face bigger repairs later? A quick check can save you headaches.
Maintaining The Exterior Surfaces
The outer part of your range hood often gets splashed with grease and food particles. Cleaning it regularly keeps your kitchen looking fresh and prevents buildup.
- Use a mild detergent and a soft cloth to wipe the surfaces weekly.
- Avoid abrasive cleaners that can scratch the finish.
- Polish stainless steel hoods with a dedicated cleaner for shine and protection.
Does your hood look dull or stained? A little attention goes a long way in preserving its appearance.
Credit: www.kitchenaid.com

Credit: www.create-enjoy.com
Frequently Asked Questions
What Tools Are Needed To Install A Range Hood Vent?
You need a drill, hole saw, measuring tape, screwdriver, level, and caulk gun. Safety gear like gloves and goggles is essential too.
How Do You Choose The Right Vent Location?
Pick a spot with clear access outside, avoiding electrical wires and plumbing. Ensure the vent is near the cooking area for efficiency.
Can I Install A Range Hood Vent Myself?
Yes, if you have basic DIY skills and tools. Follow manufacturer instructions carefully and check local building codes for venting requirements.
How To Seal The Vent To Prevent Leaks?
Use high-quality exterior caulk around the vent edges. Proper sealing stops air leaks and water damage, improving vent performance.
Conclusion
Installing a range hood vent through a wall can improve kitchen air quality. Follow each step carefully for a safe and effective setup. Measure and cut precisely to avoid mistakes. Use the right tools and materials for best results. Seal all gaps to keep your home energy efficient.
Test the vent to ensure it works properly. A well-installed vent helps remove smoke and odors fast. Take your time, and enjoy a fresher kitchen space. Simple steps lead to great results.