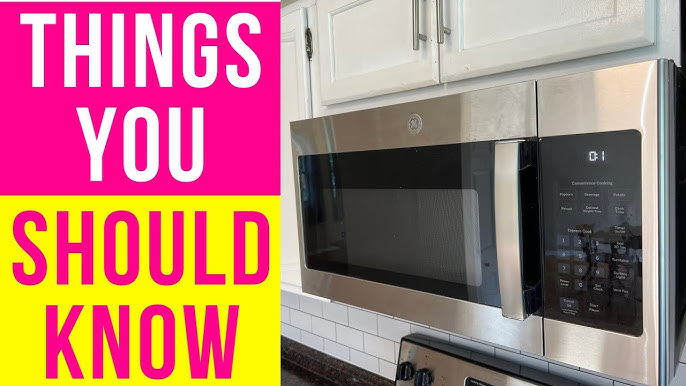
Are you ready to upgrade your kitchen with a sleek and efficient GE over the range microwave oven? If the thought of installation seems daunting, you’re not alone.
Many people feel unsure about tackling this project. But what if I told you it’s simpler than you think? Imagine the satisfaction of completing this task on your own, saving money, and having a modern appliance that enhances your cooking space.
In this guide, you’ll discover step-by-step instructions that make the installation process easy and stress-free. Let’s turn your kitchen into the culinary hub you’ve always dreamed of, with a microwave that not only looks great but also works like a charm. Ready to get started? Let’s dive in!
Preparation Before Installation
Proper preparation makes installing a GE over the range microwave easier. It saves time and helps avoid mistakes. Gathering tools, checking safety, and measuring space are key steps before starting.
Tools And Materials Needed
- Power drill with drill bits
- Screwdrivers (Phillips and flathead)
- Measuring tape
- Stud finder
- Level
- Pencil or marker
- Mounting template (usually included with the microwave)
- Safety glasses
- Screws and mounting hardware (provided with microwave)
- Electrical tape
- Wire nuts
Safety Precautions
Turn off power to the kitchen area at the circuit breaker. This prevents electrical shock during installation. Wear safety glasses to protect your eyes from dust and debris. Use a sturdy ladder or step stool for working above the stove. Avoid loose clothing that might catch on tools or microwave parts. Double-check all connections before restoring power.
Checking The Space And Electrical Requirements
Measure the width, height, and depth of the space above your stove. Compare these with the microwave’s dimensions to ensure a proper fit. Check for any obstructions like cabinets or vents. Confirm that an electrical outlet is nearby and meets the microwave’s voltage and amperage needs. The outlet should be grounded and dedicated to the microwave for safety. Verify the wall can support the microwave’s weight using a stud finder to locate studs.

Credit: www.kellyshomecenter.com
Removing The Old Microwave
Removing the old microwave is the first task before installing your new GE over the range microwave oven. This process requires care to avoid damage and ensure safety. Follow these simple steps to take out the old unit smoothly.
Disconnecting Power
Start by turning off the microwave’s power source. Unplug the microwave from the electrical outlet. If the microwave is hardwired, switch off the circuit breaker connected to it. Never handle electrical parts with wet hands. Confirm the power is off to avoid any accidents.
Detaching The Unit
Locate the mounting screws that hold the microwave in place. Remove these screws carefully using a screwdriver. Ask for help to support the microwave while loosening screws. Gently pull the microwave away from the wall or cabinet. Be cautious to avoid dropping or damaging the microwave.
Clearing The Installation Area
Once the microwave is removed, clean the area thoroughly. Wipe down the wall and cabinet space. Check for any leftover screws or debris. Make sure the surface is dry and clear. This step prepares the space for a smooth installation of the new microwave.
Mounting The Microwave Bracket
Mounting the microwave bracket is a key step in installing your GE over the range microwave oven. This bracket holds the microwave securely on the wall. Proper installation ensures the microwave stays stable during use and keeps your kitchen safe. Follow the instructions carefully for a firm and safe setup.
Locating Studs And Marking Holes
Find the wall studs behind your backsplash. Use a stud finder to locate them accurately. Mark the stud locations with a pencil. These spots will hold the bracket firmly.
Hold the mounting bracket on the wall at the desired height. Use a level to keep it straight. Mark the screw holes on the wall through the bracket holes. Make sure marks align with the studs for strong support.
Securing The Bracket To The Wall
Drill pilot holes at the marked points. Use a drill bit slightly smaller than the screws. This step prevents wood from splitting and eases screw insertion.
Attach the mounting bracket using lag screws. Tighten screws fully to secure the bracket. Check the bracket for any movement. It should be stable and flush against the wall.
Installing The Microwave Oven
Installing your GE Over the Range Microwave Oven correctly is key to ensuring safety and optimal performance. This process requires careful handling and attention to detail. Let’s walk through the critical steps that help you set up your microwave securely above your stove.
Lifting And Positioning The Microwave
Before lifting, make sure you have a clear path and enough space to maneuver. Microwaves can be heavy and bulky, so it’s wise to ask for help. Lift the microwave carefully, keeping it balanced to avoid any damage or injury.
Position the microwave so that the mounting holes line up with the bracket on the wall. You might need to tilt it slightly to get it into place. Take your time here—rushing can lead to misalignment, making the next steps harder.
Attaching The Microwave To The Bracket
Once positioned, hook the microwave onto the mounting bracket securely. The bracket supports the weight, so ensuring it’s fully engaged is essential. Check that the microwave is flush against the wall and sits evenly.
Look closely at the edges to confirm there are no gaps. If you notice any unevenness, adjust the position until the microwave fits snugly. Proper attachment here prevents wobbling and enhances safety.
Securing With Screws
After confirming the microwave is properly hooked, use the screws to secure it in place. These screws typically go through the top of the microwave into the cabinet above. Use a drill or screwdriver to tighten them firmly but avoid over-tightening, which can damage the unit or cabinetry.
Double-check all screws after installation. A loose screw can cause the microwave to shift over time, which could be dangerous. Have you tested the stability by gently trying to move the microwave? If it feels solid, you’re ready to move on to connecting the power and venting system.
Connecting The Vent And Electrical Components
Connecting the vent and electrical components is a critical part of installing your GE over the range microwave oven. Proper attachment ensures your microwave functions safely and efficiently. Taking the time to connect these parts correctly protects your kitchen from smoke and ensures your microwave powers up without any issues.
Attaching The Ventilation System
Start by identifying the type of venting your microwave supports—recirculating or external venting. If you’re using external venting, align the vent adapter on the microwave’s exhaust outlet. Make sure the adapter fits snugly and secure it with the screws provided.
Next, connect the ductwork from your kitchen vent to the microwave’s exhaust adapter. Use foil tape to seal all joints tightly, preventing any air leaks. This step keeps smoke and cooking odors from escaping into your kitchen.
Have you checked if your kitchen duct size matches the microwave’s vent size? If the sizes don’t match, you might need a duct transition piece to ensure a proper fit. This small detail can make a big difference in ventilation performance.
Plugging In The Power Cord
Before plugging in the microwave, confirm that the electrical outlet is grounded and rated for the microwave’s power needs. Safety comes first, so avoid using extension cords or adapters that could cause overload.
Carefully route the power cord through the designated opening on the microwave bracket. Once the microwave is mounted, plug the cord directly into the wall outlet behind the unit. This keeps the cord neat and prevents any accidental unplugging.
Do you know the location of your circuit breaker? It’s a good idea to switch off the power before making any connections to avoid shocks. Once connected, switch the power back on and test the microwave’s functions to confirm everything is working properly.

Credit: danmarcappliance.com
Testing And Final Adjustments
After installing your GE Over the Range Microwave Oven, testing and final adjustments are crucial. These steps ensure safety, efficiency, and a perfect fit. Careful checks will help your microwave work as expected and last longer.
Powering On The Microwave
Connect the microwave to the power source. Press the start button to check if it turns on. Listen for any unusual sounds. Test the keypad to confirm all buttons respond. Set the clock to ensure the display works properly.
Checking Ventilation And Lighting
Turn on the ventilation fan. Feel the airflow above the stove. It should be strong and clear. Check the light inside the microwave and under the unit. Replace any bulbs if the lighting is dim or not working.
Adjusting Fit And Finish
Look for gaps around the microwave edges. Use a level to confirm it is straight. Tighten or loosen mounting screws as needed. Wipe the surface clean to remove dust or fingerprints. Make sure the door opens and closes smoothly without sticking.
Troubleshooting Common Issues
Troubleshooting common issues during the installation of a GE over the range microwave oven helps ensure safe and proper use. Many problems arise from simple mistakes or overlooked details. Identifying these issues early can save time and effort. Addressing common problems allows the microwave to work efficiently and last longer.
Microwave Not Powering On
Check if the microwave is plugged in securely. Verify the circuit breaker is not tripped or the fuse is intact. Ensure the wall outlet provides power by testing with another device. Inspect the power cord for visible damage. Confirm the control panel is responsive and not locked. Sometimes, resetting the microwave by unplugging it for a minute helps.
Ventilation Problems
Proper ventilation is crucial for safety and performance. Confirm the vent cover is not blocked by grease or debris. Clean the vent filters regularly to avoid buildup. Make sure the ductwork connects firmly and has no gaps or leaks. Use the correct venting option, either recirculating or external, as per your microwave model. Poor ventilation can cause overheating and reduce appliance life.
Mounting Stability Concerns
Check the mounting bracket is installed on a sturdy wall or cabinet. Use a level to ensure the microwave is straight and balanced. Tighten all screws securely but avoid overtightening, which can damage parts. Confirm the microwave sits firmly on the bracket without wobbling. Inspect the weight capacity of your mounting surface to avoid accidents. Proper mounting prevents noise and ensures safety during operation.

Credit: www.abt.com
Frequently Asked Questions
How Do I Prepare To Install A Ge Over The Range Microwave?
Start by turning off power and removing the old microwave. Measure the space and check wall studs. Gather necessary tools and hardware before beginning installation.
What Tools Are Needed For Installing Ge Microwave Oven?
You will need a drill, screwdriver, stud finder, tape measure, pencil, and level. These tools ensure accurate and safe installation of your microwave.
How Do I Safely Mount The Microwave Over The Range?
Locate wall studs for secure mounting. Use the mounting plate provided and fasten it firmly. Lift the microwave carefully and hook it onto the plate.
How Do I Connect The Microwave’s Power Supply?
Plug the microwave into a grounded outlet above the range. If no outlet exists, hire a qualified electrician to install one safely.
Conclusion
Installing a GE over the range microwave oven is simple with clear steps. Take your time and follow each instruction carefully. Use the right tools and ensure safety first. Double-check your work before finishing. This helps your microwave work well and last longer.
Enjoy the new convenience in your kitchen. You are ready to cook and heat food faster. A well-installed microwave makes daily tasks easier. Keep the manual handy for future reference. Small effort now saves trouble later.