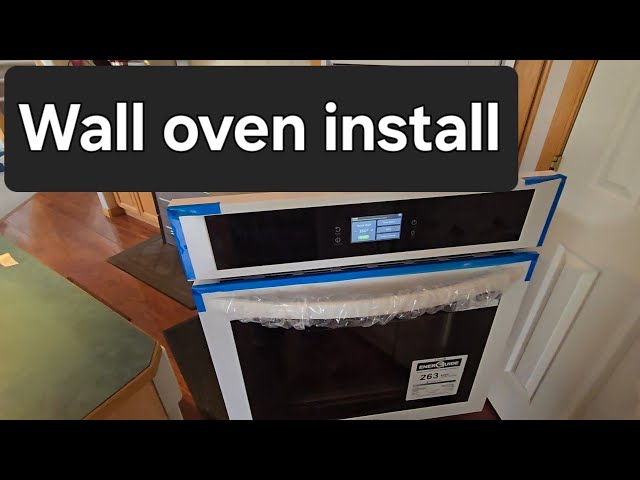
Are you ready to upgrade your kitchen with a sleek, built-in wall oven? Installing one might seem tricky, but you can do it yourself with the right steps.
Imagine having a stylish oven that saves space and makes cooking easier every day. In this guide, you’ll find clear, simple instructions that take the guesswork out of the process. By the end, you’ll feel confident and proud of your new kitchen upgrade.
Keep reading to discover how to install your wall oven quickly and safely.

Credit: www.youtube.com
Preparing For Installation
Installing a wall oven needs good planning. Proper preparation helps avoid problems.
Check the space, tools, and power before starting. This guide helps you get ready.
Measuring The Space
Measure the wall cavity where the oven will go. Use a tape measure for accuracy.
- Measure the height, width, and depth of the opening.
- Check for any obstructions inside the cavity.
- Compare measurements with the oven’s size specifications.
- Leave extra space for ventilation as per the manual.
Gathering Necessary Tools
Prepare tools to make the installation smooth and safe. Have them ready before you start.
- Tape measure for exact measurements.
- Level to ensure the oven sits straight.
- Screwdrivers for mounting screws.
- Drill with bits for making holes.
- Wire strippers and connectors for electrical work.
- Safety gloves and glasses for protection.
Checking Electrical Requirements
Wall ovens need specific electrical setups. Confirm your home meets these needs.
| Requirement | Details |
|---|---|
| Voltage | Usually 240 volts, check oven label. |
| Amperage | Typically 30 to 50 amps depending on model. |
| Dedicated Circuit | Required to avoid overload and hazards. |
| Grounding | Proper grounding must be in place for safety. |
Removing The Old Oven
Removing an old wall oven requires care and safety. This guide covers key steps to take before installing a new oven.
Focus on disconnecting power, detaching the oven, and clearing the space. Follow each step carefully.
Disconnecting Power
Turn off the oven’s power to prevent electric shock. Use the circuit breaker or unplug the unit if possible.
- Locate the circuit breaker panel
- Switch off the breaker for the oven
- Test that the oven is off by trying to turn it on
- If your oven plugs into an outlet, unplug it
Detaching The Oven
Remove screws or brackets that hold the oven in place. Carefully pull the oven out from the wall.
- Open the oven door and empty it
- Unscrew the mounting screws on the sides or top
- Gently pull the oven forward to access wiring
- Disconnect the wires or plug carefully
- Remove the oven completely
Clearing The Installation Area
Prepare the space for the new oven by cleaning and checking the area. Make sure the cabinet is free of debris.
| Task | Details |
|---|---|
| Remove debris | Clear dust, old screws, and packaging |
| Check cabinet size | Measure width, height, and depth for fit |
| Inspect wiring | Make sure electrical connections are safe |
| Clean surfaces | Wipe down walls and cabinet inside |
Installing The New Oven
Installing a new wall oven is a task that requires care and attention. This guide will help you place and connect your oven safely.
Follow each section closely to ensure a proper and secure installation.
Positioning The Oven
Start by measuring the opening where the oven will fit. Make sure it matches the oven’s size exactly. Clear any debris or obstacles inside the cabinet space.
- Check the oven dimensions with the cutout space.
- Remove any packaging or protective coverings from the oven.
- Lift the oven carefully and slide it into the cabinet opening.
- Ensure the oven is level and flush with surrounding cabinetry.
Securing The Oven In Place
Once the oven is in position, secure it to prevent movement. Use the mounting brackets and screws provided with your oven.
| Tool | Purpose |
| Drill | To make pilot holes for screws |
| Screwdriver | To tighten mounting screws |
| Level | To check the oven is even |
| Mounting brackets | To hold oven firmly in place |
Check the oven again after securing to confirm it does not shift.
Connecting Electrical Components
Before connecting, turn off the power supply to avoid shocks. Use the oven’s wiring diagram for correct connections.
- Remove the access panel on the oven’s back.
- Connect the ground wire to the green screw.
- Attach the hot wires to the terminal block according to color.
- Secure all wire connections with wire nuts.
- Replace the access panel and tighten screws.
- Turn the power back on and test the oven functions.
Testing The Installation
After installing your wall oven, it is important to test it. Testing ensures the oven works safely and correctly.
Check the oven’s main functions before regular use. This step helps avoid future problems and damage.
Powering On The Oven
Start by turning on the oven’s power supply. Make sure the oven is properly connected to electricity.
Use the control panel to switch on the oven. Look for any lights or sounds that show the oven is active.
Checking For Proper Functionality
Test the oven’s heating by setting it to a low temperature. Wait to see if it heats evenly and reaches the set temperature.
Use the timer and other features to confirm they work as expected. Watch for unusual noises or smells.
- Check the heating elements for proper warmth
- Test the oven light and display screen
- Confirm the timer counts down correctly
- Listen for any strange noises
Addressing Common Issues
If the oven does not power on, check the circuit breaker and power connection. Ensure all wires are secure.
If heating is uneven or the oven stops working, reset the oven or consult the manual. Contact a professional if problems continue.
- Verify power supply and breaker status
- Check for loose or damaged wiring
- Reset oven controls if unresponsive
- Seek expert help for persistent faults
Safety Tips And Maintenance
Installing a wall oven needs care for safety and long use. Proper upkeep keeps the oven working well. Follow simple steps to protect your home and family.
This guide covers ventilation, cleaning, and when to get expert help. Each part helps keep your oven safe and reliable.
Ensuring Proper Ventilation
Good airflow stops heat buildup and prevents damage. Make sure the oven vents are clear and open. Avoid blocking vents with objects or insulation.
- Check that vents are not clogged with dust or debris
- Keep space around the oven as per manufacturer advice
- Use exhaust fans if needed to remove heat and fumes
- Do not cover vent openings with foil or plastic
Routine Cleaning Tips
Clean your wall oven regularly to avoid grease and grime. Use mild cleaners and soft cloths. Avoid harsh chemicals that can damage surfaces.
| Cleaning Task | Frequency | Recommended Tools |
| Wipe oven door and exterior | Weekly | Soft cloth, mild soap |
| Clean oven interior | Monthly | Non-abrasive cleaner, sponge |
| Check and clean vents | Every 3 months | Vacuum, soft brush |
| Remove and clean racks | Every 2 months | Warm water, dish soap |
When To Call A Professional
Some problems need expert care. Do not try to fix electrical or gas issues yourself. Call a certified technician for these tasks.
- If the oven does not heat properly
- When you smell gas or see sparks
- If controls or displays stop working
- For installation or repair of wiring and gas lines
Credit: www.whirlpool.com
Credit: www.artisanwestappliance.com
Frequently Asked Questions
How Do I Prepare The Wall For Oven Installation?
First, measure the wall opening for the oven size. Ensure proper electrical and ventilation access. Remove any obstructions or old appliances. Check that the wall surface is level and sturdy to support the oven weight before proceeding.
What Tools Are Needed To Install A Wall Oven?
You will need a screwdriver, drill, level, tape measure, wire strippers, and safety gloves. These tools help secure the oven and connect electrical wiring safely. Having all tools ready makes the installation smoother and faster.
How Do I Connect The Electrical Wiring Safely?
Turn off the power at the circuit breaker before starting. Follow the manufacturer’s wiring diagram exactly. Use wire nuts to secure connections and ensure grounding. If unsure, consult a licensed electrician to avoid hazards.
Can I Install A Wall Oven Myself Or Hire A Professional?
DIY installation is possible with basic skills and proper tools. However, for complex wiring or wall modifications, hiring a professional is safer. Professionals ensure compliance with building codes and reduce installation errors.
Conclusion
Installing an in-wall oven can improve your kitchen’s look and function. Follow the steps carefully to ensure safety and success. Measure the space and check electrical needs before starting. Take your time with wiring and securing the oven. Testing it after installation is important for proper use.
With patience and care, you can enjoy a sleek, built-in cooking appliance. Ready to cook up delicious meals in your new oven?