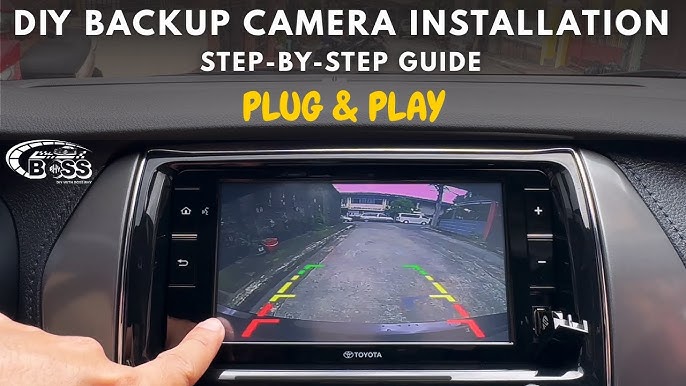
Have you ever struggled with parking or backing up your car safely? Installing a reverse camera can change that experience completely.
Imagine having a clear view of what’s behind your vehicle every time you shift into reverse. It’s not just about convenience—it’s about keeping you, your passengers, and others safe. In this guide, you’ll learn exactly how to install a reverse camera in your car step-by-step.
No confusing jargon, just simple instructions that anyone can follow. Ready to make your driving safer and easier? Let’s get started.
Choosing The Right Camera
Installing a reverse camera in your car improves safety. It helps you see behind the vehicle clearly.
Picking the right camera is important. It makes installation easier and gives better results.
Types Of Reverse Cameras
There are several types of reverse cameras. Each type fits different needs and cars.
- Wired cameras connect with cables to your car’s display.
- Wireless cameras send video signals without cables.
- Flush mount cameras fit inside the car’s body for a clean look.
- Surface mount cameras attach on the car’s surface and are easy to install.
Key Features To Consider
Look for features that make the camera useful and reliable. Some features improve visibility and ease of use.
- Wide viewing angle to see a large area behind the car.
- Night vision for clear images in the dark.
- Waterproof design for all weather conditions.
- High resolution for sharp video quality.
- Guidelines on the screen to help judge distance.
Compatibility With Your Car
Check if the camera works with your car model and display system. Compatibility avoids installation problems.
Some cameras fit only certain cars or need special adapters. Verify the camera’s size and power needs.
- Confirm the camera fits your car’s mounting spot.
- Make sure the camera connects to your car’s display or radio.
- Check if your car supports wired or wireless cameras.
- Review power requirements and wiring options.
Gathering Necessary Tools
Installing a reverse camera in your car needs the right tools. Getting these tools ready saves time and effort.
Before you start, gather everything you need. This makes the installation smooth and safe.
Basic Tools Checklist
These basic tools help you install the reverse camera properly. You likely have most of them at home.
- Screwdrivers (flathead and Phillips) for removing panels and securing parts
- Wire strippers to prepare the wires for connection
- Electrical tape to protect wire connections
- Power drill with drill bits for mounting the camera
- Panel removal tool to avoid damaging car trim
- Multimeter to test electrical connections
- Zip ties to keep wires organized and secure
Optional Equipment For Easier Installation
Some extra tools can make the job easier and faster. These are not required but helpful.
- Wire connectors for quicker and safer wire joining
- Heat shrink tubing for better insulation of wires
- Extension cords to reach hard spots in your car
- Magnetic pickup tool to retrieve dropped screws
- Flashlight or headlamp to see clearly in dark areas
- Plastic pry tools to avoid scratching surfaces
Preparing Your Car
Installing a reverse camera in your car needs careful preparation. This step helps ensure the camera works well and stays safe.
Start by understanding where to place the camera and how to reach the rear panel. This guide focuses on these two key areas.
Locating The Ideal Mounting Spot
Find a spot at the back of your car that gives a clear view behind. The camera should not be blocked by any part of the car.
- Look near the license plate area for a good view.
- Avoid places with heavy dirt or water splashes.
- Choose a flat surface to mount the camera firmly.
- Check that the spot does not interfere with car sensors.
- Make sure the camera lens will face directly backward.
Accessing The Rear Panel
You need to open the rear panel to connect the camera wires safely. This area usually hides the wiring and power source.
| Tool Needed | Purpose |
|---|---|
| Screwdriver | Remove screws holding the panel |
| Trim tool | Lift plastic trims without damage |
| Flashlight | See inside dark spaces |
| Wire stripper | Prepare wires for connection |
Credit: dashcamtalk.com
Installing The Camera
Installing a reverse camera helps you see behind your car easily. It improves safety when parking or reversing.
Follow the right steps to mount the camera and run the wiring properly. This guide covers these important parts.
Mounting The Camera Securely
Find a good spot at the rear of your car to mount the camera. It should have a clear view and stay stable.
- Clean the mounting area to remove dirt and dust.
- Use the screws or adhesive that come with your camera kit.
- Check the camera angle to cover the whole rear area.
- Tighten screws firmly but avoid over-tightening.
- Test the camera view before finalizing the mount.
Running The Wiring Through The Vehicle
Route the wires from the camera to your car’s display carefully. Avoid sharp edges and hot parts.
| Wire Section | Tips |
|---|---|
| From Camera to Trunk | Use rubber grommets to protect wires where they pass through metal. |
| Along the Car Floor | Secure wires with clips to keep them from moving or getting damaged. |
| Near the Dashboard | Connect wires to the reverse light power and display input carefully. |
Connecting To Power And Display
Installing a reverse camera in your car needs proper wiring and display connections. This guide covers how to connect the camera to power and your monitor.
Focus on two main parts: wiring to the reverse light and linking to the monitor or head unit.
Wiring To Reverse Light
The reverse camera gets power from the reverse light circuit. It turns on automatically when you shift to reverse gear.
- Locate the reverse light wire at the back of your car.
- Use a test light or multimeter to confirm the wire only has power in reverse.
- Connect the camera’s power wire to the reverse light wire using a tap connector.
- Ground the camera by attaching its ground wire to a metal part of the car chassis.
- Secure all wires to avoid loose connections or damage.
Linking To The Monitor Or Head Unit
Next, connect the camera video output to your car’s monitor or head unit. This lets you see the camera feed on the screen.
| Connection Type | Description | Notes |
| RCA Cable | Standard video cable from camera to monitor. | Most common for aftermarket monitors. |
| Wireless Transmitter | Sends video signal without cables. | Requires power for transmitter and receiver. |
| Head Unit Input | Connects directly to the car stereo display. | Check compatibility with your unit. |
Make sure to test the camera view before finalizing the installation. Adjust the camera angle if needed for a clear view behind your car.

Credit: www.youtube.com
Testing The System
After installing the reverse camera, you must test it to ensure it works well. Testing helps find any problems early.
Check the camera image and adjust the angle for the best view. This step makes reversing safer.
Checking Camera Functionality
Turn on your car and put it in reverse gear. The camera should power on automatically, showing the rear view on the screen.
- Look for a clear and sharp image without flicker.
- Check if the camera switches on and off with the reverse gear.
- Make sure no lines or spots block the view.
- Test the night vision if your camera has this feature.
- Listen for any strange sounds from the camera or wires.
Adjusting Camera Angle
Set the camera angle to cover the widest rear area possible. Adjust it to avoid blind spots and glare.
| Angle Adjustment | Purpose | How to Check |
| Vertical tilt | See low objects near the bumper | Look downwards on the screen |
| Horizontal pan | Cover wider rear area | Check edges of the screen for clear image |
| Rotation | Keep horizon straight | Ensure image is level and not tilted |
Troubleshooting Common Issues
Installing a reverse camera in your car can improve safety. Sometimes, issues can stop it from working well.
Here are common problems and how to fix them quickly. Follow these tips to get your camera working again.
No Image On Display
If you see no image on the screen, check if the camera is powered. Loose wires often cause this issue.
- Verify the camera’s power cable is connected correctly.
- Check the video cable connection between the camera and display.
- Inspect for blown fuses in the car’s fuse box.
- Test the camera on another display if possible.
- Replace faulty cables or connectors.
Poor Picture Quality
Blurry or unclear images reduce the camera’s usefulness. Dirt or damage may cause this.
| Cause | Solution |
| Dirty camera lens | Clean lens with a soft cloth |
| Low light conditions | Install additional lighting or use night vision camera |
| Loose cable connection | Secure all video and power cables |
| Damaged camera sensor | Replace the camera |
Power Connection Problems
Power issues can cause the camera to turn off or not start. Check these common causes.
- Check if the power wire is connected to the car’s reverse light circuit.
- Test the voltage at the power wire using a multimeter.
- Make sure the ground wire is properly attached to the car chassis.
- Replace any damaged power cables.
- Ensure the car battery is charged and working.
Maintaining Your Reverse Camera
Keeping your reverse camera clean and checked helps it work well. Dirt and damage can block the view. Regular care keeps your camera clear and safe.
This guide covers simple cleaning tips and routine checks for your reverse camera. Follow these steps to avoid problems and maintain clear images.
Cleaning Tips
Clean the camera lens often to remove dirt, dust, and water spots. Use a soft cloth to avoid scratches. Avoid harsh chemicals that can damage the lens.
- Use a microfiber cloth for cleaning
- Apply gentle glass cleaner or soapy water
- Wipe in circular motions to remove spots
- Dry the lens completely after cleaning
- Check for damage or cracks during cleaning
Routine Checks
Regular checks help find problems early. Look for loose wires, damaged mounts, and fogging inside the lens. Fix small issues before they get worse.
| Check Item | What to Look For | How Often |
|---|---|---|
| Lens Condition | Scratches, dirt, or cracks | Weekly |
| Wiring | Loose connections or wear | Monthly |
| Mount Stability | Secure and steady attachment | Monthly |
| Image Quality | Clear and sharp display | Weekly |

Credit: www.youtube.com
Frequently Asked Questions
How Do I Install A Reverse Camera In My Car?
To install a reverse camera, first mount the camera at the rear of the car. Connect it to the power source and display screen. Finally, test the camera for proper functioning before securing all wires neatly.
What Tools Are Needed To Install A Reverse Camera?
You need a screwdriver, wire stripper, electrical tape, and a drill. A multimeter can help test connections. These tools make the installation process easier and safer.
Can I Install A Reverse Camera Myself?
Yes, DIY installation is possible with basic knowledge of car electronics. Follow the instructions carefully and take safety precautions. If unsure, consult a professional.
How Much Does It Cost To Install A Reverse Camera?
Installation costs vary from $50 to $200 depending on the camera type and labor. DIY installation reduces cost but requires time and effort.
Conclusion
Installing a reverse camera in your car makes parking safer and easier. The steps are simple and clear to follow. You only need a few tools and some patience. Take your time connecting the wires and placing the camera. Test the camera before driving to ensure it works well.
A reverse camera helps avoid accidents and protects your car. Enjoy the added safety and convenience every time you park. This small upgrade brings big benefits on the road.