Changing a tire can feel tricky if you don’t know the right steps. But what if you could quickly and safely jack up your car without stress or confusion?
Knowing how to jack up your car properly is the key to getting that flat tire fixed fast. In this guide, you’ll learn simple, clear steps that anyone can follow. By the end, you’ll feel confident handling your car and ready to tackle tire changes on your own—saving time, money, and hassle.
Keep reading to discover how easy it really is!
Tools Needed
Changing a tire requires some basic tools. Using the right tools makes the job safer and faster.
Before you start, gather all the necessary equipment and safety gear. This keeps you prepared.
Essential Equipment
You need a few key tools to jack up a car properly. These tools help lift the car and remove the tire.
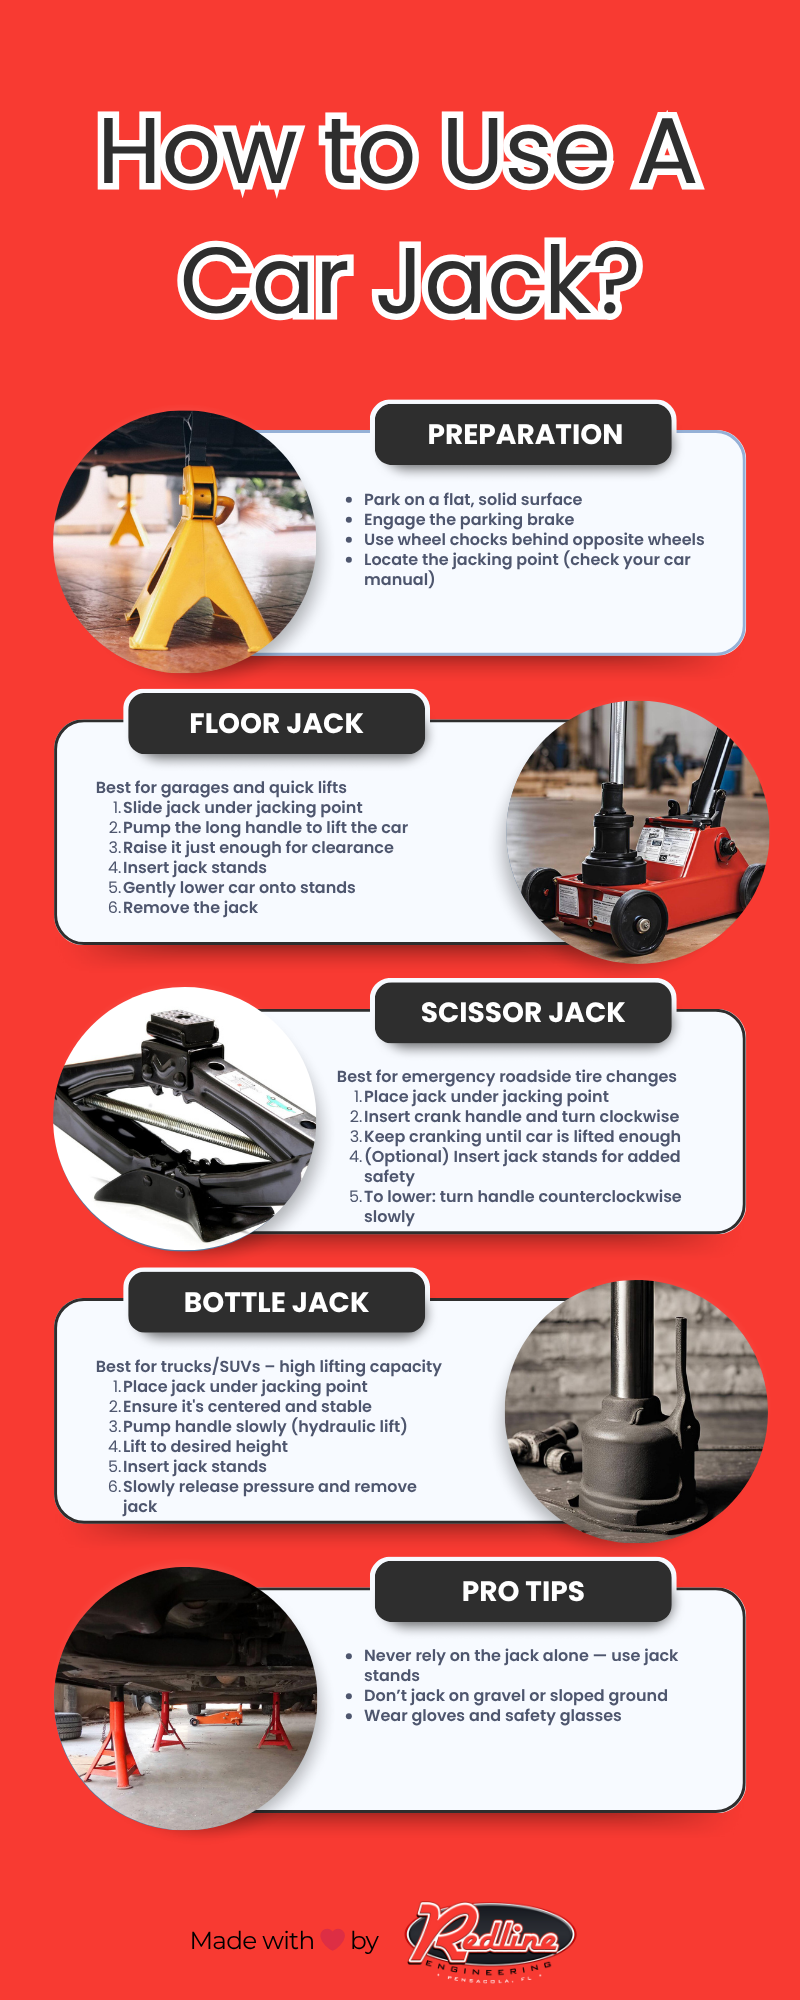
- Car Jack:A hydraulic or scissor jack to lift the car.
- Lug Wrench:To loosen and tighten lug nuts on the tire.
- Spare Tire:A good spare tire to replace the flat one.
- Wheel Wedges:To block the wheels and stop the car from rolling.
- Owner’s Manual:To find the jack points and instructions for your car.
Safety Gear
Safety gear protects you while you change the tire. Always use safety items to avoid injury.
- Gloves:Protect your hands from dirt and sharp objects.
- Safety Glasses:Shield your eyes from debris.
- Reflective Vest:Makes you visible to other drivers if on the road.
- Wheel Chocks:Keep the car from moving when lifted.

Credit: www.mrclutch.com
Preparing The Vehicle
Changing a tire starts with preparing your vehicle properly. This helps keep you safe during the process.
Follow simple steps to make sure your car is ready before using the jack.
Choose A Safe Location
Park your car on a flat and solid surface. Avoid soft ground or slopes to prevent the car from moving.
Make sure the area is away from traffic. This keeps you safe from passing cars.
Engage Parking Brake
Apply the parking brake firmly. This stops the car from rolling while you work.
If you have an automatic car, put it in park. For a manual, set it in first or reverse gear.
Loosen Lug Nuts
Before jacking up the car, slightly loosen the lug nuts on the flat tire. Use a lug wrench for this.
Turn the nuts counterclockwise but do not remove them completely yet. This is easier than loosening them when the wheel is off the ground.
Positioning The Jack
Knowing how to position the jack is important to safely lift your car. Proper placement prevents damage to your vehicle. It also helps keep you safe during the tire change.
This guide covers how to find the right jack points and how to set up the jack for lifting your car.
Locate Jack Points
Jack points are strong spots on your car’s frame. These spots support the car’s weight when lifted. Using the wrong spot can cause damage or make the car fall.
- Check your car’s owner manual for exact jack point locations.
- Look near each tire for a small notch or reinforced metal area.
- Avoid soft parts like plastic or thin metal panels.
- Use the frame or rocker panel if visible and marked.
- Do not place the jack under the bumper or exhaust pipe.
Set Up The Jack
After finding the jack points, get the jack ready on a flat surface. Setting up the jack correctly helps keep the car stable while lifting.
| Action | Details |
| Place jack base | On firm, level ground to prevent slipping. |
| Align jack saddle | Center it under the jack point for full contact. |
| Check jack handle | Ensure it moves smoothly for easy lifting. |
| Test stability | Lift slightly to confirm the jack holds the car steady. |
Lifting The Car
Lifting the car safely is important before changing a tire. Use the jack correctly to avoid accidents.
This guide explains how to operate the jack and raise the car until the tire clears the ground.
Operate The Jack
Place the jack under the car’s frame near the tire you want to change. Make sure it touches the metal part, not plastic or other materials.
- Check the jack’s position is stable and straight.
- Insert the jack handle into the jack.
- Turn or pump the handle slowly to start lifting the car.
- Stop if the jack slips or feels unstable.
Raise Until Tire Clears Ground
Keep lifting the car until the tire is off the ground. This makes it easy to remove and replace the tire safely.
| Check Point | Why It Matters |
|---|---|
| Tire is fully off the ground | Allows easy removal and prevents damage |
| Jack is stable and not leaning | Prevents accidents and car from falling |
| Car on flat surface | Keeps the car steady during lifting |
Removing The Tire
Removing the tire is an important part of changing it safely. You must first loosen the lug nuts and then take off the tire.
Follow the right steps to avoid damage and make the process smooth.
Unscrew Lug Nuts
Start by loosening the lug nuts that hold the tire in place. Use a lug wrench to turn them counterclockwise.
Do not remove the lug nuts completely yet. Just break their tight grip while the car is still on the ground.
- Place the wrench on a lug nut.
- Turn it left to loosen.
- Repeat for all lug nuts.
- Do not remove nuts yet.
Take Off The Tire
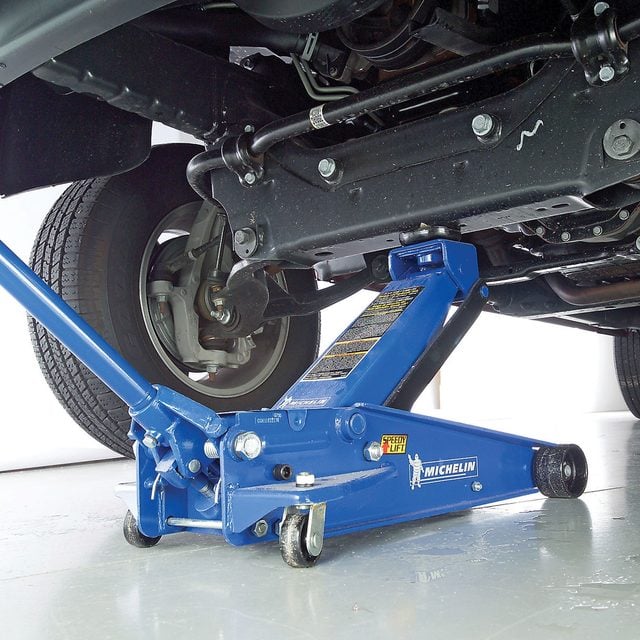
After loosening the lug nuts, raise the car with a jack until the tire is off the ground. Now you can remove the lug nuts completely.
Pull the tire straight toward you to take it off the hub. Keep it flat so it does not fall or get damaged.
- Raise the car with a jack.
- Remove all lug nuts.
- Grip the tire firmly.
- Pull the tire straight off.
Credit: www.familyhandyman.com
Installing The Spare
After lifting the car with a jack, you are ready to install the spare tire. This step is important for a safe and secure fit.
Take your time to place the spare tire correctly before tightening the lug nuts.
Mount The Spare Tire
Lift the spare tire and align it with the wheel studs. Push it firmly onto the hub to make sure it fits snugly. Check that the holes in the tire match the studs on the car.
- Hold the tire steady with both hands
- Align holes with wheel studs
- Push the tire onto the hub
- Make sure the tire sits flush against the wheel base
Tighten Lug Nuts By Hand
Start tightening the lug nuts by hand to avoid cross-threading. Use your fingers to screw each nut onto the studs. Tighten them as much as you can without tools.
| Lug Nut | Action |
| 1 | Turn clockwise by hand |
| 2 | Turn clockwise by hand |
| 3 | Turn clockwise by hand |
| 4 | Turn clockwise by hand |
| 5 | Turn clockwise by hand |
Lowering The Car
After you have lifted the car and changed the tire, it is time to lower the car carefully. Lowering the car correctly keeps you safe and protects the car from damage.
Follow these steps to lower the car smoothly and finish the tire change safely.
Slowly Lower The Jack
Turn the jack handle slowly to lower the car. Do this step by step to keep the car stable.
Watch the tire as it moves down. Stop if you feel any sudden movement or hear strange noises.
- Turn the jack handle slowly and steadily
- Keep clear of the car while lowering
- Check the tire and jack for proper contact
- Lower the car until the tire touches the ground
Fully Tighten Lug Nuts
Once the car is on the ground, tighten the lug nuts fully. This keeps the tire secure while driving.
Use a wrench to tighten the nuts in a star pattern. This helps even pressure on all sides of the tire.
- Start with one lug nut
- Move to the opposite lug nut next
- Continue in a star pattern until all are tight
- Check each lug nut again for security
Credit: www.redlinestands.com
Final Checks
After jacking up your car and changing the tire, it is important to complete final checks. These steps ensure your safety and proper function of the vehicle.
Taking time to inspect and store tools correctly helps avoid problems on the road and saves effort later.
Inspect Tire Pressure
Check the air pressure in the new tire before lowering the car. Proper tire pressure improves driving safety and tire life.
Use a tire pressure gauge to measure the pressure. Adjust the pressure to match the car manufacturer’s recommended level.
- Remove the valve cap from the tire
- Press the gauge firmly on the valve stem
- Read the pressure on the gauge
- Add or release air to reach the correct pressure
- Replace the valve cap securely
Store Tools Safely
After finishing the tire change, put all tools back in their proper places. This keeps your car organized and tools ready for next use.
Store the jack, lug wrench, spare tire, and any other equipment in the trunk or storage compartment. Make sure nothing is loose to prevent noise or damage while driving.
- Clean tools if dirty before storing
- Place tools in their designated holders or bags
- Secure the spare tire tightly
- Double-check that the trunk or compartment closes properly
Frequently Asked Questions
How High Should I Jack Up A Car To Change A Tire?
Jack the car until the flat tire is off the ground. This usually means raising it about 6 inches or enough to remove the tire safely. Ensure the car is stable before removing the tire to avoid accidents or damage.
Where Is The Best Spot To Place A Car Jack?
Place the jack under the car’s frame near the tire you want to change. Look for a reinforced jack point or the vehicle’s manual recommendation. Avoid placing the jack on the car body to prevent damage and ensure stability.
Can I Use Any Jack To Lift My Car?
No, use a jack rated for your car’s weight. Common types include scissor jacks, bottle jacks, and floor jacks. Using the wrong jack can be dangerous and may not lift the car properly.
How Do I Ensure Safety While Jacking Up A Car?
Always engage the parking brake and chock the opposite tires. Work on a flat, stable surface to prevent the car from rolling. Never place any part of your body under the car while it’s only supported by a jack.
Conclusion
Changing a tire is easier with the right steps. Always park on a flat surface and use the parking brake. Place the jack correctly under the car’s frame. Lift the car slowly and steadily. Remove the tire carefully and replace it with the spare.
Lower the car gently and tighten the lug nuts well. Practice these steps to feel confident during tire changes. Safety matters most. Stay calm and take your time. Now, you can handle a flat tire without stress.