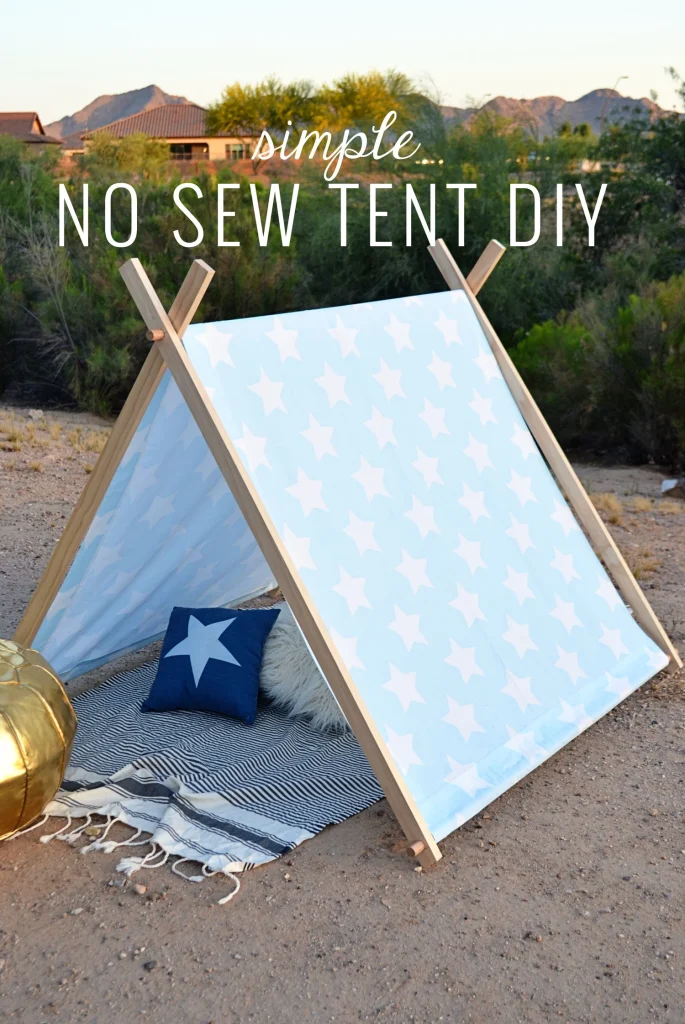
Have you ever wanted to create a special hideaway for your child, a place where their imagination can run wild and adventures never end? Making a child’s tent is easier than you think, and it’s a fantastic way to bring joy and creativity right into your home or backyard.
In this guide, you’ll discover simple steps to build a cozy, fun tent that your little one will love. Ready to turn ordinary space into a magical retreat? Let’s get started!
Materials Needed
Making a child’s tent is a fun and simple project. You only need a few materials to get started. These materials help build a safe and cozy space for kids to play.
Choosing the right materials makes the tent strong and comfortable. It also makes it easy to set up and take down.
Fabric Options
Pick fabric that is light and easy to clean. Cotton and canvas work well for tents. They are soft and strong enough to last a long time.
You can also use polyester fabrics. These dry quickly and resist stains. Choose bright or fun patterns to make the tent look cheerful.
- Cotton: soft, breathable, easy to sew
- Canvas: durable, heavier, good for outdoor use
- Polyester: water-resistant, lightweight, quick-drying
- Old bedsheets: cost-effective, easy to find
Frame Choices
The frame holds the tent up. You can use wood, PVC pipes, or metal rods. Each has its own benefits for strength and ease of use.
Wood is strong and natural but can be heavy. PVC pipes are light and easy to cut. Metal rods are sturdy but may need special tools to shape.
- Wooden dowels: sturdy, natural look
- PVC pipes: lightweight, easy to assemble
- Metal rods: strong, long-lasting
- Plastic connectors: useful for joining frame pieces
Additional Supplies
You need some extra supplies to put the tent together. These include fasteners, tools, and decorations. Fasteners keep the fabric tight and secure.
Tools help cut and join materials. Decorations make the tent fun and inviting for children. Use simple items to keep the project easy and safe.
- Sewing thread and needles or fabric glue
- Scissors for cutting fabric
- Zip ties or strong string for attaching fabric to frame
- Clamps or clips to hold fabric while assembling
- Soft floor mat or blanket for inside the tent
- Decorative items like flags or fairy lights (optional)
Choosing The Tent Design
Choosing the right design is the first step in making a child’s tent. The design affects how easy it is to build and how the tent looks. Pick a style that fits your space and your child’s needs.
Here are three popular tent styles to consider. Each has its own shape and setup method. Review each style to find the best fit for your project.
Simple Teepee Style
The teepee style is a classic and easy design. It uses long poles tied at the top and fabric wrapped around. This shape gives a cozy, tall space for kids to play inside.
- Needs about 3 to 4 poles
- Uses a large piece of fabric or sheet
- Easy to disassemble and carry
- Good for indoor and outdoor use
Classic A-frame
The A-frame tent is stable and simple. It looks like a triangle from the side. Two poles form the frame with fabric draped over. This style gives a roomy floor area.
| Feature | Details |
| Frame | Two poles crossed at the top |
| Cover | Fabric or blanket over the frame |
| Space | Good headroom and floor space |
| Setup Time | Medium |
Pop-up Variations
Pop-up tents are fast to set up. They come with a flexible frame inside. Kids can help open and close them. These tents fold flat for easy storage.
- Quick to assemble in seconds
- Lightweight and portable
- No need for extra poles or tools
- Often made with water-resistant fabric
Preparing The Frame
Building a child’s tent starts with making a strong frame. The frame supports the fabric and keeps the tent stable. You will need to cut poles and put them together carefully.
Use light but sturdy materials for the frame. This makes it easy to move and safe for children to play around.
Cutting And Assembling Poles
Choose wooden dowels or PVC pipes for the poles. Measure each pole to the right length for your tent size. Use a saw to cut the poles smoothly.
After cutting, join the poles by fitting them together. You can use connectors or strong tape to hold the poles firmly. Make sure the joints are tight to avoid wobbling.
- Measure poles twice before cutting
- Use sandpaper to smooth edges
- Connect poles with plastic or metal joints
- Check each joint for tightness
Securing The Structure
Place the frame on a flat surface. Secure the poles at the base with rope or zip ties. This helps keep the tent steady during play.
Attach the fabric cover to the frame using clips or Velcro strips. Check all connections to make sure the tent will not collapse easily. Safety is important.
- Tie the base poles tightly
- Use clips to fasten fabric
- Test stability by gently shaking
- Fix loose parts before use

Credit: www.tinylandus.com
Cutting And Sewing The Fabric
Making a child’s tent starts with careful cutting and sewing of fabric. These steps need focus and patience.
Using the right techniques helps the tent hold its shape and last longer. Let’s look at how to measure, mark, and sew the fabric.
Measuring And Marking
Measure the fabric carefully before cutting. Use a ruler or measuring tape to get exact sizes for each piece of the tent.
- Mark the fabric with tailor’s chalk or a fabric marker.
- Draw straight lines for cutting guides.
- Double-check all measurements before cutting.
- Allow extra fabric for seams and hems.
- Cut slowly along the marked lines for accuracy.
Basic Stitching Techniques
Use simple stitches to join fabric pieces. Basic sewing skills help create strong and neat seams.
| Stitch Type | Description | Use |
| Running Stitch | Small, even stitches in a straight line | Joining fabric edges |
| Backstitch | Strong stitch that overlaps slightly | Seams that need extra strength |
| Whipstitch | Stitches that wrap around fabric edges | Closing edges or hems |
| Slip Stitch | Invisible stitch used for hems | Neatly finishing edges |
Attaching Fabric To Frame
Attaching fabric to the frame is key to building a sturdy child’s tent. The fabric must stay in place and be easy to remove.
Use simple fasteners that hold well and keep the tent looking neat. Two common methods are ties with loops and Velcro or button fasteners.
Using Ties And Loops
Ties and loops are easy to make and very secure. You can sew fabric loops on the tent and use fabric ties to attach the fabric to the frame.
- Cut strips of fabric about 6 inches long for ties.
- Sew small loops on the tent fabric near the frame edges.
- Wrap the tie around the frame and thread it through the loop.
- Tie a simple knot or bow to hold the fabric in place.
- Make enough ties to keep the fabric tight and even.
Velcro And Button Fasteners
Velcro strips and buttons are great for quick attachment and removal. Velcro can stick directly to fabric and frame parts, while buttons add a classic touch.
| Fastener Type | Advantages | Tips |
| Velcro | Easy to attach and remove | Use strong adhesive Velcro or sew on strips |
| Buttons | Secure and decorative | Sew buttonholes on fabric, tie loops or use elastic bands |
Adding Decorative Touches
Decorating a child’s tent makes it more fun and inviting. Simple touches can create a cozy space for play.
Use easy ideas to add color and light. These small changes make the tent special for your child.
Painting And Stenciling
Painting the tent fabric adds bright colors and patterns. Use safe, washable paint for the best results.
Stenciling helps create neat shapes and designs. You can use stars, animals, or your child’s favorite characters.
- Choose simple shapes for easy stenciling
- Use sponge brushes to apply paint gently
- Let paint dry fully before use
- Try bright colors to catch attention
Adding Lights And Accessories
String lights add a soft glow inside the tent. Battery-powered lights are safe and easy to use.
Accessories like pillows, rugs, and stuffed toys make the tent cozy. Choose soft and colorful items your child likes.
- Use LED string lights with a timer
- Add cushions for comfort and color
- Place a small rug for a soft floor
- Include favorite stuffed animals for fun
Safety Tips
Making a child’s tent is fun and creative. Safety is very important to keep kids safe while they play.
Follow these tips to build a safe and sturdy tent that children will enjoy without risks.
Stable Structure
Make sure the tent is strong and will not fall easily. Use sturdy materials for the frame like wood or thick poles.
Check all connections and joints to keep the tent steady. Avoid sharp edges or loose parts that can hurt children.
- Use strong poles or wooden sticks for support
- Secure all joints tightly with rope or zip ties
- Keep the tent low to prevent falls
- Check for any loose or broken parts regularly
Non-toxic Materials
Choose fabrics and paints that are safe for children. Avoid materials with harmful chemicals or strong smells.
Natural cotton or polyester fabrics work well. Use water-based paints if you want to decorate the tent.
- Pick fabrics labeled as child-safe or non-toxic
- Do not use materials with small parts that can detach
- Use only water-based, non-toxic paints and glues
- Wash fabrics before use to remove any residues

Credit: www.creativegreenliving.com
Maintenance And Storage
Keeping a child’s tent clean and stored properly helps it last longer. Regular care prevents damage and makes it safe for play.
Follow simple steps for cleaning and folding the tent. This guide covers easy ways to maintain and store your child’s tent well.
Cleaning The Tent
Clean the tent after each use to remove dirt and dust. Use mild soap and water for gentle cleaning. Avoid harsh chemicals that can harm the fabric.
- Brush off loose dirt with a soft brush.
- Mix mild soap with warm water in a bucket.
- Use a sponge to wipe the tent surface gently.
- Rinse with clean water to remove soap.
- Let the tent dry completely in the shade.
- Check for tears or damage and repair if needed.
Proper Folding And Storing
Folding the tent correctly saves space and keeps it safe. Store the tent in a dry place to avoid mold and odors.
| Folding Tips | Storage Tips |
|---|---|
| Make sure the tent is dry before folding. | Store in a cool, dry area away from sunlight. |
| Fold along the original creases to avoid damage. | Use a breathable bag or container for storage. |
| Keep poles and stakes together in a small bag. | Check the tent monthly for moisture or pests. |
| Do not force folds; be gentle to protect fabric. | Avoid heavy items on top of the stored tent. |

Credit: www.creativegreenliving.com
Frequently Asked Questions
What Materials Are Needed To Make A Child’s Tent?
To make a child’s tent, you need fabric, wooden poles, string, and clips. Soft, durable fabrics like cotton work best. Poles provide structure, while string and clips help secure the fabric. These materials ensure safety and comfort for your child’s playtime.
How Long Does It Take To Build A Child’s Tent?
Building a child’s tent typically takes 1 to 2 hours. This depends on your experience and tent complexity. Simple designs are quicker, while elaborate tents require more time. Planning ahead and organizing materials can speed up the process.
Is It Safe To Make A Tent For Kids At Home?
Yes, making a tent at home is safe if you use child-friendly materials. Avoid sharp edges and toxic substances. Ensure the tent is stable and well-ventilated. Supervise children during play to prevent accidents and maintain safety.
Can I Customize The Child’s Tent Design Easily?
Absolutely. You can customize colors, shapes, and decorations. Use fabric paint, stickers, or fairy lights to personalize. Customizing makes the tent more appealing and encourages imaginative play. It also matches your child’s preferences and room decor.
Conclusion
Creating a child’s tent is a fun family project. It offers a cozy space for kids to explore and play. Remember, safety is key when assembling the tent. Use soft materials and secure all parts well. Encourage your child’s creativity by letting them decorate.
This simple activity can bring joy and spark imagination. Enjoy the smiles and laughter. It’s more than just a tent; it’s a cherished memory in the making. So, gather your supplies and start crafting a magical world for your child today!