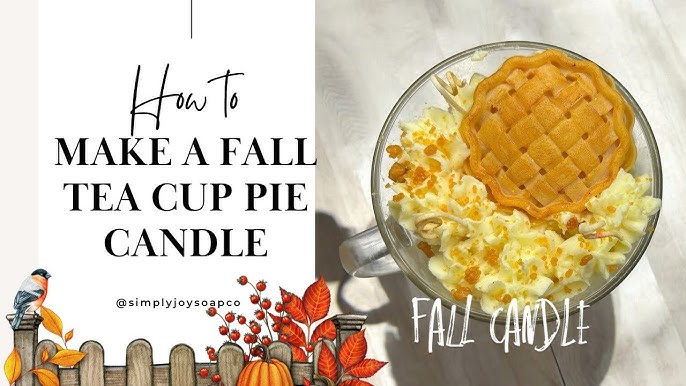
Have you ever wanted to create something cozy and beautiful that lights up your space? Making a tea cup candle is easier than you think, and it’s a perfect way to add a personal touch to your home or gift something special.
Imagine the warm glow flickering inside a charming cup you chose yourself. In this guide, you’ll discover simple steps to craft your own tea cup candle, even if you’ve never tried candle making before. Ready to turn an ordinary cup into a glowing masterpiece?
Let’s get started!
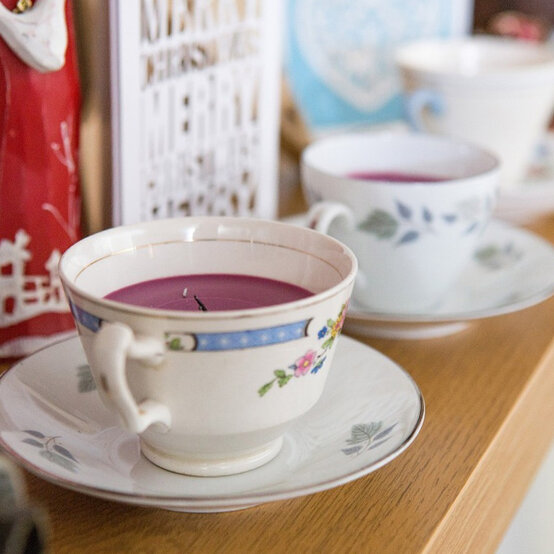
Credit: www.hobbycraft.co.uk
Choosing The Right Tea Cup
Making a tea cup candle starts with picking the best tea cup. The right cup affects how your candle looks and burns. This guide helps you choose the perfect cup for your craft.
Think about the cup’s material, size, shape, and design. Each part plays a role in how your candle will turn out.
Material Options
Tea cups come in many materials. Porcelain, ceramic, glass, and metal are common choices. Each material works differently for candles.
- Porcelain:Smooth and classic. It handles heat well and looks elegant.
- Ceramic:Often thicker. It keeps heat and is less likely to crack.
- Glass:Transparent and stylish. You can see the candle wax inside.
- Metal:Durable but can get very hot. Use with caution.
Size And Shape Considerations
| Size | Effect on Candle | Tips |
|---|---|---|
| Small (under 4 oz) | Burns faster, good for small spaces | Use short wick for safety |
| Medium (4-8 oz) | Balanced burn time and wax amount | Choose stable base to avoid tipping |
| Large (over 8 oz) | Long burn time, more wax | Use multiple wicks if wide |
| Wide shape | Burns evenly, needs good wick placement | Check wick length carefully |
| Narrow shape | Burns slower, wax melts deep | Use slim wick for best results |
Design Styles
Tea cups come in many designs. Choose one that fits your style or theme. Classic, vintage, floral, or modern patterns all work well.
Here are some design styles to consider:
- Classic white with gold trim for elegance
- Floral prints for a cozy, warm look
- Bold colors for a modern feel
- Vintage patterns for a nostalgic touch
Gathering Candle Making Supplies
Making a tea cup candle is a fun and simple project. You need the right supplies to get started. Choosing the best materials helps your candle look and smell great.
This guide covers the main supplies you need: wax, wicks, holders, fragrance oils, and colors. Each part plays a key role in your candle’s quality.
Types Of Wax
Wax is the base of your candle. Different waxes burn in different ways. Pick one that fits your style and needs.
- Paraffin Wax:Common and easy to use. It holds scent well and has a smooth finish.
- Soy Wax:Natural and eco-friendly. Burns cleaner and lasts longer.
- Beeswax:Natural and has a sweet smell. It burns slowly but is more expensive.
- Gel Wax:Clear and decorative. Not ideal for tea cup candles but used in special designs.
Wicks And Holders
Wicks control how your candle burns. Choosing the right wick size and type is important. Holders keep the wick in place while you pour the wax.
| Wick Type | Best For | Notes |
| Cotton Wick | Most wax types | Burns evenly and cleanly |
| Wooden Wick | Soy and beeswax | Crackles when burning, adds ambiance |
| Hemp Wick | Natural waxes | Eco-friendly and slow-burning |
| Wick Holder | All types | Keeps wick straight during pouring |
Fragrance Oils And Colors
Fragrance oils add scent to your candle. Colors make your candle look attractive. Use them carefully for best results.
- Choose fragrance oils made for candles. These burn safely and smell strong.
- Use dye chips or liquid dyes made for candle wax.
- Add fragrance and color after melting the wax, before pouring.
- Test small amounts first to get the right scent and shade.
Preparing The Tea Cup
Making a tea cup candle starts with a clean and dry cup. This helps the wax stick well and look nice. Preparing the cup properly also keeps your candle safe.
Follow simple steps to get your tea cup ready. This guide focuses on cleaning, drying, and securing the wick.
Cleaning And Drying
Wash the tea cup with warm water and mild soap. Remove any dust, dirt, or leftover tea stains. A clean cup helps the candle last longer.
Dry the cup completely before adding wax. Use a towel to remove water and let it air dry. Any moisture can cause problems with the candle wax.
Securing The Wick
Place the wick in the center of the tea cup. Keeping it straight helps the candle burn evenly. Secure the wick so it does not move while pouring wax.
- Use a small drop of hot glue or wick sticker at the bottom
- Hold the wick upright with a pencil or chopstick across the cup
- Make sure the wick tip is a little above the cup’s rim

Credit: www.craftymorning.com
Melting And Coloring The Wax
Making a tea cup candle starts with melting the wax properly. Adding color and scent makes the candle unique and nice.
Use safe techniques to melt the wax and mix the dye and fragrance well. This helps create a smooth, even candle.
Melting Techniques
Use a double boiler to melt wax safely. This stops the wax from burning or overheating.
Stir the wax gently while it melts. Watch the temperature to keep it steady between 170°F and 180°F.
- Fill a pot with water and heat it on medium.
- Place a heat-safe container with wax inside the pot.
- Stir the wax slowly as it melts.
- Use a thermometer to check the temperature.
Adding Fragrance And Dye
Add dye to the melted wax to give your candle a nice color. Use small amounts and mix well.
Pour fragrance oil after the wax cools to 160°F. Stir gently for even scent distribution.
- Use dye chips or liquid dye made for candles.
- Add dye slowly until you reach the color you want.
- Choose fragrance oils made for candle making.
- Mix fragrance evenly for consistent scent.
Pouring Wax Into The Cup
Pouring wax into your tea cup candle is a delicate task. Doing it right helps the candle burn well and look nice.
This guide covers the best temperature for pouring wax and how to avoid air bubbles.
Optimal Temperature
Pour wax when it reaches the right temperature. Too hot wax can crack the cup. Too cool wax won’t stick properly.
- Heat wax to 135°F to 145°F (57°C to 63°C).
- Check temperature with a thermometer.
- Pour slowly to keep wax smooth.
- Do not pour if wax is above 150°F (65°C).
Avoiding Air Bubbles
Air bubbles can ruin your candle’s look and burning quality. Follow these tips to avoid bubbles.
| Tip | Reason |
| Pour wax slowly | Prevents air from trapping in wax |
| Pour near the cup edge | Helps wax flow evenly |
| Tap cup gently after pouring | Releases trapped air bubbles |
| Use a skewer to pop visible bubbles | Ensures smooth surface |
Setting And Curing The Candle
After pouring wax into the tea cup, it needs time to set properly. Setting and curing help the candle burn well and last longer.
Patience is key during this process. Do not rush to light the candle before it cures completely.
Cooling Time
Let the candle cool at room temperature. Avoid moving it or touching the surface while it hardens.
- Place the tea cup on a flat, stable surface
- Keep the candle away from direct sunlight or heat
- Allow at least 4 to 6 hours for the wax to solidify fully
- If possible, wait 24 hours before lighting the candle
Trimming The Wick
Trimming the wick helps the candle burn evenly and prevents smoke.
| Wick Length | Purpose | How Often |
| ¼ inch (6 mm) | Prevents large flames and soot | Before each lighting |
| Too long | Causes flickering and smoke | Trim immediately |
| Too short | Flame may go out quickly | Adjust before lighting |
Decorating Tea Cup Candles
Decorating tea cup candles adds a personal touch. It makes them unique and lovely gifts.
You can use simple ideas to make your candles look charming. Small details make a big difference.
Adding Embellishments
Add small decorations to your tea cup candles. Embellishments create a special look and feel.
Try using ribbons, dried flowers, or beads around the cup. These items make the candle more attractive.
- Wrap a thin ribbon around the cup’s handle
- Glue small dried flowers on the candle surface
- Add beads or pearls near the rim for sparkle
- Use lace for a vintage style decoration
Labeling And Packaging Ideas
Labels help identify your tea cup candles. Packaging keeps them safe and neat.
Use simple labels with candle names or scents. Choose packaging that fits the cup size well.
- Print labels on kraft paper for a natural look
- Attach tags with twine or thin string
- Use small boxes or clear bags for packaging
- Add tissue paper inside boxes for extra protection

Credit: www.sunshinevalleywv.com
Safety Tips For Candle Making
Candle making is fun but needs care. Safety helps prevent accidents.
Knowing how to handle hot wax and fire is very important.
Handling Hot Wax
Hot wax can burn skin easily. Always use heat-resistant gloves.
- Keep a thermometer to check wax temperature.
- Do not heat wax above 200°F (93°C).
- Use a double boiler for melting wax safely.
- Pour wax slowly to avoid splashes.
- Keep children and pets away from the workspace.
Fire Safety Precautions
Fire is a risk in candle making. Follow these rules to stay safe.
| Precaution | Reason |
| Keep a fire extinguisher nearby | To put out any small fires fast |
| Never leave hot wax unattended | Wax can catch fire if too hot |
| Work in a well-ventilated area | Prevents smoke buildup |
| Clear your workspace of flammable items | Stops accidental fires |
| Have a fire blanket ready | For quick smothering of flames |
Creative Uses For Tea Cup Candles
Tea cup candles add charm to any space. They blend old-fashioned style with soft light.
Use them in many ways to brighten your home or special events.
Home Decor Ideas
Place tea cup candles on shelves or tables for a cozy look. Their vintage feel fits many rooms.
- Group several tea cup candles on a tray for a centerpiece
- Use them in the bathroom for a spa-like feel
- Set a candle inside a tea cup with dried flowers around it
- Place them near bookshelves for soft reading light
Gifts And Event Favors
Tea cup candles make thoughtful gifts and lovely event favors. They suit weddings, birthdays, and holidays.
| Event Type | How to Use Tea Cup Candles |
| Wedding | Place on guest tables as keepsakes |
| Birthday | Give as party favors with matching tags |
| Holiday | Use in gift baskets with treats |
Frequently Asked Questions
What Materials Are Needed To Make A Tea Cup Candle?
You need wax, a wick, a tea cup, fragrance oil, and a double boiler. These basics ensure a safe and fragrant candle.
How Do You Choose The Right Wax For Tea Cup Candles?
Soy wax or beeswax is ideal for tea cup candles. They melt evenly and hold scent well, providing a clean burn.
Can I Reuse Old Tea Cups For Candle Making?
Yes, old tea cups can be reused. Ensure they are clean, dry, and heat-resistant to safely hold the melted wax.
How Long Does It Take To Make A Tea Cup Candle?
Making a tea cup candle takes about 30-45 minutes. This includes melting wax, pouring, and allowing it to set properly.
Conclusion
Creating a tea cup candle is simple and rewarding. It adds charm to any space. Plus, it’s a thoughtful gift. The materials are easy to find. Crafting it is enjoyable. You can choose your favorite scent. Personalize it with unique decorations.
This project saves money too. It also brings a personal touch to your home. Enjoy the warm glow of your handmade candle. Share it with friends and family. They will appreciate your creativity. So, gather your supplies. Start crafting today.
Embrace the joy of making something beautiful.