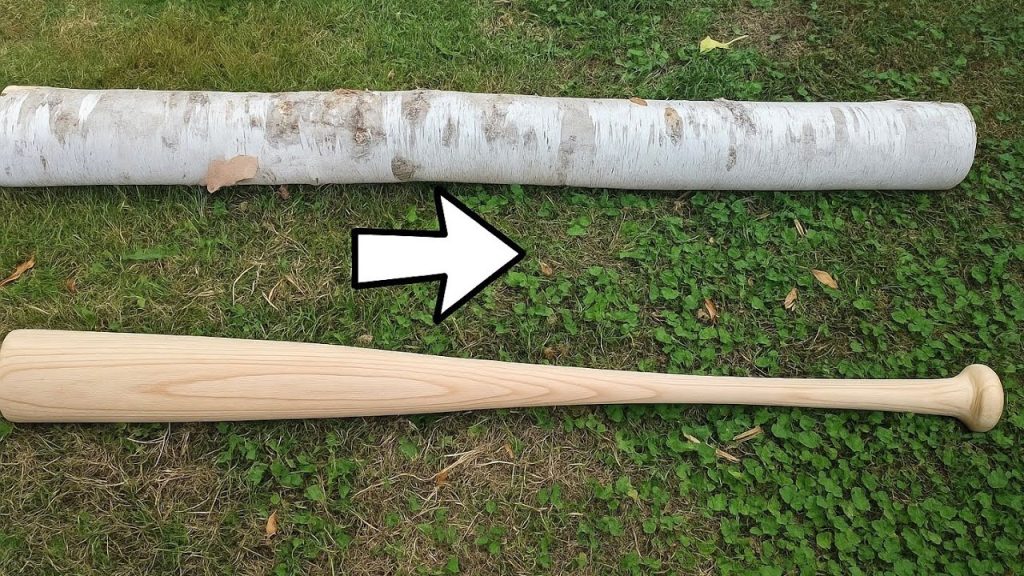
Have you ever wanted to hold a baseball bat that you made yourself? Making your own wooden baseball bat is not only a fun project, but it also gives you a unique connection to the game.
Imagine stepping up to the plate with a bat crafted by your own hands—feeling that pride and confidence. In this guide, you’ll discover simple steps to turn a plain piece of wood into your very own baseball bat. Whether you’re a beginner or just curious, you’ll find everything you need to get started right here.
Ready to create something truly special? Let’s dive in!

Credit: www.reddit.com
Choosing The Right Wood
Making a wooden baseball bat starts with picking the right wood. The wood affects the bat’s strength and performance.
Good wood makes the bat durable and comfortable to use. Choose wood carefully to get the best results.
Types Of Wood For Bats
Different woods are used to make baseball bats. Each wood type has unique features.
- Maple: Hard and dense, offers great power
- Ash: Lighter and flexible, good for control
- Birch: Combines hardness and flex, popular choice
- Hickory: Very strong but heavier, less common now
Wood Quality And Grain
High-quality wood lasts longer and performs better. Look for wood with straight grain lines.
Grain lines should be close and even. Avoid wood with knots or cracks. Smooth wood helps with bat balance.
Sourcing Materials
Find wood from trusted suppliers or lumber yards. Check if the wood is properly dried and treated.
Buying local wood can reduce cost and support local businesses. Always inspect wood before buying for any defects.

Credit: www.amazon.com
Preparing The Wood Blank
Making a wooden baseball bat starts with preparing the wood blank. This step ensures the wood is ready for shaping and finishing.
A well-prepared blank makes the bat stronger and easier to work on. Careful attention here improves the final product.
Cutting To Size
Cut the wood blank to the right length before shaping. A typical bat blank is about 33 to 34 inches long.
Use a saw that can make straight, clean cuts. Mark the cutting line clearly to avoid mistakes.
- Choose a hard wood like maple or ash
- Mark the length on the blank carefully
- Cut slowly to keep the edges smooth
- Check the cut for evenness before moving on
Shaping The Blank
Shaping gives the bat its classic form. Use a lathe or hand tools to carve the wood.
Start with rough shaping and then refine the curves. Make sure the handle is comfortable and the barrel is thick enough.
- Secure the blank firmly before shaping
- Shape the handle first for grip comfort
- Gradually shape the barrel for balance
- Check the bat’s weight as you work
Sanding Basics
Sanding smooths the bat’s surface and removes tool marks. Use sandpaper of different grits.
Start with coarse grit to remove rough spots. Finish with fine grit for a smooth feel.
- Begin sanding with 80-grit sandpaper
- Move to 120-grit for medium smoothing
- Finish with 220-grit for a smooth surface
- Sand along the grain for best results
Turning The Bat On A Lathe
Turning a wooden baseball bat on a lathe is a key step in shaping it. This process smooths the wood and gives the bat its round form.
Using a lathe allows you to create a balanced and even bat. You can control the shape and size by carefully working the wood.
Setting Up The Lathe
First, make sure the lathe is clean and all parts work well. Check the power and safety guards before starting.
Mount the wooden blank securely between the headstock and tailstock. It should be tight to prevent movement during turning.
- Check the lathe speed; start slow for safety
- Use a sharp tool for smooth cuts
- Wear safety goggles and a dust mask
Rough Turning
Rough turning shapes the bat’s basic form. Remove large amounts of wood to get close to the bat’s size.
Use a bowl gouge or roughing gouge to cut the wood. Keep the tool steady and move it slowly along the blank.
- Start from the thicker end of the blank
- Shape the handle and barrel roughly
- Keep checking the shape with calipers
Fine Turning Techniques
Fine turning adds smoothness and detail. Use smaller tools to refine the bat’s shape and remove tool marks.
Sand the bat while it spins at low speed. Begin with coarse sandpaper, then use finer grits for a smooth finish.
- Use spindle gouges for detailed shaping
- Sand evenly to avoid flat spots
- Check dimensions often for accuracy
Shaping The Handle And Barrel
Making a wooden baseball bat involves careful shaping. The handle and barrel are key parts. Each needs attention for the bat to perform well.
Crafting these parts affects how the bat feels. It also impacts how the bat handles during play.
Tapering The Handle
The handle is where players grip the bat. It must be comfortable and secure. Tapering the handle involves narrowing it gradually towards the end.
This helps players maintain a firm grip. A well-tapered handle reduces slipping during swings.
- Start with a wider base for strength
- Gradually narrow towards the end for comfort
- Ensure smooth transition for easy grip
Defining The Barrel
The barrel is the thick part of the bat. It’s where the ball makes contact. A well-shaped barrel improves hitting power.
Defining the barrel involves making it round and smooth. This ensures even contact with the ball.
| Barrel Diameter | Influences hitting power |
| Length | Affects balance and reach |
Creating The Knob
The knob is at the end of the handle. It prevents the bat from slipping. Creating the knob involves shaping a small bulb at the handle’s end.
A well-crafted knob helps players hold the bat securely. It also adds balance to the bat.
- Make the knob round for comfort
- Ensure it’s large enough to prevent slipping
- Keep it smooth to avoid blisters
Sanding And Smoothing
Sanding is key to making a smooth wooden baseball bat. It removes rough spots and shapes the wood nicely.
This process helps the bat feel good in your hands and look clean. Sanding also prepares the surface for finishing.
Progressive Sanding Grits
Use different sanding grits in order from coarse to fine. This removes deep scratches first, then smooths the surface.
- Start with 80-grit sandpaper to shape the bat and remove large marks.
- Move to 120-grit to smooth rough areas and blend scratches.
- Use 220-grit to refine the surface for a soft feel.
- Finish with 320-grit or higher for a polished look.
Removing Imperfections
Check the bat for dents, cracks, or rough patches after sanding. Fix these before moving on.
- Use wood filler for small dents and holes.
- Sand filled areas lightly after drying.
- Remove dust with a soft brush or cloth.
- Repeat sanding if needed to keep the surface even.
Final Surface Prep
| Task | Purpose | Tips |
|---|---|---|
| Clean Surface | Remove dust and oils | Use a tack cloth or damp rag |
| Light Sanding | Prepare wood for finish | Use fine 320-grit sandpaper |
| Inspect Bat | Ensure smoothness | Run hand over surface carefully |
| Apply Finish | Protect wood | Follow product instructions |

Credit: www.amazon.sg
Applying Finish
Applying a finish protects your wooden baseball bat. It also makes the bat look better. The finish keeps moisture out and stops cracks.
Choosing the right finish and applying it carefully is very important. This guide explains how to do it step by step.
Choosing The Right Finish
Pick a finish that protects wood from water and dirt. It should also keep the bat smooth. Common finishes include oil, varnish, and polyurethane.
Oil finishes soak into the wood and keep it natural. Varnish and polyurethane create a hard layer on top for strong protection.
- Oil: natural look, easy to apply
- Varnish: glossy, strong protection
- Polyurethane: very durable, water-resistant
Staining The Bat
Staining adds color and highlights the wood grain. Choose a stain color that you like. Test it on a scrap piece first.
Apply the stain evenly with a cloth or brush. Let it soak for a few minutes, then wipe off extra stain. Let it dry fully before finishing.
- Use light coats for even color
- Work with the wood grain
- Wipe off excess stain quickly
- Dry stain at least 24 hours
Sealing And Protecting
Seal the bat to protect it from water and damage. Use a brush to apply thin coats of your chosen finish. Let each coat dry well.
Sand lightly between coats with fine sandpaper. This helps the next coat stick better and smooths the surface. Apply 2 to 3 coats for best results.
- Apply thin, even coats
- Let each coat dry fully
- Lightly sand between coats
- Use 2-3 coats total
Adding Personal Touches
Making a wooden baseball bat gives you a chance to add your own style. Personal touches make your bat unique and special.
Two great ways to customize your bat are engraving and branding, and using custom paint and decals. Each method adds character to your creation.
Engraving And Branding
Engraving and branding give your bat a classic look. You can add names, dates, or logos. This makes your bat stand out and feel personal.
- Use a wood burner or laser engraver for clean lines
- Choose simple fonts for easy reading
- Brand the bat with a hot iron stamp for a rustic effect
- Mark important dates or initials
- Test your design on a scrap piece of wood first
Custom Paint And Decals
Painting and decals add color and fun to your bat. You can match team colors or create your own design. Seal your work to protect the paint.
| Paint Type | Best Use | Durability |
| Acrylic | Bright colors, quick drying | Moderate |
| Oil-based | Rich finish, smooth look | High |
| Spray Paint | Even coating, easy application | Moderate |
| Decals | Detailed logos, easy to apply | Depends on sealant |
Testing And Care
Making a wooden baseball bat is only part of the process. Testing and caring for the bat keeps it ready to use. Proper care can make the bat last longer.
Checking the balance and weight helps you find the best feel. Bat maintenance tips protect the wood from damage and wear.
Checking Balance And Weight
Hold the bat at the handle and swing it slowly. The bat should feel even and not too heavy at the end. A well-balanced bat improves control and power.
Use this simple test to check balance and weight:
- Hold the bat at your knob (handle end).
- Swing it forward like you would when hitting.
- Note if the bat feels heavy or hard to control.
- Try holding it near the middle to compare weight distribution.
- Adjust your bat design if it feels unbalanced.
Bat Maintenance Tips
Wooden bats need care to avoid cracks and dents. Keeping the wood dry and smooth helps the bat last longer.
- Store your bat in a cool, dry place away from moisture.
- Wipe the bat clean after each use with a dry cloth.
- Apply a light coat of linseed oil once every few months.
- Do not leave the bat in direct sunlight or extreme heat.
- Check regularly for cracks and small dents and repair them if possible.
- Avoid hitting hard surfaces like concrete or metal fences.
Frequently Asked Questions
What Type Of Wood Is Best For Making A Baseball Bat?
Ash and maple are the most popular woods for bats. Ash offers flexibility and lightness, while maple provides hardness and durability. Choose wood based on your preference for feel and performance.
How Long Does It Take To Make A Wooden Baseball Bat?
Typically, crafting a wooden bat takes about 2 to 4 hours. This includes cutting, shaping, sanding, and finishing. Drying time for any coatings may add extra hours.
What Tools Do I Need To Make A Wooden Baseball Bat?
Essential tools include a lathe, bandsaw, sandpaper, and wood finish. A measuring tape and pencil are helpful for precision. Safety gear is also important during the process.
Can I Make A Baseball Bat Without A Lathe?
Yes, but it’s challenging. You can use a bandsaw and hand tools for shaping. However, a lathe provides smoother and more accurate results.
Conclusion
Making a wooden baseball bat takes patience and care. Each step shapes the wood into a strong bat. You learn to use tools safely and precisely. The final product feels special because you made it yourself. Practice makes your skills better every time.
Enjoy the process as much as the result. Now, you have a bat ready for play or display. Keep trying and improving with each new bat you create.