
When winter arrives, keeping your walkways and driveways ice-free is a top priority. But have you ever wondered how to make brine for ice melt that works fast and lasts longer?
Creating your own brine solution can save you money and give you control over how effective and eco-friendly it is. You’ll discover simple steps to make your own brine for ice melt right at home. By the end, you’ll be ready to tackle icy surfaces with confidence and ease.
Keep reading to learn the secrets that can make your winter safer and hassle-free.
Benefits Of Brine For Ice Melt
Brine offers several advantages that make it a smart choice for melting ice effectively. It’s not just about clearing sidewalks and driveways; using brine can save you money, protect the environment, and work better in harsh winter conditions. Understanding these benefits can help you decide if brine is right for your ice-melting needs.
Cost Efficiency Compared To Salt
Brine uses salt more efficiently than spreading dry salt directly. Because it’s a liquid solution, you need less salt to cover the same area, which lowers your overall salt usage. This reduction in salt means you spend less money over the winter season, especially if you treat large areas like parking lots or long driveways.
Think about how often you refill your salt containers when using traditional rock salt. Switching to brine cuts down those refills and the hassle that comes with it.
Environmental Impact
Using brine reduces the environmental damage caused by excess salt. Salt runoff from roads and sidewalks can harm plants, soil, and waterways. Since brine applies salt more precisely and in smaller amounts, it minimizes this runoff.
Less salt waste means less harm to local ecosystems. If you care about keeping your garden healthy and protecting nearby streams, brine offers a cleaner alternative.
Effectiveness At Lower Temperatures
Brine works better than traditional salt in very cold temperatures. While rock salt can stop working below 15°F (-9°C), brine remains effective at melting ice even when it’s colder. This means you can rely on it during harsh winter days when other methods fail.
Have you ever noticed patches of ice that just won’t melt with regular salt? Brine helps tackle those stubborn spots faster, making your walkways safer with less effort.

Credit: farmhouseharvest.net
Essential Ingredients For Brine
Brine for ice melt requires a few simple but key ingredients. Each ingredient affects how well the brine works in cold weather. Choosing the right components ensures faster melting and better coverage.
Understanding these essential ingredients helps create an effective and safe ice melt solution.
Types Of Salt To Use
Salt is the main ingredient in brine. Different salts affect melting speed and temperature range.
- Rock Salt (Sodium Chloride):Common and affordable. Works best above 15°F (-9°C).
- Calcium Chloride:Melts ice quickly. Effective at very low temperatures, down to -25°F (-32°C).
- Magnesium Chloride:Less corrosive and eco-friendly. Works well in temperatures around 5°F (-15°C).
- Potassium Chloride:Safer for plants but less effective in very cold weather.
Water Quality Considerations
Water quality impacts how well salt dissolves and how pure the brine is.
- Use clean, fresh water:Avoid dirty or hard water to prevent clumps.
- Soft water preferred:It dissolves salt faster and improves brine consistency.
- Filtered water:Removes impurities that can reduce brine effectiveness.
Optional Additives For Enhanced Performance
Additives can improve brine’s ice melting power and reduce corrosion.
- Anti-corrosion agents:Protect metal surfaces from damage.
- Surfactants:Help brine spread evenly on surfaces.
- Glycol or alcohol:Lower freezing point and boost performance in extreme cold.
- Colorants:Help mark treated areas for safety.
Equipment Needed
A large container or bucket is needed to mix the brine solution. Salt, water, and a stirring tool are essential for making the ice melt brine. A measuring cup helps ensure the right salt-to-water ratio.
Making brine for ice melt requires the right tools. These tools ensure efficiency and safety. Let’s explore the essential equipment needed.Containers For Mixing
Choose strong, large containers for mixing. Plastic buckets work well. They resist corrosion and are lightweight. Ensure the container has enough space. This prevents spills and makes mixing easy. Consider using a lid for storage.Measuring Tools
Accurate measurements are key. Use measuring cups and spoons. They help maintain the right salt-to-water ratio. A digital scale can also be helpful. It provides precise weight measurements. This ensures effectiveness and reduces waste.Application Tools
Applying brine needs careful tools. A garden sprayer works well for small areas. For larger areas, use a backpack sprayer. They distribute brine evenly and efficiently. Make sure the sprayer is clean and free of clogs. This ensures smooth and consistent application.Step-by-step Brine Preparation
Preparing brine for ice melt is simple but requires attention to detail to get the right concentration. The effectiveness of your brine depends on how well you measure, mix, and store it. Let’s break down the process so you can make a brine solution that works efficiently every time.
Measuring Salt And Water
Accuracy matters when measuring salt and water for your brine. Too much salt can be wasteful and less effective, while too little won’t melt ice properly.
- Use a kitchen scale or measuring cup to get precise amounts.
- A common ratio is 1 part salt to 3 parts water by volume for effective ice melting.
- Consider the type of salt—rock salt or table salt—as density varies slightly.
Have you ever guessed measurements and ended up with a solution that froze instead of melting ice? Getting this right saves frustration and improves safety.
Mixing Techniques
Mixing salt and water thoroughly ensures the salt dissolves completely, maximizing the brine’s ice-melting power.
- Use a large container to prevent overflow when stirring.
- Stir slowly but consistently with a sturdy spoon or paddle until no salt crystals remain.
- If possible, warm the water slightly to speed up salt dissolution, but avoid boiling.
Did you know that stirring too fast can cause salt to clump and settle unevenly? Patience during mixing pays off with a smoother solution.
Storage Tips
Proper storage keeps your brine ready for use and prevents contamination or freezing.
- Use airtight containers made of plastic or glass to avoid corrosion.
- Label containers with the date and concentration for easy reference.
- Store brine in a cool place away from direct sunlight to maintain effectiveness.
Have you ever found your brine frozen solid or contaminated because it wasn’t stored properly? Taking time to store it right saves you from last-minute hassle.
Applying Brine Effectively
Applying brine effectively ensures quick melting of ice and safer walking paths. Proper timing and correct amounts are key. Safety must guide every step. This helps protect surfaces and people.
When To Apply For Best Results
Apply brine before ice forms for best results. It prevents ice from sticking to the ground. Early application saves time and effort later. Avoid applying during heavy snowfall. This can dilute the brine and reduce its effect.
Check weather forecasts to pick the right moment. Apply when temperatures are near freezing or just below. This keeps the surface clear and safe.
Recommended Application Rates
Use the right amount of brine to avoid waste and damage. Typical rates range from 0.05 to 0.1 gallons per square yard. Adjust based on temperature and surface type.
| Temperature Range | Application Rate (Gallons per Sq. Yard) |
|---|---|
| 28°F to 32°F (-2°C to 0°C) | 0.05 |
| 20°F to 28°F (-7°C to -2°C) | 0.07 |
| Below 20°F (-7°C) | 0.1 |
Spread the brine evenly for consistent melting. Use a sprayer or spreader designed for liquids. This avoids puddles and slippery spots.
Safety Precautions
- Wear gloves and eye protection during application.
- Keep brine away from plants and pets to prevent harm.
- Store brine in labeled containers, away from children.
- Do not mix brine with other chemicals.
- Clean equipment after use to avoid corrosion.
Following safety rules helps protect health and property. Use brine responsibly for the best results.

Credit: www.youtube.com
Troubleshooting Common Issues
Troubleshooting common issues with brine for ice melt can save you time and frustration. Identifying problems early helps you adjust your process and improve results. Let’s look at some common challenges and how you can fix them.
Brine Freezing Problems
If your brine is freezing, it might be too diluted. Ice melt brine needs the right salt-to-water ratio to stay liquid at low temperatures.
Try increasing the salt concentration gradually and test the solution’s freezing point. Also, make sure you’re using the correct type of salt—rock salt or calcium chloride works best.
Have you checked the temperature where you store your brine? If it’s too cold, even a strong brine can freeze. Consider storing it in a warmer place or using additives designed to lower freezing points.
Corrosion Concerns
Corrosion can damage your equipment and surfaces when using brine. This often happens if the brine is too acidic or contains impurities.
Test your brine’s pH level and keep it neutral or slightly alkaline to reduce corrosion risk. Using high-purity salt reduces contaminants that accelerate rusting.
Applying a protective coating on metal surfaces in contact with brine can also help. Do you inspect your tools regularly for signs of wear? Catching corrosion early prevents costly repairs.
Uneven Ice Melting
Uneven ice melting often results from inconsistent brine application or incorrect concentration. If some areas remain icy, your solution might be too weak or too strong.
Make sure to mix your brine thoroughly and apply it evenly over the surface. Adjust the concentration based on the weather—colder days may need stronger brine.
Consider the surface texture too; rough or porous areas may hold ice differently. Do you monitor how quickly ice melts in different spots? Tracking this helps you tweak your brine for better coverage.
Environmental And Safety Tips
Making brine for ice melt requires attention to the environment and safety. Using the right practices helps protect plants, pets, and the surroundings. Proper handling and disposal avoid accidents and pollution. Follow these tips to keep your home safe and green.
Minimizing Impact On Plants And Pets
Keep brine away from garden plants and grass. Salt can harm roots and dry out soil. Use barriers or cover plants before applying brine near them. Avoid spreading brine where pets walk or play. Salt can irritate paws and cause health issues. Clean pet paws after they go outside in treated areas.
Safe Storage Practices
Store brine in a sealed, labeled container. Choose a cool, dry place away from children and pets. Avoid storing near food or drink. Keep containers off the floor to prevent leaks. Check containers regularly for cracks or spills. Wear gloves and eye protection when handling brine.
Disposal Guidelines
Never pour leftover brine into storm drains or natural water bodies. Saltwater can harm aquatic life and pollute water. Use brine up completely or dilute it before disposal. Small amounts can go down the drain with plenty of water. For large quantities, contact local waste services for advice. Follow all local rules for chemical disposal.
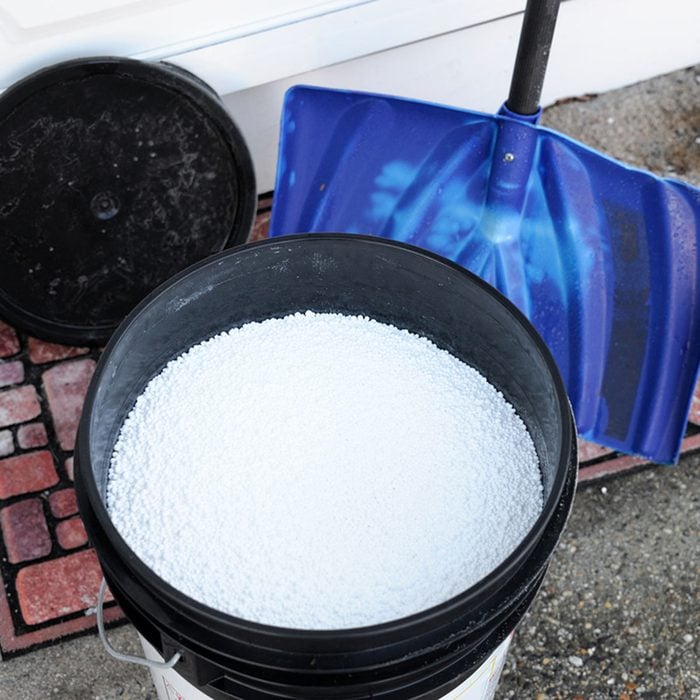
Credit: www.familyhandyman.com
Frequently Asked Questions
What Is Brine For Ice Melt?
Brine for ice melt is a saltwater solution used to prevent ice formation. It works by lowering water’s freezing point, making it effective for safer walkways and roads during winter.
How Do You Make Brine For Ice Melt?
To make brine, dissolve rock salt or sea salt in warm water. Use a 23% salt-to-water ratio for effective ice melting and store it in a sealed container.
Why Use Brine Instead Of Solid Salt?
Brine acts faster than solid salt because it spreads evenly and sticks to surfaces. It also reduces salt waste and environmental impact by targeting ice more efficiently.
When Should You Apply Brine For Ice Melt?
Apply brine before snowfall or ice forms for best results. Pre-treatment helps prevent ice bonding to surfaces, making snow removal easier and safer.
Conclusion
Making brine for ice melt is simple and effective. Use the right salt and water amounts. Stir well to dissolve the salt completely. Store the brine in a safe container. Apply it carefully on icy surfaces. This helps melt ice faster and keeps walkways safe.
Regular use can prevent slips and falls. Try this easy method to handle winter ice safely.