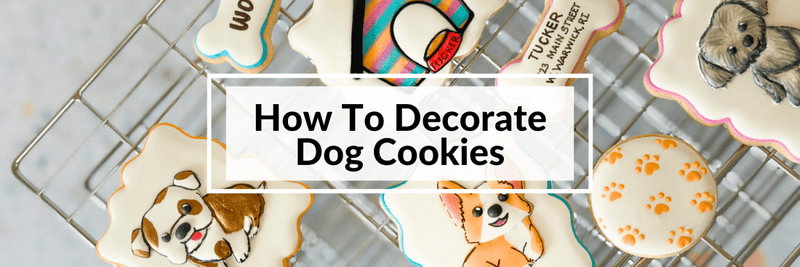
If you want to treat your furry friend to something special, making dog cookies with icing is a fun and easy way to do it. Imagine your dog’s excitement when they see colorful, tasty treats made just for them.
You don’t need fancy ingredients or baking skills—just simple steps that anyone can follow. Keep reading, and you’ll discover how to create delicious, safe, and eye-catching dog cookies that will have your pup wagging their tail for more. Your dog deserves a homemade treat that’s both healthy and delightful, and you’re just a few clicks away from learning how.

Credit: studioist.co
Ingredients For Dog Cookies
Choosing the right ingredients is key to making healthy and tasty dog cookies. Every ingredient should be safe and beneficial for dogs. Avoid harmful substances like chocolate, xylitol, or artificial sweeteners.
Use simple, natural ingredients that dogs enjoy. Fresh, whole foods make the best treats. Focus on flours, mix-ins, sweeteners, and icing that suit canine digestion.
Dog-friendly Flours And Mix-ins
- Oat flour: gentle on the stomach and rich in fiber
- Rice flour: gluten-free and easy to digest
- Whole wheat flour: suitable for dogs without wheat allergies
- Pumpkin puree: adds moisture and nutrients
- Shredded carrots: natural sweetness and crunch
- Peanut butter (unsalted, no xylitol): protein and flavor boost
- Applesauce (unsweetened): natural sweetness and moisture
Safe Sweeteners And Flavorings
- Honey: natural and dog-safe in small amounts
- Molasses: rich flavor, use sparingly
- Cinnamon: adds aroma and is safe for dogs
- Vanilla extract: use pure and in small quantities
- Unsweetened coconut flakes: texture and mild sweetness
Icing Ingredients For Dogs
- Greek yogurt (plain, unsweetened): creamy and healthy base
- Cream cheese (low-fat, unsalted): smooth texture and flavor
- Peanut butter (natural, no xylitol): adds taste and thickness
- Pureed pumpkin: natural color and nutrition
- Mashed banana: sweet and smooth consistency
Tools And Equipment Needed
Gathering the right tools and equipment sets you up for success when making dog cookies with icing. Having everything at hand keeps your process smooth and enjoyable. It also helps you focus on creating tasty treats without unnecessary interruptions.
Mixing And Measuring Tools
Precision matters when mixing ingredients for dog cookies. Use measuring cups and spoons to get accurate amounts of flour, oats, and peanut butter. A sturdy mixing bowl and a wooden spoon or silicone spatula make combining ingredients easy and mess-free.
Have you tried using a digital kitchen scale? It can improve consistency, especially if you like experimenting with different recipes. It’s a small investment that pays off in perfectly balanced dough every time.
Baking Supplies
Quality baking supplies help your dog cookies bake evenly and come out just right. Non-stick baking sheets or parchment paper prevent sticking and make clean-up simple. Cookie cutters add fun shapes that your dog will love—bones, paws, or hearts are popular choices.
Don’t forget an oven thermometer! Your oven’s temperature might not be accurate, and this tool ensures your cookies bake at the perfect heat. Have you noticed how some ovens run hotter or cooler? This small check can save your batch from burning or undercooking.
Icing Application Tools
Applying icing neatly requires the right tools. A small offset spatula or butter knife spreads icing smoothly over your cookies. For more detailed designs, piping bags with different nozzles let you create shapes, lines, and dots with ease.
If you want to keep things simple, you can use a plastic sandwich bag with a small hole cut in one corner. This DIY piping bag works well for beginners. What creative designs will you try to make your dog’s treats extra special?
Preparing The Cookie Dough
Mix flour, oats, and peanut butter in a bowl for dog cookies. Stir until smooth and thick.
Preparing the dough for dog cookies with icing is a delightful experience that can bring you and your furry friend closer. Imagine the joy on their face as they watch you knead and shape their treats. This section will guide you through the essential steps of mixing and perfecting the dough, setting the stage for delicious homemade cookies.Mixing Dry And Wet Ingredients
Begin by gathering your dry ingredients. Common choices include whole wheat flour, oats, and a pinch of baking powder. These form the base of your cookies and provide texture. In a separate bowl, whisk together the wet ingredients. Peanut butter, applesauce, or pureed pumpkin are popular options for flavor. Add an egg for binding and a touch of honey if you desire a hint of sweetness. Combine the dry and wet mixtures gradually. It’s important to ensure they’re blended evenly. This will prevent uneven textures in your cookies, ensuring each bite is just right.Achieving The Right Dough Consistency
The key to perfect dough is its consistency. You want it to be firm yet pliable. This balance ensures the cookies hold their shape during baking. If the dough feels too sticky, sprinkle in a little more flour. Conversely, if it’s too dry, a splash of water or additional applesauce can help. Think about how happy your dog will be with each bite. Your effort in achieving the right consistency directly impacts their enjoyment. Can you imagine the wag of their tail with every delicious cookie?Shaping And Baking Cookies
Shaping and baking your dog cookies is where your creativity meets precision. This part turns simple dough into fun, tasty treats your furry friend will love. Getting the shapes right and baking them perfectly makes a huge difference in texture and taste.
Rolling And Cutting Shapes
Start by dusting your work surface lightly with flour or oat flour to stop the dough from sticking. Roll the dough evenly to about 1/4 inch thick—thin enough to bake through but thick enough to hold its shape.
Use cookie cutters to create fun shapes like bones, paws, or hearts. If you don’t have cutters, a small glass or knife can work just as well. Remember, the size affects baking time, so keep shapes consistent for even cooking.
Baking Time And Temperature Tips
Set your oven to 350°F (175°C) for best results. Bake the cookies on a parchment-lined tray to avoid sticking and burning.
- Small cookies (1-2 inches) need about 10-12 minutes.
- Larger cookies (3-4 inches) take around 15-18 minutes.
Watch closely near the end. You want them golden and firm but not too hard. Overbaking makes the cookies brittle, which can be tough on your dog’s teeth.
Cooling And Storage
Let the cookies cool completely on a wire rack. Warm cookies can get soggy if stored too soon, losing their crunch.
Store the cooled cookies in an airtight container. They last about one week at room temperature or up to three months in the freezer.
Have you tried freezing your dog treats? It’s a great way to keep them fresh and ready whenever your pup deserves a special snack.
Making Dog-safe Icing
Making dog-safe icing requires careful choice of ingredients. The goal is to create a tasty, non-toxic topping for your dog cookies. Avoid sugars and artificial additives that can harm dogs. Use simple, natural ingredients that dogs enjoy and digest well.
Choosing Icing Bases
Start with a plain base that is safe and easy to work with. Common options include:
- Greek yogurt – thick and smooth, full of probiotics.
- Cream cheese – soft, mild, and dogs usually love it.
- Peanut butter – choose unsalted and no sugar added.
- Mashed banana – naturally sweet and soft texture.
These bases are healthy and blend well with other ingredients.
Adding Natural Colors And Flavors
Enhance the icing using natural sources for color and taste. Use:
- Beet juice or powder for a red tint.
- Turmeric for a yellow shade and health benefits.
- Spinach powder for green coloring.
- Pureed pumpkin for orange and added fiber.
These options keep the icing safe and appealing to dogs.
Adjusting Consistency For Decorating
Consistency matters for easy application and neat decoration. Thicken or thin the icing by:
- Adding more base ingredient to thicken.
- Mixing in a small amount of water or broth to thin.
- Chilling the icing to firm it up before use.
- Using a piping bag or spoon for better control.
Test the icing on a plate first to see how it spreads.

Credit: www.pastries4pet.com
Decorating Dog Cookies
Decorating dog cookies can turn a simple treat into a delightful experience for both you and your furry friend. It’s not just about making the cookies look good; it’s about adding a personal touch that shows your care. With a bit of patience and creativity, you can transform plain dog cookies into eye-catching, tasty rewards.
Simple Icing Techniques
Start with a basic icing made from dog-safe ingredients like yogurt or peanut butter mixed with a little powdered sugar or honey. Use a spoon or a small piping bag to spread or pipe the icing gently over the cookie surface.
Try simple patterns like dots, lines, or swirls. These require minimal skill but make a big difference. If you want cleaner edges, chill the cookies before decorating to prevent the icing from melting too fast.
Creative Designs And Ideas
Think about your dog’s personality when choosing designs. Paw prints, bones, or their name can make the cookies special. You can use natural food coloring to add subtle shades without harming your pet.
Try layering colors by letting one layer dry before adding another. Edible decorations like small bits of carrot or apple can add texture and interest. Have you ever tried making holiday-themed cookies? They add a festive touch your dog will love.
Tips For Safe And Fun Decoration
- Always use dog-safe ingredients in your icing to avoid health issues.
- Keep decorations simple to prevent choking hazards—avoid hard or small non-edible items.
- Let your dog watch or sniff the cookies while you decorate to build excitement and bond.
- Use gloves or clean hands to keep the process hygienic.
Remember, decorating dog cookies is about fun and love, not perfection. How can you make your dog’s treats more enjoyable with just a few simple steps?
Storage And Serving Tips
Knowing how to store and serve your homemade dog cookies with icing properly ensures they stay tasty and safe for your furry friend. Proper storage keeps the cookies fresh longer, while smart serving habits help maintain your dog’s health. Let’s look at the best ways to handle your delicious treats after baking.
Keeping Cookies Fresh
Store your dog cookies in an airtight container to keep moisture out and maintain their crunch. If you plan to keep them for more than a week, consider refrigerating them to prevent spoilage. For longer storage, freezing is a great option—just thaw a few at a time to avoid waste.
Did you know that icing can affect shelf life? Because it often contains natural sweeteners like honey or yogurt, iced cookies might spoil faster than plain ones. Keep an eye on any changes in texture or smell to catch spoilage early.
Serving Size And Frequency
Always keep your dog’s size and dietary needs in mind when serving cookies. A small dog may only need a half or quarter of a cookie, while larger dogs can handle a whole one. Moderation is key; treats should not exceed 10% of your dog’s daily calorie intake.
How often you give treats matters as well. Daily treats can be fine if they’re healthy and portioned right, but avoid overfeeding. Try using cookies as rewards during training sessions to make each treat count.
Allergy And Safety Considerations
Check all ingredients for potential allergens before baking, especially if your dog has known sensitivities. Common allergens include wheat, dairy, and certain nuts. You can substitute with dog-safe alternatives like oat flour or coconut oil.
Be cautious with icing ingredients too. Some natural additives like xylitol are toxic to dogs. Always read labels and stick to pet-friendly recipes. When in doubt, consult your vet to ensure your treats are safe and healthy.
Troubleshooting Common Issues
Making dog cookies with icing can sometimes bring small challenges. These issues might affect the dough, icing, or even the cookie’s shape. Fixing these problems helps create tasty and beautiful treats your dog will love. Use simple tips to avoid common mistakes and enjoy baking with ease.
Fixing Dough Problems
Dough that is too sticky can be hard to shape. Add a little more flour, but not too much. If the dough is too dry and crumbly, add a small splash of water or milk. Knead gently until smooth. Avoid overmixing to keep the cookies soft. Chill the dough for 30 minutes if it feels too soft.
Handling Icing Mistakes
Icing that is too runny will slide off the cookies. Add a bit more powdered sugar to thicken it. If the icing is too thick, add a few drops of water. Work quickly before the icing hardens. Use a small spoon or piping bag for neat designs. Clean spills with a damp cloth before the icing sets.
Preventing Cookie Breakage
Cookies can break if the dough is too dry or overbaked. Roll dough evenly to about 1/4 inch thick. Avoid rolling too thin. Bake at the right temperature and watch the time closely. Let cookies cool on the baking sheet for a few minutes before moving. Store cookies in a container with a paper towel to keep them fresh and prevent cracks.
Fun Variations And Recipes
Making dog cookies with icing doesn’t have to be the same every time. You can add your own twist to the recipe by trying different ingredients, shapes, and flavors. These fun variations keep your dog excited for treat time and let you customize the treats to suit their taste and health needs.
Adding Healthy Mix-ins
Think about what your dog loves and what’s good for them. You can add things like shredded carrots, mashed sweet potatoes, or even a spoonful of peanut butter to the cookie dough. These mix-ins add flavor and nutrients without any extra sugar or artificial stuff.
Try sprinkling in some flaxseeds or chia seeds for omega-3 benefits. Adding tiny bits of apples or blueberries also works well and brings natural sweetness. What healthy ingredients does your dog enjoy that you could try next time?
Seasonal And Themed Cookies
Changing cookie shapes and decorations to match holidays or seasons makes baking more fun for you and your dog. Use cookie cutters shaped like pumpkins for fall, hearts for Valentine’s Day, or bones for any day.
You can color the icing with natural dyes like beet juice for red or spinach powder for green. This adds a festive touch without harmful chemicals. How could you make your next batch of cookies fit a special day or season?
Alternative Icing Flavors
Instead of the usual yogurt or peanut butter icing, experiment with other dog-safe options. Try pureed pumpkin or mashed banana mixed with a little coconut oil for a smooth, tasty topping. These alternatives add new tastes and textures your dog might love.
Mix in a tiny bit of cinnamon for a hint of spice—just be sure your dog isn’t sensitive to it. Changing up icing flavors keeps treats interesting and lets you discover what your dog prefers. What new icing flavor will you try first?

Credit: lifeandsprinkles.com
Frequently Asked Questions
What Ingredients Are Safe For Dog Cookies With Icing?
Use dog-friendly ingredients like whole wheat flour, peanut butter, oats, and pumpkin. For icing, opt for yogurt or cream cheese. Avoid chocolate, xylitol, and artificial sweeteners as they are toxic to dogs.
How Do I Make Dog-safe Icing For Cookies?
Mix plain yogurt or cream cheese with a small amount of natural peanut butter. Keep the icing simple, free from sugar, chocolate, or artificial sweeteners to ensure it’s safe and tasty for dogs.
Can Homemade Dog Cookies With Icing Be Stored?
Yes, store cookies in an airtight container in the fridge for up to two weeks. For longer storage, freeze them and thaw before serving to keep freshness and flavor intact.
How To Decorate Dog Cookies With Safe Icing?
Use a piping bag or a spoon to apply thin layers of dog-safe icing. Add dog-friendly toppings like small pieces of carrot or apple for added texture and appeal.
Conclusion
Making dog cookies with icing is fun and simple. You can use safe ingredients for your pet. Decorating with icing adds a special touch. These treats show your love and care. Baking at home keeps your dog healthy. Try different shapes and colors for variety.
Your dog will enjoy these tasty snacks. Happy baking and sharing with your furry friend!