Are you ready to take your cakes and cupcakes to the next level? Making milk chocolate icing at home is easier than you think, and the rich, creamy taste will make your desserts unforgettable.
Imagine spreading a smooth, velvety layer of chocolate that melts perfectly in your mouth. In this guide, you’ll discover simple steps to create delicious milk chocolate icing with ingredients you probably already have. Keep reading, and soon you’ll be impressing everyone with your homemade chocolate magic!
Credit: umamigirl.com
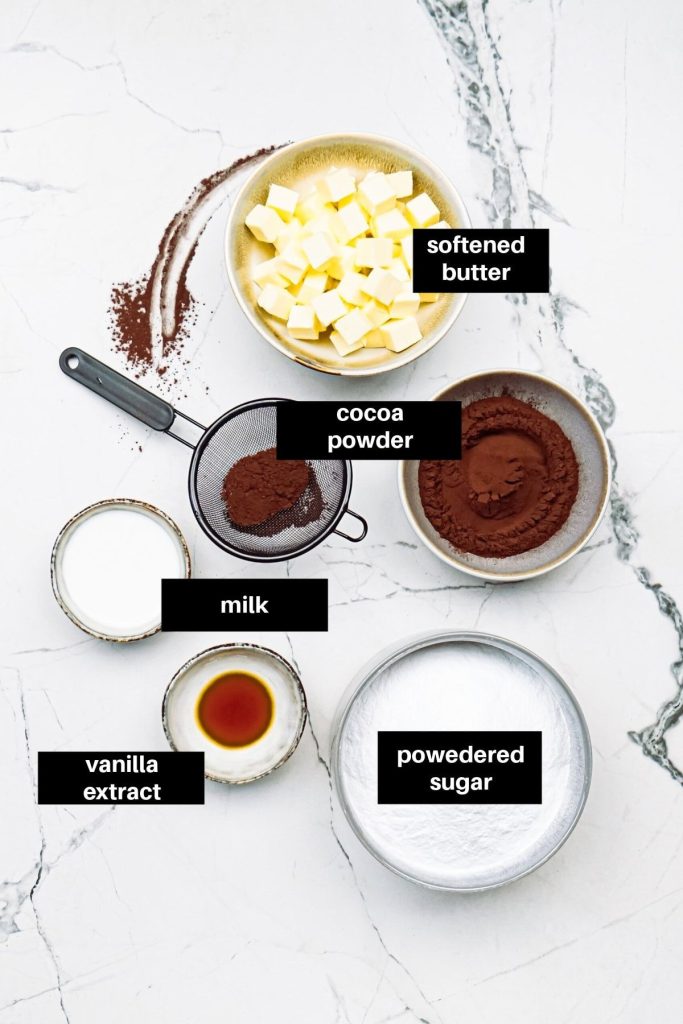
Ingredients For Milk Chocolate Icing
Milk chocolate icing brings a creamy, sweet touch to cakes and cupcakes. The right ingredients create a smooth, rich texture with a balanced chocolate flavor. Knowing which ingredients to use helps make the best icing every time.
Essential Ingredients
- Milk Chocolate:Use good quality milk chocolate for a creamy taste and smooth texture.
- Butter:Softened unsalted butter adds richness and helps with smoothness.
- Powdered Sugar:Finely sifted powdered sugar sweetens and thickens the icing.
- Milk or Cream:Adds moisture and adjusts the consistency for easy spreading.
- Vanilla Extract:Enhances the chocolate flavor with a warm, sweet note.
Optional Add-ins
- Salt:A pinch balances sweetness and enhances chocolate taste.
- Cocoa Powder:Deepens chocolate flavor for a richer icing.
- Instant Coffee Powder:Brings out the chocolate flavor without a coffee taste.
- Heavy Cream:Use instead of milk for extra creaminess and shine.
- Chocolate Chips:Melt into the icing for added texture and chocolate intensity.
Tools You’ll Need
Having the right tools makes a huge difference when you’re making milk chocolate icing. It’s not just about convenience; the right equipment helps you get the smoothest texture and the best flavor balance. Before you start mixing, gather everything you’ll need to make the process easy and enjoyable.
Mixing Bowls
Choose mixing bowls that are sturdy and easy to clean. Glass or stainless steel bowls work best because they don’t retain odors or stains. A medium-sized bowl gives you enough space to whip your icing without making a mess.
Electric Mixer Or Whisk
An electric mixer speeds up the process and gives you a creamier texture. If you don’t have one, a sturdy whisk works fine but expect a bit of an arm workout. Think about what you have at home—sometimes simple tools can do the job well with a little extra effort.
Measuring Cups And Spoons
Precision matters in icing. Use accurate measuring cups and spoons to get the right balance of ingredients. This helps you avoid a too-thick or too-runny consistency, which can ruin the final look and taste.
Spatula
A flexible silicone spatula is your best friend for scraping down the bowl and folding ingredients together. It helps you mix everything evenly without wasting any of the delicious chocolate icing. Have you noticed how much easier it is to get every last bit out of the bowl with a good spatula?
Double Boiler Or Microwave-safe Bowl
Melting chocolate gently is key to smooth icing. A double boiler lets you melt milk chocolate without overheating it. If you don’t have one, a microwave-safe bowl will work—just remember to heat the chocolate in short bursts and stir frequently.
Preparing The Chocolate Base
Preparing the chocolate base is a crucial part of making milk chocolate icing. It sets the tone for the texture and flavor of your final product. Taking time to melt the chocolate properly and choosing the right kind will make your icing smooth, creamy, and full of rich taste.
Melting The Milk Chocolate
Melting milk chocolate requires gentle heat to avoid burning or seizing. Use a double boiler or a heatproof bowl set over simmering water. Stir frequently to ensure even melting and prevent hotspots.
If you prefer using a microwave, heat the chocolate in short bursts of 15-20 seconds. Stir well between each burst until it’s completely melted and smooth. Have you noticed how chocolate can suddenly turn grainy if overheated? Keeping the temperature low helps keep that creamy texture you want.
Choosing The Right Chocolate
Not all milk chocolates are created equal. Look for chocolate with a cocoa content between 30% and 40%. This balance gives your icing a nice sweetness without being too overpowering.
Check the ingredient list for real cocoa butter instead of vegetable oils. Real cocoa butter melts better and gives a silky finish. Have you ever tasted icing that felt waxy? That’s usually a sign of low-quality chocolate.
Using high-quality milk chocolate might cost a bit more, but it’s worth it for the taste and texture. Your icing will be smoother and have a richer chocolate flavor that everyone will notice.

Credit: www.twosisterscrafting.com
Making The Icing Creamy
Making milk chocolate icing creamy is key to a delicious dessert topping. The right ingredients and mixing methods create a smooth, soft texture. This section explains how to achieve that perfect creaminess.
Adding Butter And Cream
Butter adds richness and smoothness to the icing. Use unsalted butter at room temperature for easy blending. Cream makes the icing lighter and silkier. Add heavy cream in small amounts for better control. Both ingredients help balance the sweetness and make the texture smooth.
- Use soft butter, not melted or cold.
- Pour cream slowly, checking the texture.
- Mix butter and cream before adding chocolate.
Mixing Techniques For Smooth Texture
Mixing well is essential for creamy icing. Start by beating the butter until fluffy. Gradually add sugar and chocolate while stirring. Use a hand mixer or stand mixer for best results. Scrape the bowl sides often to blend all ingredients evenly. Overmixing can make icing too soft, so watch the texture closely.
- Beat butter alone for 2-3 minutes.
- Add powdered sugar slowly with continuous mixing.
- Mix chocolate last to keep smoothness.
- Stop mixing when icing looks soft and spreadable.
Adjusting Sweetness And Flavor
Creating the perfect milk chocolate icing involves more than just mixing ingredients. Adjusting sweetness and flavor ensures your icing complements your baked goods. A well-balanced icing can enhance the overall taste experience.
Balancing Sugar Levels
Sugar is the main sweetener in milk chocolate icing. Begin with a base amount and taste as you go. Too much sugar can overpower the chocolate flavor. Consider using powdered sugar for a smoother texture. You can also substitute some sugar with honey for a richer taste. Always taste the icing and adjust to your preference.
Enhancing Flavor With Vanilla Or Salt
Vanilla extract can deepen the flavor of your icing. Add a small amount and taste. A little goes a long way in enhancing the chocolate notes. Salt is another secret weapon. Just a pinch can balance the sweetness and bring out the chocolate flavor. Experiment with different types of salt like sea salt for unique flavor profiles.
Tips For Perfect Consistency
Achieving the perfect consistency in milk chocolate icing is key to a smooth and tasty result. The texture affects how the icing spreads and how it tastes. A good balance makes decorating easier and enhances the cake’s appeal. Several simple tricks help adjust the thickness or thinness of your icing quickly.
Fixing Runny Or Thick Icing
Runny icing can cause a mess and won’t hold its shape. To thicken runny icing, add powdered sugar little by little. Mix gently to keep the texture smooth. If the icing is too thick and hard to spread, add a small splash of milk or cream. Stir well to soften it. Avoid adding too much liquid at once. Test the consistency after each addition for best results.
Storage And Reheating
Store leftover milk chocolate icing in an airtight container. Keep it in the fridge to prevent spoilage. Before using again, let it reach room temperature. Stir well to restore smoothness. If the icing feels too stiff, warm it slightly in the microwave. Use short intervals of 5 to 10 seconds. Stir between heating sessions to avoid overheating and separation.
Using Milk Chocolate Icing
Using milk chocolate icing can transform a simple cake or cupcake into a delightful treat that’s both visually appealing and delicious. Its creamy texture and sweet, smooth flavor work well in many decorating styles, making it a versatile choice for your baking projects. Whether you want to cover an entire cake or add delicate designs, understanding how to handle milk chocolate icing will give you confidence and better results.
Spreading On Cakes And Cupcakes
Spreading milk chocolate icing evenly creates a professional look with minimal effort. Start with a cooled cake or cupcake to prevent the icing from melting or sliding off. Use an offset spatula or a butter knife to spread the icing gently in long, smooth strokes.
If the icing feels too thick, let it sit at room temperature for a few minutes or stir in a small amount of milk to soften it. Don’t rush—take your time to smooth out any lumps or uneven spots. Have you noticed how a steady hand makes a big difference in getting a sleek finish?
Piping Designs And Decorations
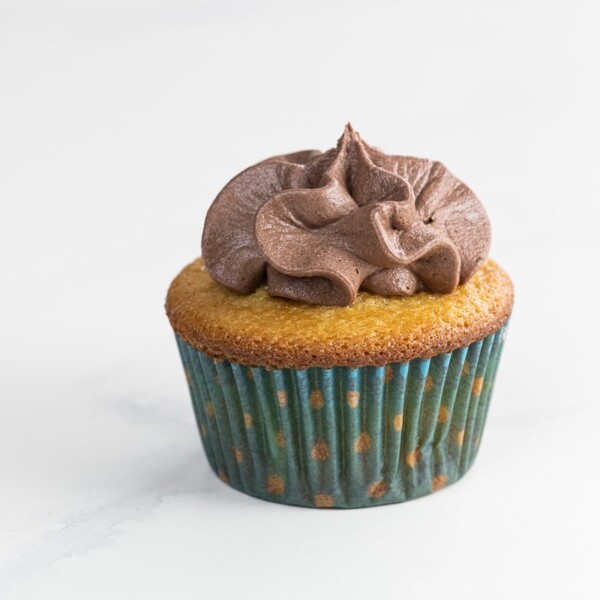
Milk chocolate icing is excellent for piping because it holds shape well but remains soft enough to flow through your piping tip. Use a piping bag fitted with different nozzles to create borders, rosettes, or intricate patterns on your cakes and cupcakes.
Practice pressure control to avoid uneven lines or blobs of icing. If your icing is too stiff, add a teaspoon of cream or milk and mix well before piping. What’s your favorite piping tip for adding that special touch to your baked goods?

Credit: food52.com
Troubleshooting Common Issues
Milk chocolate icing can be a delightful topping, but it sometimes throws unexpected challenges your way. Knowing how to fix common problems quickly keeps your baking experience enjoyable and your desserts looking perfect. Let’s tackle some issues you might face and how to solve them effectively.
Grainy Texture Solutions
If your milk chocolate icing turns out grainy, it’s often because the sugar hasn’t dissolved completely. This can happen if you add powdered sugar too quickly or mix at a high speed.
Try these fixes to smooth it out:
- Warm the icing gently over a double boiler while stirring constantly. This helps dissolve sugar crystals without cooking the icing.
- Add a teaspoon of milk or cream to loosen the texture and make it silkier.
- Use a fine sieve to sift your powdered sugar before mixing to prevent lumps.
- Beat the icing at a lower speed for a longer time to allow ingredients to blend smoothly.
Have you ever stopped to check if your sugar is fresh? Sometimes old powdered sugar absorbs moisture, affecting texture.
Preventing Icing From Hardening
Hard icing can be disappointing when you want a soft, creamy finish. Often, this happens if the icing is left exposed to air too long or if the butter-to-sugar ratio is off.
To keep your milk chocolate icing soft and spreadable:
- Cover it tightly with plastic wrap, pressing the wrap directly onto the surface to avoid air contact.
- Add a little extra butter or a splash of milk right before spreading to maintain smoothness.
- Store the icing at room temperature if you plan to use it within a few hours; refrigeration can cause it to harden.
Ever wondered why your icing hardens faster in some kitchens? Humidity and temperature play a bigger role than you might think.
Frequently Asked Questions
What Ingredients Are Needed For Milk Chocolate Icing?
Milk chocolate icing requires milk chocolate, butter, powdered sugar, vanilla extract, and milk. These ingredients create a smooth, creamy texture and rich chocolate flavor perfect for cakes and cupcakes.
How Do You Make Milk Chocolate Icing Creamy?
To make it creamy, melt the milk chocolate and butter together. Then, gradually add powdered sugar and milk while mixing until smooth and spreadable.
Can I Store Milk Chocolate Icing For Later Use?
Yes, store milk chocolate icing in an airtight container. Keep it refrigerated for up to one week. Bring to room temperature and stir before using.
Is Milk Chocolate Icing Suitable For Decorating Cakes?
Milk chocolate icing is ideal for cake decoration. It spreads easily and hardens slightly, creating a smooth, shiny finish that enhances cake appearance and taste.
Conclusion
Making milk chocolate icing is simple and fun. You only need a few ingredients and a little time. This icing adds a creamy, sweet touch to any cake or cupcake. Enjoy spreading it on your favorite desserts. Try different variations to find your best taste.
Baking becomes more enjoyable with homemade icing. Share your treats and smiles with family and friends. Keep practicing to improve your skills. Happy baking!