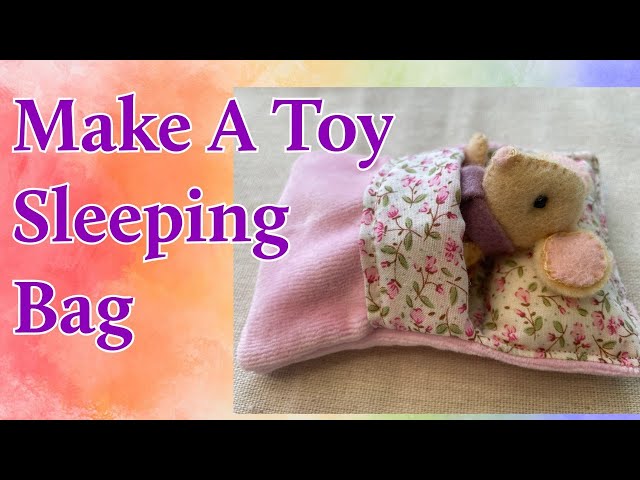
Are you ready to create your very own sleeping bag? Imagine having a cozy, custom-made sleeping bag that fits your style and needs perfectly.
Whether you love camping, hiking, or just want a comfy spot for naps, making your own sleeping bag can be easier than you think. In this guide, you’ll discover simple steps and tips to craft a sleeping bag that keeps you warm and comfortable.
Keep reading, and soon you’ll have a unique sleeping bag made just for you!
Choosing The Right Materials
Making a sleeping bag needs good materials. The right choice keeps you warm and dry. This guide helps you pick fabrics and fillings.
Each part of the sleeping bag has a special job. The fabric, outer shell, and filling work together for comfort and protection.
Selecting Fabric For Insulation
The insulation fabric should trap heat well. It must be soft and breathable. Cotton and fleece are popular choices for lining.
Look for fabric that feels warm and light. It should not absorb moisture quickly. This helps you stay dry during sleep.
Picking The Outer Shell
The outer shell protects against wind and rain. It must be strong and water-resistant. Nylon and polyester are common fabrics for this layer.
- Water resistance keeps you dry in wet weather
- Durability ensures long use without tears
- Lightweight fabric makes the bag easy to carry
- Breathable material stops overheating inside
Choosing The Filling
| Type | Warmth | Weight | Cost | Care |
|---|---|---|---|---|
| Down | High | Light | Expensive | Needs gentle washing |
| Synthetic | Medium | Heavier | Affordable | Machine washable |
| Wool | Good | Medium | Moderate | Hand wash preferred |
Choose filling based on warmth, weight, and care. Down is warm but costs more. Synthetics dry fast and wash easily. Wool feels natural and warm.
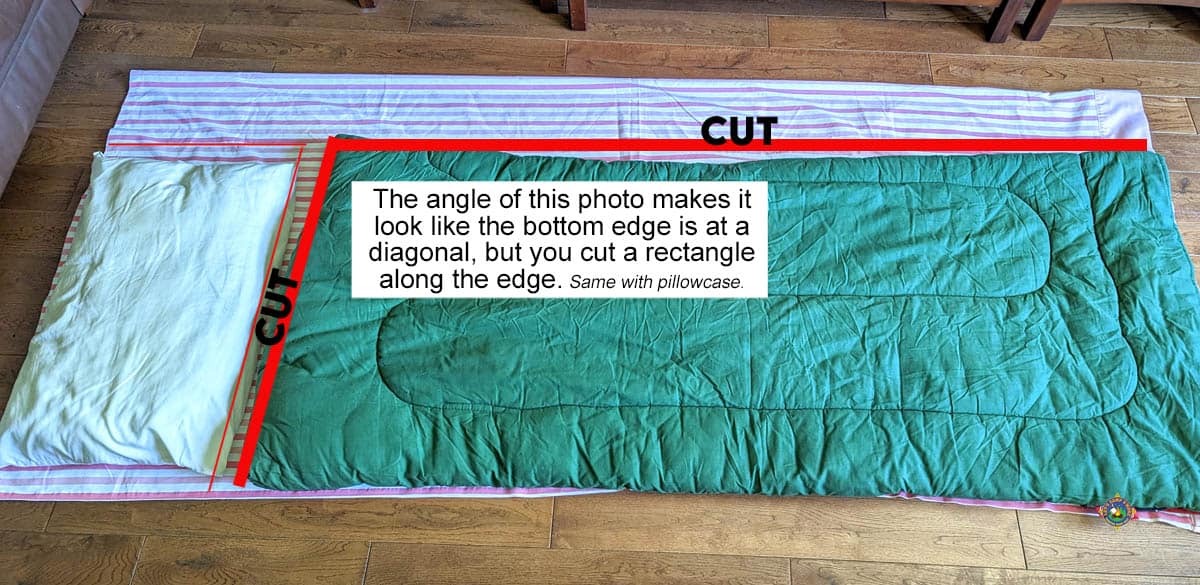
Credit: letscampsmore.com
Measuring And Cutting Fabric
Making a sleeping bag starts with measuring and cutting fabric carefully. Proper measurements ensure a good fit and comfort.
Cutting fabric correctly saves material and makes sewing easier. Follow simple steps for best results.
Taking Accurate Body Measurements
Measure the person who will use the sleeping bag. Take these key measurements to get the right size.
- Length from shoulder to feet
- Width across the shoulders
- Width across the hips
- Chest circumference
Write down each number clearly. Double-check the measurements for accuracy.
Creating A Pattern
Use the measurements to draw a simple pattern on paper. This pattern will guide your fabric cutting.
Draw the sleeping bag shape with extra space for seams. Add a hood if you want one.
- Draw a rectangle for the main body
- Add a hood shape at the top
- Include seam allowances of about 1 inch
- Mark where zippers or closures will go
Cutting Fabric Pieces
Place the pattern on your fabric. Pin it down to keep it from moving.
Use sharp scissors to cut around the pattern edges. Cut carefully to keep the shape accurate.
- Cut two main body pieces (front and back)
- Cut hood pieces if your pattern includes a hood
- Cut any additional pieces like pockets or zippers
- Label each piece to avoid confusion when sewing
Sewing The Sleeping Bag
Sewing a sleeping bag requires care and precision. This step ensures the bag stays warm and comfortable.
We will focus on stitching the insulation, attaching the outer shell, and adding the lining.
Stitching The Insulation Layers
The insulation keeps you warm inside the sleeping bag. It must be stitched evenly to avoid cold spots.
Use a sewing machine with strong thread. Sew in straight lines or a box pattern to hold the insulation in place.
- Lay insulation flat on a clean surface
- Pin layers together to avoid shifting
- Sew slowly to keep stitches straight
- Check for any loose areas after sewing
Attaching The Outer Shell
The outer shell protects the insulation and keeps moisture out. It needs to be sewn carefully to the insulation.
Align the outer shell fabric with the insulation. Use pins to hold them together. Sew along the edges with a tight stitch.
- Place outer shell fabric right side down on insulation
- Pin edges evenly around the bag
- Sew with a ½ inch seam allowance
- Trim excess fabric to reduce bulk
Adding The Lining
The lining makes the sleeping bag soft and comfortable against the skin. It also hides the insulation and seams.
Place the lining fabric on top of the outer shell. Pin all layers. Sew around the edges, leaving an opening for turning the bag inside out.
- Use smooth, lightweight fabric for the lining
- Pin lining carefully to avoid wrinkles
- Sew with a consistent seam allowance
- Leave a gap to turn the bag inside out
- After turning, sew the gap closed by hand or machine

Credit: gluesticksblog.com
Adding Features For Comfort
Making a sleeping bag comfortable is important for a good night’s rest. Adding special features helps keep you warm and cozy.
Small changes like zippers, hoods, and draft tubes make a big difference in comfort and usability.
Installing A Zipper
A zipper lets you open and close your sleeping bag easily. It also helps with ventilation if you get too warm.
Use a zipper designed for outdoor gear. Sew it along one side of the sleeping bag, making sure it closes smoothly.
- Choose a durable, rust-resistant zipper
- Sew with strong thread for durability
- Test the zipper several times before finishing
Adding A Hood And Collar
A hood helps keep your head warm inside the sleeping bag. A collar stops cold air from entering around your neck.
Create a hood shape and attach it to the top of the sleeping bag. Add a collar that fits snugly to block drafts.
- Use soft, warm fabric for the hood
- Make the collar adjustable with drawstrings
- Ensure both fit comfortably without tightness
Incorporating Draft Tubes
Draft tubes are strips of fabric sewn inside the zipper area. They stop cold air from leaking through the zipper.
Attach a draft tube along the full length of the zipper on the inside of the sleeping bag. This keeps warmth trapped inside.
- Use thick, insulated fabric for the draft tube
- Make sure it covers the zipper completely
- Secure it firmly with strong stitches
Finishing Touches
Finishing touches make your sleeping bag strong and comfortable. These details help keep warmth inside and add useful features.
Focus on sealing seams, adding drawstrings, and testing the bag. These steps improve your sleeping bag’s quality and fit.
Sealing Seams
Sealing seams stops cold air and moisture from entering the sleeping bag. Use waterproof tape or seam sealer for this job.
Apply the sealer carefully on all inside seams. Let it dry fully before using the bag to keep it warm and dry.
- Clean seams before sealing
- Apply an even layer of seam sealer
- Allow enough drying time
Inserting Drawstrings
Drawstrings help close the sleeping bag around your head and shoulders. This keeps heat inside and blocks cold air.
Insert drawstrings into the hood area using a cord lock. Make sure the strings move easily and stay secure when tightened.
- Choose strong, durable cord
- Use a cord lock for easy adjustment
- Test the drawstring for smooth movement
Testing For Warmth And Fit
Test your sleeping bag to check warmth and comfort. Try it on or use a thermometer to measure heat retention.
Adjust the fit by adding or removing insulation if needed. Make sure it fits well without being too tight or loose.
- Wear the bag in a cool room
- Check if cold spots appear
- Adjust insulation or size if needed

Credit: www.fleecefun.com
Maintenance Tips
Keeping your sleeping bag in good condition helps it last longer. Simple care steps keep it clean and warm.
Learn easy ways to clean, store, and fix your sleeping bag. These tips help keep it ready for your next trip.
Cleaning Your Sleeping Bag
Wash your sleeping bag only when it is dirty. Use a gentle detergent made for outdoor gear. Avoid bleach or fabric softeners.
- Hand wash or use a front-loading washing machine.
- Use cold or warm water, never hot.
- Rinse thoroughly to remove all soap.
- Dry slowly in shade or use a large dryer on low heat.
- Do not iron or dry clean your sleeping bag.
Proper Storage Techniques
Store your sleeping bag loosely to keep its shape. Avoid tight stuff sacks for long-term storage. Keep it dry and away from sunlight.
| Storage Method | Benefit |
|---|---|
| Hanging on a wide hanger | Keeps loft and shape |
| Loose storage bag or cotton sack | Protects from dust and moisture |
| Avoid compressed stuff sacks | Prevents loss of insulation |
Repairing Common Issues
Fix small tears and broken zippers quickly. Use repair patches and zipper lubricant to keep your bag usable.
- Patch holes with fabric repair tape or patches.
- Use a needle and thread for small seam tears.
- Lubricate zippers with silicone spray or candle wax.
- Replace zipper sliders if broken.
- Check repairs before your next trip.
Frequently Asked Questions
What Materials Are Best For Making A Sleeping Bag?
The best materials for sleeping bags are lightweight, insulating, and breathable. Common choices include nylon or polyester for the outer shell. Down or synthetic fibers are ideal for insulation. These materials provide warmth, durability, and comfort during outdoor use.
How Do I Choose The Right Insulation For My Sleeping Bag?
Choose insulation based on climate and budget. Down insulation is warm and compressible but expensive. Synthetic insulation is affordable and performs well in wet conditions. Consider your typical camping environment to select the best option for warmth and comfort.
What Are The Basic Steps To Make A Sleeping Bag?
To make a sleeping bag, start by selecting fabric and insulation. Cut the fabric into patterns, sew the pieces together, and add insulation layers. Finish by adding a zipper or closure. Proper measurement and stitching ensure comfort and durability.
How Can I Make A Sleeping Bag Warmer?
To increase warmth, use high-quality insulation like down or thick synthetic fill. Add a draft collar and zipper draft tube to trap heat. Choose materials with good thermal ratings and consider using a sleeping bag liner for extra insulation.
Conclusion
Creating your own sleeping bag is simple and rewarding. You save money and customize it to your needs. Follow the steps carefully. Choose materials that suit the weather. Stitch with care for durability. Add personal touches for style and comfort.
Enjoy the satisfaction of using something handmade. A cozy, self-made sleeping bag enhances any camping adventure. Try it once, and you’ll see the benefits. Experience the joy of creating practical gear yourself. It’s more than just a project. It’s a valuable skill.
Happy crafting, and enjoy your camping trips!