Imagine a world where you can’t rely on your car brakes, or your coffee machine refuses to brew your morning cup of joy. Both scenarios sound dreadful, right?
The secret behind these everyday conveniences lies in the power of vacuum. But how do you measure something you can’t see? That’s where things get intriguing. Understanding how to measure vacuum is crucial for ensuring the efficiency and safety of various appliances and industrial processes.
In this guide, you’re about to unlock the secrets of vacuum measurement, making the invisible visible. Whether you’re a curious mind, a DIY enthusiast, or a professional in the field, mastering this skill will empower you to ensure everything runs smoothly. Ready to dive in and discover how to make vacuum your ally? Let’s get started!

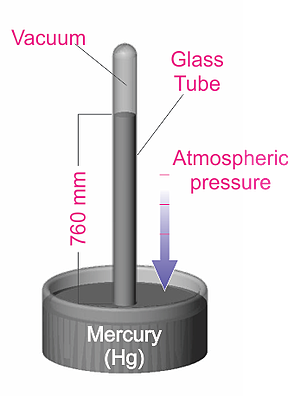
Credit: www.welchvacuum.com
Types Of Vacuum Measurement
Measuring vacuum accurately requires different tools for various pressure ranges. Each type of vacuum measurement offers unique benefits and suits specific applications. Understanding these types helps choose the right gauge for your needs.
Mechanical Gauges
Mechanical gauges measure vacuum by physical movement. They include devices like Bourdon tubes and diaphragm gauges. These gauges work well for low to medium vacuum levels. Their simple design makes them durable and easy to use. Mechanical gauges provide quick, direct readings without electrical power.
Thermal Conductivity Gauges
Thermal conductivity gauges detect vacuum by sensing heat loss. They measure how gases conduct heat away from a heated wire. These gauges work best in low vacuum ranges. They are sensitive to gas type and pressure changes. Thermal conductivity gauges offer precise measurements for clean systems.
Ionization Gauges
Ionization gauges measure vacuum by ionizing gas molecules. They detect very low pressures, in high and ultra-high vacuum ranges. These gauges use electric currents to create ions from gas particles. Ionization gauges provide highly accurate readings in scientific and industrial settings. They require careful handling and calibration for best results.
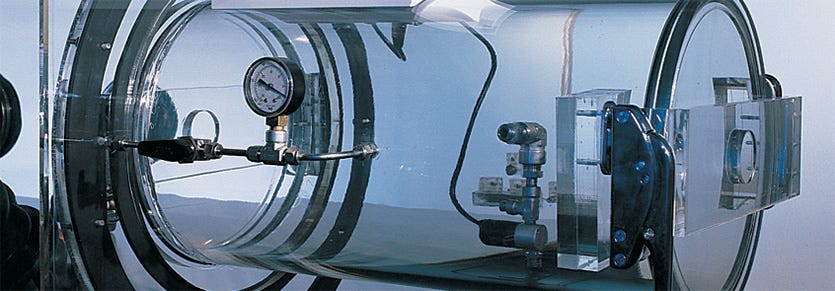
Credit: www.terrauniversal.com
Choosing The Right Gauge
Choosing the right vacuum gauge is crucial to get accurate and reliable measurements. The gauge you select directly affects your ability to monitor and control vacuum systems effectively. Understanding what to consider will save you time, money, and frustration down the line.
Pressure Range Considerations
Start by identifying the pressure range your vacuum system operates in. Gauges are designed for specific ranges—some work best at low vacuum levels, while others handle higher vacuums more accurately.
If you use a gauge outside its range, you risk inaccurate readings or even damaging the instrument. For example, a Pirani gauge works well for medium vacuum but fails in ultra-high vacuum conditions.
Ask yourself: What is the lowest and highest pressure I need to measure? This clarity will guide you to a gauge that fits your exact needs.
Application Specifics
Different applications demand different types of gauges. Are you measuring vacuum in a laboratory, an industrial pump, or a refrigeration system? Each setting has unique requirements.
Some gauges are better suited for clean environments, while others tolerate harsh conditions like dust or moisture. Also, consider if you need a gauge with digital output or one that integrates easily with your control system.
Think about your daily use—will you need portability, quick readings, or long-term stability? These details influence your gauge choice more than you might expect.
Accuracy Requirements
Accuracy is more than just a number; it defines how much you can trust your measurements. Precision matters especially in processes where vacuum control impacts product quality or safety.
Look for gauges with specifications that match your accuracy needs. Some offer ±1% error, while others may have broader tolerances suitable only for rough estimates.
Do you need real-time monitoring with high precision, or will periodic checks suffice? Understanding this helps you avoid overpaying for features you won’t use or settling for unreliable data.
Calibration Techniques
Calibration techniques ensure vacuum measurements stay accurate and reliable. Proper calibration helps avoid errors that affect equipment and processes. It involves checking instruments against known standards and adjusting them as needed. Careful calibration keeps vacuum systems running smoothly and safely.
Calibration Frequency
Regular calibration keeps vacuum gauges accurate over time. The frequency depends on the device type and usage. High-precision instruments may need monthly checks. Less critical equipment might require quarterly or yearly calibration. Frequent calibration helps catch drift before it affects readings.
Using Reference Standards
Reference standards are precise devices used to check vacuum gauges. They have known, stable values for comparison. Common standards include mercury manometers and calibrated ion gauges. Using these ensures your instrument reads correctly. Always choose standards traceable to national or international bodies.
Common Calibration Errors
Errors can occur during calibration due to poor technique or faulty equipment. Common mistakes include:
- Not allowing the gauge to stabilize before reading
- Using dirty or damaged reference standards
- Ignoring environmental factors like temperature and humidity
- Incorrectly adjusting the instrument after comparison
Careful attention to these details improves calibration quality and vacuum measurement accuracy.
Preparing For Measurement
Preparing for vacuum measurement sets the foundation for accurate and reliable results. Skipping this crucial phase can lead to errors that waste time and resources. By focusing on cleaning, understanding environmental factors, and checking for system leaks, you’ll ensure your vacuum readings reflect true conditions.
Cleaning And Maintenance
Before measuring vacuum, inspect your equipment thoroughly. Dust, grease, or debris on sensors and connection points can distort readings. Clean these areas with appropriate solvents or wipes to maintain sensor accuracy.
Regular maintenance isn’t just about cleanliness; it also extends the life of your instruments. Check seals, O-rings, and fittings for wear or damage. Replacing worn parts prevents leaks that affect vacuum levels.
Environmental Factors
Consider the environment where you measure vacuum. Temperature fluctuations can cause pressure changes, leading to inconsistent results. Try to perform measurements in a stable environment or note temperature conditions during testing.
Humidity also plays a role. Moisture in the air can condense inside your vacuum system, affecting readings and potentially damaging equipment. Use desiccants or dry air purging if you work in high-humidity areas.
System Leak Checks
Leaks are the silent enemies of accurate vacuum measurement. Even tiny leaks can cause significant errors. Use a leak detector or apply soapy water to joints and watch for bubbles to find leaks quickly.
After sealing leaks, perform a pressure decay test. Close the system and monitor pressure over time; any drop indicates remaining leaks. This step ensures your vacuum readings truly reflect system performance.
Taking Accurate Readings
Taking accurate vacuum readings is essential for reliable system performance. Incorrect readings lead to poor decisions and inefficient maintenance. Precision depends on the proper setup and careful observation of the gauge. Follow key steps to ensure your measurements reflect true vacuum levels.
Proper Gauge Installation
Install the vacuum gauge securely to avoid leaks. Connect it directly to the vacuum source using clean, tight fittings. Use appropriate adapters if needed to match gauge and system ports. Avoid flexible hoses that may collapse or allow air entry. Position the gauge where it is easy to read and protected from damage.
Reading Stabilization
Allow the gauge needle or digital display to settle before noting the reading. Sudden changes in vacuum cause fluctuations that can mislead. Wait several seconds for the value to stabilize. Observe the gauge without moving or shaking the system. Consistent readings indicate a stable vacuum level.
Avoiding Common Mistakes
- Do not read the gauge while the system is starting up.
- Avoid using damaged or dirty gauges that affect accuracy.
- Do not ignore temperature effects on gauge performance.
- Never force the gauge beyond its measurement range.
- Ensure the gauge zero point is correctly set before use.
Interpreting Measurement Data
Interpreting vacuum measurement data is crucial for making informed decisions about your system’s performance. Without understanding what the numbers represent, you might miss signs of leaks or inefficiencies. Let’s break down how to read and use this data effectively to keep your vacuum systems running smoothly.
Understanding Units
Vacuum measurements can be confusing if you don’t know the units involved. Common units include torr, pascal (Pa), and inches of mercury (inHg). Each unit measures pressure differently, so make sure you know which one your gauge uses.
For example, 1 torr equals about 133.3 pascals. If your gauge reads 500 torr, that’s quite different from 500 pascals. Double-checking units avoids costly mistakes and helps you compare readings accurately.
Data Logging Techniques
Recording vacuum data over time reveals patterns you can’t see with a single snapshot. Use digital loggers or apps connected to your gauge to capture continuous readings. This way, you can track fluctuations and spot trends that indicate problems.
Try setting intervals for data collection—every minute or hour, depending on your process. This makes it easier to pinpoint when issues start, especially in complex systems. Don’t rely solely on manual readings; automated logs save time and improve accuracy.
Analyzing Trends
Look for gradual changes in vacuum levels rather than just isolated readings. A slow drop in vacuum pressure might mean a small leak developing. Sudden spikes could signal equipment failure or blockages.
Ask yourself: Are the readings consistent during operation? Do they change after maintenance? Use charts or graphs to visualize data—seeing trends visually often highlights problems you might miss in raw numbers.
Understanding these patterns helps you act before small issues turn into costly repairs. What unexpected trends have you noticed in your vacuum data lately?
Troubleshooting Measurement Issues
Dealing with vacuum measurement issues can be frustrating, especially when readings don’t match your expectations. Identifying the root cause quickly saves time and ensures your equipment performs reliably. Let’s look at common problems and how you can fix them to get accurate vacuum readings every time.
Signal Fluctuations
Are your vacuum readings jumping around unpredictably? Signal fluctuations often happen due to loose wiring or poor electrical connections. Check all cables and connectors for tightness and corrosion. Sometimes, simply securing a loose wire stabilizes the output instantly.
Another cause might be electrical noise from nearby devices. Try moving your gauge or using shielded cables to reduce interference. Have you tried powering your gauge from a different outlet to see if that helps? Small changes like these can make a big difference.
Gauge Malfunctions
If your gauge shows constant zero or maximum vacuum, it might be malfunctioning. Mechanical gauges can get stuck due to dirt or damage inside. Cleaning the internal parts carefully with manufacturer-recommended methods often restores function.
Electronic gauges sometimes need recalibration after extended use or exposure to harsh conditions. Don’t hesitate to recalibrate or replace the sensor if you notice persistent errors. Have you noted when the last calibration was done? Regular checks prevent surprises.
Environmental Interferences
Temperature and humidity can affect vacuum measurements more than you might expect. Extreme cold or heat can cause sensor drift or condensation inside the gauge. Try to keep the gauge in a stable environment, or use models rated for your specific conditions.
Dust and chemical vapors also interfere with sensors. If your workspace has these factors, consider protective filters or enclosures. Have you monitored the environment to see if it correlates with erratic readings? Adjusting your setup to reduce these influences improves accuracy significantly.

Credit: us.narwal.com
Frequently Asked Questions
What Tools Are Needed To Measure Vacuum Accurately?
You need a vacuum gauge to measure vacuum accurately. Common types include digital, analog, and thermal conductivity gauges. Choose one based on your vacuum range and application for precise readings.
How Do I Calibrate A Vacuum Gauge Properly?
Calibrate a vacuum gauge using a known reference standard. Follow the manufacturer’s instructions for zeroing and span adjustments. Regular calibration ensures accurate and reliable vacuum measurements over time.
What Units Are Used To Measure Vacuum Pressure?
Vacuum pressure is typically measured in torr, pascals (Pa), or inches of mercury (inHg). The unit choice depends on the vacuum system and industry standards, ensuring consistent and clear communication of pressure levels.
Can I Measure Vacuum Without Specialized Equipment?
Measuring vacuum without specialized tools is unreliable. Vacuum gauges are essential for accurate readings. Improper measurement can lead to incorrect system assessments and potential damage.
Conclusion
Measuring vacuum helps you check pressure accurately and safely. Use the right tool for your task. Always read the gauge carefully and follow instructions. Regular checks keep equipment running well and prevent problems. Practice makes it easier to understand vacuum levels.
Keep learning to improve your skills over time. Clear measurements lead to better results in your work. Simple steps make vacuum measurement less confusing. Stay patient and consistent when taking readings. This knowledge supports many projects and daily tasks.