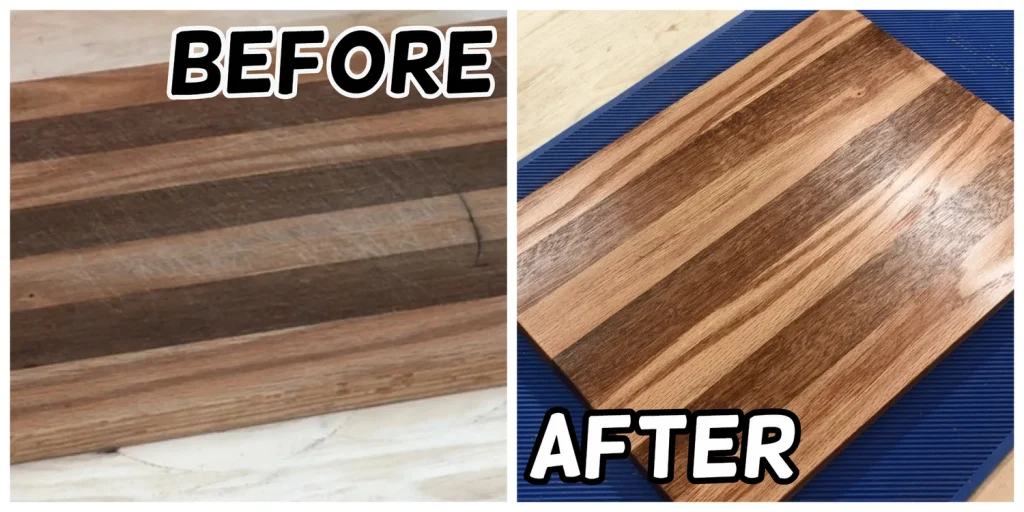
Your wood cutting board has seen countless meals and plenty of wear. Over time, it might look dull, scratched, or even a bit rough.
But before you think about tossing it out, there’s good news: you can bring it back to life. Refinishing your wood cutting board is easier than you might think, and the results will make your kitchen feel fresh and inviting again.
In this guide, you’ll learn simple steps to restore your board, making it safer and more beautiful for your next cooking adventure. Ready to see your cutting board shine like new? Let’s dive in.

Credit: www.youtube.com
Choosing The Right Tools
Refinishing a wood cutting board needs the right tools for best results. Using proper materials helps restore the board’s surface smoothly and safely.
This guide covers the sanding materials, cleaning supplies, and oils or finishes you need. Each tool plays a key role in making your cutting board look and work like new.
Sanding Materials
Sanding removes old stains and smooths the wood. Choose sandpaper with the right grit. Coarser grit removes more damage, finer grit smooths the surface.
- Start with 80-120 grit for rough sanding
- Use 150-220 grit for finishing touches
- Consider sanding blocks or electric sanders for even pressure
- Always sand along the grain of the wood
Cleaning Supplies
Cleaning the board after sanding removes dust and dirt. Choose gentle cleaners that do not harm the wood. Avoid harsh chemicals.
| Cleaning Supply | Purpose | Notes |
| Mild Dish Soap | Remove grease and dirt | Use warm water |
| White Vinegar | Disinfect surface | Dilute with water |
| Sponge or Soft Cloth | Apply cleaner and wipe | Non-abrasive |
| Dry Towel | Dry the board after cleaning | Absorbent material |
Oils And Finishes
Oiling protects the wood and keeps it from drying out. Choose food-safe oils and finishes made for cutting boards.
- Food-grade mineral oil
- Beeswax blends for extra protection
- Coconut oil (refined and food safe)
- Avoid vegetable oils that can turn rancid
Preparing The Cutting Board
Refinishing a wood cutting board starts with proper preparation. This process makes the board clean and safe for food use again.
Two main steps help prepare the board: cleaning and drying, then removing stains and odors. Each step restores the wood’s surface.
Cleaning And Drying
Cleaning removes dirt, oils, and old food residues from the board. Drying prevents moisture damage and warping of the wood.
- Scrub the board with warm water and mild soap.
- Use a soft brush or sponge to avoid scratches.
- Rinse thoroughly to remove all soap.
- Dry the board with a clean towel right away.
- Let it air dry standing up to allow air circulation.
Removing Stains And Odors
Stains and odors can make your cutting board unpleasant. Natural products work well to clear them without harming the wood.
| Method | How to Use | Effect |
| Lemon and Salt | Rub half a lemon with salt on stains. Let sit 5 minutes. Rinse. | Removes stains and deodorizes |
| Baking Soda Paste | Mix baking soda with water to paste. Apply and scrub. Rinse. | Lightens stains and absorbs odors |
| White Vinegar | Wipe board with vinegar. Let dry fully. | Kills bacteria and removes smells |
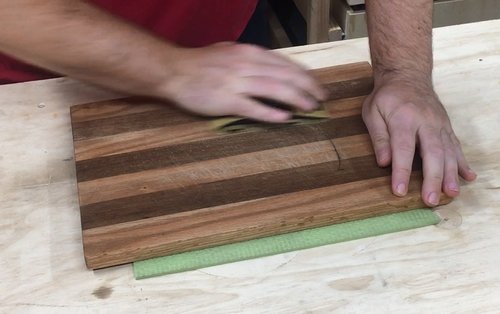
Sanding Techniques
Refinishing a wood cutting board starts with sanding. Sanding removes old stains and smooths the surface. It prepares the wood for oiling or sealing.
Choosing the right sanding technique helps you get a clean and even finish. You can sand by hand or use power tools.
Hand Sanding Vs. Power Sanding
Hand sanding uses sandpaper and your hands to smooth the board. It lets you control pressure and focus on small areas. It works well on delicate spots.
Power sanding uses electric sanders to make the job faster. It removes old finish quickly on large flat surfaces. It may be rough on edges if not careful.
- Hand sanding is gentle and precise.
- Power sanding is faster for big areas.
- Use hand sanding near corners and edges.
- Power sanding can cause uneven spots if rushed.
Sanding Grit Progression
Start sanding with coarse grit to remove deep marks and stains. Then move to medium grit to smooth the surface. Finish with fine grit for a soft, even finish.
Using the right order of grits helps avoid scratches and prepares wood for oiling or sealing.
- Begin with 80 or 100 grit sandpaper.
- Use 120 or 150 grit next to smooth roughness.
- Finish with 220 grit for a fine surface.
Sanding Tips For Corners And Edges
Corners and edges need special care to avoid rounding them too much. Use hand sanding here to keep the shape sharp. Sand gently with light pressure.
Fold sandpaper to fit small areas or use a sanding sponge. Check often to keep edges even and smooth without removing too much wood.
- Use folded sandpaper for tight corners.
- Sand edges lightly to keep shape.
- Use hand sanding for better control.
- Check edges frequently while sanding.
Credit: www.slightlycrookedworkshop.com
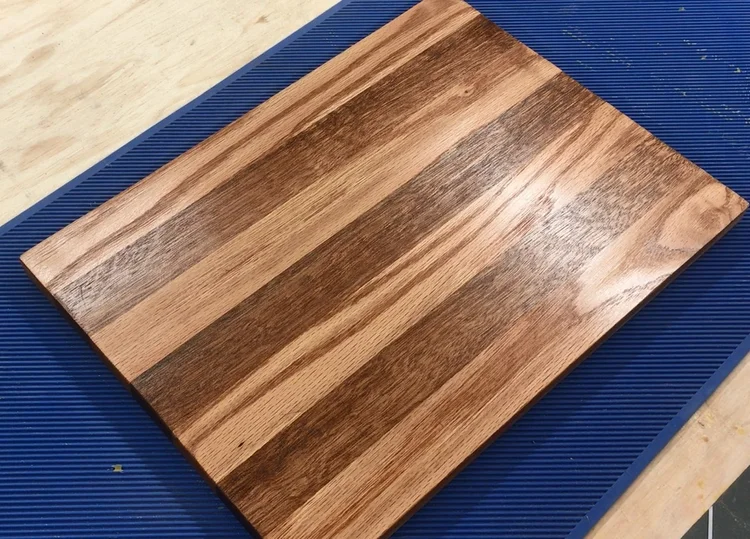
Applying Oil And Finish
Refinishing a wood cutting board protects it and keeps it looking good. Applying the right oil and finish helps prevent cracks and warping.
This guide covers how to choose safe oils, apply them, and allow drying for the best results.
Choosing Food-safe Oils
Use oils that are safe to eat and will not go rancid. These oils soak into the wood and protect it from moisture.
Common food-safe oils include mineral oil, walnut oil, and coconut oil. Avoid vegetable oils that can spoil quickly.
- Mineral oil: cheap and odorless
- Walnut oil: natural and durable
- Coconut oil: solid at room temperature
- Beeswax: often mixed for extra protection
Application Methods
Clean the board before applying oil. Use a soft cloth or paper towel to spread the oil evenly.
Apply oil in small amounts. Rub it in a circular motion until the wood stops absorbing it.
- Pour a small amount on the board
- Use a clean cloth to spread oil evenly
- Rub oil into all surfaces and edges
- Repeat until the wood feels saturated
Drying And Curing Time
Let the oil soak into the wood for several hours. Some oils need overnight drying for best results.
After drying, wipe off any extra oil with a clean cloth. The board may need multiple oiling sessions for full protection.
- Allow 4 to 12 hours for oil to soak in
- Wipe off excess oil after drying
- Repeat oiling 2-3 times for new or dry boards
- Let board cure for 24 hours before use
Maintenance Tips For Longevity
Refinishing a wood cutting board helps keep it safe and clean. Good care makes the board last longer.
Simple maintenance steps can protect your board from cracks and stains. Follow these tips to keep it in top shape.
Regular Cleaning
Clean your cutting board after every use to stop bacteria growth. Use warm water and mild soap only.
Do not soak the board or put it in a dishwasher. Dry it quickly with a clean towel to avoid warping.
Periodic Oiling
Apply food-safe mineral oil to your board once a month. This keeps the wood from drying out and cracking.
Rub oil evenly on the surface and edges. Let it soak for a few hours, then wipe off any extra oil.
- Use mineral oil or beeswax-based conditioner
- Do not use vegetable or olive oils
- Oil the board more often in dry climates
Avoiding Damage
Protect your board from heat and sharp impacts. Avoid cutting bones or frozen foods on it.
Store the board in a dry place standing upright. This prevents moisture buildup and mold growth.
- Do not use harsh chemicals for cleaning
- Keep away from direct sunlight and heat sources
- Use both sides of the board to reduce wear
Common Mistakes To Avoid
Refinishing a wood cutting board can bring it back to life. Avoiding common mistakes helps protect the board. This keeps it safe and strong for cooking.
Many people rush or use the wrong methods. These errors can damage the wood or make it unsafe. Learn what to avoid for the best results.
Using Harsh Chemicals
Strong chemicals can hurt the wood and leave harmful residues. Avoid bleach or ammonia. These can dry out or crack the board.
- Use mild soap and warm water for cleaning.
- Choose natural oils like mineral oil for finishing.
- Check that any product is food safe before use.
- Avoid strong detergents and chemical cleaners.
Skipping Sanding Steps
Not sanding enough leaves scratches and rough spots. Sanding smooths the wood and removes stains or cuts. It helps oil soak in better.
| Sandpaper Grit | Purpose |
| 80-100 | Remove deep scratches and old finish |
| 150-180 | Smooth rough areas |
| 220 | Final smoothing before oiling |
Over-oiling
Adding too much oil makes the board sticky and soft. It can trap dirt and cause odor. Oil only as much as the wood can absorb.
- Apply a thin layer of oil with a clean cloth.
- Let it soak in for at least 20 minutes.
- Wipe off extra oil with a dry cloth.
- Repeat oiling only when the wood looks dry.
Credit: www.slightlycrookedworkshop.com
Frequently Asked Questions
How Often Should I Refinish A Wood Cutting Board?
Refinish your wood cutting board every 6 to 12 months. Regular refinishing maintains its surface, prevents cracking, and removes knife marks. Frequency depends on usage and care. Well-maintained boards last longer and stay safe for food preparation.
What Type Of Oil Is Best For Cutting Boards?
Food-grade mineral oil is best for wood cutting boards. It penetrates the wood, preventing drying and cracking. Avoid vegetable or olive oils, as they can turn rancid. Apply oil regularly to keep your board hydrated and protected.
Can I Use Sandpaper To Refinish My Cutting Board?
Yes, sandpaper is ideal for refinishing cutting boards. Start with coarse grit to remove deep scratches, then use fine grit for a smooth finish. Sanding restores the surface and prepares the board for oiling. Always sand with the wood grain.
Is It Safe To Refinish A Cutting Board At Home?
Refinishing a cutting board at home is safe and easy. Use food-safe materials like mineral oil and clean sandpaper. Follow proper steps to avoid contamination. Ensure the board is dry and clean before use to maintain food safety.
Conclusion
Refinishing a wood cutting board brings it back to life. Sand the surface gently to remove scratches and stains. Apply food-safe oil to protect and nourish the wood. Let the board dry fully before use. This simple care keeps your board safe and strong.
A well-maintained board lasts much longer and looks great. Try this easy process to refresh your kitchen tool today. Your cutting board deserves a fresh start.