
Thinking about removing your wall oven but not sure where to start? You’re not alone.
Taking out a wall oven can feel tricky and overwhelming, especially if you’ve never done it before. But what if you could learn the simple steps to safely and easily remove your oven without calling a pro? In this guide, you’ll discover exactly how to do it right, saving time, money, and stress.
Keep reading, and you’ll gain the confidence to handle this task on your own—no headaches, just clear, straightforward instructions.
Prepare The Work Area
Removing a wall oven needs a clean and organized space. Preparing the work area helps keep you safe and makes the job easier.
Follow simple steps to clear space, get tools ready, and ensure safety before starting.
Clear Surrounding Space
Clear the area around the oven to avoid damage and give yourself room to work. Move any furniture or appliances nearby.
- Remove items from counters next to the oven.
- Move rugs or mats that could cause slipping.
- Ensure good lighting in the workspace.
- Keep children and pets away from the area.
Gather Necessary Tools
Having the right tools ready saves time and prevents frustration. Check the tools you will need before you begin.
| Tool | Purpose |
| Screwdriver (Phillips and flathead) | Remove screws and panels |
| Adjustable wrench | Disconnect gas or water lines |
| Putty knife | Loosen caulk or sealant |
| Work gloves | Protect your hands |
| Flashlight | See inside dark spaces |
Ensure Safety Measures
Safety is important when removing a wall oven. Take steps to protect yourself and your home.
- Turn off power to the oven at the circuit breaker.
- If the oven uses gas, shut off the gas supply.
- Wear safety glasses and gloves during the removal.
- Keep a fire extinguisher nearby in case of emergencies.
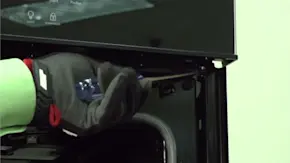
- Have a helper assist you to handle heavy parts safely.
Credit: www.searspartsdirect.com
Turn Off Power And Gas
Removing a wall oven is a task that needs care and safety. The first step is to turn off the power and gas. This prevents accidents and injuries.
Always check both electrical and gas supplies before you start the removal. This guide will help you do it right.
Switch Off Electrical Circuit
Find the circuit breaker that powers the oven. This is usually in your home’s main electrical panel. Flip the switch to the off position.
Turning off the circuit stops electricity from reaching the oven. This keeps you safe while working on the appliance.
- Locate your home’s electrical panel
- Identify the breaker for the wall oven
- Flip the breaker switch to “off”
- Double-check that the oven has no power
Shut Off Gas Supply
Locate the gas shutoff valve near the oven or where the gas line enters your kitchen. Turn the valve handle clockwise until it stops.
Shutting off the gas stops fuel from flowing to the oven. This prevents gas leaks and dangerous situations.
- Find the gas valve near the oven or gas entry point
- Turn the valve handle clockwise to close it
- Make sure the valve is fully closed
Test For Power And Gas
Use a voltage tester to check the oven’s electrical connection. Make sure no electricity is present before you continue.
For gas, smell near the oven area to detect leaks. You can also use a gas leak detector for safety.
- Use a voltage tester on the oven’s power wires
- Confirm the electrical circuit is off
- Check for gas smells around the oven
- Use a gas leak detector if available
- Do not proceed if you smell gas or detect power
Disconnect The Oven
Removing a wall oven starts with disconnecting it safely. This prevents accidents and damage.
Follow each step carefully to ensure the oven is fully disconnected before removal.
Remove Oven Door
Take off the oven door to make the unit lighter and easier to handle. This also helps prevent damage.
Open the door fully, then find the hinges or clips that hold it in place. Unlock or unclip them gently.
- Open the oven door completely
- Locate hinge locks or clips on both sides
- Release the locks or clips carefully
- Lift the door off the hinges slowly
Detach Electrical Connections
Disconnect the oven from the electrical supply to avoid shocks. Turn off the circuit breaker first.
Remove the oven’s access panel to reach the wiring. Carefully disconnect each wire from the terminals.
- Switch off the power at the breaker box
- Remove the oven’s back or bottom panel
- Identify and note each wire connection
- Use a screwdriver to loosen wire terminals
- Disconnect wires one by one
Disconnect Gas Line
If your wall oven uses gas, you must disconnect the gas line safely. Shut off the gas supply first.
Use a wrench to loosen the fitting where the gas line connects to the oven. Have a cloth ready for small leaks.
- Turn off the gas valve supplying the oven
- Ensure no open flames or sparks nearby
- Use a wrench to loosen the gas line fitting
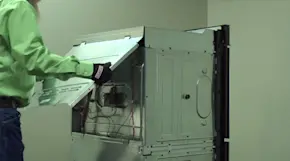
- Disconnect the gas line carefully
- Seal the gas pipe end if needed
Credit: www.searspartsdirect.com
Remove Mounting Hardware
Removing the mounting hardware is an important step to take out a wall oven safely. It helps free the oven from its built-in place.
Follow the right process to avoid damage or injury when handling the oven and its parts.
Locate Mounting Screws
Look inside the oven frame for screws that hold it to the wall cabinet. These screws are usually along the sides or at the top and bottom edges.
- Open the oven door fully to see the frame edges.
- Use a flashlight if the area is dark.
- Check for screws or brackets securing the oven.
- Note the screw types and locations for easier removal.
Unscrew Fasteners
Use the right screwdriver or drill bit to remove the mounting screws carefully. Keep the screws in a safe place for later use.
| Tool | Purpose |
|---|---|
| Phillips screwdriver | Remove crosshead screws |
| Flathead screwdriver | Remove slotted screws |
| Drill with bit | Unscrew tightly fastened screws |
| Magnet tray | Hold screws safely |
Handle Oven Carefully
Once all screws are out, gently pull the oven from the wall opening. Avoid sudden moves to prevent damage or injury.
- Ask for help if the oven is heavy.
- Hold the oven firmly on both sides.
- Place the oven on a soft, stable surface after removal.
- Check for any remaining wires before moving the oven too far.
Extract The Wall Oven
Removing a wall oven requires care to avoid damage and injury. This guide helps you pull out the oven safely.
Follow the steps below to handle the oven properly during removal and check it for any issues.
Pull Oven Out Gently
Start by unplugging the oven and disconnecting any wires. Use both hands to pull the oven slowly from the wall slot. Avoid quick or sharp movements to prevent damage.
Manage Heavy Lifting
Wall ovens can be heavy and awkward. Use these tips to lift safely:
- Ask for help from another person.
- Bend your knees and keep your back straight.
- Lift with your legs, not your back.
- Wear gloves for better grip.
- Move slowly and take breaks if needed.
Inspect For Damage
| Check Area | What to Look For |
| Oven Body | Dents, cracks, loose parts |
| Power Cord | Frays, cuts, or exposed wires |
| Wall Cavity | Marks, holes, or leftover debris |
| Door Seal | Wear or tears in gasket |

Credit: www.youtube.com
Clean And Prepare For New Installation
Removing a wall oven requires careful preparation. Cleaning and checking your kitchen space helps ensure a smooth installation.
Follow these steps to make the process easy and efficient. Your new oven will fit perfectly if you prepare the area correctly.
Clean Oven Cavity
Before removing the old oven, clean the oven cavity thoroughly. This removes grease and debris, making removal safer.
- Wear gloves to protect your hands.
- Use a degreaser to clean the surfaces.
- Wipe with a damp cloth to remove residue.
Check Wall Condition
Inspect the wall for any damage. Ensure the wall is sturdy and ready to support the new oven’s weight.
| Wall Type | Condition Check |
| Drywall | Look for cracks or holes |
| Brick | Check for loose bricks |
| Wood | Inspect for rot or termites |
Plan For Replacement
Measure the current space carefully. Ensure the new oven fits and that there is enough ventilation.
Frequently Asked Questions
How Do I Safely Disconnect A Wall Oven?
First, turn off the circuit breaker powering the oven. Then, unplug the oven or disconnect the wiring carefully. Use a voltage tester to confirm no power flows. Always follow safety guidelines to avoid electrical hazards during removal.
What Tools Are Needed To Remove A Wall Oven?
You will need a screwdriver, a socket wrench, and possibly pliers. A voltage tester is essential for safety. Additionally, have a flashlight and a pry bar handy for tight spaces. Proper tools ensure a smooth and safe removal process.
Can I Remove A Wall Oven Alone?
Removing a wall oven alone is possible but not recommended. Ovens are heavy and bulky, so having help reduces injury risk. Enlist a friend or family member to assist with lifting and handling the oven safely.
How Do I Avoid Damaging Cabinets When Removing An Oven?
Use protective padding or towels around cabinet edges. Remove screws carefully to prevent stripping or cracking wood. Work slowly and avoid forcing the oven out. Proper care preserves your cabinetry and makes reinstallation easier.
Conclusion
Removing a wall oven does not have to be hard. Follow each step with care and patience. Turn off the power and gas before starting. Use the right tools to avoid damage. Take your time to disconnect wires safely. Keep all screws and parts in one place.
This guide helps you work smart and safe. Soon, you will have space for a new oven or other plans. Stay cautious and enjoy your kitchen project.