Is your garden hose leaking right where the end meets the connector? That drip might seem small, but it wastes water and makes your outdoor chores frustrating.
The good news is you don’t have to buy a whole new hose or call a plumber. You can fix that garden hose end yourself—quickly and easily. In this guide, you’ll discover simple steps to repair your hose so it works like new again.
Keep reading, and you’ll save money, time, and avoid unnecessary hassle with just a few handy tools.

Credit: www.amazon.ca
Tools And Materials Needed
Fixing a garden hose end needs the right tools and materials. Using proper items makes the repair easier.
Gather everything before you start. This will save time and help you work safely.
Replacement Hose End Connector
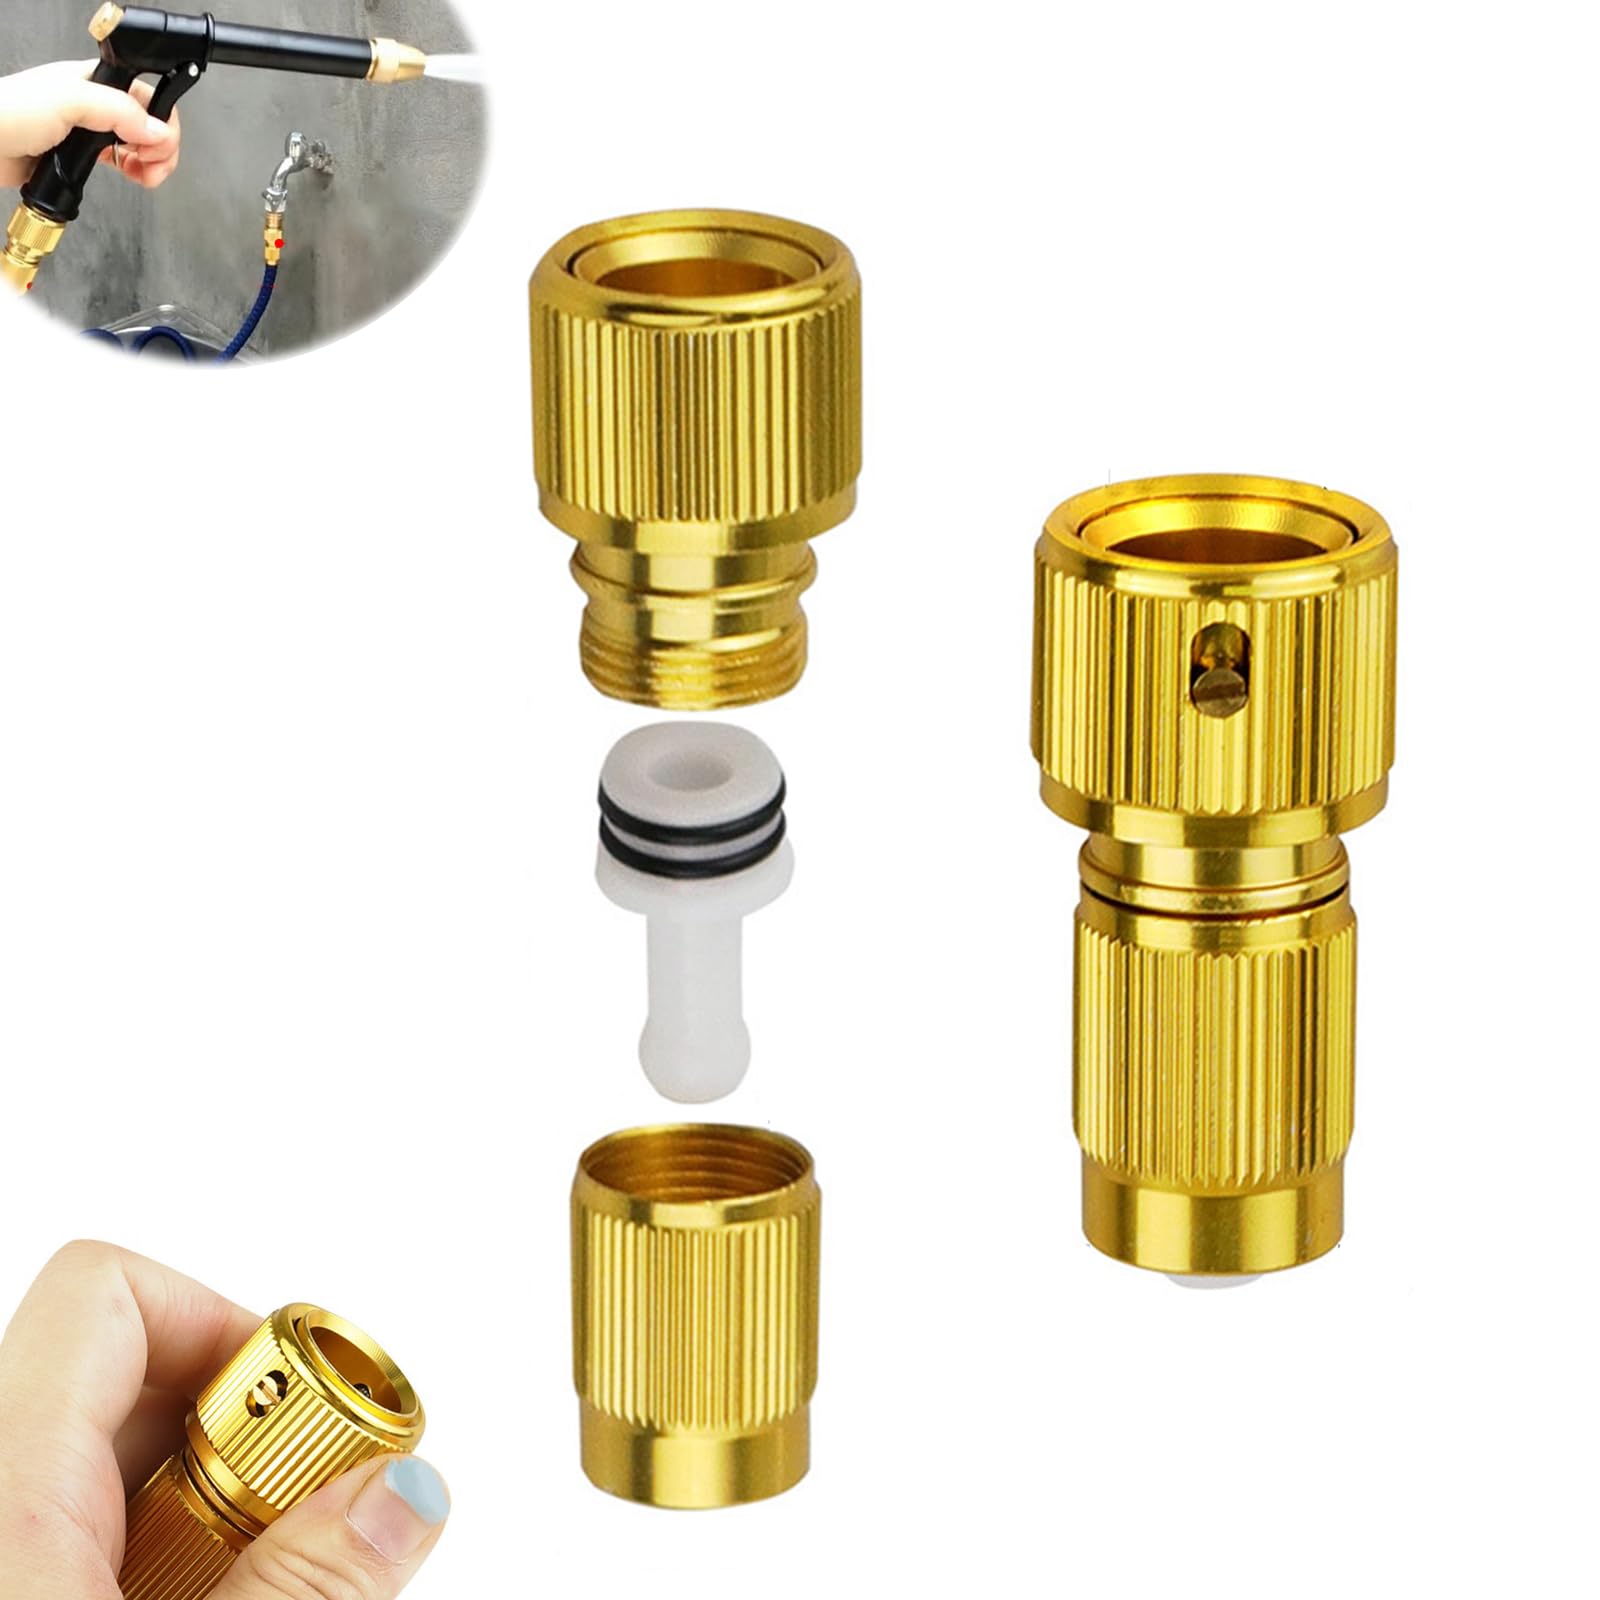
The replacement connector attaches to the hose and connects to the water source. Choose one that fits your hose size.
Common connector types include brass and plastic. Brass lasts longer but costs more.
- Check the hose diameter (usually 5/8 inch or 3/4 inch)
- Pick a connector that matches the hose type
- Choose between plastic and brass connectors
Utility Knife Or Hose Cutter
Use a sharp knife or hose cutter to cut the hose cleanly. A clean cut helps the connector fit tightly.
Do not use dull tools. They can make uneven cuts that cause leaks.
Screwdriver Or Wrench
Many hose ends use screws or clamps to hold the connector. You need a screwdriver or wrench to tighten these.
- Flathead or Phillips screwdriver depending on screws
- Adjustable wrench for tightening nuts
Hose Clamp
A hose clamp secures the connector to the hose. It prevents water leaks and keeps the connection strong.
Choose a clamp that fits around your hose size. Stainless steel clamps resist rust and last longer.
Teflon Tape (optional)
Teflon tape wraps around the threads of the connector. It helps create a tight seal and stops leaks.
This tape is easy to use and is often found in plumbing supplies.
Work Gloves
Wear gloves to protect your hands from sharp edges and tools. Gloves also help you grip the hose better.
Choose gloves that fit well and are comfortable to wear during the repair.
Identifying Common Hose End Problems
Garden hose ends can wear out or get damaged over time. Knowing the common problems helps you fix them fast.
Check your hose ends regularly to spot issues before they get worse. This saves water and keeps your hose working well.
Leaks And Cracks
Leaks and cracks are common at the hose end due to pressure and weather. They cause water to drip or spray out.
Small cracks can grow bigger if not fixed. Leaks waste water and reduce water flow to your plants.
- Look for wet spots or water dripping near the end
- Check the hose end for visible splits or holes
- Feel for soft or brittle areas that may crack soon
Loose Fittings
Loose fittings make the hose wobble or leak water where it connects. This happens when parts wear out or are not tight.
Loose fittings cause water to spray in unwanted directions and lower water pressure at the nozzle.
- Try to move the hose end by hand to check for looseness
- Look for gaps between the hose and fitting
- Feel if water sprays out when the hose is on
Damaged Threads
The threads on the hose end can get stripped or bent. This makes it hard to connect or seal tightly.
Damaged threads cause leaks or make the hose end fall off easily during use.
- Look closely at the metal or plastic threads for wear
- Check if the hose end screws on smoothly or feels stuck
- Notice if water leaks around the connection point
Preparing The Hose For Repair
Fixing a garden hose starts with good preparation. Cleaning and cutting the hose correctly helps ensure a lasting repair.
This guide covers two key steps: draining and cleaning, and cutting damaged sections. Follow these to get your hose ready.
Draining And Cleaning
Empty water from the hose before repair. Water inside can cause leaks or damage to the repair parts.
After draining, clean the hose end to remove dirt and debris. This helps the new connector fit tightly.
- Lay the hose flat on the ground.
- Lift one end to let water flow out completely.
- Use a cloth to wipe the hose end clean.
- Check for mud, leaves, or small stones.
- Let the hose dry before cutting.
Cutting Damaged Sections
Cut off any cracked or worn parts of the hose end. A clean cut helps the new fitting attach securely.
| Tool | Purpose |
| Sharp utility knife | Make a straight, clean cut |
| Hose cutter | Cut thick hoses without crushing |
| Scissors | Use only for thin, soft hoses |
Cut the hose straight across. Avoid angled cuts that cause leaks. After cutting, remove any loose bits inside the hose end.
Credit: www.amazon.ca
Fixing Leaks With Sealant
Leaks at the garden hose end waste water and cause frustration. You can fix these leaks using simple sealants. This guide shows two easy ways to stop leaks and save your hose.
Applying Teflon Tape
Teflon tape helps create a tight seal on threaded hose ends. Wrap the tape around the threads to stop leaks from dripping or spraying.
Wrap the tape clockwise, covering the threads evenly. Usually, two to three layers of tape work well. Avoid wrapping too much tape, or the fitting may not tighten properly.
- Clean the hose threads first
- Wrap tape clockwise around threads
- Use 2-3 layers for a good seal
- Tighten the hose fitting after wrapping
Using Hose Repair Tape
Hose repair tape is a sticky, waterproof tape made to fix small holes and leaks. Wrap it tightly around the leak area on the hose end.
Stretch the tape as you wrap to create a strong, water-tight seal. Overlap the tape by half its width for better coverage. This tape works well for leaks that are not on the threads.
- Dry the hose before applying tape
- Stretch tape while wrapping
- Overlap tape by half the width
- Press tape firmly to stick well
Replacing Hose Ends
Garden hoses are essential for watering plants and cleaning tasks. Over time, hose ends may wear out and need replacement.
Replacing a hose end can extend the life of your hose. This process involves removing the old fitting and installing a new connector.
Removing Old Fittings
To replace the hose end, you first need to remove the old fitting. This can be done with a few simple tools available at home.
- Use a utility knife to cut off the damaged end of the hose.
- Ensure the cut is straight and clean for a good fit with the new connector.
- Remove any debris or residue from the inside of the hose.
Installing New Connectors
With the old fitting removed, you can now attach a new connector to your garden hose. Ensure you have the right size and type.
- Insert the new connector into the cut end of the hose.
- Tighten the clamp around the hose with a screwdriver to secure the connector.
- Check for leaks by turning on the water slowly.

Credit: www.amazon.ca
Securing Hose Ends With Clamps
Fixing a garden hose end properly keeps water flowing without leaks. Using clamps is a simple way to secure hose ends tightly.
Choosing the right clamp and tightening it correctly helps prevent damage and ensures a long-lasting fix.
Choosing The Right Clamp
Select clamps made from rust-resistant materials like stainless steel or brass. Make sure the clamp size matches your hose diameter for a secure fit.
- Measure the hose end diameter before buying
- Pick clamps designed for garden hoses
- Avoid cheap clamps that may break or rust
- Choose clamps with a screw or bolt tightening mechanism
Properly Tightening Clamps
Use the right tools to tighten clamps firmly but not too tight. Over-tightening can damage the hose or clamp.
| Tool | Purpose |
| Screwdriver | Tighten screw clamps evenly |
| Wrench | Secure bolt clamps firmly |
| Hands | Start clamp placement before tightening |
Testing The Repair
After fixing the garden hose end, you need to test it. Testing ensures the repair works well.
Check if water flows correctly and there are no leaks. This confirms the hose is ready to use.
Checking For Leaks
Turn on the water slowly and watch the repaired area. Look closely for any dripping or wet spots.
If you see water escaping, the repair may not be tight or sealed properly. Tighten or reseal as needed.
- Inspect the hose end carefully
- Look for small drops or wetness
- Check the connection points
- Fix leaks by tightening or replacing parts
Ensuring Proper Water Flow
Turn the water on fully and observe how it flows from the hose end. The flow should be steady and strong.
Weak or uneven water flow means there might be a blockage or poor connection. Clear any blockages and check fittings.
- Open the faucet all the way
- Watch the water coming out of the hose
- Ensure the flow is smooth without interruptions
- Clear debris or tighten connections if needed
Maintaining Hose Ends For Longevity
Garden hose ends are easy to damage without care. Keeping them in good shape helps the hose last longer.
Simple maintenance can stop leaks and breaks. It saves time and money on repairs.
Regular Inspections
Check hose ends often for cracks, rust, or wear. Early spotting fixes small problems fast.
Look for loose fittings or leaks near the end. Tighten or replace parts if needed.
- Inspect before and after use
- Feel for soft spots or splits
- Check washers inside the connectors
- Replace worn parts promptly
Proper Storage Tips
Store hoses properly to avoid damage to ends. Keep them dry and out of harsh weather.
Coil hoses loosely to prevent kinks. Avoid sharp bends that stress the hose ends.
- Drain water before storing
- Use a hose reel or hanger
- Keep away from direct sunlight
- Do not leave under heavy objects
Frequently Asked Questions
How Do I Fix A Leaking Garden Hose End?
To fix a leaking garden hose end, first turn off the water. Remove the damaged fitting, replace washers or O-rings, and reattach the end securely. Tighten connections properly to prevent leaks and test the hose for any remaining drips before use.
What Tools Do I Need To Repair A Garden Hose End?
You need pliers, a wrench, replacement washers or O-rings, and possibly a new hose end fitting. Having a utility knife and Teflon tape can help ensure a clean cut and tight seal for a durable repair.
Can I Repair A Garden Hose End Without Cutting The Hose?
Yes, if the damage is minor, replacing washers or O-rings in the hose end can fix leaks. However, for severe cracks or breaks, cutting the hose and installing a new fitting is necessary for a secure repair.
How Do I Prevent Garden Hose End Damage?
Prevent damage by avoiding kinks and sharp bends near the hose end. Store the hose properly, avoid dragging it over rough surfaces, and disconnect it during freezing temperatures to extend its lifespan.
Conclusion
Fixing a garden hose end saves money and time. It keeps water flowing without leaks. You only need a few tools to do it. Follow the steps carefully for a tight fit. A repaired hose lasts longer and works better.
Regular checks help spot problems early on. Try this simple fix before buying a new hose. Small repairs can make a big difference in your garden care. Keep your hose ready for watering anytime. Easy and quick fixes keep your garden happy.